

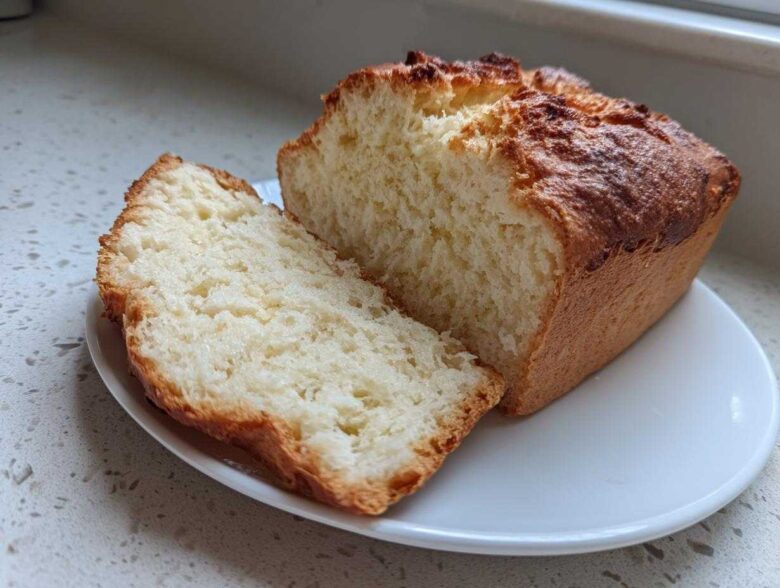
You know those nights, right? You’ve got a big pot of chili simmering or maybe a hearty stew that needs exactly one perfect thing alongside it. You want fresh bread, gloriously crusty bread, but the thought of kneading dough and waiting two hours for it to rise? Forget it! That’s why I’m handing you the keys to my absolute favorite lazy-baker secret: the ultimate Quick Beer Bread. This recipe is my go-to for moist, flavorful results with zero rising time. It’s the champion of Easy No Yeast Bread on a busy Tuesday night!
I’ve been tinkering with simple baked goods for years—you can read more about my kitchen philosophy on my About page—and this no-knead method is the one that truly stuck. It uses the carbonation from the beer to do all the heavy lifting, turning basic pantry staples into something truly special in under an hour. Seriously, folks, this beer bread is magic.
Why This Is the Best Beer Bread Recipe (No Yeast Required)
Hands down, this is my go-to method when I need a Buttery Bread Side Dish fast. We’re talking 5 minutes of actual work, tops. You skip the entire drama of yeast—the warming, the waiting, the worrying if it’s doubled! This Quick Beer Bread relies on baking powder and the fizzy goodness inside that bottle of beer to give you lift. That carbonation acts like a natural leavener, which is why this recipe is officially Easy No Yeast Bread royalty.
The result? A loaf that’s surprisingly Fluffy Beer Bread on the inside but gets this killer golden crust from the melted butter poured right over the top. It’s the easiest bread you’ll ever make, trust me on this one.
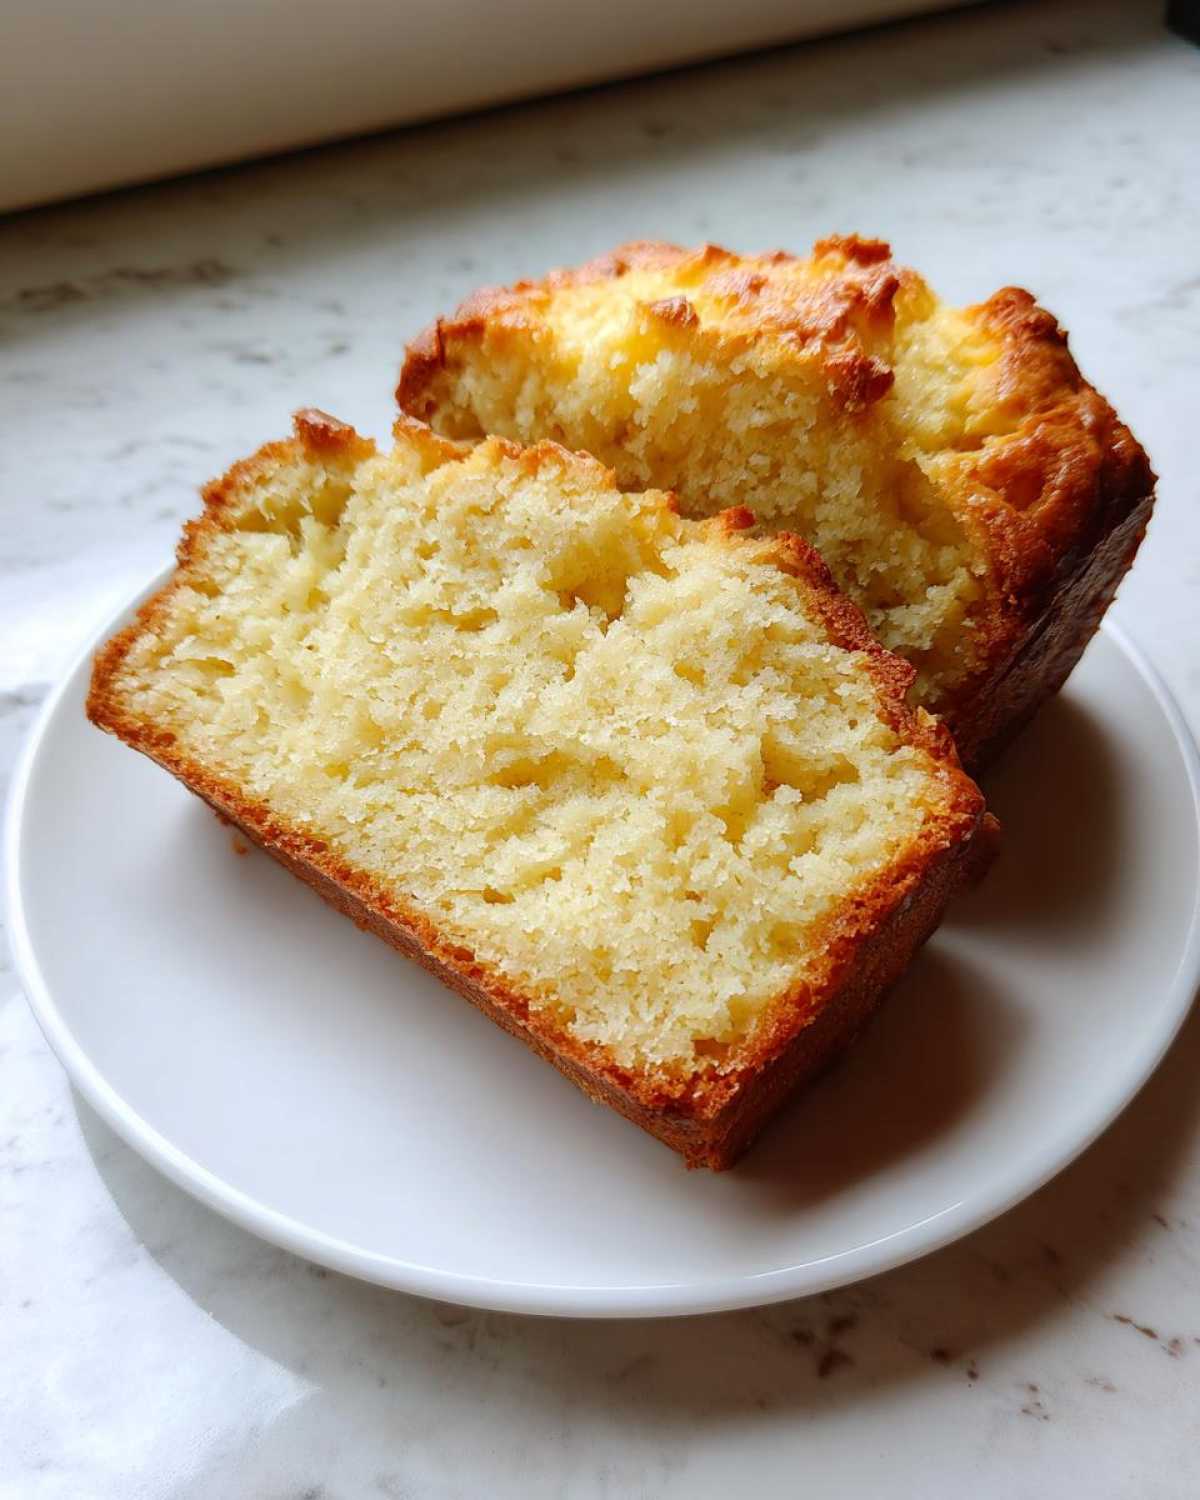
Speed and Simplicity: Perfect Weeknight Baking Recipes
I love that this falls squarely in the Weeknight Baking Recipes category. Seriously, if you have flour, baking powder, salt, and a beer in the fridge, you’re basically minutes away from homemade bread. You don’t even need a stand mixer; a spoon and a large bowl are your best friends here. Traditional bread demands commitment, but this simple homemade bread just asks for five minutes of your time, and you get a delicious loaf back in less than an hour. It’s the perfect solution for impromptu dinner guests or when you realize halfway through making chili that you forgot a side!
Ingredients for Your Simple Homemade Bread
Okay, let’s talk about what goes into this marvel. The beauty of this Simple Homemade Bread is that it uses such basic stuff you probably have right now. Seriously, you won’t need any fancy starters or fancy equipment. It’s just the dry stuff, the beer, and the butter magic!
Here’s what you need to gather up before you even think about preheating the oven:
- 3 cups all-purpose flour
- 1 tablespoon baking powder (this is crucial since we aren’t using yeast!)
- 1 teaspoon salt
- 1/4 cup granulated sugar (Only if you want a hint of sweetness! For savory bread, you can totally skip this part, which is what I do most of the time.)
- 1 (12 ounce) bottle of beer, room temperature (Don’t use ice-cold beer, trust me, it dulls the lift!)
- 1/2 cup (1 stick) unsalted butter, melted
See? That list is short and sweet! The sugar being optional is your first easy modification point. If you plan on loading this up with cheese and herbs later, leave the sugar out completely. If you’re having it plain with soup, I like to keep it in for that slight golden edge and soft crumb.
Step-by-Step Instructions for Perfect Beer Bread
Alright, now for the fun part where we turn those ingredients into actual bread! This whole process is so fast you almost feel like you cheated. Remember, the goal here is speed and texture, so don’t rush the prep, but don’t fuss over the mixing. We are aiming for a tender crumb, not a tough brick!
First things first, get that oven hot! Preheat to 375°F (190°C). While it’s warming up, grab your 9×5 inch loaf pan. I always grease mine generously and then dust it with flour—better safe than sorry with quick breads, even if this one isn’t super tricky!
Mixing the Batter for Fluffy Beer Bread
Time to bring everything together! Grab your biggest bowl. We’re going to whisk together all the dry stuff first: the flour, baking powder, salt, and your optional sugar. A good whisk ensures that baking powder is evenly distributed, which is key since we have no yeast doing the heavy lifting here.
Now, the star! Pour in that entire room-temperature bottle of beer. Use a spoon and mix things *gently* until it’s just combined. I cannot stress this enough: Do not overmix! If you see a few lingering lumps of flour, just leave them alone. Overmixing develops the gluten in the flour, and that’s how you get dense bread instead of Fluffy Beer Bread. We want tender, not tough!
Once it’s barely mixed, pour in about half of your melted butter and give it one last quick stir. Then, scrape the whole glorious, bubbly batter right into your prepared loaf pan.
Baking and Cooling Your Beer Bread
Before it goes into the oven, take that remaining melted butter and drizzle it all over the top. This is what creates that amazing, slightly crackly, buttery crust we all crave. Pop the pan into your preheated 375°F (190°C) oven.
It takes about 45 to 55 minutes to bake. You’ll know it’s ready when a toothpick you stick right in the center comes out completely clean—no wet batter clinging to it. Once it’s done, pull it out, but don’t turn it out yet! Let the bread cool right there in the pan for a good 10 minutes. This resting time lets the structure set up perfectly. After those 10 minutes, invert it onto a wire rack so it can cool down properly. If you flip it too soon, the bottom might get a little soggy from trapped steam.
Tips for the Best Beer Bread Recipe
I’ve made this simple homemade bread using everything from pale lagers to dark stouts, and I’ve learned a few secrets along the way that really elevate this from ‘quick bread’ to the ‘Best Beer Bread Recipe’ you’ll ever try. These tips are less about complex technique and more about respecting the few ingredients we are using.
First up: the beer itself! The type of beer you use will absolutely flavor your final loaf. A light American lager results in a very neutral, slightly bready flavor, which is perfect if you’re loading it up with cheese and garlic. If you use a slightly darker ale or a malty brown ale, you’ll get a much deeper, richer color and a background note that tastes almost like molasses. It’s subtle, but it’s there! Experimenting with beer choice is half the fun here.
Ingredient Notes and Substitutions for Beer Bread
We went over the room temperature beer requirement earlier, but it bears repeating—cold liquid tends to shock the baking powder and makes for less consistent lift. This is a quick bake; we need all the help we can get!
Now, let’s talk butter substitutes. The melted butter is essential because it gets drizzled on top for that crust, but you can switch things up in the batter if you absolutely have to. While I insist on real unsalted butter, if you’re out, melted coconut oil works in a pinch for the internal mixing step. However, you must still melt some form of butter or oil to drizzle over the top, because that fat barrier is what keeps the crust crisp rather than tough.
Also, please pay attention to pan size. If you use a pan that is too small, the batter will overflow while baking, making a huge mess and potentially ruining the structure of your loaf. If you use a pan that is far too large, you’ll end up with a flat, dense cracker instead of fluffy bread because the batter won’t have enough depth to rise properly. A standard 9×5 inch loaf pan is what this recipe was perfected in, so stick to that for a beautiful, sturdy loaf!
Savory Variations: Making Cheesy Bread Recipe Additions
Now, while I love the classic loaf, the real crowd-pleaser—and probably what I make most often—is the cheesy, garlicky version. If you’re looking for an incredible snack or the ultimate weekend side dish, seriously transform this base into a proper Cheesy Bread Recipe. It’s still ridiculously fast, but it gets that savory punch that makes it totally addictive.
This is where we take control of the flavor profile! Remember how I said we skip the optional sugar if we’re going savory? Awesome. That slight lack of sweetness lets the cheese and garlic really shine through. These Savory Quick Breads are perfect for dunking into leftover salsa or just eating straight out of the oven while it’s still warm enough to melt the cheese on your fingers.
Here’s exactly what I do to transition this basic beer bread into a spectacular Garlic Cheddar Bread:
- Omit the Sugar: First thing, leave out that 1/4 cup of granulated sugar entirely. We want savory depth, not sweetness.
- Cheese Power: Add about 1 cup of sharp shredded cheddar cheese right into your dry ingredients along with the flour and baking powder. Make sure the cheese is colder, as it mixes in better before it gets warm from the room.
- Garlic Kick: Toss in 1 teaspoon of garlic powder with the dry ingredients. If you want to get really fancy, use a garlic infused olive oil instead of plain butter for the initial melt, but the powder works beautifully.
Mix it exactly as the main recipe dictates—gently, just until the dry bits are incorporated into the moist beer batter. You’ll see the batter get thicker and streaky with orange cheese bits. Pour it in, drizzle that last bit of melted butter over the top (you can sprinkle a little extra parmesan on top of the butter for an even crustier finish, just a thought!), and bake as directed. When that comes out of the oven, the smell is just heaven. It’s warm, it’s sharp, and it’s the best Quick Dinner Sides you’ll ever bake, guaranteed!
Serving Suggestions for Your Buttery Bread Side Dish
What do you even *do* with this glorious, fast, Buttery Bread Side Dish once it comes out of the oven? Well, honestly, I usually stand over the cooling rack and eat half the loaf before it’s even cool enough to slice, but that’s neither here nor there!
The real beauty of this Quick Beer Bread is how versatile it is. Since it has that slightly rustic, almost biscuit-like crumb structure, it’s absolutely perfect for soaking up liquids. It’s not delicate; it holds up to heavy sauces and thick soups beautifully. This is why it’s my absolute favorite go-to when I’m making dinner for the family on a chilly night.
You need a proper side dish for heavy meals, and this loaf fits the bill perfectly. It’s one of those easy weeknight staples that makes a simple meal feel special.
Here are my top ways to serve this wonderfully easy bread:
- The Chili Companion: This is classic for a reason! Serve thick slices of warm beer bread alongside a giant bowl of homemade chili. Whether you go plain or make the Garlic Cheddar version, it’s perfect for scooping up the last bits at the bottom of the bowl.
- Stew Soaker: If you’ve made a hearty beef stew or a thick lentil soup, this bread is mandatory. It’s absorbent, so it soaks up all those rich broth flavors without immediately disintegrating, which is more than I can say for store-bought rolls!
- Breakfast Toast Substitute: Hear me out—slice leftover bread the next morning, toast it lightly, and spread it with softened cream cheese and a drizzle of honey. It’s amazing. That little bit of sweetness from the original recipe really shines through here.
- Dipping Dipper: If you’ve already made the cheesy version, trust me, you don’t need anything else. But even the plain loaf is fantastic dipped in melted garlic butter or a smooth homemade tomato sauce. I always make sure to bake a loaf just to have something to snack on while I clean up!
And hey, don’t forget, if you end up with any ends or slightly oddly shaped pieces, toss them in a pan with a little oil and toast them up—they make the best croutons for a Caesar salad! No waste in my kitchen!
I hope these ideas get you excited to bake this loaf up tonight! For more information on my kitchen guidelines and what we believe in here at the blog, please check out our cooking disclaimer.
Storage & Reheating Instructions for Homemade Beer Bread
This bread is genuinely best enjoyed the day it’s baked, obviously! That crust is still crisp, and the inside is at peak fluffiness. But unless you’re feeding a small army, you’re probably going to have leftovers. The goal with storing this simple homemade bread is to trap enough moisture so it stays soft, but not so much that the crust gets gummy!
Don’t try to put it in the fridge immediately. Seriously, cold air is the enemy of quick bread texture. Stick it on the counter for the first day, wrapped tightly in plastic wrap or tucked into a large zip-top plastic bag. Make sure the bag is closed securely—we want to keep that fresh air out. Stored this way on the counter, it should stay wonderfully soft for a solid two days. After that, you might notice it starts to feel a little drier, but don’t panic, we have a fix for that!
If you know you won’t get to the second half within 48 hours, you can freeze it! Slice the loaf first; this is key for easy reheating later. Wrap the individual slices tightly in plastic wrap, and then place them all into a freezer-safe bag. It freezes beautifully for up to two months.
Reheating for That Fresh-From-the-Oven Vibe
Okay, so you baked this yesterday, and now it’s a little less than perfect. No problem! We just need to wake up the steam inside the bread without making the crust soggy. I have two favorite methods depending on how much time I have.
For a single slice or two, grab your toaster! If you have a toaster oven, even better; you get the benefit of radiant heat mimicking the oven. Just put the slice in for one cycle. You’ll get a slightly crisper crust than when it was first baked, and the inside will warm up just enough to be tender again. This works especially well if you made the savory Garlic Cheddar version!
If you are reviving the whole loaf, go for the oven trick. Preheat your oven to a low temperature—say, 300°F (150°C). You can wrap the whole loaf loosely in aluminum foil (this traps the steam but lets the outside dry a bit) and warm it through for about 10 minutes. If you skip the foil, watch it closely, as the crust can firm up too much if left naked in the heat. Once it’s warm, slice it right away and serve it warm for the best experience!
Frequently Asked Questions About Baking Without Yeast
I get so many questions about this recipe because it seems almost too easy to be true! People wonder how something that is technically Bread Without Yeast can turn out so good. It’s all down to chemistry, friends, but don’t let that scare you off! Here are a few things folks ask me all the time about this Easy No Yeast Bread.
Can I use non-alcoholic beer in this beer bread?
Yes, you absolutely can! This is a great question, especially if you’re baking for kids or just don’t want any alcohol in the house. The yeast in traditional brewing is what creates the alcohol, but the carbonation—that’s the lift we are after—is still present in non-alcoholic versions. So, chemically speaking, it works just fine for leavening. The only difference you might notice is flavor. Alcoholic beer tends to add a slight malty depth, especially if you use an amber or stout. A non-alcoholic pale lager will give you a very clean, mild bread flavor, which is fantastic if you are planning on loading it up with cheese and bacon.
What happens if I overmix the batter for this Quick Beer Bread?
This is the number one mistake newbies make, and why you have to resist the urge to keep stirring until it looks perfectly smooth! When you overmix flour with liquid, you start activating the proteins and creating gluten networks. Gluten is what you want when you’re making chewy pizza dough, but it’s the enemy of light and tender bread.
If you beat this batter for too long, even just an extra minute or two, you’ll end up with a dense, chewy, almost rubbery loaf, rather than that beautiful, fluffy texture we are aiming for in our Quick Beer Bread. Remember what I said? A few lumps are a sign of a job well done. Just mix until the dry streaks disappear, and then stop immediately!
If I use a stout, won’t my bread turn out dark brown?
That’s a smart observation! If you decide to go for a really dark beer, like a chocolate stout or a heavy porter, yes, your bread *will* come out much darker than if you use a light lager. That deep color doesn’t necessarily mean it’s burned; it’s just the color of the malt base in the beer coming through. If you’re using a dark beer, you’ll want to double-check with your toothpick test around the 40-minute mark, just to make sure the outside isn’t cooking faster than the inside. Visually, it will look done sooner, but the flavor is totally worth the darker shade!
Does the type of baking powder matter for my No Knead Bread?
It really helps if you use fresh baking powder! Since this baking powder is doing all the work that yeast usually handles in a No Knead Bread recipe, we need it at peak performance. If your baking powder has been sitting in the cabinet for ages, it might have lost some of its lifting power. A quick test: drop a teaspoon of the powder into a little bit of hot water. If it fizzes nicely, you’re good to go! If it just sits there sadly, toss it and grab a new can.
Share Your Experience Making This Comfort Food Bread
I truly hope this simple recipe has made your hectic weeknights a little bit easier and a lot more delicious! Making this beer bread is just so satisfying because you go from pantry staples to incredibly fluffy, warm bread in practically no time at all. It proves you don’t need hours of kneading and waiting for truly great homemade bread.
Now that you’ve gotten your hands delightfully covered in flour and topped your loaf with that amazing buttery crust, I absolutely want to hear all about it! Did you try the sweet version? Or did you go all out with the cheese and garlic making that savory version?
Pop down in the comments below and let me know two things—first, what kind of beer did you use? I’m always excited to hear which brews folks try, whether it’s a local IPA or a simple, reliable lager. Second, rate this recipe for me! Your feedback means the world and helps other busy cooks decide if this is the right Quick Dinner Side for them.
If you have any questions about the process or want to share a variation I haven’t even thought of yet, please reach out! You can always send me a note through the contact page, but the comments section is the best place to shout out your favorite tips. Happy baking, friends!
PrintQuick and Easy No-Yeast Beer Bread
Make this simple, moist beer bread with just a few ingredients. It requires no rising time and is perfect as a side dish.
- Prep Time: 5 min
- Cook Time: 50 min
- Total Time: 55 min
- Yield: 1 loaf
- Category: Baking
- Method: Baking
- Cuisine: American
- Diet: Vegetarian
Ingredients
- 3 cups all-purpose flour
- 1 tablespoon baking powder
- 1 teaspoon salt
- 1/4 cup granulated sugar (optional, adjust for savory)
- 1 (12 ounce) bottle of beer, room temperature
- 1/2 cup (1 stick) unsalted butter, melted
Instructions
- Preheat your oven to 375°F (190°C). Grease and flour a standard 9×5 inch loaf pan.
- In a large bowl, whisk together the flour, baking powder, salt, and sugar (if using).
- Pour the entire bottle of beer into the dry ingredients. Mix gently with a spoon until just combined. Do not overmix; a few lumps are fine.
- Pour half of the melted butter into the batter and stir briefly.
- Pour the batter into the prepared loaf pan.
- Drizzle the remaining melted butter over the top of the batter.
- Bake for 45 to 55 minutes, or until a toothpick inserted into the center comes out clean.
- Let the bread cool in the pan for 10 minutes before turning it out onto a wire rack to cool completely.
Notes
- For a savory version, omit the sugar and add 1 cup of shredded sharp cheddar cheese and 1 teaspoon of garlic powder to the dry ingredients.
- Use a room temperature beer for best results; cold beer can affect the leavening action.
- Brush the top with melted garlic butter immediately after removing it from the oven for extra flavor and crust.
Nutrition
- Serving Size: 1 slice
- Calories: 220
- Sugar: 4
- Sodium: 350
- Fat: 10
- Saturated Fat: 6
- Unsaturated Fat: 4
- Trans Fat: 0
- Carbohydrates: 32
- Fiber: 1
- Protein: 5
- Cholesterol: 25