

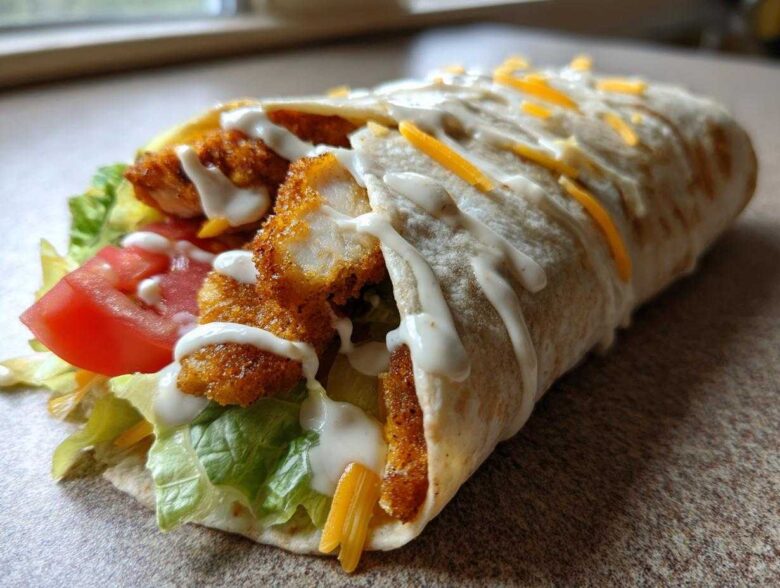
Oh my gosh, have you ever just craved that absolute perfect bite? You know the one—where you get the shattering crunch of perfectly seasoned chicken wrapped up with something so ridiculously creamy and garlicky it feels decadent? That is what this Crispy Chicken Wrap with Creamy Garlic Sauce delivers. Forget limp, sad chicken strips! I spent what felt like months perfecting this coating. I swear I tried adding cornstarch, baking powder, even crushed chips one time (don’t ask). But I finally landed on the secret breading that gives you incredible crunch every single time. If you want to know more about the folks behind these crazy culinary experiments, you can check out our story over at Flavorzine. Trust me when I say this filling is the ultimate power lunch or super quick weeknight dinner. We’re aiming for texture fireworks here!
Why This Crispy Chicken Wrap with Creamy Garlic Sauce Stands Out
I’m telling you, this isn’t your average sad lunch wrap. When you’re looking for the Best Crispy Chicken Wrap Recipe out there, you need three things, and this recipe nails them all. Friends have started calling this the Ultimate Chicken Wrap Recipe because once you try it, you won’t go back to fast food versions.
Here is what sets this wrap apart from everything else:
- The crunch factor on the chicken stays strong. Seriously, it resists getting soggy longer than any other method I’ve tried!
- The homemade sauce? Forget about it. The Fresh garlic in our Creamy Garlic Sauce for Wraps tastes brighter and richer than anything bottled.
- Quick Assembly means you can tackle this on a busy night when you need something satisfying immediately.
For more delicious ideas and recipes hitting your inbox weekly, don’t forget to peek at our main blog page!
Ingredients for the Crispy Chicken Wrap with Creamy Garlic Sauce
Okay, let’s gather our gear! Because we want the best results, we’re breaking this down into four key areas, just like my prep station in the kitchen. Remember, precision matters, especially when we’re trying to make that chicken *pop*!
For the star of the show, you’ll need about 1 lb of boneless, skinless chicken breasts, cut up nice and neat into strips—about half an inch thick usually works perfectly for fast frying.
The dry breading requires 1 cup of flour, 1 teaspoon of salt, half a teaspoon of black pepper, and just a little kiss of paprika and cayenne for warmth. For the wet dip, we’re using 2 large eggs beaten up with half a cup of milk. Then, you’ll need enough vegetable oil to get about an inch deep in your skillet for frying.
For assembly, grab 4 large flour tortillas—make sure they are the big ones so they can actually hold everything in! Then we need the basics: 1 cup of shredded lettuce, half a cup of sliced tomato, and a quarter cup of cheddar cheese. It’s simple veggies, but they add the necessary cool crunch.
For the Creamy Garlic Sauce for Wraps
This is where the magic happens, so don’t cut corners! You need half a cup of mayonnaise. I strongly suggest using a full-fat, really good quality mayonnaise because that’s the base that gives us the richness we need. If you use light mayo, the sauce might taste a little flat, but hey, you do you! The secret weapon here is 2 cloves of garlic, minced—and I mean *finely* minced, or even grated if you have tiny chunks that throw you off. Keep it fresh! We also add 1 tablespoon of bright lemon juice, 1 teaspoon of Dijon mustard for that tiny tang, and usually 2 tablespoons of water or milk to get it flowing perfectly along the wrap.
How to Prepare the Crunchiest Chicken for Wraps
Listen, if the chicken isn’t crispy, what are we even doing? This is the most critical step for any Crispy Chicken Wrap, and it all comes down to the coating technique called double-dredging. It sounds fancy, but it’s just making sure the chicken gets a thick, crusty suit of armor before it hits the oil.
First, you set up your stations. You need that shallow dish with your spiced flour mixture—make sure you whisk it up so that the paprika and cayenne are totally integrated. Then, your wet station: the eggs and milk whisked together. You take your chicken strip and gently dredge it in the flour first, shaking off any major clumps. Then, plunge it into the egg wash, letting the excess drip off for just a second. Finally, back into the flour for the second coating!
This is where you have to be firm! When you put it back in the flour, use your hands (before you start frying, obviously!) to really **press** that coating onto the chicken. We want this crust sticking tight so it doesn’t fall off in the hot oil. Once pressed, you’re ready for the fry pan.
You need vegetable oil heated in a deep skillet to exactly 350°F (175°C). If you use a candy thermometer, it makes this so much easier. If it’s not hot enough, the crust gets greasy, and we hate greasy chicken! Fry those strips in small batches—don’t overcrowd the pan—for about 4 to 6 minutes. Remember, we are cooking them through, so always check that internal temperature hits 165°F (74°C) when you test them. Safety first, always!
Technique for Perfectly Seasoned Fried Chicken Strips
The seasoning mix is where you customize the flavor, but make sure you apply it *before* the wet dip the first time. That flour sticks better to the raw chicken. Then, when you do the final press in the second coating, you’re essentially locking that seasoning right into the batter.
I watch people trying to sprinkle seasoning on *after* they fry, and honestly, it just falls right off. We want that flavor baked right into the crust! After they come out golden brown, immediately put them on a clean wire rack set over a baking sheet, not paper towels if you can help it. Paper towels trap steam, and steam destroys crispiness! If you’re looking for the speediest way to get crunch without deep frying, check out my tips for making an Air Fryer Crispy Chicken Wrap variation; it works like a charm!
Mastering the Creamy Garlic Sauce for Wraps
Alright, let’s talk about the absolute superstar of this whole operation: the sauce! If the chicken is the crunch, this Garlic Mayo Dip for Wraps is the velvety, luxurious hug that brings it all together. Seriously, nobody wants dry wrap filling, and honestly, the bottled stuff never tastes right when you’re craving that fresh, sharp garlic flavor.
Making this sauce is faster than boiling water, which is why I love it for Quick Weeknight Chicken Wraps. You take that half cup of good mayonnaise, and you just start incorporating everything else—the Dijon, the lemon juice, and most importantly, those two cloves of fresh, finely minced garlic.
Now, here’s where people mess up. They dump in the water or milk all at once, and suddenly, your thick, luscious sauce turns into soup! You have to add that liquid—the 2 tablespoons of water or milk—slowly, maybe a teaspoon at a time, whisking constantly. You’re looking for a texture that’s easy to drizzle but still coats the back of your spoon. Don’t be afraid to taste and adjust the tanginess with more lemon if you need it.
My pro tip, and this is a little secret I picked up from a very fussy chef friend, is to let the sauce sit. Once it’s completely mixed, cover the little bowl and just let it hang out on the counter for about five minutes before you use it. Why? Because that raw minced garlic needs just a tiny minute to “bloom” its flavor into the mayonnaise base. It makes a massive difference in the final taste!
If you want even more recipe inspiration for quick dips, I recently shared how to make a fantastic quick creamy 10-minute olive dip that would also be wild on these wraps!
Assembling Your Crispy Chicken Wrap with Creamy Garlic Sauce
Alright, the chicken is crispy, the sauce is jazzy—now we have to put it all together without creating a soggy mess! Assembly is a crucial skill; we are making Loaded Chicken Tortilla Wraps here, not sloppy joes! If you get the order wrong, that beautiful crispiness you worked so hard for disappears in seconds. I’ve learned some serious Wrap Assembly Tips and Tricks over the years to make sure everything stays tightly tucked inside.
Don’t just dump everything in the middle! The real trick is creating a moisture barrier. You want to layer your cool, dry ingredients first, right against the tortilla. So, start with a bed of lettuce—and I mean a good handful of shredded lettuce. This acts as a little buffer between the warm, saucy chicken and the tortilla itself. That way, even if some sauce drips onto the lettuce, the tortilla stays strong! This is the same layering logic I use when putting together my Buffalo Chicken Wraps for lunch prep, just with different fillings.
Next, spread that gorgeous Creamy Garlic Sauce for Wraps right over the lettuce bed. Don’t be stingy, but don’t drown it either! Then, you lay down those hot, crispy chicken strips. Follow that up with your sliced tomatoes and a little sprinkle of that cheddar cheese right on top of the chicken.
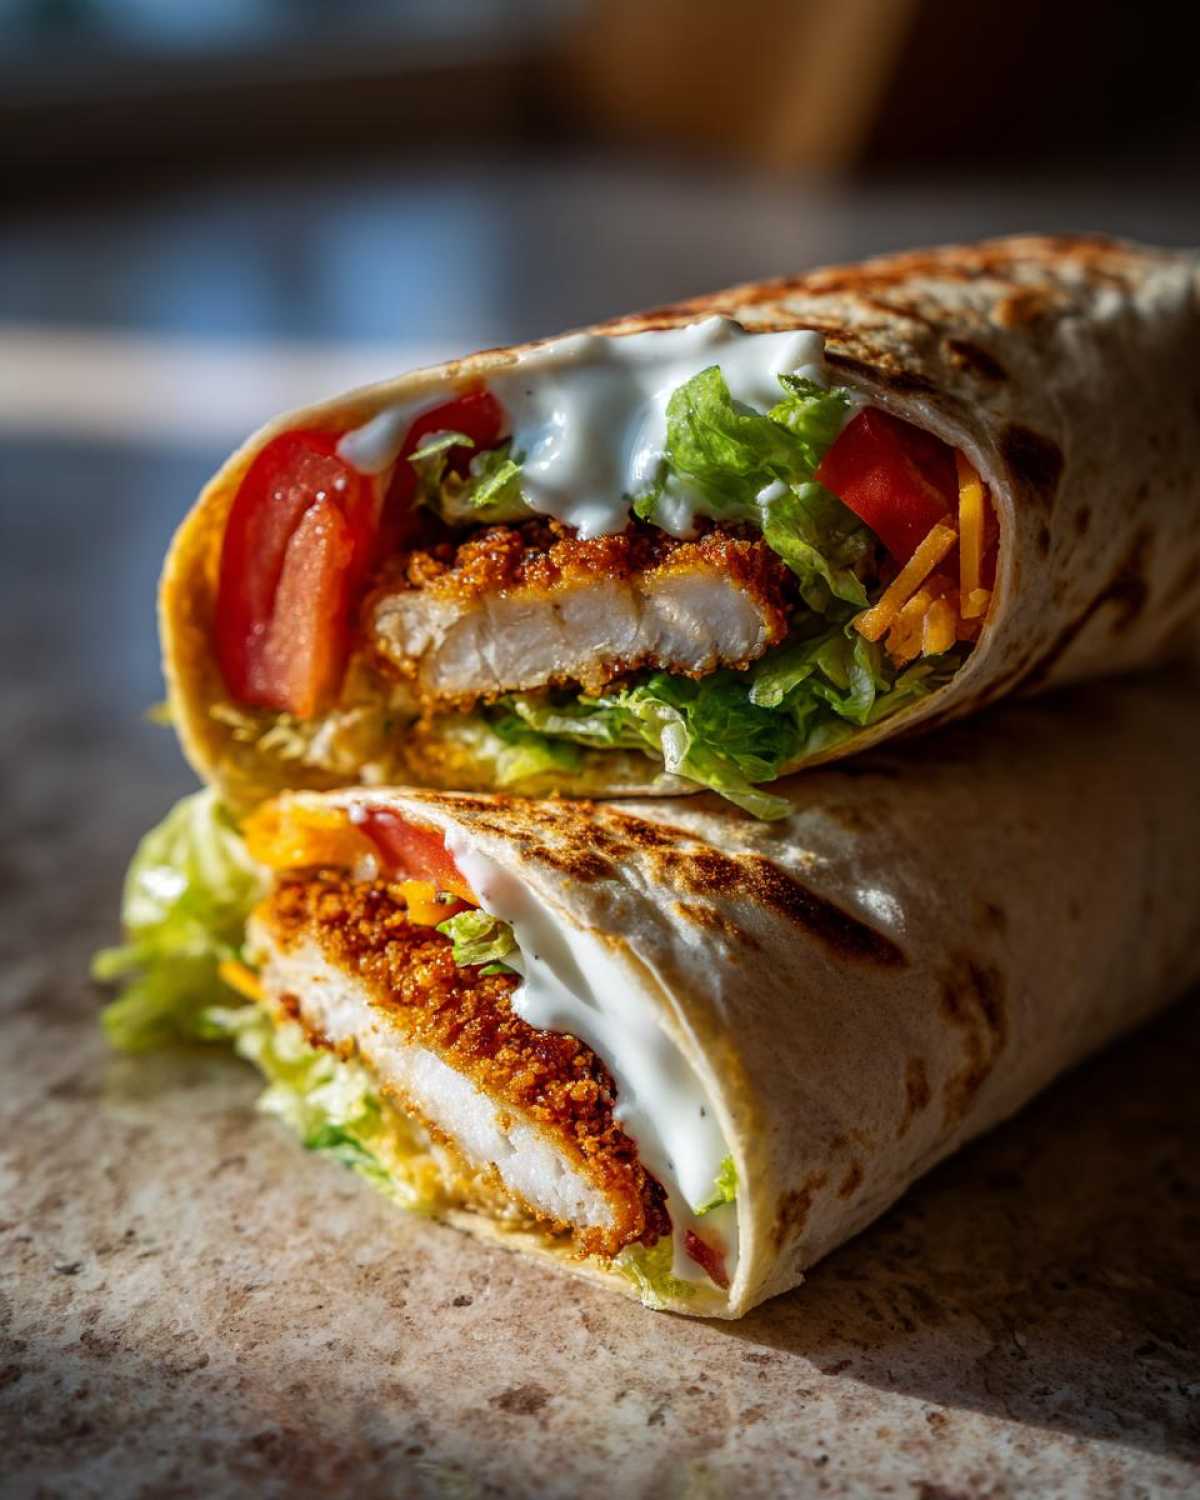
Tortilla Warming and Rolling for a Sturdy Wrap
You cannot roll a cold, stiff tortilla, or it will crack the second you try to fold it. I learned that the hard way when I almost lost half a wrap all over the counter! You need them pliable and warm. The best way—and it only takes a minute—is heating your tortillas briefly in a completely dry skillet over medium heat, just until they start to puff a little. Flip them once. That slight heat activates the gluten and makes them stretchy and perfect for rolling.
Once warmed, place your layered ingredients down the center, leaving about two inches clear on the sides. Now, here’s the rolling technique I swear by: Fold both sides (the left and right edges) inward over the filling first. This contains the contents so nothing falls out the ends. Then, take the bottom flap (the edge closest to you) and fold it up tightly over the filling. Tuck it in firmly, and then you roll upward, keeping the tension tight the whole way. If you roll it loose, it will explode when you pick it up!
Tips for Success with Your Crispy Chicken Wrap with Creamy Garlic Sauce
Making an amazing wrap is one thing, but making one that survives a commute to work or sitting untouched for an hour while you take a phone call requires strategy! I’ve learned that while this recipe is incredibly fast when made fresh, you absolutely have to treat the components differently if you’re prepping ahead. I’m giving you the insider scoop here, based on how I prep my Make Ahead Breakfast Burritos so they still taste great later!
The biggest concern is always that beautiful crisp coating we worked so hard on, right? Heat and moisture are the enemies of crunch. If you assemble this whole beautiful thing, wrap it tightly, and stick it in the fridge, the steam from the vegetables and the sauce will get that chicken soggy faster than you can say ‘no more crunch.’
Customization is also fun! If you were looking for something a little less heavy on the dairy fat, try swapping out half of that mayonnaise in the sauce for plain, thick Greek yogurt. It adds a wonderful tanginess, just like asking for a lighter dressing on the side at a restaurant. It makes the sauce slightly less rich, but still incredibly flavorful.
Make Ahead Chicken Wrap Components
Here is my non-negotiable rule for making this ahead: DO NOT ASSEMBLE ANYTHING MORE THAN AN HOUR BEFORE YOU PLAN TO EAT IT. Seriously, if you assemble it the night before, you are basically making warm, soggy wraps. It’s just science!
However, you can totally prep the two major flavor items early:
- The Chicken: Cook your chicken strips exactly as directed, but let them cool completely on that wire rack. Once cool, store them in an airtight container on the counter or in the fridge—but here’s the trick: don’t stack them! Lay them in a single layer or put a piece of parchment between layers so they don’t steam each other.
- The Sauce: The Creamy Garlic Sauce for Wraps is perfect for prepping. It actually tastes better the next day because the garlic has time to deepen its flavor. Keep it in a sealed jar in the fridge. It might thicken up slightly when it chills, so when you’re ready to eat, just whisk in a tiny splash of water or milk to bring it back to that perfect drizzle consistency.
Keep your lettuce and tomatoes washed, chopped, and bone dry in separate containers. When it’s lunchtime, just warm the chicken slightly if you must (or eat it cold!), grab the sauce, warm your tortilla, and build it right then. That way, you get the ultimate texture contrast every single time you bite in!
Variations for Your Chicken Wrap Dinner Ideas
You know I love a recipe that lets you play around with flavors! While this Crispy Chicken Wrap with Creamy Garlic Sauce is honestly perfection right out of the gate, sometimes you just need to shake things up, especially if you’re making wraps for dinner all week long. Think of the base recipe as your launching pad!
The easiest place to start customizing is with the veggies and the cheese. If you aren’t feeling plain cheddar, try Pepper Jack for a little subtle heat, or maybe some crumbled Cotija if you want a saltier, drier texture. I also absolutely love throwing in something acidic to cut through that rich garlic sauce. Pickled red onions are fantastic; they add color and such a great tang!
If you feel like your filling needs an extra layer of richness or texture, try adding a few homemade Garlic Parmesan Chicken Skewers pieces instead of the strips. It’s a different vibe, but still super tasty!
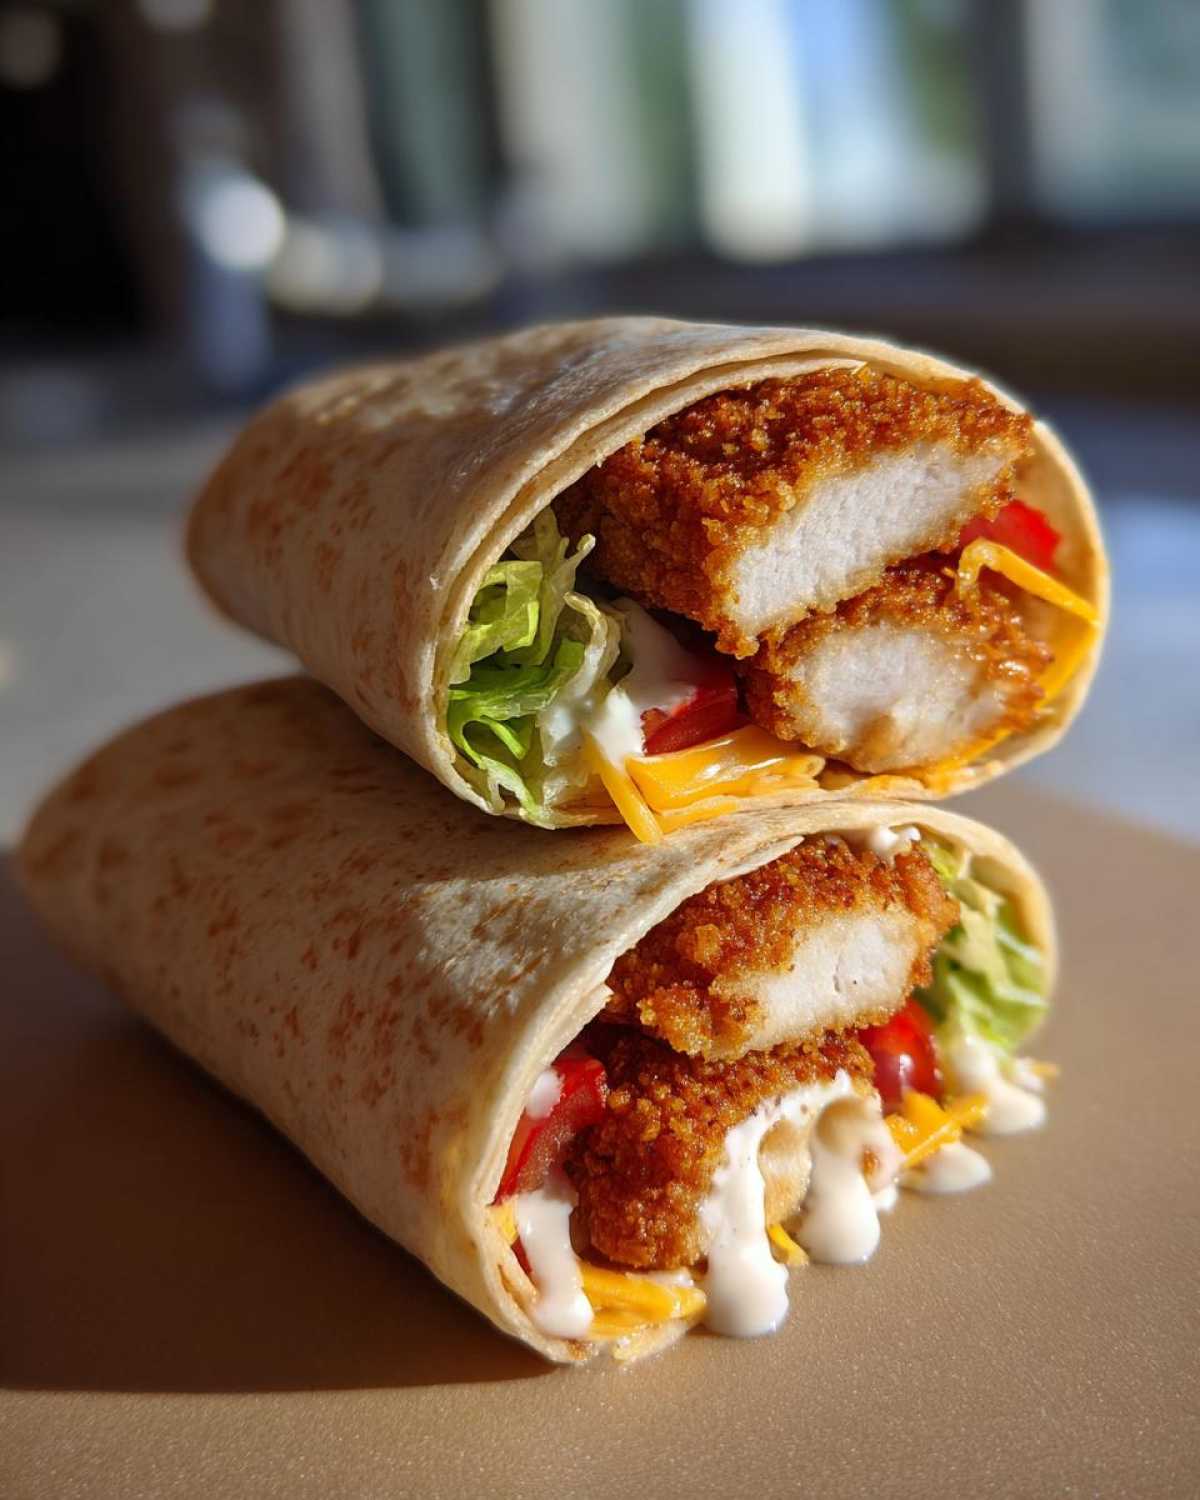
Now, let’s talk about turning that sauce into something truly bold. If you want to elevate that flavor profile and create a fantastic Tangy Cream Sauce for Chicken, you just need to raid your hot sauce cabinet.
Instead of just using the standard Dijon in the base recipe, try incorporating a teaspoon or two of your favorite vinegary hot sauce—like Cholula or Frank’s RedHot—right into the mayo mix. It doesn’t have to make it blazing hot; it just gives that sauce an extra layer of acidity and complexity that makes people go, “Ooh, what is that flavor?” It’s an instant upgrade for your Easy Chicken Wrap Dinner Ideas!
And for those who like a bit more earthiness, consider swapping out the fresh lettuce for a base of finely shredded Napa cabbage. It stays crispier longer, even under the sauce, giving you a slightly different kind of crunch when you bite into that perfect wrap!
Frequently Asked Questions About This Recipe
I know when I’m making a new recipe, I always have a million little questions running through my head before I even start dicing things up. So, here are some of the things folks ask most about this amazing wrap—hopefully, this clears everything up so you can get cooking fast!
Can I bake the chicken instead of frying it?
Yes, you absolutely can, because sometimes deep-frying just isn’t what you want to deal with for a busy night! If you’re trying to make this an Easy Chicken Wrap Dinner Idea that’s lighter, baking works. You’d want to place those coated strips on a baking sheet lined with a cooling rack—seriously, skip the flat pan—and bake them in a hot oven, say 425°F, for about 18 to 22 minutes. You still need to turn them halfway through to make sure you get decent color. But let me be honest, it won’t have that insane, shattering crunch of the fried birds. For a true crunchy texture without the deep oil, use that air fryer tip I gave earlier!
What is the best tortilla type for this recipe?
This is vital for keeping everything sealed up! Since we are loading these wraps up with juicy chicken and creamy sauce, you need a wrapper that has some give and is large enough to hold everything. I always reach for the biggest flour tortillas I can find—we’re talking 10-inch or 12-inch ones. Corn tortillas are just too small and they tend to tear when you fold them around something this substantial. Always make sure you warm them up slightly before wrapping; a cold tortilla will fight you every single time!
How long does the homemade Creamy Garlic Sauce for Wraps last?
Because this sauce relies on fresh garlic and mayonnaise, it doesn’t last forever like some of those highly processed jarred sauces, but it lasts perfectly long enough for meal prep! Once made, keep the sauce sealed tight in the fridge. It should be good for about 5 to 7 days. You’ll notice the garlic flavor deepens which is nice, but if it starts smelling at all sour or strange, toss it out immediately. Remember, if you’re planning to eat these later in the week, always store the sauce separately from the chicken!
Why is my chicken coating falling off during frying?
Oh, that’s the worst, isn’t it? It usually comes down to improper dredging or the oil temperature being wrong. If your oil isn’t hot enough (under 350°F), the coating just sits there, softening and absorbing too much oil, and then it starts peeling away from the chicken. Also, make sure you are doing that second press in the flour! You have to really use your hands to press that last layer of spiced flour onto the strips right before they go into the hot oil. That pressure welds the coating on there so it stays put!
If you want more straightforward guidance on making great dinners, check out my guide on Easy Chicken Wrap Dinner Ideas!
Storing Leftovers of Your Crispy Chicken Wrap with Creamy Garlic Sauce
Look, I’m going to be totally honest with you: even my incredible, perfectly crunchy chicken strips aren’t quite as mind-blowing the next day. Nothing beats that first bite of a perfectly assembled, warm wrap right off the pan!
That said, if you’re smart about leftovers, you can still have an amazing Savory Chicken Wrap Lunch Idea tomorrow without resorting to sad, cold, soggy ingredients. The secret to success here is realizing that the wrap itself—the flour tortilla—is usually the first thing to go soft. So, we never, ever store these completely assembled if we think they might sit for more than, say, an hour.
Think of it like building an ice cream sundae; you want the toppings separate until you’re ready to eat! If you can keep the creamy sauce, the cooked chicken, and the fresh veggies apart, you win.
Once the chicken has completely cooled down after frying—this is important, you don’t want to trap warm moisture—store those crispy strips in an airtight container. If you have room, I even lay a paper towel underneath them just to absorb any residual oil. The sauce goes in its own tiny, sealed jar. The fresh lettuce and tomato need their own breathable container so they don’t sweat.
When lunchtime rolls around, the assembly process is fast; you just reverse the steps we went through earlier. The biggest hurdle is reheating that chicken, but it’s easy if you want that crunch back!
For reheating, skip the microwave if humanly possible—it turns the crust chewy and sad instantly. Instead, try laying those chicken strips directly onto a baking sheet and pop them into a hot oven (around 375°F) for about 5 to 7 minutes. Even better? Use an air fryer for about 3 minutes! It reactivates that crispiness better than anything else. Once the chicken is hot and crunchy again, warm your tortilla slightly, throw down your barrier of lettuce, layer on the reheated strips, drizzle that stellar Creamy Garlic Sauce for Wraps, and roll it up tight. You’ll have a wrap that tastes nearly as good as the original. For more meal strategies, you can always explore my thoughts on Savory Chicken Wrap Lunch Ideas!
PrintCrispy Chicken Wrap with Creamy Garlic Sauce
Make a satisfying wrap featuring crunchy fried chicken strips smothered in a rich, homemade garlic sauce.
- Prep Time: 20 min
- Cook Time: 15 min
- Total Time: 35 min
- Yield: 4 servings
- Category: Lunch
- Method: Pan Frying
- Cuisine: American
- Diet: Low Fat
Ingredients
- 1 lb boneless, skinless chicken breasts, cut into strips
- 1 cup all-purpose flour
- 1 teaspoon salt
- 1/2 teaspoon black pepper
- 1/2 teaspoon paprika
- 1/4 teaspoon cayenne pepper
- 2 large eggs, beaten
- 1/2 cup milk
- Vegetable oil, for frying
- 4 large flour tortillas
- 1 cup shredded lettuce
- 1/2 cup sliced tomato
- 1/4 cup shredded cheddar cheese
- For the Sauce: 1/2 cup mayonnaise
- 2 cloves garlic, minced
- 1 tablespoon lemon juice
- 1 teaspoon Dijon mustard
- 2 tablespoons water or milk (to thin)
Instructions
- Prepare the chicken: In one shallow dish, mix the flour, salt, pepper, paprika, and cayenne. In a second dish, whisk the eggs and milk.
- Dredge each chicken strip first in the flour mixture, shaking off excess. Dip into the egg mixture, then coat again thoroughly in the flour mixture. Press the coating onto the chicken.
- Heat about 1 inch of vegetable oil in a deep skillet to 350°F (175°C). Fry the chicken strips in batches for 4-6 minutes, turning occasionally, until golden brown and cooked through (internal temperature of 165°F or 74°C). Remove and drain on a wire rack or paper towels.
- Make the sauce: Combine the mayonnaise, minced garlic, lemon juice, and Dijon mustard in a small bowl. Whisk until smooth. Add water or milk slowly until you reach your desired creamy consistency.
- Warm the tortillas briefly in a dry skillet or microwave until pliable.
- Assemble the wraps: Lay a tortilla flat. Spread a generous amount of the creamy garlic sauce down the center. Layer with lettuce, tomato, cheese, and 3-4 crispy chicken strips.
- Fold the sides of the tortilla inward, then roll tightly from the bottom up to seal the wrap. Slice in half if desired and serve immediately.
Notes
- For extra crispiness, you can air fry the coated chicken at 400°F (200°C) for 12-15 minutes, flipping halfway.
- To prevent sogginess, place the lettuce directly on the tortilla before adding the sauce and chicken.
- For a tangier sauce, substitute half the mayonnaise with plain Greek yogurt.
Nutrition
- Serving Size: 1 wrap
- Calories: 650
- Sugar: 5
- Sodium: 850
- Fat: 35
- Saturated Fat: 7
- Unsaturated Fat: 28
- Trans Fat: 0
- Carbohydrates: 45
- Fiber: 3
- Protein: 40
- Cholesterol: 120