

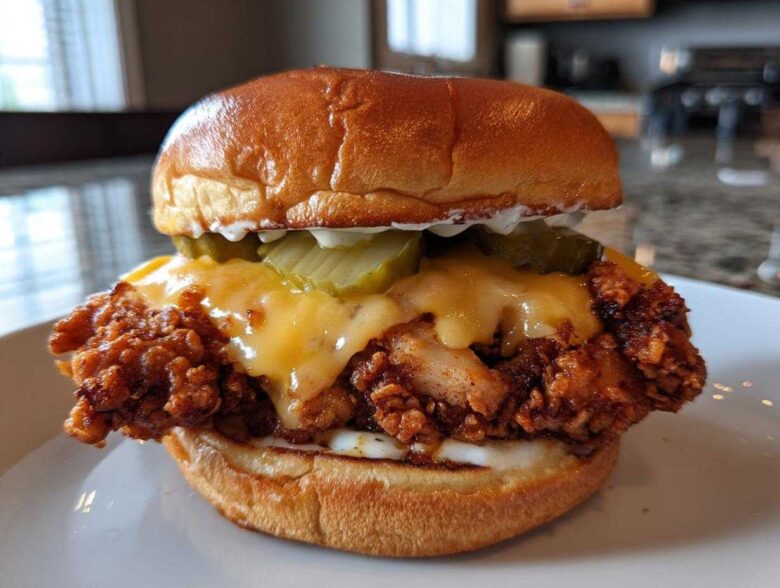
Oh my gosh, let’s talk crunch! I swear, the sound of a perfect, shatteringly crisp chicken crust is the best sound in the kitchen. If you’re tired of soggy bottoms and dry chicken centres, you’ve come to the right place today. We are absolutely tackling the Crispy Chicken Burger with Melty Cheese, and I’m going to show you every single trick I learned the hard way.
Forget those cardboard patties you get sometimes! My goal here is texture, texture, texture—a coating so aggressively craggy and golden that it echoes that amazing restaurant version. But we aren’t sacrificing juiciness, because what’s a crunch without a juicy interior, right? And naturally, that chicken needs to wear a gorgeous blanket of gooey, shimmering cheese. Trust me, after you nail this breading technique, you won’t look back!
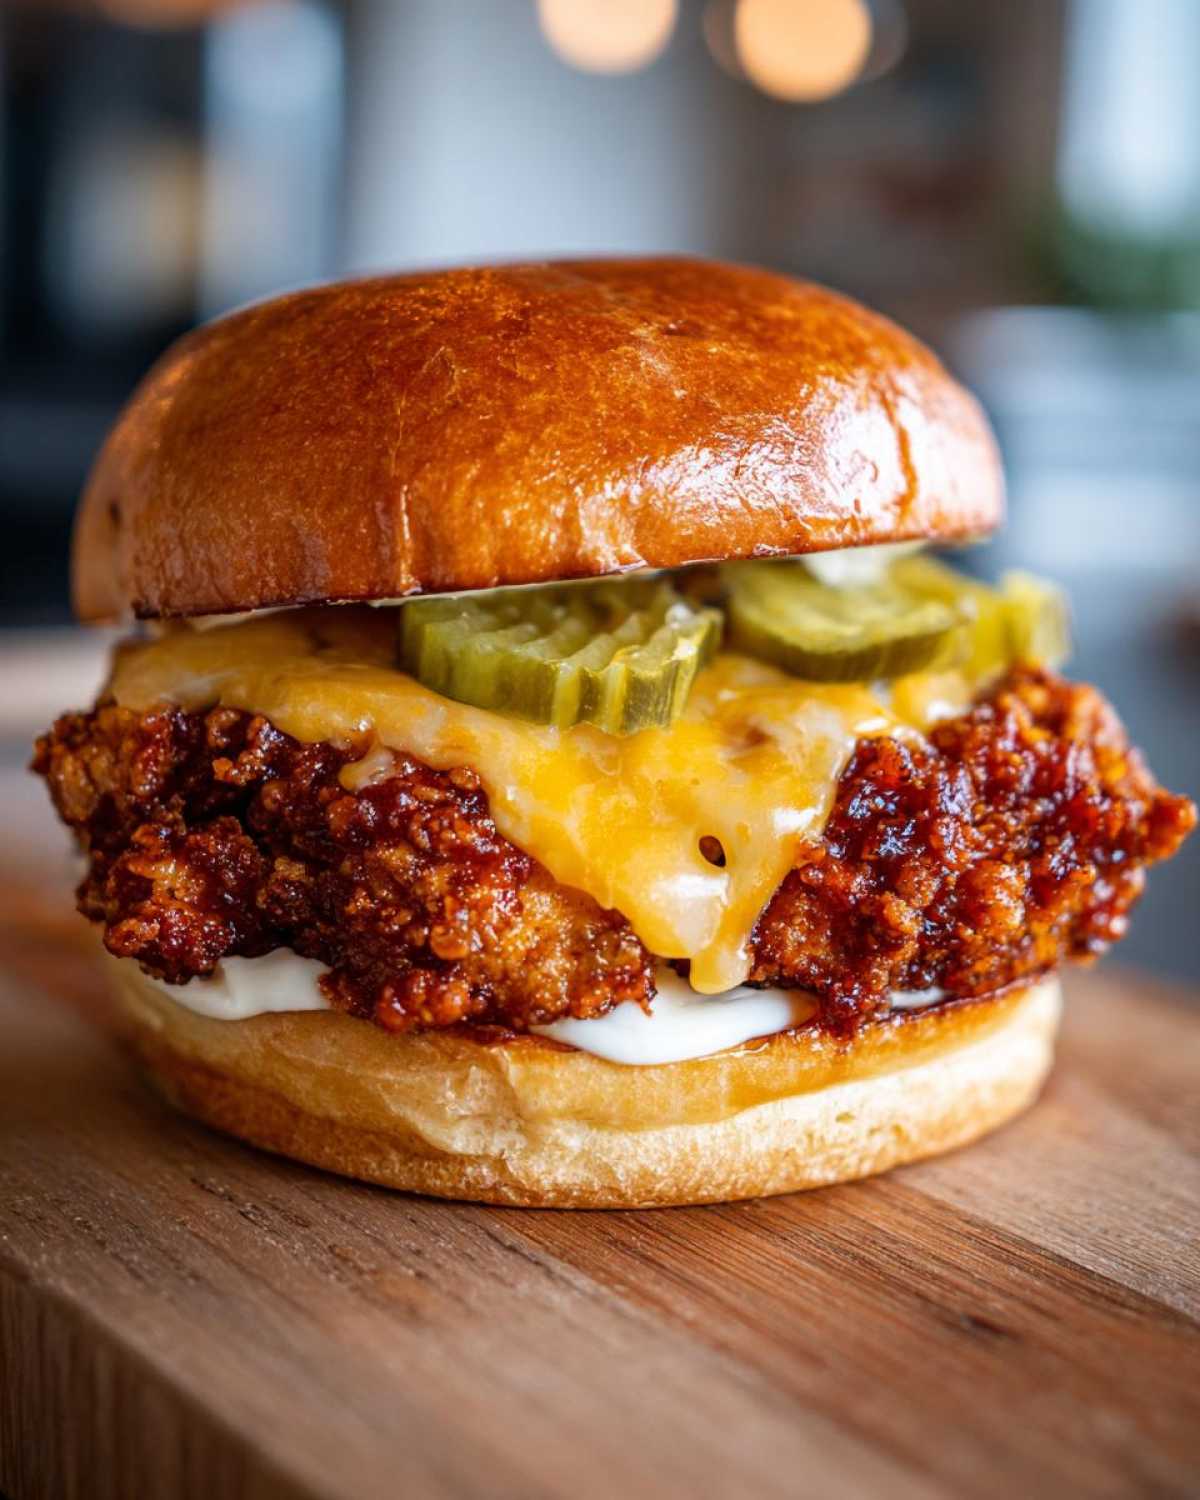
Why This Crispy Chicken Burger with Melty Cheese Recipe Works
You need a burger that delivers on every promise, and this recipe is my rock-solid guarantee. It isn’t just another fried chicken sandwich; it’s a study in contrasts that just *works*. I’ve fine-tuned this method over countless weekend lunchtime disasters and triumphs.
Here’s what makes this specific combination—the Crispy Chicken Burger with Melty Cheese—a winner every single time:
- You get that incredible, audible crunch from the cornstarch and the double-dredge breading. It’s superior crunch, friends!
- We pound the chicken thin, so you’re guaranteed a juicy interior without waiting forever for it to cook through. No dry bites here.
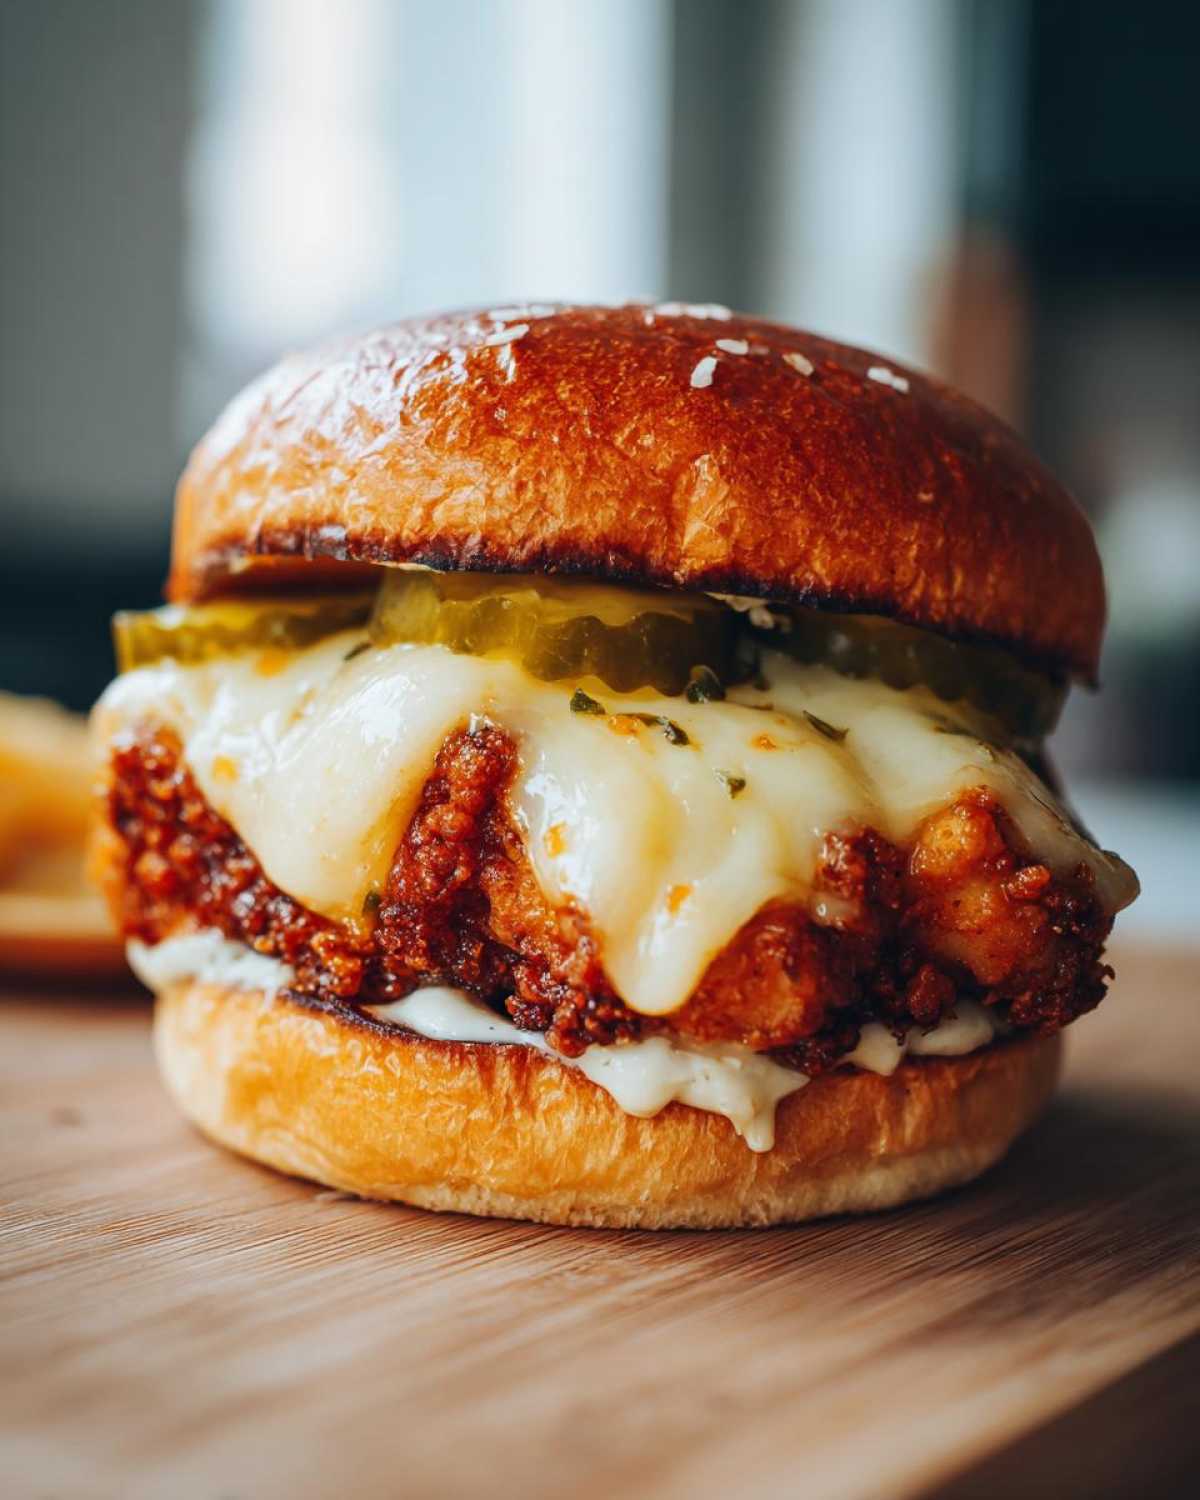
- The cheese move is genius—we use Monterey Jack right at the perfect moment. It creates that beautifully loaded, gooey cheese covering you dream about.
- It comes together stunningly fast! A true weeknight winner when you need that gourmet fix.
Ingredients for the Ultimate Crispy Chicken Burger with Melty Cheese
When you’re striving for that perfect crunch and that amazing, glossy melt, the ingredients have to be spot on. It’s not about fancy items; it’s about having the right tools in hand! I’ve laid out everything you need below. I pulled this list straight from my notes when I was learning how to make crispy fried chicken at home, so you know it’s battle-tested!
You’ll need a few things grouped by purpose:
- For the Chicken: 2 boneless, skinless chicken breasts (aim for about 6 oz each, we need them even!)
- The Dredge (Dry Mix): 1 cup all-purpose flour, 1/2 cup cornstarch (this is the crunch secret!), 1 tablespoon salt, 1 teaspoon black pepper, 1 teaspoon paprika, 1/2 teaspoon garlic powder, and 1/2 teaspoon cayenne pepper if you like a little kick.
- The Binder (Wet Mix): 2 large eggs and 1/4 cup milk—just the basics here.
- For Cooking & Cheese: Enough vegetable oil for frying (aim for 2 inches deep in a skillet), 4 slices of glorious Monterey Jack cheese (it melts like a dream!), and 4 brioche burger buns—lightly sweet ones are the best contrast.
- Finishing Touches: Mayonnaise for spreading (don’t skip the mayo spread!), and some good pickle slices for that necessary sour pop.
See? Nothing too complicated, but that cornstarch in the flour mix is essential for that restaurant-style texture we’re shooting for!
Mastering the Perfect Crispy Chicken Patty for Your Crispy Chicken Burger with Melty Cheese
Here is where we win or lose the eternal battle against soggy chicken! Getting that shatteringly crisp crust is all about preparation and technique, not magic. We have to treat our chicken right so we can achieve that perfect outcome for our Crispy Chicken Burger with Melty Cheese. Remember that cornstarch we added to the flour? That’s your insurance policy against a limp crust. It absorbs moisture like a champ!
Once you’ve done the dredge—and you *must* do the double-dredge, folks—here is my biggest pro tip: Let the coated patties rest on a wire rack for at least ten minutes before they hit the oil. Seriously! This resting time allows the coating to hydrate slightly, turning into a sort of batter glue that adheres beautifully during the fry. It locks everything in place! This whole process is why my Best Burger Breading Technique is the foundation of this sandwich.
Pounding and Preparing the Juicy Chicken Fillet Burger
We’re not looking for thick, chewy chicken here; we want tender, fast-cooking succulence. Grab those breasts and put them between plastic wrap or parchment paper. Then, just gently but firmly pound them out to an even half-inch thickness. Why half an inch? Because you want the chicken to cook through at the exact same speed as your crust browns. This is the key to ensuring you end up with that absolutely Juicy Chicken Fillet Burger experience instead of dry disappointment!
The Double-Dredge Technique for Maximum Crispiness
Now for the fun part—the actual breading, which is what separates a so-so sandwich from the best you’ve ever had. We use the “dry-wet-dry” method, and we do it twice! First dive into the spiced flour mix, shake off the excess. Then, a lightning-fast dip into the egg/milk bath. Immediately back into the dry mix, but this time, press down! Really massage that coating into the chicken. The more craggy bits you get sticking out, the crispier your final Crispy Chicken Burger with Melty Cheese will be. Those little jagged edges are what catch the oil and turn instantly golden brown!
Frying Instructions for the Crispy Chicken Burger with Melty Cheese
Whew, your chicken is breaded and rested, looking suitably rugged and ready to go! Now comes the moment of truth: the fry. This step determines whether you get that amazing crunch or a soggy oily mess, so pay attention to your heat!
You want your frying oil—I usually go with a neutral vegetable oil—heated up to a solid 350°F (175°C). Don’t trust your gut; grab a thermometer! If the oil is too cool, your beautiful coating soaks up grease instead of crisping up. If it’s too hot, the outside burns before your Juicy Chicken Fillet Burger cooks inside. That’s why maintaining that temperature is everything when aiming for the Perfectly Fried Chicken Patty.
Next, don’t be selfish with the pan! Only put one or maybe two pieces of chicken in at a time. Overcrowding drops the oil temperature way too fast. Let them swim freely for about 4 to 6 minutes on each side until they hit 165°F internally. Safety first, right? Once they look golden brown and fantastic, pull them out onto that wire rack to drain. We need them hot for the next step!
Secrets to Melting Cheese on Burgers for a Loaded Chicken Burger with Gooey Cheese
Okay, we’ve done the hard part—the crunch is secured! Now we need to deliver on that gooey, shimmering promise of a Loaded Chicken Burger with Gooey Cheese. This step is so quick, you almost feel like you’re cheating, but trust me, timing is everything here.
My absolute first choice is always Monterey Jack cheese, like the recipe calls for. Why Jack? Because it has a fantastic moisture content and melts beautifully without getting oily or separating. It just turns into pure, creamy goodness that cascades down the crispy edges! I also have a soft spot for good American cheese slices when I’m feeling ultra-nostalgic for diner food, but Jack is the champion for that gourmet look.
The timing for adding the cheese is non-negotiable: it goes on the second the hot chicken leaves the oil and lands on the draining rack. Don’t wait! That residual heat is your friend. Place one slice right on top of each sizzling-hot patty. Give it maybe sixty seconds—just while you’re reaching for the bun—and it will start to soften beautifully.
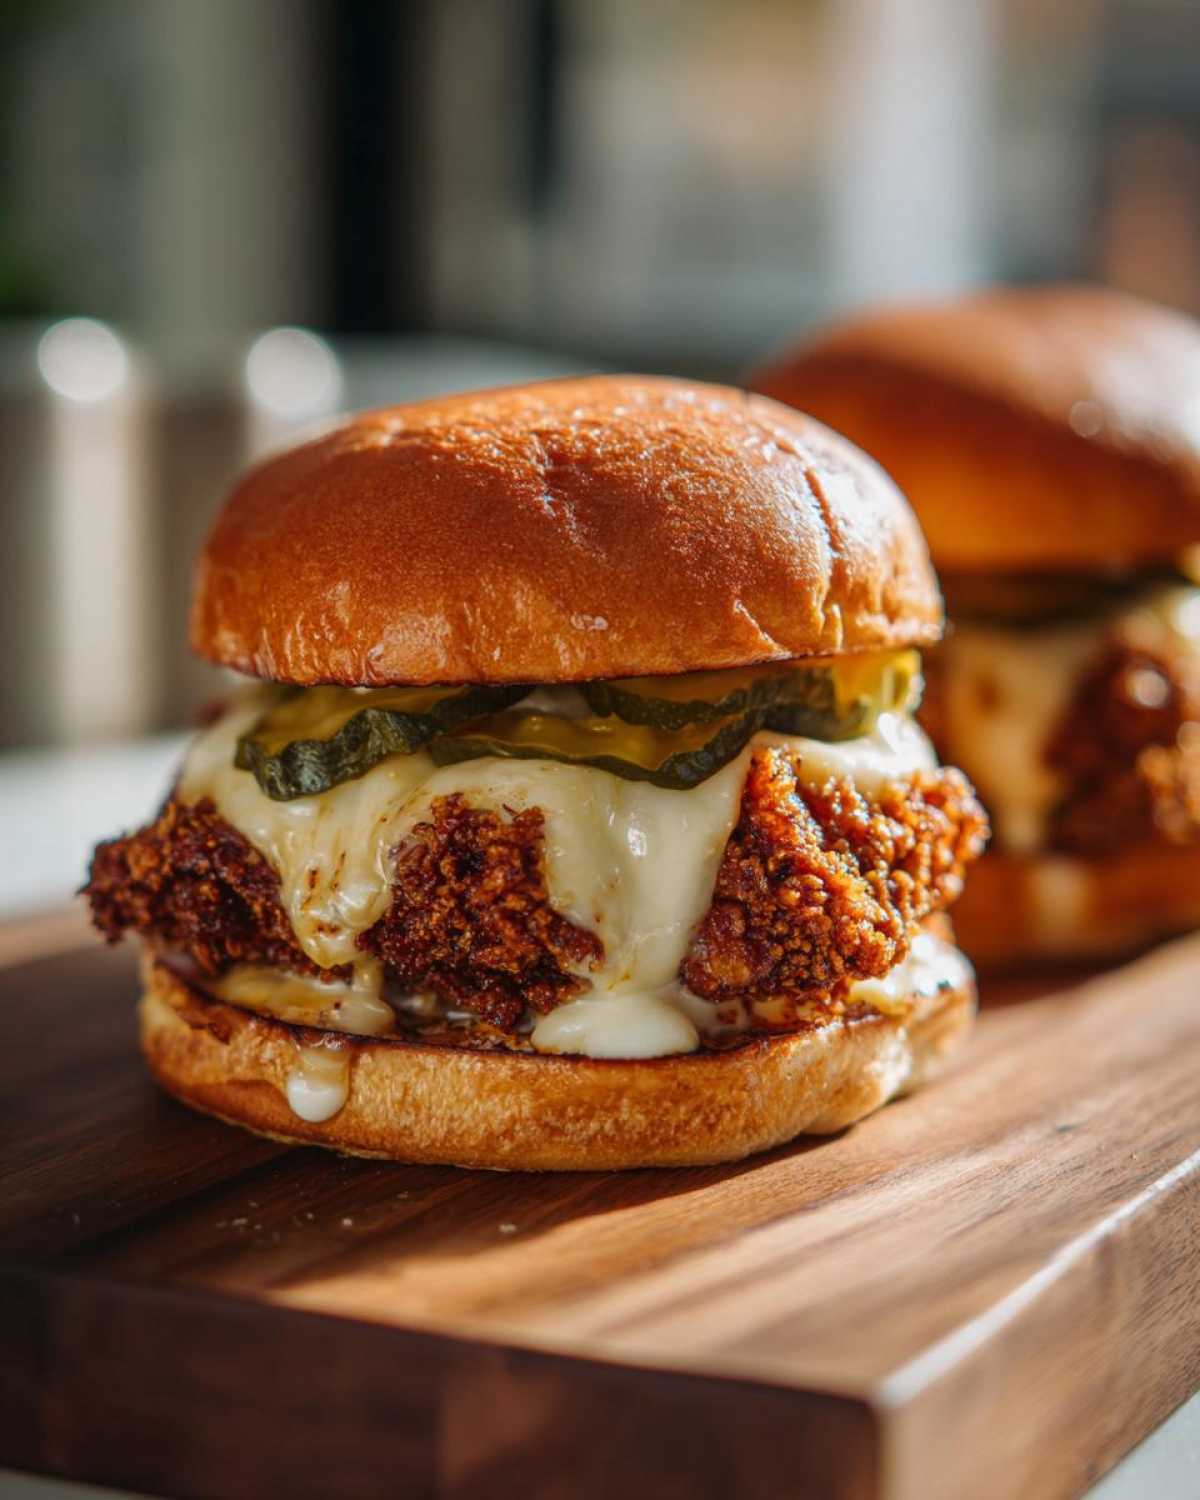
Now, if you want that perfectly uniform, draped melt, here’s the trick I learned from watching way too many cooking shows: Trapping the steam! As soon as the cheese is on, take a metal bowl or another skillet (one that’s bigger than the patty size) and just gently invert it over the cheese-topped chicken for about 30 seconds. It traps the heat and steam, melting the cheese instantly and totally. It’s one of my favorite little cheats covered in my guide on Melting Cheese on Burgers Secrets. That steam melts the cheese right down to the core, creating the ultimate Crispy Chicken Burger with Melty Cheese!
Assembling Your Gourmet Crispy Chicken Sandwich
Whew! We’ve got the crunch locked down, and the cheese is glistening—it’s time for the grand finale! How you stack this thing determines whether it’s just a sandwich or a true Gourmet Crispy Chicken Sandwich experience. My main rule here is speed; you want zero hesitation once that hot, cheesy chicken comes off the resting rack. The crispiness fades fast if it sits around, so get that bun ready!
First things first: the bun prep. If you haven’t toasted them yet, stop everything and do it now! Toasting isn’t just about making them pretty brown; it creates a moisture barrier. That buttery, slightly sweet brioche—which I prefer for this recipe—will hold up against the juices and mayo without getting soggy underneath the chicken.
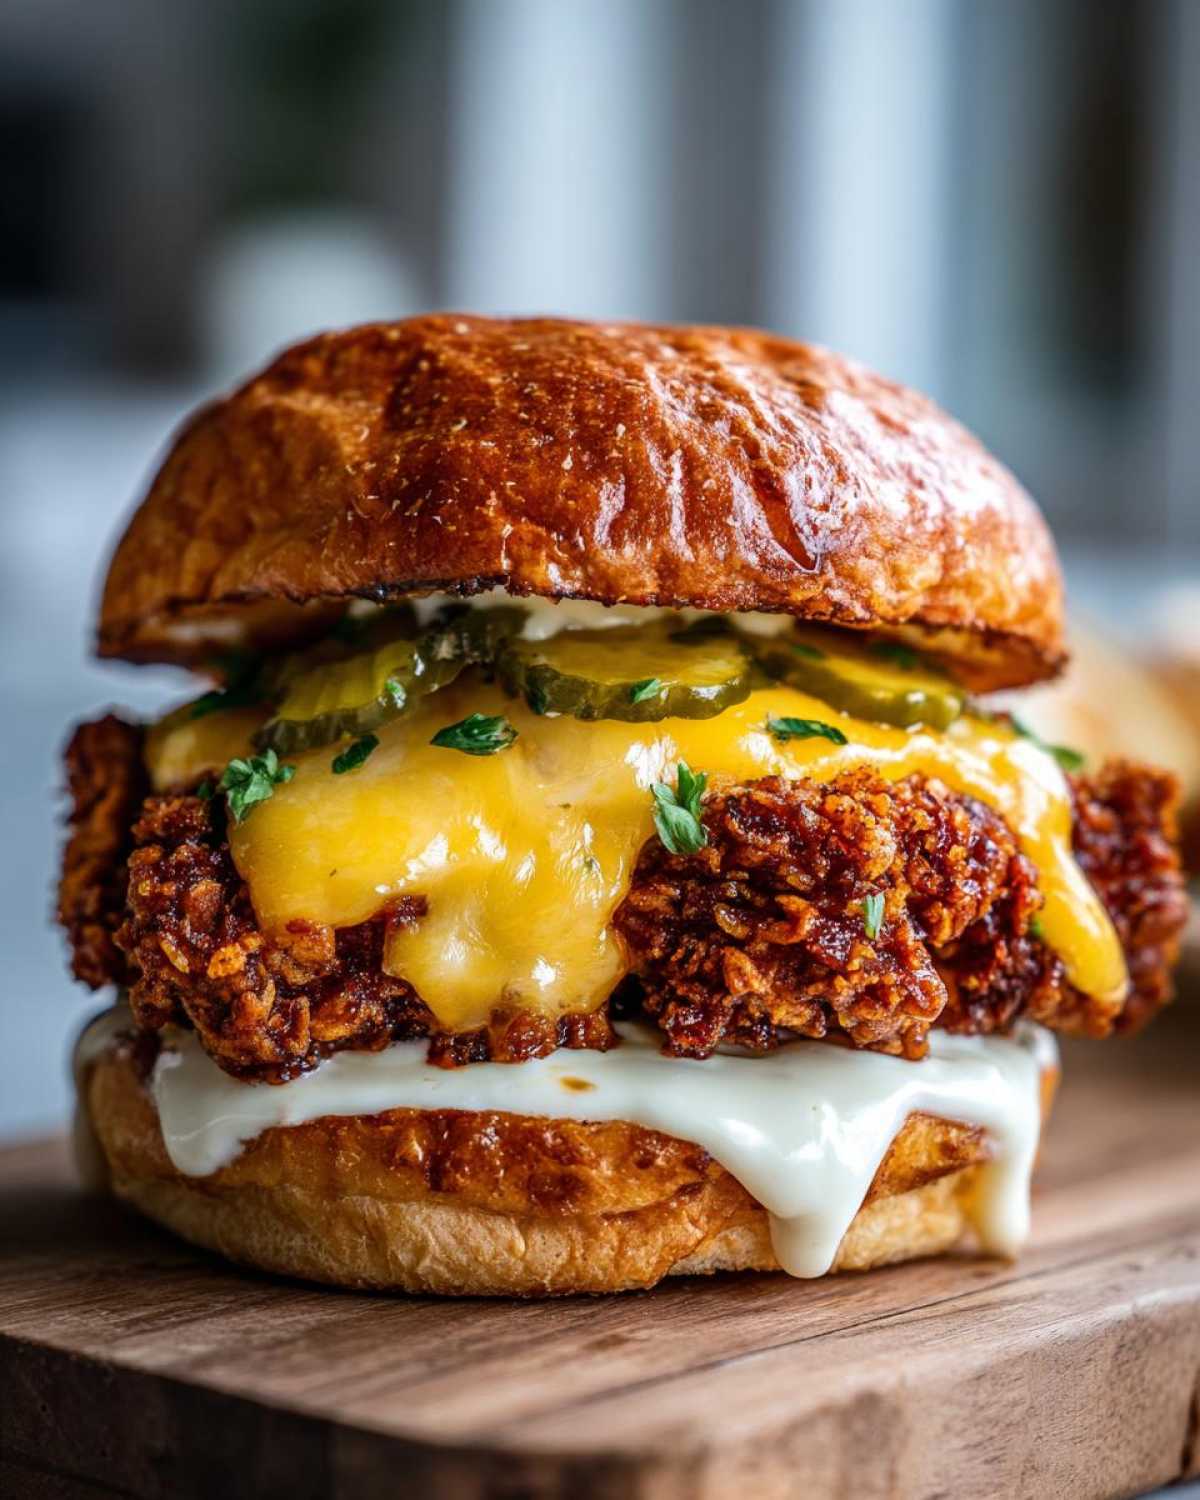
We’re keeping the toppings simple because we want the star (that crispy chicken) to shine. Layer them up right, and you’ve got perfection. You can find tons of inspiration over at my guide on the Best Toppings for Crispy Chicken Sandwich, but for *this* specific burger, we stick to the classics!
Buns and Condiments for the Crispy Chicken Burger with Melty Cheese
Don’t underestimate the role of the condiment! Forget the ketchup for a second. For a rich, fried patty like this, you need a good, creamy counterpoint. That’s why mayonnaise is my undisputed choice for this Crispy Chicken Burger with Melty Cheese. Spread a generous layer on *both* the top and bottom bun halves. The fat in the mayo helps carry the flavor and smooths out that intense crispiness.
Once the mayo is spread, it’s time to build. Bottom bun, mayo side up. Then, nestle that beautiful, cheesy fillet right on top. The cheese should be warm enough that it’s just starting to flow down the sides of the crust. Then, we add the necessary acidity: those crunchy pickle slices! They cut through the richness of the fried coating and the fat from the cheese and mayo perfectly. Top it with the other bun half, give it a little gentle press, and serve it immediately!
Alternative Cooking Methods: Air Fryer Crispy Chicken Burger with Melty Cheese
Now, I know what you’re thinking: “All that glorious crunch, but do I have to haul out the deep fryer?” Don’t worry yourself! I totally get it; sometimes we want the result without the oil mess. Good news—you can absolutely still achieve a fantastic texture for your Crispy Chicken Burger with Melty Cheese recipe using an air fryer. This method gets you way closer to true fried quality than baking does, honestly.
The key shift here is temperature and time. Since the air fryer circulates super-hot air, it cooks faster and requires less fat. You’ll need to spray your beautifully breaded patties lightly but thoroughly with cooking spray—we still need that fat to activate the crispness in the flour and cornstarch mix. Don’t just mist the top; flip and spray the bottom too!
For the 1/2-inch thick cutlets, you’ll want to preheat your air fryer to 380°F (about 195°C). Pop those sprayed patties in, making sure they aren’t touching. You’ll cook them for about 12 to 15 minutes total. Check them halfway through and flip ’em over. They should look beautifully golden brown!
One thing to remember about the cheese: since the air fryer chicken cools down a bit quicker than deep-fried chicken, you might need to assemble the cheese sooner or use that little steam-trap trick I told you about earlier to get that perfect melt covered in my Air Fryer Crispy Chicken Burger guide. But yes, you can absolutely get that satisfying crunch!
Storage and Reheating Instructions
So, you managed to have leftovers? Good for you, because this Crispy Chicken Burger with Melty Cheese is genuinely tasty the next day—if you handle the leftovers correctly, that is! If you let that beautiful chicken sit in the fridge overnight, I’m going to be straight with you: the crust *will* get soft. That’s just the nature of breading and moisture working against each other in a cold environment.
If you plan on having seconds tomorrow, don’t assemble the burger! Keep the bun, cheese, and chicken separate. The cheese should just be wrapped tightly, and the pickles should go in a little container.
Now, here is the crucial part of my advice, the thing that makes me a trustworthy source: Never, ever try to reheat the fully assembled burger! That lettuce/pickle/mayo combo will turn into a sad, soggy mess. You have to save the chicken and the bun separately, and you must reheat the chicken using dry heat to bring back that crunch we worked so hard for.
Refrigerator storage is okay for about two days max, but the freezer is actually better for longer storage if you’re prepared. If you want to freeze them, let the cooked patties cool completely first, then wrap each one individually in plastic wrap and then foil. This prevents freezer burn!
When it’s time to eat leftovers, forget the microwave—it turns everything rubbery. You need to revive that crust! The best method? Your oven or air fryer. Preheat your oven to 400°F (200°C) or your air fryer to 375°F. Place the cold patty on a wire rack set inside a baking sheet. This allows air to circulate all the way around, which is key to crispiness restoration! A cooked patty should take about 10 to 12 minutes in the oven, or 6 to 8 minutes in the air fryer, until it’s piping hot all the way through. Then, you toast your fresh bun, melt a new slice of cheese on top when it’s hot, and you’re back in business!
Frequently Asked Questions About This Recipe
I know you might still have some burning questions, especially if you’re new to making your own Restaurant Style Crispy Chicken Sandwich at home. It’s natural! These are the things I used to obsess over when I was first testing this recipe. Hopefully, these quick answers save you some time and stress! If you’re interested in making your own perfect bread for next time, check out my guide on Homemade Chicken Burger Buns.
Can I use chicken thighs instead of breasts for this Crispy Chicken Burger with Melty Cheese?
Absolutely, you totally can! Chicken thighs are inherently more forgiving because they have more fat marbled through them. They are guaranteed to stay juicy, even if you accidentally let them hang out in the fryer for an extra minute. The trade-off is that dark meat is a little thicker and takes slightly longer to cook through compared to the pounded breast cutlets we use here. If you use thighs, just rely completely on that internal temperature check—165°F is your absolute minimum to be safe!
What is the best way to prevent the breading from falling off during frying?
If your breading is sliding off like cheap wallpaper, it’s almost always down to two things: one, not pressing hard enough during that final coat of flour, and two, the oil temperature messing with the crust formation. Remember, you need to commit to that *press* when you put the raw patty back into the dry dredge. You’re physically embedding those craggy bits into the meat! Also, if the oil isn’t hot enough (below 340°F), the coating just sits there soaking up oil instead of frying instantly, which makes it weak. Make sure that oil is shimmering and steady at 350°F before you drop them in!
Can I make the chicken patties ahead of time?
Yes, this is a lifesaver when you’re planning a big backyard bash! The breading process is messy, so doing it the day before cuts down on the chaos right before serving. Once you have completed the double-dredge step—so the chicken is fully coated but raw—you’ll need to store them properly. Lay them out in a single layer on a baking sheet lined with parchment paper or paper towels. Cover them loosely with plastic wrap and pop that sheet right into the fridge. You don’t want to cover them tightly, or the coating will get sticky! When you’re ready to cook, just proceed exactly as if you just finished breading them. They might need an extra minute or two in the hot oil since they are starting out cold.
PrintCrispy Fried Chicken Burger with Melty Cheese
Follow these steps to make a homemade chicken burger featuring an extra crispy coating and perfectly melted cheese.
- Prep Time: 20 min
- Cook Time: 15 min
- Total Time: 35 min
- Yield: 4 servings
- Category: Main Course
- Method: Frying
- Cuisine: American
- Diet: Low Fat
Ingredients
- 2 boneless, skinless chicken breasts (about 6 oz each)
- 1 cup all-purpose flour
- 1/2 cup cornstarch
- 1 tablespoon salt
- 1 teaspoon black pepper
- 1 teaspoon paprika
- 1/2 teaspoon garlic powder
- 1/2 teaspoon cayenne pepper (optional)
- 2 large eggs
- 1/4 cup milk
- Vegetable oil, for frying
- 4 slices Monterey Jack cheese
- 4 brioche burger buns
- Mayonnaise, for spreading
- Pickle slices, for topping
Instructions
- Pound the chicken breasts between two sheets of plastic wrap until they are about 1/2 inch thick and uniform in size.
- In a shallow dish, whisk together the flour, cornstarch, salt, pepper, paprika, garlic powder, and cayenne pepper. This is your dry dredge.
- In a second shallow dish, whisk the eggs and milk together. This is your wet mixture.
- Dredge each chicken cutlet first in the dry mixture, shaking off excess. Dip it completely into the wet mixture. Return the cutlet to the dry mixture and press firmly to create a thick, craggy coating. Set aside on a rack.
- Heat about 2 inches of vegetable oil in a deep skillet or Dutch oven to 350°F (175°C).
- Carefully place one or two chicken cutlets into the hot oil, ensuring you do not overcrowd the pan. Fry for 4 to 6 minutes per side, until golden brown and the internal temperature reaches 165°F (74°C).
- Remove the cooked chicken and place it on a wire rack set over a paper towel-lined baking sheet to drain excess oil.
- While the chicken is hot, immediately place one slice of Monterey Jack cheese on top of each patty. Let it sit for 1 minute to melt.
- Lightly toast the cut sides of the brioche buns in a dry pan or under the broiler until golden.
- Spread mayonnaise on both halves of each bun.
- Place the cheesy chicken patty on the bottom bun, top with pickle slices, and place the top bun on. Serve immediately.
Notes
- For extra crispiness, double-dip the chicken in the wet and dry mixtures for a thicker crust.
- Use a thermometer to maintain oil temperature; too low results in greasy chicken, too high burns the crust before the center cooks.
- Monterey Jack melts well due to its high moisture content; cheddar or American cheese are good substitutes.
Nutrition
- Serving Size: 1 burger
- Calories: 650
- Sugar: 8
- Sodium: 1100
- Fat: 35
- Saturated Fat: 12
- Unsaturated Fat: 23
- Trans Fat: 0.5
- Carbohydrates: 45
- Fiber: 2
- Protein: 40
- Cholesterol: 150