

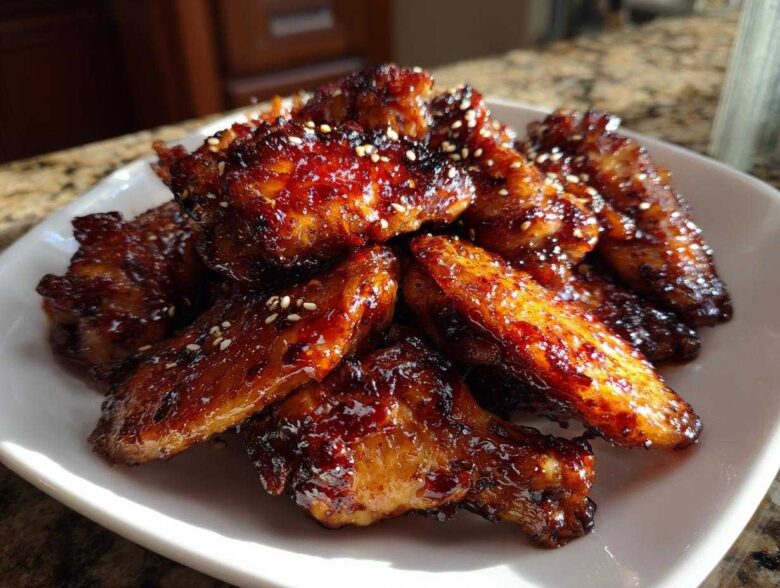
Oh, game day is coming, or maybe it’s just Tuesday and you’re craving that perfect, saucy indulgence, but the thought of deep frying wings makes you want to quit before you even start? I get it. Cleaning that greasy fryer oil is the worst! Trust me, I spent years trying to get that takeout quality without the mess, and I finally cracked the code. We are making absolutely incredible Sticky Teriyaki Chicken Wings Oven Baked right here on a simple baking sheet. This isn’t just another baked wing recipe; this is the sweet, savory, beautifully caramelized magic you’ve been searching for. Getting that sticky glaze to cling just right is all about timing, and I’m going to show you exactly how I do it every single time. You can check out a bit more about my kitchen philosophy over at our little corner of the internet, but for now, let’s focus on wings!
Why You Will Love This Sticky Teriyaki Chicken Wings Oven Baked Recipe
I promise, these are a total winner for weeknights or game days. Forget the frying pan drama; this recipe keeps things contained and neat. Here’s why I keep coming back to this exact method:
- No Mess Eating: We get that amazing sticky, caramelized texture without ever heating up the deep fryer.
- Perfect Texture: You get unbelievably crispy skin despite baking—it’s all in the prep!
- Flavor Punch: That simple homemade teriyaki sauce is perfectly balanced—sweet but savory, clinging beautifully to every wing.
- Easy Clean-Up: Since we use foil and a rack, cleanup is generally a breeze.
Essential Ingredients for Sticky Teriyaki Chicken Wings Oven Baked
Okay, I know you want to get cooking, but stick with me for just a minute while we look at what you need. The best part about making these Sticky Teriyaki Chicken Wings Oven Baked at home is that the ingredient list is super straightforward. We aren’t dealing with seven different specialty items here! A great wing starts with dry meat and a killer glaze, so I’ve broken down what goes where. Honestly, having good quality soy sauce and that mirin makes all the difference in the final flavor, so don’t skimp!
For the Chicken Wings Prep
This is what you need to get those wings ready so they actually get crispy in the oven. Trust me, skipping a step here leads to sad, pale wings!
- 2 lbs chicken wings, separated into flats and drumettes (Make sure you have both sections!)
- 1 tablespoon vegetable oil (Just enough to help the seasoning stick.)
- 1 teaspoon salt
- 1/2 teaspoon black pepper
Crafting the Sticky Teriyaki Glaze Recipe
This is where the magic happens. The balance of sweet, salty, and tangy creates that wonderfully sticky texture when it caramelizes.
- 1/2 cup soy sauce (Use low sodium if you’re worried about saltiness, but the flavor is slightly different.)
- 1/2 cup mirin (sweet rice wine) – This is key for shine!
- 1/4 cup brown sugar, packed (Packing it in gives us that deep molasses flavor.)
- 2 tablespoons rice vinegar
- 1 tablespoon grated fresh ginger (Fresh is non-negotiable here, the flavor boost is huge!)
- 2 cloves garlic, minced
- 1 teaspoon sesame oil
- 1 tablespoon cornstarch (Our secret weapon for thickness!)
- 2 tablespoons cold water (Mix this separately with the cornstarch.)
- 1 teaspoon sesame seeds, for garnish (Just for looks, but I can’t skip them!)
Prepping the Wings for Crispy Oven Wings Success
Okay, we’ve got all the ingredients out, which is half the battle! Now we need to talk technique because this is the difference between flabby, baked wings and genuinely satisfying Crispy Oven Wings. You’ve got about 15 minutes of prep time here before they hit the heat, and every minute counts. Remember, we are trying to mimic that deep-fried texture without actually frying, so moisture is our enemy!
First things first: YOU MUST PAT THEM DRY. I repeat, dry those wings until you think they are dry, and then pat them again. Use a whole stack of paper towels if you have to. Moisture turns into steam in the oven, and steam means chewy skin. We want that skin to crisp up and get ready for that beautiful glaze later. Seriously, moisture prevents the skin from crisping, so be aggressive with your drying!
Once they are bone-dry, toss them gently in that half tablespoon of oil, salt, and pepper. The oil helps the seasoning adhere and speeds up the crisping process. I always use a wire rack set over a foil-lined baking sheet. The aluminum foil is for easy cleanup—you can thank me later! The rack is vital because it lets the air circulate all around the wing, top and bottom. If they just sit on the pan, the bottoms will boil in their own rendered fat, and you won’t get that perfect texture we’re aiming for. This setup is the secret weapon for anyone avoiding the fryer!
Once they are arranged in a single layer—and I mean single layer, no overlapping, people!—they are ready for that initial blast in the 400-degree oven. You can read more about how I adapted this rack idea from my favorite cookie recipe over at my cookie post if you’re curious about kitchen organization!
Step-by-Step Instructions for Sticky Teriyaki Chicken Wings Oven Baked
Alright, the wings are drying, the oven is warming up—now let’s get this timing down so we achieve the best Sticky Teriyaki Chicken Wings Oven Baked possible. The whole cooking process takes about 50 minutes, but those glazing steps are everything. You can’t just dump the sauce on at the beginning; that’s how you dry out your wings or end up with a burnt puddle instead of a sticky coat. We’re working in stages here, just like when I bake specialty breads! Feel free to check out some general cooking tips I share on my recipe archives while the sauce simmers.
Making the Simple Homemade Teriyaki Sauce
This sauce really only takes minutes, but you need to pay attention because the cornstarch slurry thickens things up quickly. Start by throwing the soy sauce, mirin, brown sugar, rice vinegar, grated ginger, minced garlic, and sesame oil into a small saucepan. Get that cooking over medium heat. You’re just stirring until that brown sugar dissolves completely—that’s the first stage. It will look thin, and that’s okay!
Now for the game-changer: the slurry. In a separate tiny bowl, whisk the cornstarch and the cold water together until it’s totally smooth—no lumps allowed! Once the simmering sauce is smooth and hot, slowly whisk in that slurry. Keep whisking constantly! It will transition quickly, usually within a minute or two, into a beautiful, thick sauce that coats the back of a spoon. That’s how you know you’ve got that sticky base! Pull it right off the heat once it’s thick.
Baking and Caramelizing the Glazed Chicken Wings Recipe
Remember, those wings have been baking naked at 400°F for 25 minutes by now (this is where that dry prep pays off!). When you pull that tray out, use a pastry brush to paint half of your gorgeous, thick teriyaki sauce all over them. Be generous, but try to avoid letting too much sauce drip down onto the foil below; we want that sauce clinging to the meat.
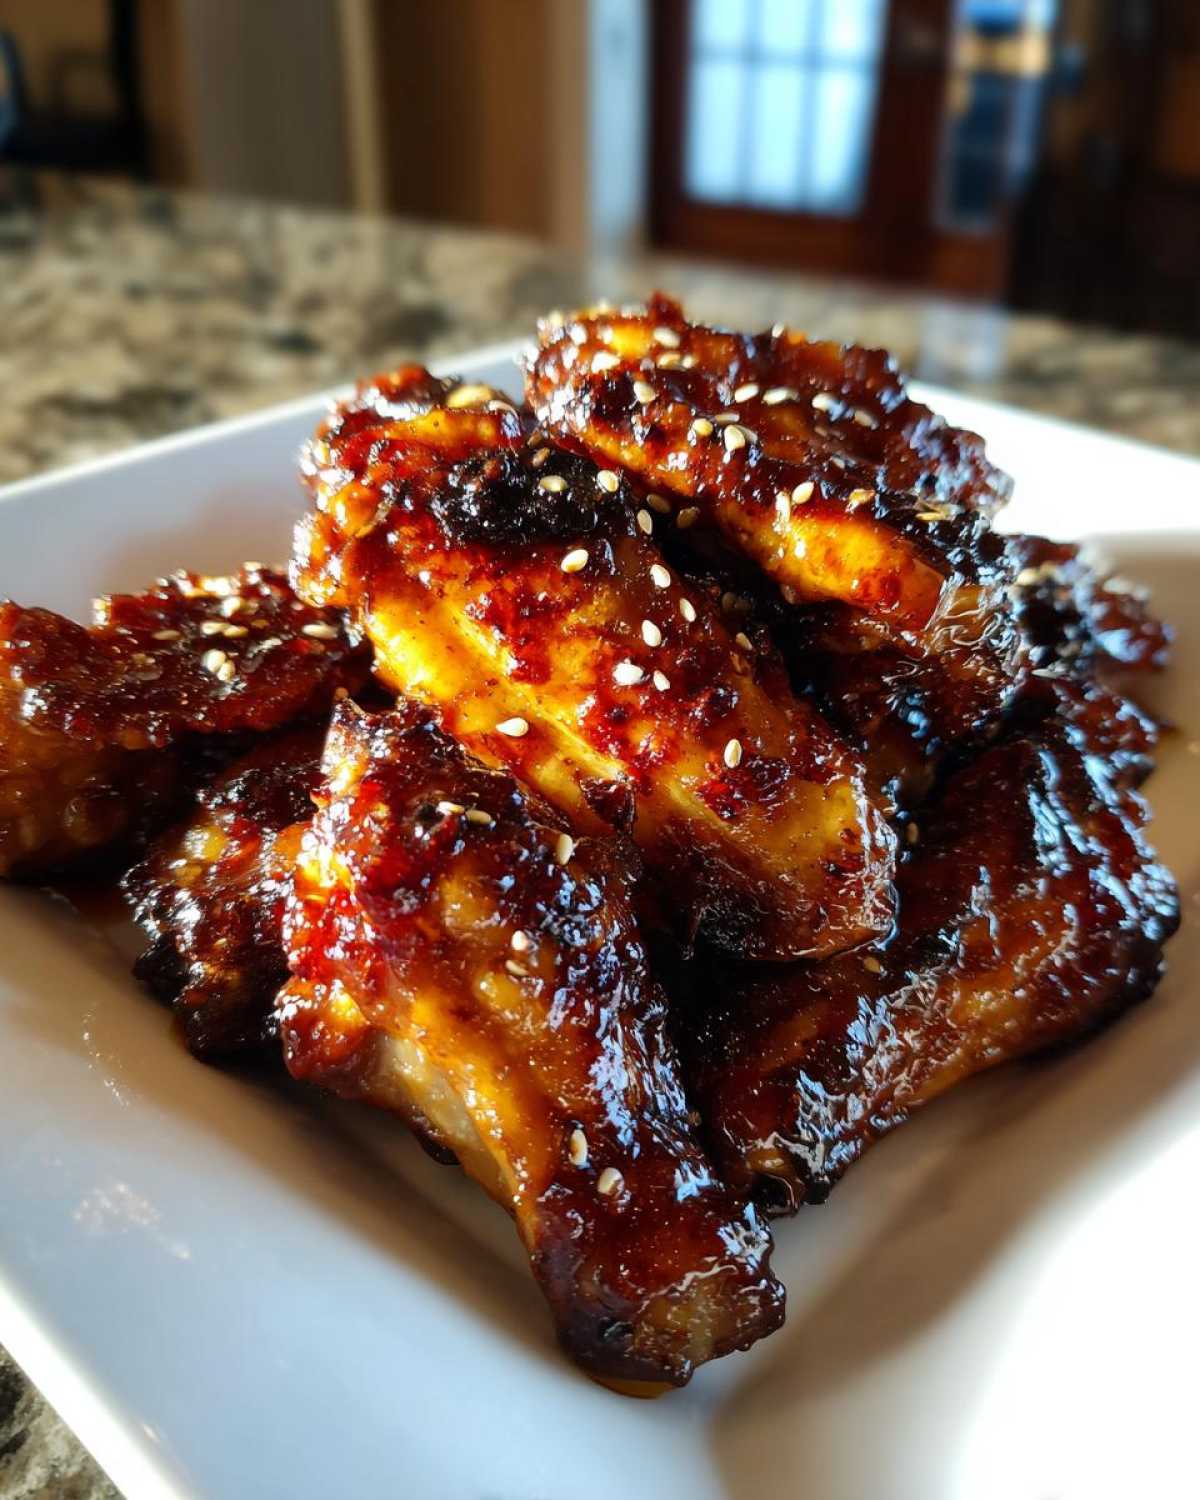
Pop them back in for another 15 minutes. This first coat sets the flavor. After those 15 minutes, pull them out *again*. Now, brush on the rest of that amazing sauce. This is the final layer that really builds that sweet, deep color. This last bake is crucial for our Glazed Chicken Wings Recipe, but you have to watch it like a hawk! Bake them for just 5 to 10 more minutes. Since the sauce has sugar, it caramelizes fast. If you see the edges starting to look truly dark brown or almost black, pull them out immediately! You’re aiming for dark, bubbly, and intensely sticky, not charcoal.
When they come out, let them rest for just five minutes so the glaze can settle. Then, sprinkle on those sesame seeds and serve them piping hot! Success!
Expert Tips for Perfect Sticky Teriyaki Chicken Wings Oven Baked
Listen, even though this recipe is pretty resilient, I always have a few extra tricks up my sleeve for when I need these to be the *absolute best* wings for a party. These aren’t fancy changes, just little things to boost flavor or texture, which is what good home cooking is all about! Feel free to check out my easy chicken skewer recipe for another low-mess dinner idea.
For the absolute crispiest experience—and I mean, really shatteringly crisp—try this alternative heating method. Instead of glazing halfway through, bake the wings entirely plain at 400°F for a full 30 minutes. Then, toss them in half your thick teriyaki sauce and bake for 10 extra minutes. Pull them out, toss them in the rest of the sauce, and finish for those final 5 minutes. It’s more work, but it locks in way more crunch before the sugar hits!
Also, about that mirin substitution I mentioned: if you don’t have that sweet rice wine—which is common—you can substitute it with a dry white wine, but you really need to add about 1 teaspoon of regular sugar to replace the sweetness you lose. It gets you incredibly close! And remember that note about making sure those wings are dry? It bears repeating, it’s the single most important step for achieving that sweet, caramelized finish instead of steamed skin.
Storage and Reheating Instructions for Leftover Sticky Teriyaki Chicken Wings
Now, the real test of a great recipe: how does it taste the next day? Since these are so loaded with that sugary glaze, leftovers are always dangerous because they are just as tasty the next day! But you have to store and reheat them properly or you’ll end up with a sad, sticky clump in your fridge.
When you know you’ll have leftovers, try to avoid soaking them in too much sauce right at the very end of the cook time. Use just enough to coat. Once they are completely cool—and I mean room temperature cool—place them in a good quality, airtight container. Storing them in the fridge prevents the sticky glaze from dissolving into a puddle overnight, which can happen if they sit out too long.
Reheating is where most people go wrong. Please, please, do not microwave these! The microwave might heat them fast, but it absolutely ruins the texture and turns that crispy skin immediately rubbery. You want to bring back that exterior bite!
The best way to reheat your Oven Baked Chicken Wings is back in a moderate oven, around 350 degrees Fahrenheit. Spread them out on a wire rack placed over a baking sheet, just like you cooked them initially. Let them bake for about 8 to 10 minutes. This dries out the surface a little and gets that glaze tacky and sticky again without burning it to a crisp. If they look a little dry after reheating, you can brush them with a tiny bit more store-bought teriyaki sauce or just a teaspoon of honey mixed with a splash of water to refresh that shine. It’s worth the five extra minutes in the oven!
Serving Suggestions for Your Baked Asian Chicken Wings
So you’ve pulled your gorgeous, caramelized, Sticky Teriyaki Chicken Wings Oven Baked out of the oven, and now what? You can’t just eat a pile of saucy wings alone, right? Well, you *could*, but I like to surround them with things that offer a little balance. Since these wings are super savory, sweet, and quite rich from that glaze, you need something light and fresh to cut through it all. These aren’t just a snack; they can totally be a meal if you pair them right!
If this is a weeknight dinner, I always keep it extremely simple. Nobody wants to spend an extra hour cooking after wrangling those wings into that perfect sticky finish. My go-to is basic steamed white rice. The rice soaks up any extra sauce that drips off, and it’s wonderfully neutral. If you are trying to keep things lighter, skip the regular rice and try swapping in some cauliflower rice. I have a fantastic, easy recipe for Cauliflower Fried Rice that pairs beautifully because it’s light but still flavorful!
For game day or when you have company, you want something crunchy to contrast that heavy, sticky coating. A simple, crisp cucumber salad tossed with a touch of rice vinegar and maybe a sprinkle of black sesame seeds is the perfect palate cleanser. Another huge hit at my house is Asian-style slaw. Shredded cabbage, carrots, and maybe some thinly sliced red onion, dressed very lightly with sesame oil and a tiny splash of lime juice. It keeps things light and crunchy, which is exactly what you need next to something so intensely flavored and sweet like our Baked Asian Chicken Wings.
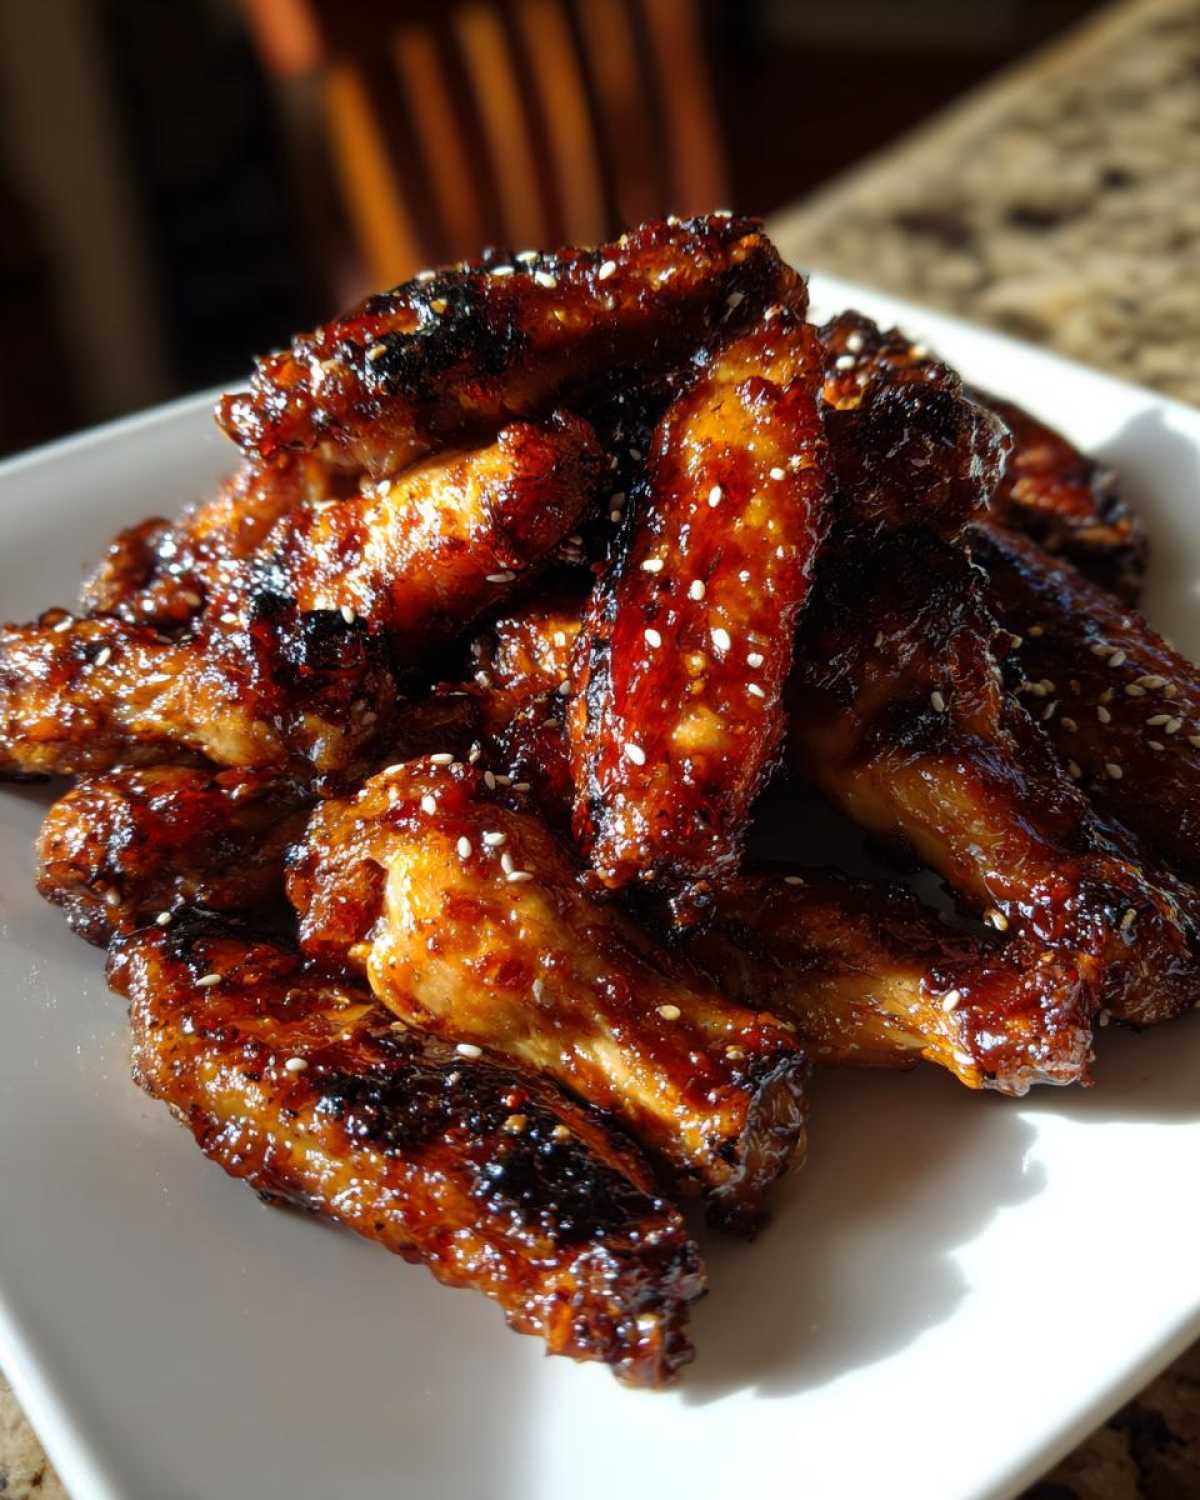
Honestly, whatever you choose, make sure it cooks fast. The wings are the star, and you want to serve them immediately so that glaze is still impossibly sticky and warm. Don’t overthink the side dish; focus on freshness!
Frequently Asked Questions About Oven Baked Chicken Wings
I know you’ve got the recipe down, but sometimes the little questions pop up when you’re actually standing in the kitchen staring at the wings. That’s totally normal! People always ask me about skipping steps, especially when they feel rushed. I’m happy to share some pointers gleaned from making hundreds of batches of these Oven Baked Chicken Wings. If you ever need to get in touch with me directly about a recipe hiccup, you can always hit up the contact page!
Can I skip using the wire rack if I don’t have one?
Oh, boy, I really wish I could say yes, but that wire rack is probably the second most important piece of equipment, right after the baking sheet itself! If you skip the rack, the bottom surfaces of your wings will sit directly in the hot fat and rendered juices. Instead of getting crispy, they basically steam themselves, leading to that soggy, pale texture we are trying so hard to avoid. If you absolutely, positively do not own a rack, look around your kitchen for a cooling rack from an old roasting pan, or even place a metal cooling rack from a cooling a parmesan chicken skewer recipe inside the pan. If all else fails, you have to flip the wings halfway through the initial bake and then flip them again before glazing, but that just adds more handling! The rack keeps things hands-off and crispy!
How do I prevent the sauce from burning during the final glaze?
This is the most common worry when making Caramelized Teriyaki Chicken indoors! Since our teriyaki glaze recipe uses brown sugar and mirin, that coating is basically candy waiting to scorch. The reason we apply the sauce in stages is to give the sugars time to cook and thicken without burning on the first pass. If you find your sauce is browning too fast in the last 10 minutes, that usually means your oven is running a little hot, or you’re using a dark pan (dark pans absorb more heat). My tip is to immediately drop your oven temperature by 25 degrees Fahrenheit when you apply the very last coat of sauce. This allows the glaze to bubble, thicken, and get sticky without incinerating the chicken!
Is it better to make my own sauce or use a store-bought Sticky Teriyaki Glaze Recipe?
I’m going to be honest: you can absolutely use a good quality store-bought sauce if you’re in a huge rush for a Weeknight Chicken Dinner Idea, but I strongly encourage you to just make your own! Why? Because store-bought sauces are often too thin and contain fewer thickening agents right out of the bottle. When you make this Simple Homemade Teriyaki Sauce, you control the cornstarch slurry, which is what gives you that authentic, clingy, sticky layer you are looking for. The fresh ginger and garlic really boost the flavor profile too, making these miles better than anything jarred.
Can I use frozen wings for this Easy Chicken Wing Recipe?
NOPE! Stop right there! If you try to bake wings straight from frozen or even partially frozen, you are guaranteeing yourself a mushy mess. Remember how I hammered home the importance of drying the wings? You can’t dry frozen wings; you’ll just end up with waterlogged messes when they thaw in the 400-degree oven. The absolute best rule of thumb for any chicken wing preparation is to thaw them completely in the refrigerator overnight, then pat them aggressively dry right before you toss them with the oil. That initial drying process is the foundation for those Best Baked Teriyaki Wings.
Nutritional Snapshot of This Glazed Chicken Wings Recipe
Look, I’m a home cook, not a certified nutritionist, but I know a lot of you are counting carbs or watching your sugar intake, especially with a glaze like this. Since we want to be totally transparent about what goes into these fantastic Glazed Chicken Wings Recipe, I pulled together the estimated nutritional breakdown for you. Since every brand of soy sauce and every cut of chicken wing varies slightly, please remember these are just solid estimates. For official counts, you’d need to check the specific labels on your ingredients.
If you’re curious about the official way I check all my recipe estimates and disclaimers, you can always take a peek over at my disclaimer page. But here are the ballpark figures for roughly four wings—which is a reasonable serving size for one person, though I rarely stick to just four!
- Serving Size: 4 wings
- Calories: approximately 350
- Fat: around 18g (which includes some of that good chicken fat, naturally!)
- Protein: 25g (Excellent source!)
- Carbohydrates: 22g (Remember, a lot of this comes from the sugar in the glaze.)
- Sugar: 18g (This is where you see the sticky payoff payoff!)
- Sodium: 750mg (Soy sauce is salty, so keep that in mind!)
The good news is that we are skipping the deep fryer, so you avoid all that extra, unnecessary absorbed oil. When you bake these Sticky Teriyaki Chicken Wings Oven Baked, you control the fat, which is a huge win in my book. Enjoy them, know what’s in them, and don’t sweat the small stuff—they taste like pure joy!
PrintSticky Teriyaki Chicken Wings Oven Baked
Follow this recipe to make flavorful, sticky teriyaki chicken wings baked in the oven without frying.
- Prep Time: 15 min
- Cook Time: 50 min
- Total Time: 65 min
- Yield: 4 servings
- Category: Appetizer
- Method: Baking
- Cuisine: Asian
- Diet: Low Lactose
Ingredients
- 2 lbs chicken wings, separated into flats and drumettes
- 1 tablespoon vegetable oil
- 1 teaspoon salt
- 1/2 teaspoon black pepper
- 1/2 cup soy sauce
- 1/2 cup mirin (sweet rice wine)
- 1/4 cup brown sugar, packed
- 2 tablespoons rice vinegar
- 1 tablespoon grated fresh ginger
- 2 cloves garlic, minced
- 1 teaspoon sesame oil
- 1 tablespoon cornstarch
- 2 tablespoons cold water
- 1 teaspoon sesame seeds, for garnish
Instructions
- Preheat your oven to 400 degrees Fahrenheit (200 degrees Celsius). Line a baking sheet with aluminum foil and place a wire rack on top of the foil.
- Pat the chicken wings completely dry using paper towels. This step helps achieve crispier skin.
- In a bowl, toss the dried wings with vegetable oil, salt, and pepper until evenly coated.
- Arrange the wings in a single layer on the wire rack.
- Bake for 25 minutes.
- While the wings bake, prepare the teriyaki sauce. Combine soy sauce, mirin, brown sugar, rice vinegar, ginger, garlic, and sesame oil in a small saucepan. Bring the mixture to a simmer over medium heat, stirring until the sugar dissolves.
- In a separate small bowl, whisk together the cornstarch and cold water to create a slurry.
- Pour the slurry into the simmering sauce, whisking constantly. Continue to cook for 1 to 2 minutes until the sauce thickens significantly. Remove from heat.
- After the initial 25 minutes of baking, brush half of the teriyaki sauce over the wings.
- Return the wings to the oven and bake for another 15 minutes.
- Remove the wings again, brush with the remaining sauce, and bake for a final 5 to 10 minutes, watching closely to prevent burning, until the glaze is sticky and caramelized.
- Remove from the oven, let rest for 5 minutes, then sprinkle with sesame seeds before serving.
Notes
- For extra crispiness, you can bake the wings plain for 30 minutes, then toss them in half the sauce and bake for 10 minutes, then toss in the remaining sauce and bake for 5 minutes.
- If you do not have mirin, you can substitute it with dry white wine mixed with 1 teaspoon of sugar.
- Ensure your wings are completely dry before seasoning; moisture prevents the skin from crisping.
Nutrition
- Serving Size: 4 wings
- Calories: 350
- Sugar: 18
- Sodium: 750
- Fat: 18
- Saturated Fat: 5
- Unsaturated Fat: 13
- Trans Fat: 0
- Carbohydrates: 22
- Fiber: 1
- Protein: 25
- Cholesterol: 90