

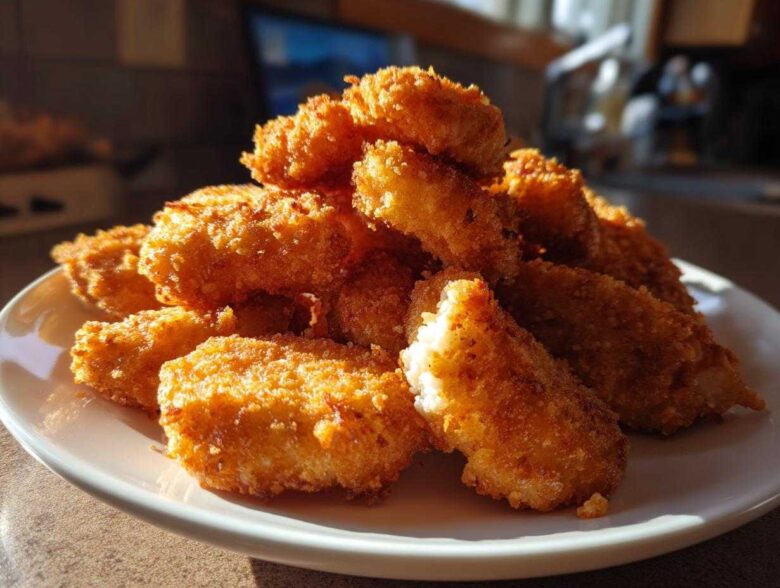
Oh my gosh, you know those days, right? You are totally craving that perfectly crunchy, golden thing you used to get from the drive-thru, but you look at your pantry and think, “No way am I dealing with that much grease.” Well, toss those worries out the window! Because this recipe for **homemade chicken nuggets** is the actual game-changer. Trust me, after testing what feels like a million batches for my family, I nailed the technique for getting them incredibly crispy—and we aren’t using a deep fryer! We’re baking them, and they come out unbelievably juicy inside. If you want a quick weeknight dinner or just need a seriously satisfying snack, this is the one that wins every time in my kitchen.
I’m sharing every little secret I learned about breading and baking to make sure yours taste amazing, just like the nuggets I grew up begging for, only better quality. You’re going to love how easy these simple, from-scratch nuggets come together!
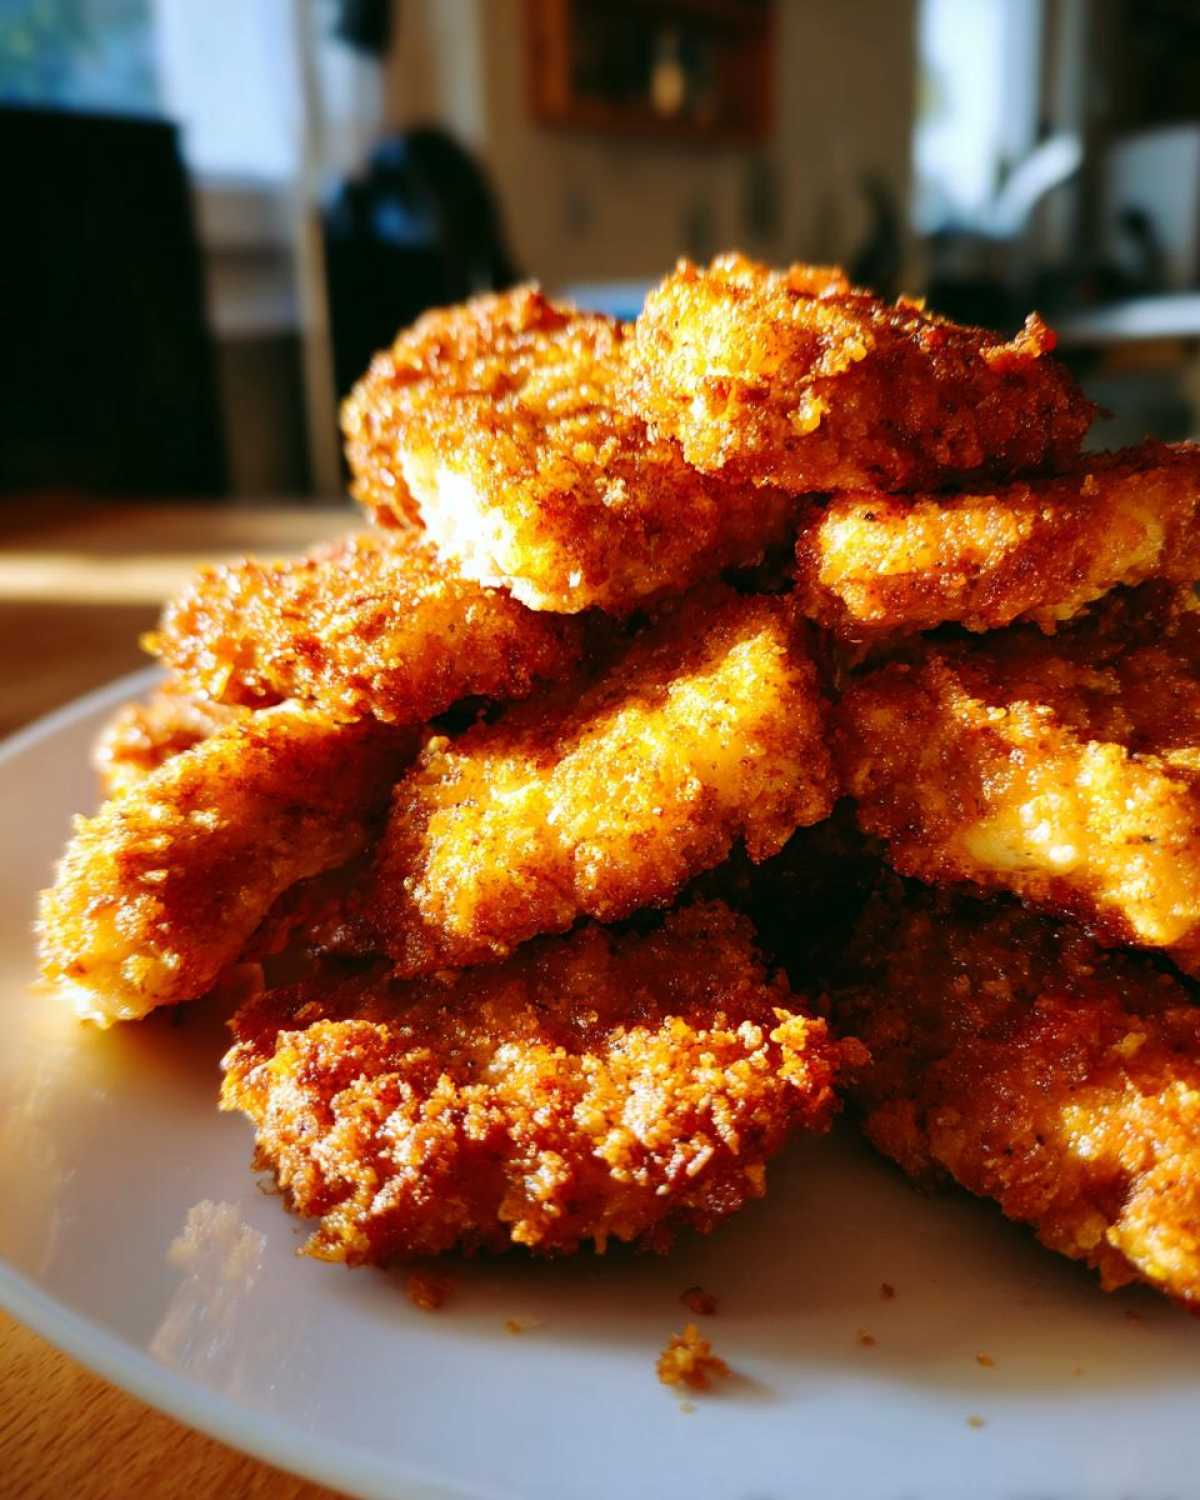
Why This Crispy Baked Homemade Chicken Nuggets Recipe Works So Well
I know what you’re thinking: baked nuggets can’t be crispy. People say that to me all the time! But I promise you, if you follow these steps, you’ll get those wonderfully golden, crunchy exteriors without ever needing a vat of oil. This method is amazing for those who want **chicken nuggets no deep frying** but still crave that satisfying crunch. The magic is all in that coating, which seals in all the juices.
The resulting **juicy homemade nuggets** are what make this recipe a staple for us. It’s comfort food made healthy, and it’s ready faster than ordering takeout!
Achieving Maximum Crispiness with Panko Crusted Chicken
Forget the fine, powdery breadcrumbs you might have used as a kid. We are going for Panko here, every single time. Panko breadcrumbs are lighter and flakier than regular crumbs, which means they toast up quicker and stay way crispier after baking. Seriously, they look fried! When you’re pressing them onto the egg-washed chicken, don’t just roll it—gently press the crumbs onto all sides. That little bit of extra pressure ensures you get a thick, sturdy crust that holds up beautifully when you flip them.
Making Homemade Chicken Nuggets a Quick Weeknight Dinner
I designed this recipe to be lightning fast because, let’s be honest, nobody wants a huge cooking marathon on a Tuesday night. You prep the chicken and the three-part breading station in about 15 minutes, and then they bake while you set the table. With a total time under 40 minutes, these **homemade chicken nuggets** easily beat any delivery time, and they make for fantastic leftovers you can reheat later!
Gathering Ingredients for Your Homemade Chicken Nuggets
Okay, the prep work is simple, but you absolutely cannot cheat on these core ingredients if you want that perfect texture. I learned the hard way that the type of breadcrumb you use makes all the difference, so please, make sure you have Panko on hand! Don’t grab the regular fine stuff—it gets soggy too fast.
For the chicken itself, I use boneless, skinless breasts because they are lean and cut so easily. You’ll want about one and a half pounds of that, and remember to cut them into pretty uniform, bite-sized pieces—think roughly 1-inch squares. Uniformity helps them all cook at the same pace, which is super important!
Here’s the quick rundown of what you’ll need for the breading station setup:
- 1.5 lbs boneless, skinless chicken breasts, cut into 1-inch pieces (Consistency is key!)
- 1 cup all-purpose flour (The first coating layer needs to stick!)
- 2 large eggs, lightly beaten
- 1.5 cups Panko breadcrumbs (This is non-negotiable for the crunch factor!)
- 1 teaspoon salt
- 0.5 teaspoon black pepper
- 0.5 teaspoon garlic powder
- 0.5 teaspoon paprika (This gives it that beautiful, light golden color)
- Cooking spray (Don’t skip this light spritz!)
That’s it! Simple pantry staples are going to give you a result that tastes like you spent all afternoon in the kitchen. We’re keeping these healthy, so no strange fillers or binders here—just good, honest ingredients.
Step-by-Step Guide to Making Easy Homemade Chicken Nuggets
Alright, this is where the fun starts! We’re going to mimic the big fast-food places by setting up a perfect little breading assembly line on your counter. It’s like playing with your food, but the end result is dinner, so it totally counts! Make sure your oven is already heating up to 400 degrees Fahrenheit because time is precious when you’re making **homemade chicken nuggets**.
Grab a sturdy baking sheet and line it with parchment paper—this is the easiest cleanup ever, seriously. A light little spritz of cooking spray over the parchment paper or the final nuggets is the secret sauce for that golden, crispy finish we are gunning for. Don’t skip that spray!
Setting Up Your Breading Station for Homemade Chicken Nuggets
You need three shallow dishes arranged in order. Think assembly line flow! In Dish One, we dump all our seasoned flour—that’s the magic mix we made with salt, pepper, paprika, and garlic powder mixed in with the regular flour. Dish Two is just for your eggs, whisked until they are nice and sloppy. Dish Three is where the Panko lives, waiting to give you that incredible crunch.
Now, work with one piece of chicken at a time. I like to follow a very strict coating dance: Flour first (shake off the extra!), then straight into the egg bath (let that excess drip!), and finally, press it hard into the Panko. Make sure you really push those crumbs onto the chicken so they stick tight. Once it’s coated, put it right onto that waiting baking sheet!
Baking Instructions for Perfect Crispy Baked Chicken Nuggets
Once all your little treasures are lined up on the sheet—make sure they aren’t touching, they need their space to crisp up!—give the tops another quick, light spray of cooking spray. This step is what gives them that extra boost of golden color.
Slide them into that hot 400°F oven. They only need about 15 to 20 minutes total. The most important thing is that you must flip them halfway through their baking time! You want both sides to get brown and crunchy. If you have a thermometer, aim for that internal temp of 165°F—that means they are safe to eat and cooked perfectly through. When they come out, they are ready for dipping!
Tips for Success: Creating the Best Chicken Nugget Recipe
We’ve nailed the baking part, but to genuinely make these the single **best chicken nugget recipe** you’ve ever tried, let me share a couple of last-minute pro-tips. Trust me, these tiny adjustments make a huge difference in texture and flavor. When you’re using quality ingredients and paying attention, that’s how you show high standards in the kitchen, right?
For instance, if you chill your breaded nuggets on the pan in the fridge for about 15 minutes before they go into the oven, that breading sets up even tougher. It’s my little trick for extra stickiness and avoiding crumbs flying off in the oven!
Ingredient Notes and Substitutions for Homemade Chicken Nuggets
If you’ve got family members who can’t do gluten, don’t worry! This recipe is super adaptable. You can easily swap out the all-purpose flour for any gluten-free flour blend, and grab some gluten-free Panko crumbs to replace the standard ones. Easy peasy!
Also, if you’re short on time or just prefer a slightly different texture, you absolutely **can use ground chicken** instead of cutting breast pieces. If you go that route, just form the ground chicken into your desired nugget shapes *before* you start the breading process. Make sure they are compact so they don’t crumble when you handle them!
Serving Suggestions: Dipping Sauces for Chicken Nuggets
Now that you have these gorgeous, golden, incredibly crispy **homemade chicken nuggets** fresh out of the oven, the only question left is: what are we dipping them in?! Honestly, the sauce is almost as important as the nugget itself, and you can’t serve these beauties dry, that would be a crime!
I always lay out a little dipping station because everyone in my house likes something different, and it makes dinner feel way more fun. Serving them with a couple of homemade sauces really takes these from a simple snack to a proper family meal.
You don’t need complicated recipes here. A few quick minutes stirring things together, and you’re done:
- The Classic Honey Mustard: You MUST have this one. It’s just equal parts good quality yellow mustard and honey, maybe a tiny splash of apple cider vinegar to cut the sweetness. It’s tangy and sweet—perfection!
- Smoky BBQ Sauce: I keep a jar of good BBQ sauce on hand, but sometimes I doctor it up by stirring in a half teaspoon of smoked paprika and a dash of Worcestershire sauce. It gives it that deep, slow-cooked flavor without the wait.
- Homemade Ranch: My kids go absolutely wild for ranch. I just mix sour cream or plain Greek yogurt with a packet of dry ranch seasoning mix and thin it slightly with milk until it’s perfectly dippable. It’s so much fresher than the bottled stuff!
- Spicy Mayo Kick: For the grown-ups (or adventurous eaters), mix mayo with a squeeze of lime juice and some sriracha or your favorite hot sauce. It’s creamy, cooling, and has a little zing to cut through the richness of the Panko crust.
Serve them hot with these sauces, and I guarantee you won’t have any leftovers!
Storage and Reheating Make Ahead Chicken Nuggets
One of the best things about making a big batch of these **homemade chicken nuggets** is having them ready to go later! They are absolutely fantastic for meal prepping or just having quick snacks on hand for the kids during the week. If you plan on making these ahead of time, storage strategy is everything if you want that beautiful Panko crust to survive.
Once the nuggets have cooled down completely after baking—this is important, don’t trap warm air in the container—you need to store them in a single layer in an airtight container. If you stack them while they are still warm, the condensation will turn that lovely crisp coating into a sponge! If you must stack them, put a layer of parchment paper between the layers to help absorb any residual moisture.
The Secret to Reheating Crispy Chicken Nuggets
Now, let’s talk about reheating, because this is where most people mess up their hard work. You absolutely, positively, must avoid the microwave if you care about that crispiness! The microwave heats beautifully, but it steams the coating, turning your beautiful **crispy baked chicken nuggets** into sad, soft little sponges. We worked too hard for that!
The best way to bring these back to life is using dry heat. If you’re making a quick batch for lunch the next day, pop them back onto a baking sheet in a 375°F oven for about 5 to 7 minutes. It works like magic! You just want them hot through and the exterior refreshed.
Using the Air Fryer for That Freshly Fried Texture
If you have an air fryer, this is where it truly shines for reheating leftovers. The air fryer circulates that hot air so well—it practically re-fries them without any extra oil! Set your air fryer to about 370°F, lay the nuggets in a single layer in the basket, and let them blast for 3 to 4 minutes. Flip them after 2 minutes. They will be so crunchy, you’d swear they just came out of the main batch!
This method ensures that even if you made these on Sunday, they still taste like a **quick appetizer for dinner** on Thursday. Keep them handy!
Frequently Asked Questions About Homemade Chicken Nuggets
I get so many messages asking about variations on this simple recipe, so I figured I should address some of the most common questions right here. We want everyone to have success making their own **homemade chicken nuggets**!
Sometimes the little details are what make all the difference between good nuggets and *great* nuggets. Don’t be shy about tweaking things, but always remember that Panko is your best friend for that fantastic crunch!
Can I use ground chicken to make these homemade chicken nuggets?
Yes, you absolutely can! This is a super popular question, especially if you are trying to get that look of the classic fast-food style nuggets. If you use ground chicken, the process is just slightly different in the beginning. Instead of cutting up breasts, you’ll need about the same weight of ground chicken or turkey. Then, you just mix your seasonings into the meat first—a little salt and pepper makes a difference—and then form the mixture into your preferred nugget shape. Make sure they are packed firmly so they don’t fall apart when you start the wet breading process! Once they are shaped, you treat them exactly the same way: flour, egg, and lots and lots of Panko!
How do I make these air fryer chicken nuggets?
Oh, the air fryer! If you have one, you should definitely use it, especially for reheating (which I talked about earlier!), but it works wonders for the initial cook, too. For fresh, **air fryer chicken nuggets**, you’ll set your machine to 375°F (that’s about 190°C). Make sure you’ve given them a good, even spray of cooking spray first. Cook them for about 10 to 12 minutes total. The key here, just like in the oven, is shaking the basket halfway through. This flips them gently so both sides get crispy and golden brown. They come out looking practically fried, but they use hardly any oil!
If you have tried this recipe and want to learn more about our site policies, you can check out our official disclaimer here. Happy cooking!
Nutritional Estimate for This Healthy Chicken Nuggets Recipe
I know a lot of you choose homemade just because you want to know exactly what your family is eating, and I totally get that! We’re consciously making these nuggets healthier than the fast-food versions, but of course, because we’re using Panko and a little cooking spray, they still feel like a treat. This information is based on five nuggets per serving, remember that heavy dipping sauce can change the numbers dramatically!
I always calculate these things loosely, because baking times and brands can vary, so take this as a very good guideline, not a hard science fact. I try to keep things in check so we can enjoy these often!
- Serving Size: 5 nuggets
- Calories: About 280
- Protein: A whopping 35 grams! That’s why this is such a great, filling weeknight meal.
- Fat: Around 7 grams total. Much better than frying, right?
- Carbohydrates: About 18 grams.
- Sugar: So low, just 1 gram! Success!
- Sodium: Around 350 mg. If you are worried about sodium, feel free to cut back a little on the salt in the initial flour mix.
This recipe definitely leans into being a high-protein option for dinner. It’s amazing how much satisfaction you get from crispy food when you know it’s packed with good stuff. Enjoy knowing exactly what went into making your family’s favorite comfort food!
Share Your Family Favorite Chicken Creations
Well, that’s it! You now have the roadmap to making the **best chicken nugget recipe** ever conceived in my kitchen—simple, shockingly crispy, and totally homemade. I put all my heart into perfecting these so that you and your family can enjoy that comforting, crispy satisfaction guilt-free.
Now it’s your turn! I truly want to know how your batch of **homemade chicken nuggets** turned out! Did they meet the crispy standard? Did your kids devour them faster than you could count to ten? Please drop a comment below and let me know what magic you served them with—I live for hearing about your adventurous dipping sauce choices!
If you made these and loved them, could you do me a huge favor? Give this recipe a big five stars right here on the page. It helps other folks find this foolproof recipe, and it means the world to me! Also, if you snapped a photo on Instagram, tag me! You can reach out via my contact page if you have specific questions about substitutions or technique.
Thank you for trusting me with your weeknight dinner plans. Happy dipping!
PrintCrispy Baked Homemade Chicken Nuggets
Make crispy, juicy chicken nuggets at home using simple ingredients. This baked method provides a healthier alternative to deep-fried versions.
- Prep Time: 15 min
- Cook Time: 20 min
- Total Time: 35 min
- Yield: 4 servings
- Category: Dinner
- Method: Baking
- Cuisine: American
- Diet: Low Fat
Ingredients
- 1.5 lbs boneless, skinless chicken breasts, cut into 1-inch pieces
- 1 cup all-purpose flour
- 2 large eggs, lightly beaten
- 1.5 cups Panko breadcrumbs
- 1 teaspoon salt
- 0.5 teaspoon black pepper
- 0.5 teaspoon garlic powder
- 0.5 teaspoon paprika
- Cooking spray
Instructions
- Preheat your oven to 400°F (200°C). Line a baking sheet with parchment paper and lightly coat with cooking spray.
- Set up a standard breading station with three shallow dishes.
- In the first dish, combine the flour, salt, pepper, garlic powder, and paprika.
- In the second dish, place the beaten eggs.
- In the third dish, place the Panko breadcrumbs.
- Take one piece of chicken and dredge it thoroughly in the flour mixture, shaking off excess.
- Dip the floured chicken piece into the egg wash, letting excess drip off.
- Coat the chicken piece completely in the Panko breadcrumbs, pressing lightly so the crumbs adhere well.
- Place the breaded chicken pieces on the prepared baking sheet in a single layer.
- Spray the tops of the nuggets lightly with cooking spray for extra crispness.
- Bake for 15 to 20 minutes, flipping halfway through, until the internal temperature reaches 165°F (74°C) and the coating is golden brown.
- Serve immediately with your favorite dipping sauce.
Notes
- For a gluten-free option, substitute the all-purpose flour with gluten-free flour blend and use gluten-free breadcrumbs.
- To make these in an air fryer, cook at 375°F (190°C) for 10 to 12 minutes, shaking the basket halfway through.
- You can use ground chicken instead of cut pieces; form the ground chicken into small nugget shapes before breading.
Nutrition
- Serving Size: 5 nuggets
- Calories: 280
- Sugar: 1
- Sodium: 350
- Fat: 7
- Saturated Fat: 1.5
- Unsaturated Fat: 4.5
- Trans Fat: 0
- Carbohydrates: 18
- Fiber: 1
- Protein: 35
- Cholesterol: 95