

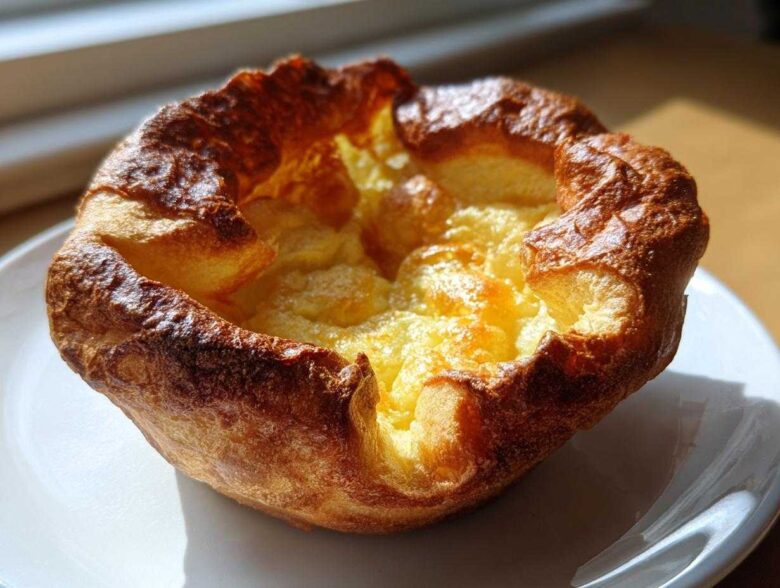
Let’s be honest, you haven’t truly had a Sunday roast until you’ve had a towering, shatteringly crisp north-of-the-border style **yorkshire pudding** sitting next to your joint of beef. I spent nearly five years—yes, five years!—trying every technique under the sun to get them consistently high, golden brown, and totally perfect. I nearly gave up when they kept ending up like sad, slightly browned pancakes. But I cracked the code, and it all comes down to the temperature of that fat. Trust me, once you nail this, you’ll never look back, because this recipe guarantees maximum rise, every single time!
Why This Traditional Yorkshire Recipe Guarantees the Perfect Rise
The secret to those beautiful, cavernous **puffy baked puddings** isn’t magic, though it certainly feels like it! It’s pure, honest science involving superheated fat and water vapor. When your batter hits that smoking-hot fat, the water content instantly turns to steam, and that steam forces the pudding upward. If your fat isn’t screaming hot, the steam escapes slowly, and you get flat bottoms. This **Traditional Yorkshire Recipe** focuses heavily on that heat transfer. If you want to read more about sticking to recipe standards, check out our full disclaimer.
We are aiming for shock and awe in the oven, folks. When you follow this **Perfect Rise Baking Technique**, you are essentially building a steam chamber inside your oven walls. If you peek too soon, you let the steam dissipate, and those glorious structures collapse faster than a house of cards. We want tall, substantial sides!
The Importance of Resting Your Light and Fluffy Batter
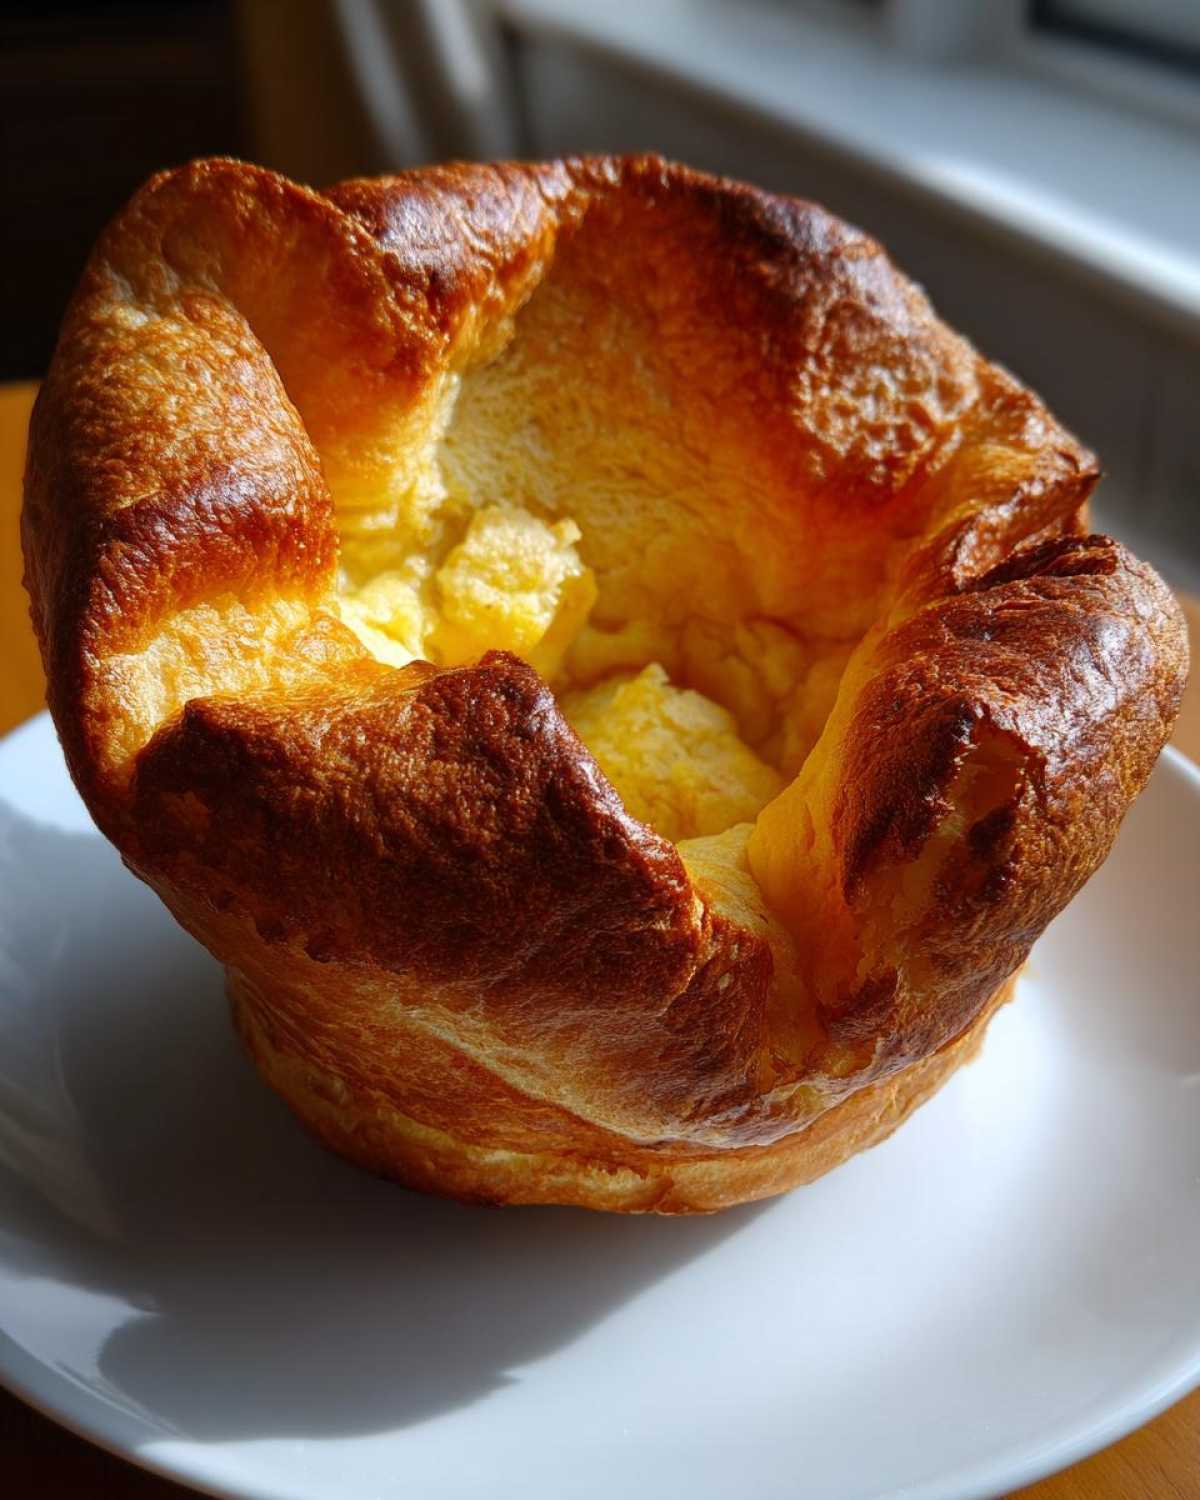
Now, don’t skip this quick step, even if you feel rushed. Letting the **yorkshire pudding** batter rest—even for thirty minutes—is crucial for that **light and fluffy batter** texture we crave. Gluten develops when you mix flour and water, and that gluten needs time to relax. If you bake it right away, the gluten is too tight, fighting the rise. A nice rest lets everything settle down so the batter can expand freely when it hits the heat. Honestly, it makes such a difference!
Essential Ingredients for Crisp Yorkshire Puffs
Okay, you might see some recipes call these **Simple 4 Ingredient Puddings**, but I’m going to give you the full, no-holds-barred list we need for truly amazing **Crispy Yorkshire Puffs**. It’s not just about having the ingredients; it’s about *which* ingredients you choose. The ratio of egg to flour to milk is critical for that lovely, light structure.
We need flour, eggs, milk, salt, and, most importantly, the fat. Don’t skimp here! This is one recipe where the fat you choose truly makes or breaks the final product. This list gives you everything necessary to be a Yorkshire expert!
Ingredient Clarity and Preparation Notes
Let’s talk specifics. I insist on using whole milk here. Skim milk has less fat, and we need that richness to help brown the outside and keep the inside tender. For the flour, you must use plain (all-purpose) flour—don’t go reaching for self-raising; it has leavening agents we don’t want messing with our steam creation! We rely on the technique, not chemical helpers.
Now, the cooking medium. You can absolutely use good quality vegetable oil, and that works fine for vegetarians. But listen to me: if you want that deep, savory, authentic flavor that signals the **Sunday Roast Essentials** are present, you simply have to use beef dripping. It has a much higher smoke point, meaning it gets hotter faster, which is exactly what we need to create those perfect pockets of steam and achieve that gorgeous **golden brown savory bake** exterior!
Step-by-Step Instructions for Golden Brown Savory Bake yorkshire pudding
This is where the real action happens! Forget everything else you’ve read; the success of your **yorkshire pudding** lives and dies in the first three minutes of baking. If you’re using my recipe, you should have your thin, rested batter waiting in a jug, ready to go. Make sure your oven is already blazing hot—it needs to be ready for us when we are!
We are aiming for that incredible lift, and it requires patience while we heat things up. Cooking these is a bit of a precision operation, but I promise, once you see them puff up, you’ll never fear making them again. If you want to know more about what goes into this site, you can check out our about us page!
Preheating the Fat: The Secret to Tall yorkshire pudding
This is the most important job you have! Get your muffin tin (or whatever dedicated tin you use) into the 220°C oven while it preheats. Once the oven hits temperature, you need to let that tin bake for another ten minutes *with* the oil or dripping in it. If you’re using vegetable oil, you want to see it shimmering and maybe just starting to smoke lightly. If you’re using beef dripping, watch for that nice little wisp of smoke—that is your signal!
When the fat is at its absolute maximum temperature, it creates an instant, violent reaction when the relatively cool batter hits it. That reaction means steam, and steam means your **puffy baked puddings** are going to soar. If the fat isn’t smoking, don’t bother pouring the batter; just give it five more minutes in the heat!
Baking Time and Avoiding Oven Door Disturbance
Now, move fast but carefully! Pull that piping hot tin out of the oven. Pour your batter evenly, filling each hole only about halfway. You should hear a satisfying, loud sizzle as the batter hits that hot fat—that’s the sound of success, folks! Get that tray right back into the center shelf of the oven *immediately*.
And here is the iron-clad rule: Do not open the oven door for the first 20 minutes of cooking. I mean it! I know you want to sneak a peek, but resist! Opening the door drops the temperature and lets the steam escape before the structure has set, resulting in sad, deflated puddings. Let them bake the full time, wait until they look deep golden brown, crispy on the edges, and totally puffed up, and then you can pull them out to serve with your gravy!
Troubleshooting Common yorkshire pudding Failures
Okay, so sometimes even when you follow the rules, things go a little wonky. We’ve all been there! If your **yorkshire pudding** ended up looking more like a sad crepe than a towering monument, 99% of the time, the issue is that initial heat. Your fat wasn’t hot enough. I can’t stress that enough: it needs to be *smoking* hot when the batter goes in. If it’s just warm, the batter sits there and cooks slowly instead of puffing instantly.
The other common issue is that they come out soft, not crispy. This usually happens if you pull them out too soon or if you baked them low and slow. We want a high, dry heat to crisp up those edges! If you’re trying to figure out **how to make puffy puddings** that hold their shape, just remember: blast the heat, then leave them alone to bake!
Serving Suggestions for your yorkshire pudding: Best Roast Dinner Sides
You’ve done the hard work, and you now possess the greatest of **Sunday Roast Essentials**! But let’s be real, a perfect **yorkshire pudding** has one true destiny, and that is to soak up rich, savory gravy. They aren’t just great side dishes; they are vehicles for sauce!
My absolute favorite way to serve these is straight out of the oven. They lose just a tiny bit of their structure if they sit around too long, so aim to have them ready at the same time as your main joint of meat. They should look fantastic—tall, golden, and ready to cradle whatever heavenly sauce you’ve made.
Obviously, they are incredible with roast beef. That combination is unbeatable. But don’t pigeonhole them! These **Classic British Side Dishes** are amazing with roasted chicken, pork shoulder, or even alongside a hearty stew. They are perfect for mopping up any juices left in the bottom of the roasting pan—think of them as your personal **Easy Gravy Soakers**!
If you happen to have any leftover gravy that you need to reheat, do it gently on the stovetop. Then, when you serve, just spoon a generous amount directly into the center of the hot pudding. The contrast between the hot, crisp pudding and the savory liquid is just perfection. Seriously, get them on the plates quickly before they cool down!
Storage and Reheating Instructions for yorkshire pudding
Look, I hate to break it to you, but while **yorkshire pudding** is absolutely, unquestionably best eaten straight out of the oven—that brief moment when the outside is crispy and the inside is all soft and steamy—sometimes life gets in the way, right? We’ve all been there, staring at leftovers the next day.
The good news is that these things hold up surprisingly well. You can store them in an airtight container at room temperature for up to two days. I wouldn’t advise longer than that, though, because they start to lose that beautiful structural integrity. Refrigerating them is okay for those two days, but they often get a little chewy when cold.
The real magic happens when you reheat them. Forget the microwave! Microwaving a **yorkshire pudding** is almost criminal—it just turns them soggy and rubbery. We need to bring that crispness back, and that means dry, high heat. I swear by putting them back into a hot oven. Preheat your oven to about 200°C, turn the heat up high, and place the puddings directly onto the wire rack for about five to seven minutes. You’ll hear them start to crackle as they heat up. That high, dry heat wicks away any residual moisture, restoring that gorgeous, shatteringly crisp exterior we aimed for!
If you manage to save any leftover gravy, warm that up separately on the hob. Then, when you reheat your puddings, pour the hot gravy right into the center cavity just before serving. You’ll get about 90% of that fresh-baked glory back, trust me!
Frequently Asked Questions about yorkshire pudding
Can I use cold milk, or does it need to be warm?
You absolutely can use cold milk! While some folks swear by room temperature milk for the batter, the most crucial temperature factor here isn’t the milk; it’s that fat in the tin—it needs to be smoking hot! If your milk is cold, it will drop the batter temperature a tiny bit before you pour it in, but because we rest the batter anyway, and because the oil is so high in heat, it evens out fast enough that you’ll still get a great rise from your **puffy baked puddings**.
Is beef dripping non-negotiable for the Perfect Rise Baking Technique?
Oh, I wish I could say yes, but I can’t! We touched on this earlier, but it bears repeating because it’s important for getting the very best texture. Beef dripping will give you the most traditional, deep, satisfying flavor, and because it has such a high smoke point, it promotes that explosive rise better than almost anything else. However, if you are vegetarian or simply don’t have dripping on hand, a neutral, high-smoke-point vegetable oil (like canola or sunflower) works perfectly fine for achieving those tall **crispy yorkshire puffs**! Don’t let a lack of dripping stop you from making these amazing **Sunday Roast Essentials**.
What is the best pan size for large yorkshire pudding?
For individual puddings, the standard 12-hole muffin tin is the standard, but if you want one massive, edible bowl for your gravy—which is a fantastic idea, by the way—you should use a standard 9×13 inch roasting pan. You’ll use the same measurements of oil, but you let the oil preheat in the whole tray. For the batter, aim to fill the base maybe a quarter to a third of an inch deep. When they come out, you just cut them into squares after baking. This is a great method for feeding a crowd without juggling twelve tiny tin holes! It’s one of my favorite ways to handle these **savory oven bakes** when we have company.
My batter seems too thin; should I add more flour?
Don’t panic if your **light and fluffy batter** looks thinner than pancake mix—that’s exactly what we want! Remember, the goal is a smooth, almost pourable consistency, like single cream. If you add extra flour to make it thick, you run the risk of creating dense, heavy puddings, which definitely won’t rise well. This recipe is designed to be thin so that the steam generation is powerful enough for that towering look. Don’t forget to check out our privacy policy for more details on recipe testing!
Estimated Nutritional Data for this Classic British Side Dish
Now, for those of you keeping track of the details, I’ve pulled together the estimated nutritional breakdown for one of these beauties. Remember, this is based on using standard vegetable oil for heating, not beef dripping, so if you go the dripping route, the fat content will jump up a bit (but oh, the flavor!). This information is just a guideline for one individual serving—or one of the 12 **puffy baked puddings** we made.
This is really helpful if you’re trying to balance out your **holiday roast accompaniment** with the rest of your meal. It’s surprisingly reasonable for something so delicious!
- Serving Size: 1 pudding
- Calories: Approximately 110
- Total Fat: About 6g
- Carbohydrates: Around 10g
- Protein: 4g
See? Not bad at all for a stunning, crispy treat! We’re keeping the sugar very low here at 2g, which is why the flavor comes mainly from the savory elements once we add the gravy. If you’re looking for more standard disclosures and legal bits about how we calculate these numbers, you can always check our terms and conditions. But honestly, grab that plate, get that gravy pouring, and try not to worry too much about the numbers when they taste this good!
Share Your Perfect yorkshire pudding Creations
Now that you’ve mastered the secret to that incredible, towering rise—seriously, tell me yours went sky-high!—I absolutely want to hear about it. My favorite part of sharing these old family secrets like this **yorkshire pudding** method is seeing your kitchen success stories.
Did you go all-in with the beef dripping? Did you notice the difference the batter resting made? Don’t be shy! Head down to the comments below and let me know how you fared with the **Perfect Rise Baking Technique**. If you managed to get those beautiful, crispy edges and soft centers, toss a rating on the recipe—five stars if you managed to keep the oven door shut for the full 20 minutes!
If you managed to get some gorgeous photos of your **Classic British Side Dish** masterpiece sitting next to your roast dinner, please tag me on social media! I live for seeing those puffed-up beauties. Sharing our wins in the kitchen really keeps the cooking spirit alive.
If you ever have questions while you’re whipping up the next batch, or if you just want to tell me how much better these are than the ones you used to buy frozen, please reach out! We’re all about helping each other succeed in the kitchen. You can always drop us a line via the contact page if you have pressing questions.
Happy baking, and enjoy that magnificent, gravy-soaking **yorkshire pudding**!
PrintFoolproof Yorkshire Puddings: Achieving Maximum Rise, Crispiness, and Perfect Fluffy Centers

Follow this simple method to make tall, crispy-edged Yorkshire puddings with light, fluffy centers, perfect for any roast dinner.
- Prep Time: 5 min
- Cook Time: 25 min
- Total Time: 30 min
- Yield: 12 puddings
- Category: Side Dish
- Method: Baking
- Cuisine: British
- Diet: Vegetarian
Ingredients
- 4 large eggs
- 200 ml milk (whole milk works best)
- 100 g plain (all-purpose) flour
- Pinch of salt
- Vegetable oil or beef dripping, for heating
Instructions
- Combine the eggs, milk, flour, and salt in a bowl. Whisk until you have a smooth, thin batter, similar in consistency to single cream. Do not overmix.
- Pour the batter into a jug for easy pouring. Cover the jug and let the batter rest at room temperature for at least 30 minutes, or up to several hours in the refrigerator. Resting helps the gluten relax and improves the rise.
- Preheat your oven to 220°C (200°C Fan/Gas Mark 7). Place a 12-hole muffin tin (or a dedicated Yorkshire pudding tin) into the oven.
- Add about 1 teaspoon of vegetable oil or beef dripping into each hole of the tin. Place the tin back into the oven for at least 10 minutes until the fat is smoking hot. This step is crucial for a high rise.
- Carefully remove the hot tin from the oven. Work quickly: pour the batter evenly into the hot fat, filling each hole about halfway. The fat should sizzle immediately when the batter hits it.
- Place the tin back into the center of the hot oven immediately. Do not open the oven door for the first 20 minutes of cooking.
- Bake for 20 to 25 minutes, or until the puddings are well-risen, deep golden brown, and crisp.
- Serve immediately with your roast dinner and gravy.
Notes
- If your puddings do not rise, the fat was likely not hot enough, or you opened the oven door too early.
- For the crispiest results, use beef dripping instead of vegetable oil.
- If you are making a large batch, heat the oil in a roasting tray instead of a muffin tin, then pour the batter in and cut into squares after baking.
Nutrition
- Serving Size: 1 pudding
- Calories: 110
- Sugar: 2
- Sodium: 80
- Fat: 6
- Saturated Fat: 1.5
- Unsaturated Fat: 4.5
- Trans Fat: 0
- Carbohydrates: 10
- Fiber: 0.5
- Protein: 4
- Cholesterol: 55