

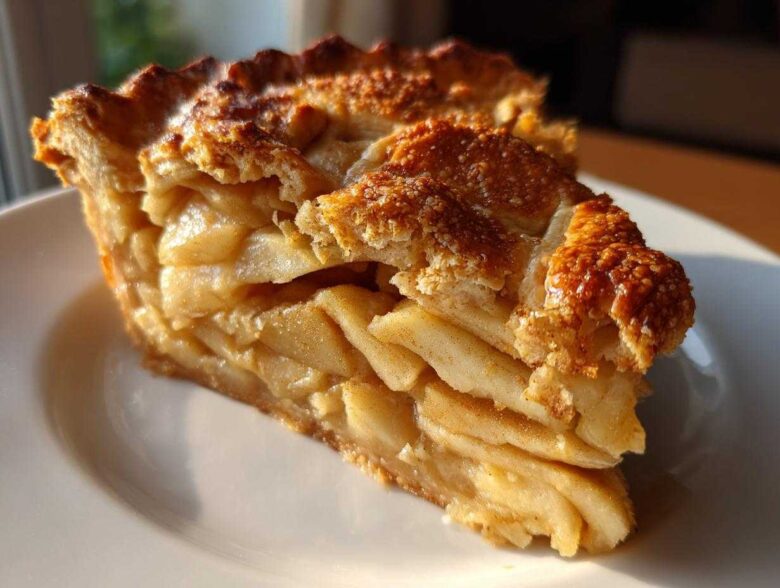
Oh, there’s nothing quite like stepping into the kitchen on a cool afternoon, knowing you’re about to make something truly comforting. For me, that’s the classic homemade apple pie. Forget those sad, pale versions you sometimes see; we are making the real deal here—the thick, bubbling, spice-laced kind with a crust that shatters when you look at it the wrong way.
When I first tried making a pie entirely from scratch, it was a disaster. The crust was tough! But I kept fiddling, learning what my grandmother always hinted at: the butter needs to be frigid, and you have to stop messing with the dough! Once I cracked that code, suddenly I was unlocking the secret to the best homemade pie anyone in the family had ever tasted. I’m sharing every little trick I learned, so you can nail that perfectly flaky crust and sweet-tart filling on your very first try. Trust me, this recipe is the one that will become your family’s favorite comfort food recipe for years to come.
Why This Is the Best Homemade Apple Pie Recipe You Will Ever Need
When people ask me what makes my recipe the one they keep coming back to, it’s all about the texture and the balance. This isn’t some overly sweet, mushy filling you might find in a diner. This is an old fashioned apple pie that respects the fruit! You’re getting heirloom quality results without requiring you to be a pastry chef. We link some great background info on our philosophy over at Flavor Zine, but let’s look at what sets this specific homemade apple pie apart:
- The filling sings—it strikes that perfect chord between tart Granny Smiths and a hint of warm spice. It tastes like real apples, not just sugar!
- It features that gorgeous, golden-brown, double crust that practically floats off your fork.
- Even though it looks completely professional, the overall instructions are surprisingly direct, making true baking from scratch accessible.
Flaky Pie Crust From Scratch: The Secret to a Buttery Pie Crust
If you take anything away from this guide, let it be this: the crust is everything! We use only the best ingredients here for that rich, buttery pie crust. The absolute key to achieving that incredible flake in a flaky pie crust from scratch is temperature control. You want your butter cubed and frozen, practically. Cold butter melts slowly in the oven, creating steam pockets, and those steam pockets are what puff up your dough into those lovely, distinct layers. If you handle the dough too much, your hands melt that crucial fat, and you end up with something closer to a cracker than a cloud. We are aiming for tender, shatteringly flaky layers, which means being gentle and quick when we mix it up for this incredible homemade apple pie!
Gathering Your Ingredients for Homemade Apple Pie
Okay, before we dive into the mixing—which is the fun part, I promise—we have to talk about what we need. Remember, this has to taste like an old fashioned apple pie, and that means good ingredients are non-negotiable. I’ve listed exactly what you need below for both the dough and the delicious spiced interior. Get everything measured out first, it makes the whole assembly go so smoothly!
Ingredients for the Buttery Pie Crust
This is where you need military precision, especially with temperatures! You absolutely must use unsalted butter, and it needs to be rock hard, cut into little cubes no bigger than a small pea—seriously, if it feels soft, stick it back in the freezer for ten minutes. And that water? It must be ice cold. If you use lukewarm water, you are defeating the entire purpose of the buttery pie crust!
- 2 1/2 cups all-purpose flour
- 1 teaspoon salt
- 1 cup (2 sticks) unsalted butter, very cold and cubed
- 1/2 cup ice water, plus more if needed
Ingredients for the Cinnamon Apple Filling
This filling is what makes people ask for the recipe for your homemade apple pie. I always use a mix—about four tart Granny Smith apples for structure and tang, and two sweeter ones like Honeycrisp or Fuji for flavor contrast. The small amount of flour might not seem like much, but it’s crucial; it grabs all those juices bubbling up from the fruit and turns them into thick, glossy syrup, not soup!
- 6 large apples (a mix of Granny Smith and Honeycrisp recommended)
- 3/4 cup granulated sugar (adjust to apple tartness)
- 1/4 cup packed light brown sugar
- 1/4 cup all-purpose flour (for thickening)
- 1 teaspoon ground cinnamon
- 1/4 teaspoon ground nutmeg
- 1 tablespoon lemon juice
- 1 large egg, beaten with 1 teaspoon water (for egg wash)
- 1 tablespoon coarse sugar (for sprinkling)
Easy Apple Pie Instructions: Crafting the Flaky Dough
Finally, we get to the fun part: assembly! Don’t let the word ‘from scratch’ intimidate you; we’re keeping things super simple here because, frankly, we don’t have all day to wait around. The goal in this step is friction-free mixing. Remember how I talked about cold butter? Well, you need to keep those chunks intact. When you mix the flour and salt, you’re going to cut in that deeply chilled butter. You can use a pastry blender, but honestly, my favorite tool is just my fingertips—they’re fast!
You stop mixing when the butter pieces are about the size of peas, or maybe a bit larger, like small beans. They still need to be distinct pieces of fat coated in flour. That’s the magic! When the pie gets hot in the oven, those butter pieces melt, creating steam that forces the dough layers apart. If you blend it until it looks like fine sand, you’ve gone too far, and that means you’ll have a tough crust, not a light one. Watch your consistency carefully here.
Once the butter chunks are coated, start adding that ice water, just a tablespoon at a time. You just want the dough to *barely* hold together when you squeeze a bit of it. It’s going to look crumbly when you first start, but keep gently pressing it. As soon as you can pull it into a shaggy ball, stop adding water immediately! Over-hydrating this dough is the quickest way to lose that beautiful flaky texture we worked so hard for!
Once it holds together, divide that shaggy mass right down the middle. Flatten each piece into a neat disk—don’t worry about making them perfect circles yet—wrap them tight in plastic wrap, and get them into the fridge. Don’t skip this part, no matter how tempting it is to rush!
Chilling the Dough for the Best Homemade Apple Pie
I know, I know, waiting is the hardest part of baking from scratch when you smell cinnamon in the air, but chilling the dough is what cements your success for that flaky pie crust from scratch. Give those dough disks a minimum of one hour in the refrigerator. What’s happening in there? Two crucial things! First, the gluten strands that developed while you were mixing—even if it was light—get a chance to relax. Relaxed gluten means tender dough!
Second, and more importantly for this recipe, the butter gets a chance to re-chill back down to that perfect, rock-solid temperature. If you try rolling out room-temperature butter discs, they smear into the flour, and boom—you’ve got shortbread instead of pie dough. Chilling ensures that when you roll it out in the next step, you’re incorporating the butter in flakes, not paste. Make sure that dough is nice and firm before you attempt to roll it into that 12-inch circle for your homemade apple pie!
Preparing the Cinnamon Apple Filling for Your Classic Apple Pie Recipe
Now that our dough is chilling out and getting nice and cold, we can focus on the star of the show: that incredible apple filling! Making the interior for your homemade apple pie is almost instant, but how you prep the fruit makes all the difference between a watery mess and a perfect, thick syrup.
First thing: those apples. You want them sliced thinly and evenly. I go for about 1/8th of an inch thick—thin enough to soften beautifully during the 60-minute bake, but thick enough that they don’t completely vanish into mush. If your slices are too thick, they’ll feel raw when the crust is done, and if they are paper-thin, they just collapse.
In a giant bowl—and I mean a really big one, because you’re going to toss this around a lot—toss all those beautiful apple slices first. Then, sprinkle over the sugars. I like to use both granulated and light brown sugar; the brown sugar adds just a faint, molasses-y depth that makes the whole classic apple pie recipe taste richer. Then, dust in your thickener, which is that 1/4 cup of flour, along with plenty of cinnamon and just a whisper of nutmeg. Please, don’t skip the nutmeg; it just brings out the warmth of the cinnamon!
And here’s my little trick for keeping things bright: lemon juice. Even if you’re using naturally tart apples, a splash of fresh lemon juice cuts through the richness of the crust and stops the whole pie from tasting overwhelmingly sweet. It just wakes everything up, which is essential when you’re assembling your homemade apple pie. Toss everything together gently with a large spatula until every single apple slice is coated in that fragrant, sugary spice mix. Then, let that stand on the counter while you roll out your first crust. The salt and sugar will start drawing out a little bit of juice, which is exactly what we want!
How to Assemble and Bake Your Apple Pie with Double Crust
Alright, the dough is chilled, the filling is waiting—it’s time to put this thing together! Take one chilled disk of dough and put it on a lightly floured surface. Roll it out gently into about a 12-inch circle. It needs to be big enough to cover the bottom of your 9-inch pie plate with a little overhang. Don’t stress if it cracks a tiny bit; that just proves how buttery it is!
Carefully drape that dough over the base of your pie plate and tuck it in slightly around the edges. Now, pour in all that gorgeous, spiced apple filling. Don’t be shy; pack those apples in tight. If you have any little leftover pieces of butter, dot those right on top before you seal it up—it helps keep the middle luscious.
Next, roll out that second disk for the top crust. Lay it right over the apples. Now for the sealing part—this is what makes it a true homemade apple pie! You take the overhanging edges of the top and bottom crusts and fold them together, tucking them under themselves. Then, you pinch and flute them all around the edge to create that classic, beautiful seal. This crimping ensures none of that amazing filling escapes while baking. Finally, grab a sharp knife and cut four or five slits right in the center top. This is vital venting! Without vents, the steam has nowhere to go, and your crust ends up soggy or, worse, explodes.
Baking Temperature Adjustments for a Perfect Finish
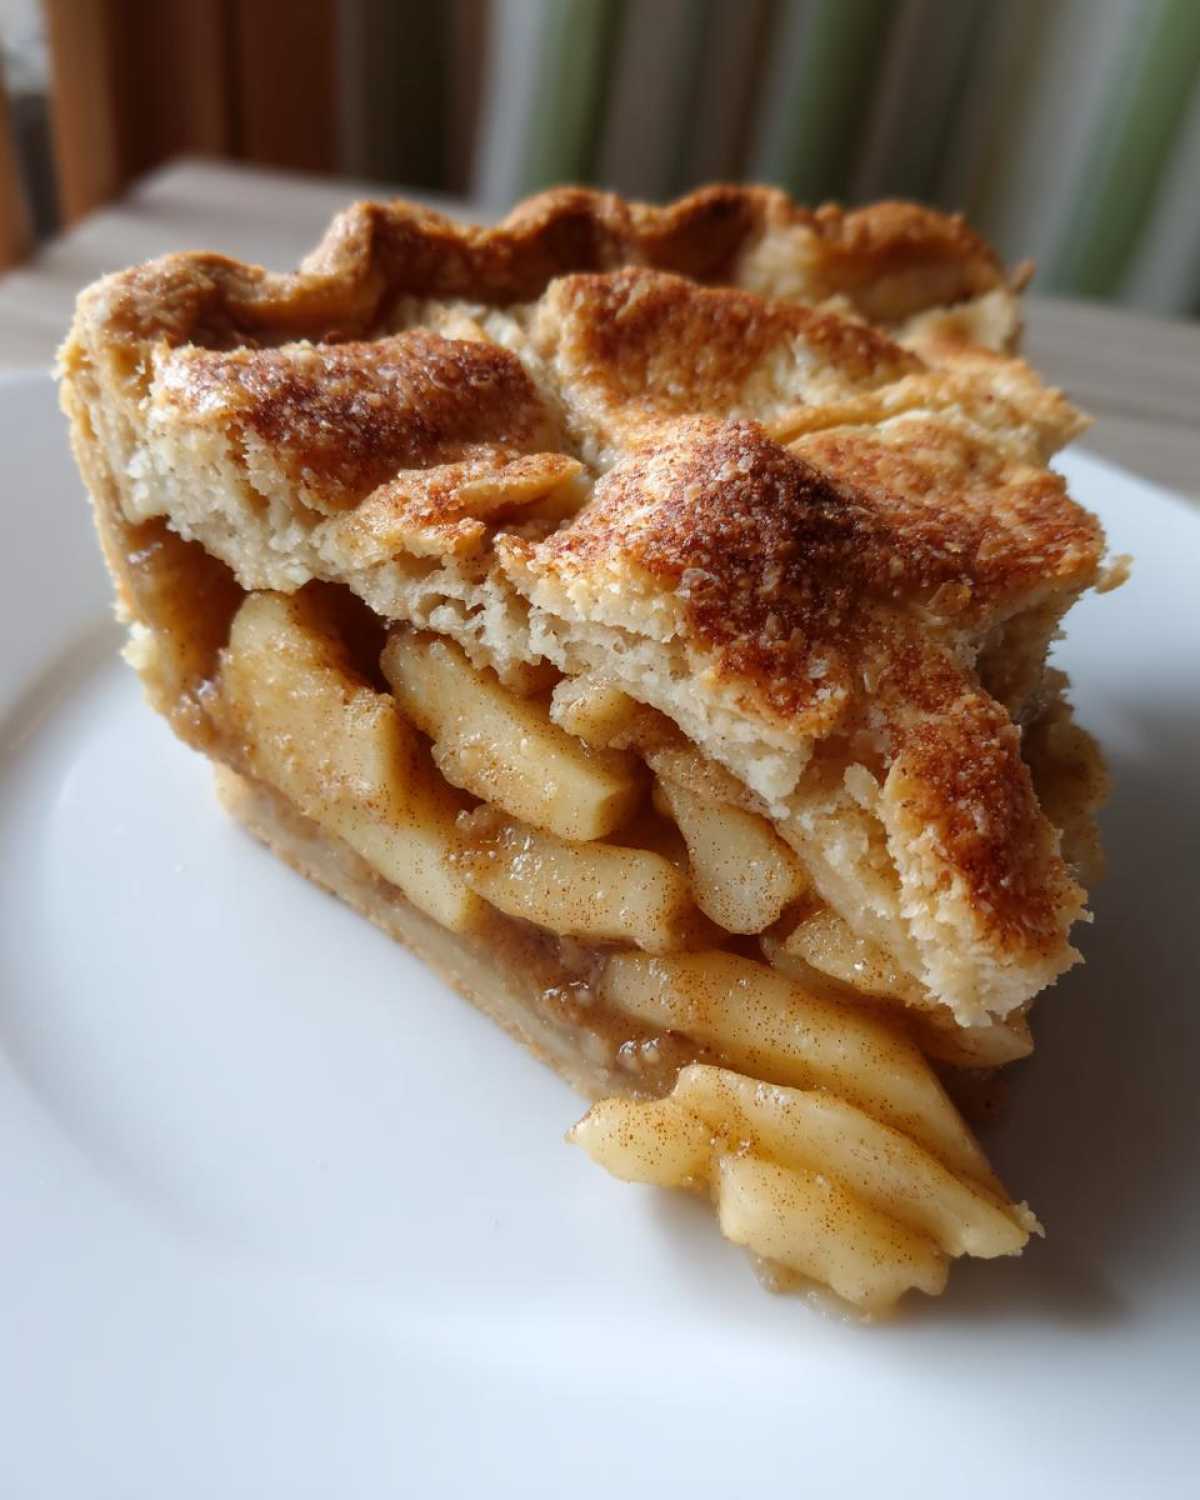
This is where a lot of people get nervous, but trust me, this two-step baking process is the key to getting a perfectly golden, flaky crust that’s cooked all the way through. We start high! Slap that beautiful homemade apple pie into an oven already set to 425°F (220°C) for the first 15 minutes. That initial blast of heat shocks the butter in the crust, making it puff up instantly—that’s where your flakiness comes from! We link to our full baking disclaimer right here if you ever have equipment questions.
After 15 minutes, you immediately drop that temperature down to 375°F (190°C) and let it bake for another 40 to 50 minutes. This lower heat lets the apples cook down and soften without burning the crust before they are tender. Before that second phase, brush the top crust very lightly with that egg wash (egg mixed with a teaspoon of water) and sprinkle generously with coarse sugar. That egg wash gives it that incredible lacquered shine we associate with a professionally made, classic apple pie recipe. If you notice the edges looking too dark halfway through the low-temp bake, just loosely shield them with strips of foil; nobody wants a burnt rim!
Tips for Success When Baking From Scratch
So, you pulled your pie out and it looks amazing—golden brown, edges crimped perfectly. Congratulations! But hold that knife! I’ve made the rookie mistake of slicing into a piping hot pie, and trust me, the filling oozes out like lava, leaving you with a delicious-looking soup on your plate. We skipped over that disastrous experience with the foil shields during baking, but the cooling period is just as important for success.
If you’re worried about a soggy bottom crust, which happens when steam gets trapped underneath the apples, my best advice is always to bake that pie on the lowest rack in your oven for the majority of the cook time. That direct heat attack on the bottom crust is the single best way to ensure it crisps up nicely and holds firm against all that lovely juice.
The Crucial Cooling Period for Homemade Apple Pie
This is the hardest part, truly, but you must let your homemade apple pie cool for a minimum of three hours on a wire rack. I repeat: three full hours! If you try to cut that pie after just an hour, the filling will still be extremely liquid because the starches and pectin haven’t had time to fully gel. It’s science, not stubbornness!
During that waiting time, the entire structure of the pie sets up. The juices will thicken, the molten sugar will solidify just enough, and the steam that’s trapped inside will redistribute evenly. If you slice it too soon, it runs everywhere, and you lose that beautiful thick syrup. Patience rewards you with that perfect slice consistency. It’s tough to resist when that cinnamon apple filling smell is wafting through the house, but trust me, waiting for this homemade apple pie means you get that perfect slice structure every single time.
Storage and Reheating Instructions for Your Whole Apple Pie
Whew! You made it through baking, cooling, and (hopefully) the first round of slicing. Now we talk about the leftovers—because let’s be real, a whole apple pie rarely gets eaten in one sitting unless you’re hosting a massive party!
The good news is that this pie keeps really well, especially because we used the right amount of flour to thicken our filling. Unlike fruit pies that rely on raw cornstarch which can break down quickly, our sturdy cinnamon apple filling holds its integrity for days!
Because we used a double sugar/butter crust combo, you actually have some flexibility on where you store it, though keeping it clean and sealed matters immensely for texture.
Storage Options for Your Leftovers
You have two main options here, depending on how long you need to keep it and how humid your kitchen is. For short-term storage—say, the first day or two—leaving the whole pie loosely covered on the counter is perfectly fine. The high sugar content acts as a preservative, so short trips out of the fridge are okay! Just make sure it’s covered well with foil or plastic wrap so it doesn’t start tasting like last night’s garlic steak.
If you know you won’t get through it within 48 hours, definitely pop it into the refrigerator. Wrap the pie tightly in plastic wrap first, and then perhaps cover it again with foil. Refrigeration will keep it good for up to four or five days, easily.
How to Bring That Crust Back to Life
When you pull a slice of pie from the fridge, it’s usually hard, and the crust feels a little…meh, right? We have to reheat it, but we absolutely cannot microwave it! Microwaving turns the wonderful buttery crust into a sad, soggy sponge. We want that glorious crispness back for your comfort food recipes rebound!
The best way to reheat a slice—or even the whole pie—is low and slow in the oven. Set your oven to about 350°F (175°C). If you’re just doing a single slice, put it on a baking sheet lined with parchment paper and let it heat for about 10 to 15 minutes. If you’re trying to revive the entire pie, give it about 20 minutes to warm through completely.
This gentle heat warms the filling back up so it’s gooey again, but most importantly, it crisps up that bottom crust and rejuvenates the top flaky layers. It tastes almost exactly like it did straight out of the oven. It’s the perfect method for enjoying your fall baking desserts all week long!
Frequently Asked Questions About Making Homemade Apple Pie
I know when you look at a huge recipe like this, questions pop up. That’s totally normal! When I first started experimenting with baking from scratch, I had dozens of questions about everything from apple acidity to crust texture. I’ve gathered the most common things people ask me in my DMs and emails lately. If you still have concerns after reading through, feel free to send a note over via the contact page—I love chatting technique! You can reach out anytime at our contact page.
Can I use a store-bought crust for this recipe?
Look, I’m not going to stand here and tell you that a store-bought crust is a mortal sin, sometimes you just need a shortcut, especially if this is your first try at making a whole apple pie! You certainly *can* use a ready-made crust, and it will still taste pretty good because that apple filling is packed with flavor.
However, you are missing out on the absolute pinnacle experience! The fresh, buttery pie crust we made here is what elevates this to the *best* pie. If you use store-bought, just make sure you let it warm up on the counter for about 15 minutes before you try to shape it into the plate, and remember to still cut those steam vents in the top layer. But I wholeheartedly encourage you to try the scratch method next time—it’s worth the effort, I promise!
What is the best way to make a sweet or tart apple pie?
This is all about choosing your apple blend and controlling the sugar. If you prefer a genuinely tart apple pie—the kind that wakes up your taste buds—I recommend using nothing but Granny Smiths, and maybe even backing that sugar down to half a cup total. If you like it sweeter, like my husband does, use sweeter apples like Gala or Fuji, and lean closer to a full cup of sugar.
For me, the perfect option—which solves all debates—is the mix! I use a 3:2 ratio of tart to sweet apples. That way, you get the structure and tang from the tart ones, but the overall profile stays nicely balanced when blended with the brown sugar and cinnamon. When you read back in the ingredient section, you’ll see I specified using all those measurements precisely for that very balanced flavor profile!
How long do I really need to pre-bake or under-bake the bottom crust?
Ah, the dreaded soggy bottom! I know people often ask about par-baking the dough before adding the filling. For this specific recipe, I strongly advise against it for a standard apple pie with double crust. Par-baking can toughen up the dough and interfere with the proper sealing we need to do to trap the steam.
Instead of pre-baking, we focus on two other steps for success in answering the common question of how to bake apple pie without a soggy base: keeping the butter icy cold during mixing, and baking the pie on the lowest oven rack initially. That intense heat blast right at the bottom ensures rapid setting. If you follow those simple steps, you absolutely will not have to worry about under-baking the bottom!
I hope these little tips help you out. Go make yourself one of these wonderful comfort food recipes!
Share Your Classic Apple Pie Recipe Experience
Alright, pie makers, that’s it! You have successfully navigated the sometimes tricky waters of making a beautiful, classic homemade apple pie completely from scratch. I hope your kitchen smells absolutely heavenly right now!
Now, I really want to see how your masterpiece turned out. Did the crust get nice and flaky? Did you manage to resist cutting into it for the full three hours? Don’t keep all that glory to yourself!
Please, drop a comment below! Tell me what kind of apples you used, how long you ended up baking it for, and if your family devoured it as quickly as mine does. If you snapped a picture of that gorgeous golden top, share it on social media and tag me! Seeing your successes is my absolute favorite part of sharing these recipes. Happy baking, and enjoy every single buttery, cinnamon-spiced slice of your incredible homemade apple pie!
PrintThe Ultimate Classic Homemade Apple Pie: Perfectly Flaky Double Crust & Sweet-Tart Cinnamon Filling
Follow these simple instructions to make a classic, old-fashioned apple pie featuring a buttery, flaky crust and a perfectly balanced sweet and tart cinnamon apple filling.
- Prep Time: 45 min
- Cook Time: 60 min
- Total Time: 105 min
- Yield: 8 servings
- Category: Dessert
- Method: Baking
- Cuisine: American
- Diet: Vegetarian
Ingredients
- 2 1/2 cups all-purpose flour
- 1 teaspoon salt
- 1 cup (2 sticks) unsalted butter, very cold and cubed
- 1/2 cup ice water, plus more if needed
- 6 large apples (a mix of Granny Smith and Honeycrisp recommended)
- 3/4 cup granulated sugar (adjust to apple tartness)
- 1/4 cup packed light brown sugar
- 1/4 cup all-purpose flour (for thickening)
- 1 teaspoon ground cinnamon
- 1/4 teaspoon ground nutmeg
- 1 tablespoon lemon juice
- 1 large egg, beaten with 1 teaspoon water (for egg wash)
- 1 tablespoon coarse sugar (for sprinkling)
Instructions
- Make the crust: In a large bowl, whisk together the flour and salt. Cut in the cold butter using a pastry blender or your fingers until the mixture resembles coarse crumbs with some pea-sized pieces of butter remaining.
- Gradually add the ice water, one tablespoon at a time, mixing until the dough just comes together. Do not overmix. Divide the dough in half, flatten each half into a disk, wrap in plastic, and chill for at least 1 hour.
- Prepare the filling: Peel, core, and thinly slice the apples. In a large bowl, toss the apple slices with the granulated sugar, brown sugar, 1/4 cup flour, cinnamon, nutmeg, and lemon juice until evenly coated.
- Preheat your oven to 425°F (220°C).
- Roll out one dough disk on a lightly floured surface into a 12-inch circle. Carefully transfer it to a 9-inch pie plate. Trim the edges, leaving a 1-inch overhang.
- Pour the apple filling into the crust. Dot the top of the filling with a few small pieces of leftover butter, if desired.
- Roll out the second dough disk for the top crust. Place it over the filling. Trim the top crust overhang to match the bottom. Crimp the edges together to seal the pie. Cut several slits in the top crust to allow steam to escape.
- Brush the top crust lightly with the egg wash and sprinkle with coarse sugar.
- Bake for 15 minutes at 425°F (220°C). Then, reduce the oven temperature to 375°F (190°C) and continue baking for 40 to 50 minutes, or until the crust is golden brown and the filling is bubbling. If the edges brown too quickly, cover them loosely with foil.
- Cool the pie on a wire rack for at least 3 hours before slicing and serving. This allows the filling to set properly.
Notes
- For the flakiest crust, keep all ingredients, especially the butter and water, very cold throughout the mixing process.
- If you prefer a sweeter filling, increase the granulated sugar by 1/4 cup.
- Use a mix of tart apples like Granny Smith with sweeter apples like Honeycrisp for the best flavor balance.
Nutrition
- Serving Size: 1 slice
- Calories: 450
- Sugar: 35g
- Sodium: 250mg
- Fat: 25g
- Saturated Fat: 15g
- Unsaturated Fat: 10g
- Trans Fat: 0g
- Carbohydrates: 58g
- Fiber: 3g
- Protein: 5g
- Cholesterol: 60mg