

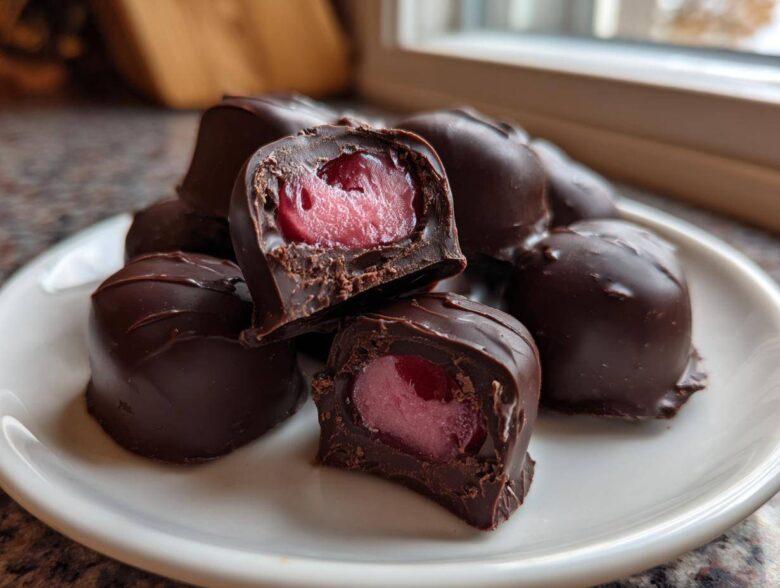
Oh my gosh, there is just nothing better than making your own candy, is there? Forget those waxy things you grab at the checkout aisle! When the holidays roll around, or honestly, any time I need a little burst of joy, I go straight for homemade chocolate covered cherries. Everyone thinks getting that perfect little burst—that gooey, liquid center that makes it a true cordial—is impossible at home. And for years, I thought so too! My first batches were disasters; either rock hard or just mushy puddles.
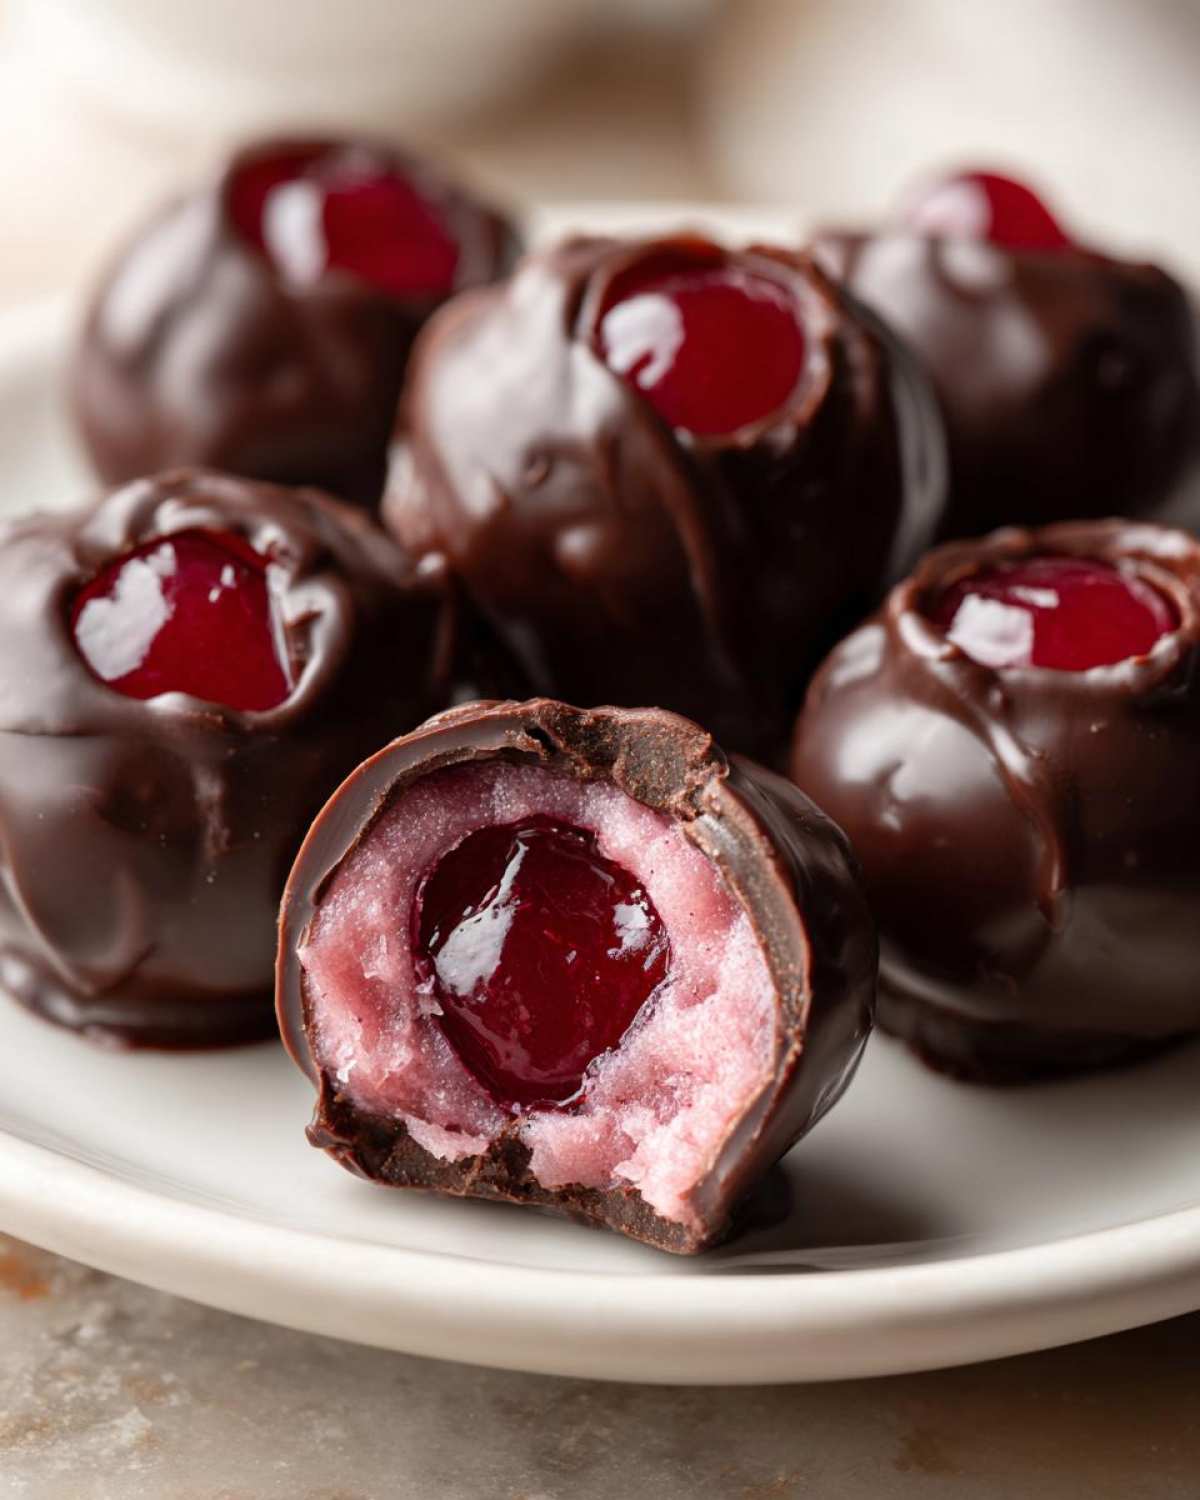
But trust me, after burning through at least three bags of cherries figuring it out, I finally cracked the code. If you want to learn more about my philosophy in the kitchen, check out my About Me page! The real secret to these chocolate covered cherries isn’t some fancy equipment; it’s all about patience with the syrup cooking and making sure your cherries are bone dry before they meet the chocolate. When you bite into one of these, and that sweet, boozy cherry juice just melts in your mouth against the rich dark chocolate? Pure magic. I’m so excited for you to try this method!
Why You Will Love This Easy Homemade Chocolate Covered Cherry Recipe
I promise you, once you make this easy cherry cordial recipe, you will never go back to the drugstore version again. They are so much richer! Plus, they make the most incredible homemade gifts, especially wrapped up in little clear bags for Christmas or Valentine’s Day. Seriously, people go nuts for them.
Key Benefits of Our Chocolate Covered Cherries
- You nail that perfect, gooey liquid center every single time.
- The flavor of quality dark chocolate completely beats the waxy coating on store brands.
- The filling recipe is surprisingly simple, just requiring a candy thermometer.
- They freeze beautifully, which buys you loads of time before big events.
- They look incredibly gourmet, even if you’re a beginner candy maker!
Essential Ingredients for Perfect Chocolate Covered Cherries
Look, when you’re making something this classic, you can’t just skimp on the quality. These chocolate covered cherries live or die by their components. We need precision, especially when we get to the fondant part because that’s what creates our precious liquid center magic! Don’t try to substitute the corn syrup unless you want a brick in a chocolate coating. We are aiming for rich, indulgent flavor, and that starts right here with the shopping list. Take your time gathering these things; measuring exactly is key!
Understanding the Chocolate Covered Cherry Filling Steps Ingredients
We are breaking our ingredients into two main groups: the filling base and the coating. For the liquid center, be sure you have granulated sugar, water, light corn syrup, vanilla extract, salt, maraschino cherry juice, and finally, the cornstarch which helps us stabilize that filling just enough before it hits the deep freeze. For the cherries themselves, remember they absolutely must be drained and then patted *completely* dry using paper towels. If they are even a little damp, the chocolate coating will refuse to stick properly. For the coating, you’ll need 12 ounces of chopped dark chocolate—I prefer the intense flavor of a good 60% cacao—and a tiny bit of shortening or coconut oil if you want that extra smooth finish for your chocolate covered cherry filling steps.
Mastering the Liquid Center Chocolate Covered Cherries: Step-by-Step
Okay, this is where the real fun starts, but also where we need to pay attention! Making these chocolate covered cherries is worth every second of focus. We are aiming for that perfect soft center, so hang tight when the candy thermometer comes out. It’s not as scary as it sounds, I promise! If you follow these steps exactly, you’ll have the most delicious, classic candy recipes masterpiece ready for any party.
Preparing Cherries and Making the Fondant Base
First things first: dry those cherries! I mean it—lay them out on paper towels and pat until you think they can’t get any drier, then pat them one more time. Any moisture here equals a cracked chocolate shell later. Next, get your syrup going. Combine the sugar, water, and corn syrup for the base in a heavy saucepan. Stir only until the sugar dissolves, then stop touching it! High heat only from here. You need to bring that mixture up to 238 degrees Fahrenheit—that’s the soft-ball stage. Immediately pull it off the heat and stir in your vanilla and that precious cherry juice. Let this cool completely. It might take an hour—go make a cup of tea! This cooling period is vital for thickening up before we turn it into actual fondant.
Forming and Freezing the Chocolate Covered Cherry Filling Steps
Once the syrup is cool and thick, it’s time to make it creamy! Mix that cornstarch slurry into the cooled syrup base. Now, grab an electric mixer—your arm will thank you—and beat it until it’s thick and pasty. This is the chocolate covered cherry filling steps part that turns gooey syrup into something you can actually wrap around a cherry. Take a little piece of that thick fondant and completely encase each dried cherry, rolling it into a neat little ball. Flatten them slightly on parchment paper before they go into the freezer for a minimum of two hours. They must be rock solid! This hard freeze is the secret weapon that keeps the center gooey when the warm chocolate hits it.
Simple Chocolate Dipping Technique for Homemade Chocolate Covered Cherries
While those guys are freezing, melt your chocolate slowly. If you are using shortening or coconut oil, mix that in now—it thins the chocolate perfectly for a beautiful, professional coating. This is key to a great simple chocolate dipping technique. Don’t rush the melt! When the cherries are icy hard, take them out one or two at a time. Dip them fast, ensuring full coverage, and then lift with a fork. Let the excess chocolate drip back into the bowl—this prevents fat pooling around the bottom. Pop them right back onto the parchment to set up. That’s it! Warm chocolate meets frozen cherry, and bam, you have a perfect cordon!
Tips for Success with Homemade Chocolate Covered Cherries
Okay, let’s talk about the times when things maybe don’t go one hundred percent to plan, because kitchen magic needs a little troubleshooting sometimes! The biggest question I always get is how you actually guarantee that lovely soft center in your chocolate covered cherries instead of just ending up with a solid cherry-flavored truffle. Simple: don’t over-beat that fondant mixture, and crucially, don’t let the filling warm up before it hits the warm chocolate.
If you beat the fondant until it’s totally stiff and light, you are incorporating too much air. That incorporates structure, which leads to a firm center. You want it creamy and thick—almost like peanut butter—but still slightly yielding. Freezing those filled balls until they are hard as rocks ensures the contrast in temperature does the work for you. The cold center resists the warmth of the chocolate just long enough so it stays liquidy inside, but it sets up nicely enough that you don’t have chocolate soup running everywhere. Always aim for that temperature shock!
Variations on Gourmet Chocolate Candy
Once you nail the basic recipe for these chocolate covered cherries, you absolutely have to start playing around! That’s the fun part of making your own gourmet chocolate candy. Why stick to just milk chocolate when the world of cocoa is your oyster? I love experimenting with different coatings. If you swap out the dark chocolate for good quality white chocolate, you get something completely different—it’s sweeter, almost like a creamsicle flavor with that cherry inside. It looks super fancy too, especially if you swirl a few drops of dark chocolate on top!
Another thing I mess with is the flavor infusion. Before you wrap that fondant around the cherry, try adding a tiny drop of almond extract to the fondant mixture. It gives it this lovely, almost bakery-like richness. Or, if you’re making these for a grown-up party, instead of plain cherry juice in the syrup, use a splash of Kirsch or a nice dark rum! Just remember, more liquid means you might need to chill the filling a little bit longer before rolling.
Using Rich Dark Chocolate Covered Cherries
If you ask me, the best version is always the one using rich dark chocolate covered cherries. The bitterness of a high-cacao dark chocolate (think 65% or higher) is the perfect foil to that super sweet, slightly artificial taste of the maraschino cherry. It stops the whole experience from tasting like pure sugar. When you get that sophisticated dark chocolate snap followed by the gooey, sweet center, that’s when you know you’ve made something truly special!
Storage and Gifting Your Chocolate Covered Cherries
Alright, you’ve made these perfect little jewels, and now you have the important job of keeping them pristine! Since these chocolate covered cherries have that soft center, they really prefer to be stored somewhere cool and dry, not necessarily the fridge, because condensation can make the chocolate sweat later. Cool room temperature is actually fantastic, and they will stay great for about two weeks. Just keep them in a single layer in an airtight container so they don’t bump into each other.
If you’re planning these for ‘Christmas chocolate gift ideas,’ I always line a nice little tin with parchment paper and stack them up carefully. For ‘Valentine’s day chocolate making,’ tie a pretty silk ribbon around a small box—that presentation just screams luxury! Because the fondant filling has so much sugar, it acts as a natural preservative, so we don’t need to rush to eat them all at once. If you need an extra few days of shelf life, or if your house is warm, pop them in the fridge, but remember you must let them come back to room temp for about 30 minutes before serving any of those gorgeous beauties. If you need to reach out with a question once you start baking, feel free to drop me a line on my Contact Page!
Frequently Asked Questions About Chocolate Dipped Cherries How to Make
When you’re tackling homemade candy, those little hiccups can feel huge, right? I get tons of questions about making these chocolate dipped cherries how to make perfectly, especially concerning that delicate coating. Don’t sweat it! Most issues just come down to one or two tiny details we can easily fix. I’ve gathered the most common concerns right here to make sure your batch is a total success. You can read up on my full site policies over on my Disclaimer Page, but let’s get to these candy problems first!
Why is my chocolate coating cracking on the chocolate covered cherries?
Nine times out of ten, the coating cracks because the cherries weren’t dry enough before dipping. That residual moisture hits the warm chocolate and causes separation! Alternatively, coating a rock-solid frozen cherry with warm chocolate can cause a temper shock and immediate cracking. Quick dip, quick set!
Can I make the liquid center chocolate cherries ahead of time?
Yes, absolutely! These liquid center chocolate cherries are almost better made a few days in advance because the filling settles. Store them cool and dry, away from strong odors. They should easily last for a couple of weeks, making them perfect for advance holiday prep.
Estimated Nutritional Profile for These Classic Candy Recipes
Now, I know we aren’t making these for health reasons—they are an indulgence, plain and simple! But I always like to give you a baseline of what you’re dealing with per cherry, just so you know where you stand when you sneak one (or four) out of the container. Remember, since these classic candy recipes rely so heavily on sugar and chocolate, calories and sugar are the main things to watch.
These numbers are just my best guess based on the standard ingredient amounts, using average dark chocolate. If you use milk chocolate or load up on extra frosting drizzle (which I won’t judge you for!), these figures will change slightly. Always treat these values as an estimate, especially if you’re sharing these amazing homemade treats with friends who ask!
- Serving Size: 1 cherry
- Calories: 120
- Sugar: 18g
- Sodium: 15mg
- Fat: 5g (Saturated Fat: 3g)
- Carbohydrates: 19g
- Protein: 1g
You can find more details on my Privacy Policy page if you’re ever curious about how I track things around here, but mostly, just enjoy these incredible homemade chocolate covered cherries guilt-free!
Share Your Homemade Chocolate Cherry Balls Experience
Whew! You made it! Now that you’ve mastered the magic of making your own DIY chocolate cherry balls, I really need to hear all about it. Honestly, seeing your creations is the best part of sharing these recipes. Did the liquid center turn out just like you hoped? Was the chocolate snap perfect?
Don’t be shy! Come back here and leave a star rating for the recipe—it really helps other bakers know this method works. Even better, snap a quick picture of your beautiful chocolate covered cherries and tag me on social media! I love seeing how everyone personalizes their candy.
If you ran into any hiccups, please leave a detailed comment! Knowing what worked or what seemed tricky helps me keep this guide updated and authoritative. Remember to check out the Terms and Conditions if you have questions about sharing your photos. Happy dipping, my friend!
PrintEasy Homemade Chocolate Covered Cherry Cordials with Liquid Centers

Make rich, homemade chocolate covered cherries with a classic liquid center using this straightforward recipe. These are perfect for holidays or gifting.
- Prep Time: 45 min
- Cook Time: 15 min
- Total Time: 3 hours
- Yield: About 24 cherries
- Category: Dessert
- Method: No Bake/Dipping
- Cuisine: American
- Diet: Vegetarian
Ingredients
- 1 cup granulated sugar
- 1 cup water
- 1/2 cup light corn syrup
- 1/4 teaspoon salt
- 1/2 teaspoon vanilla extract
- 1/4 cup maraschino cherry juice (drained from jar)
- 1/4 cup water (for syrup)
- 1 cup granulated sugar (for fondant)
- 1/2 cup light corn syrup (for fondant)
- 1/4 teaspoon salt (for fondant)
- 1/2 cup maraschino cherries, drained and patted very dry
- 1 tablespoon cornstarch
- 12 ounces dark or milk chocolate, chopped
- 1 tablespoon shortening or coconut oil (optional, for dipping)
Instructions
- Prepare the cherries: Pat the drained maraschino cherries completely dry using paper towels. Set aside.
- Make the fondant base: Combine 1 cup sugar, 1 cup water, 1/2 cup corn syrup, and 1/4 teaspoon salt in a saucepan. Stir until sugar dissolves.
- Cook the syrup: Heat the mixture to 238 degrees Fahrenheit (soft-ball stage) without stirring after it boils. Remove from heat.
- Finish the fondant: Stir in the vanilla extract and the 1/4 cup of reserved cherry juice. Let the mixture cool completely, about 1 hour, until it thickens slightly.
- Create the filling: In a separate bowl, mix the 1 tablespoon of cornstarch with 1/4 cup of water to form a slurry. Add this slurry to the cooled fondant mixture. Beat with an electric mixer on medium speed until the mixture becomes thick and creamy, resembling a thick paste.
- Fill the cherries: Take a small amount of the fondant mixture and wrap it around each dried maraschino cherry. Roll into a ball shape. Place these filled cherries on a parchment-lined baking sheet.
- Chill: Freeze the filled cherries for at least 2 hours until very firm. This step is crucial for successful dipping.
- Melt the chocolate: Place the chopped chocolate and shortening (if using) in a double boiler or microwave-safe bowl. Melt slowly until smooth.
- Dip the cherries: Remove the frozen cherries from the freezer one or two at a time. Dip each cherry completely into the melted chocolate, using a fork or dipping tool to lift it out. Allow excess chocolate to drip off.
- Set the coating: Place the dipped cherries back onto the parchment-lined sheet. Let the chocolate set completely at room temperature or briefly in the refrigerator.
Notes
- Drying the cherries thoroughly prevents the chocolate coating from cracking.
- For a liquid center, do not overmix the fondant; the freezing process keeps the center soft enough to liquefy slightly when eaten.
- Use high-quality dark chocolate for the best flavor contrast with the sweet cherry.
Nutrition
- Serving Size: 1 cherry
- Calories: 120
- Sugar: 18
- Sodium: 15
- Fat: 5
- Saturated Fat: 3
- Unsaturated Fat: 2
- Trans Fat: 0
- Carbohydrates: 19
- Fiber: 1
- Protein: 1
- Cholesterol: 5