

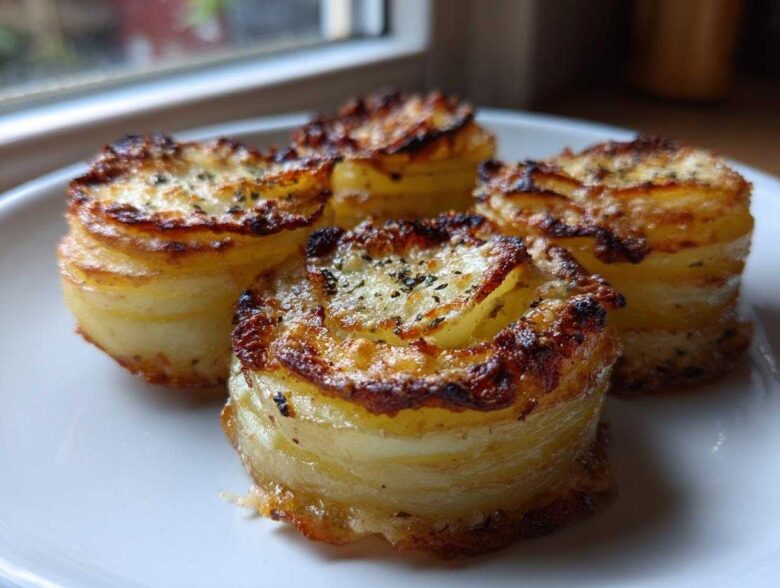
Oh my gosh, do you ever just stare into your fridge and think, “I need a side dish that isn’t boring, but also isn’t a three-hour commitment?” Me too! That’s how I stumbled onto my absolute favorite creation: perfect, savory potato stacks. Forget those flat, floppy slices of potato gratin; we are making individual miracles here!
These little beauties are baked right in a standard muffin tin, which is genius because you get maximum crispy edges on every single one. We’re talking about tender, buttery interiors hiding under a crunchy, cheesy crust. Trust me when I say these cheesy potato side dishes instantly elevate any meal, from a simple weeknight dinner to the biggest holiday spread. They became a total kitchen staple once I figured out the slicing secret!
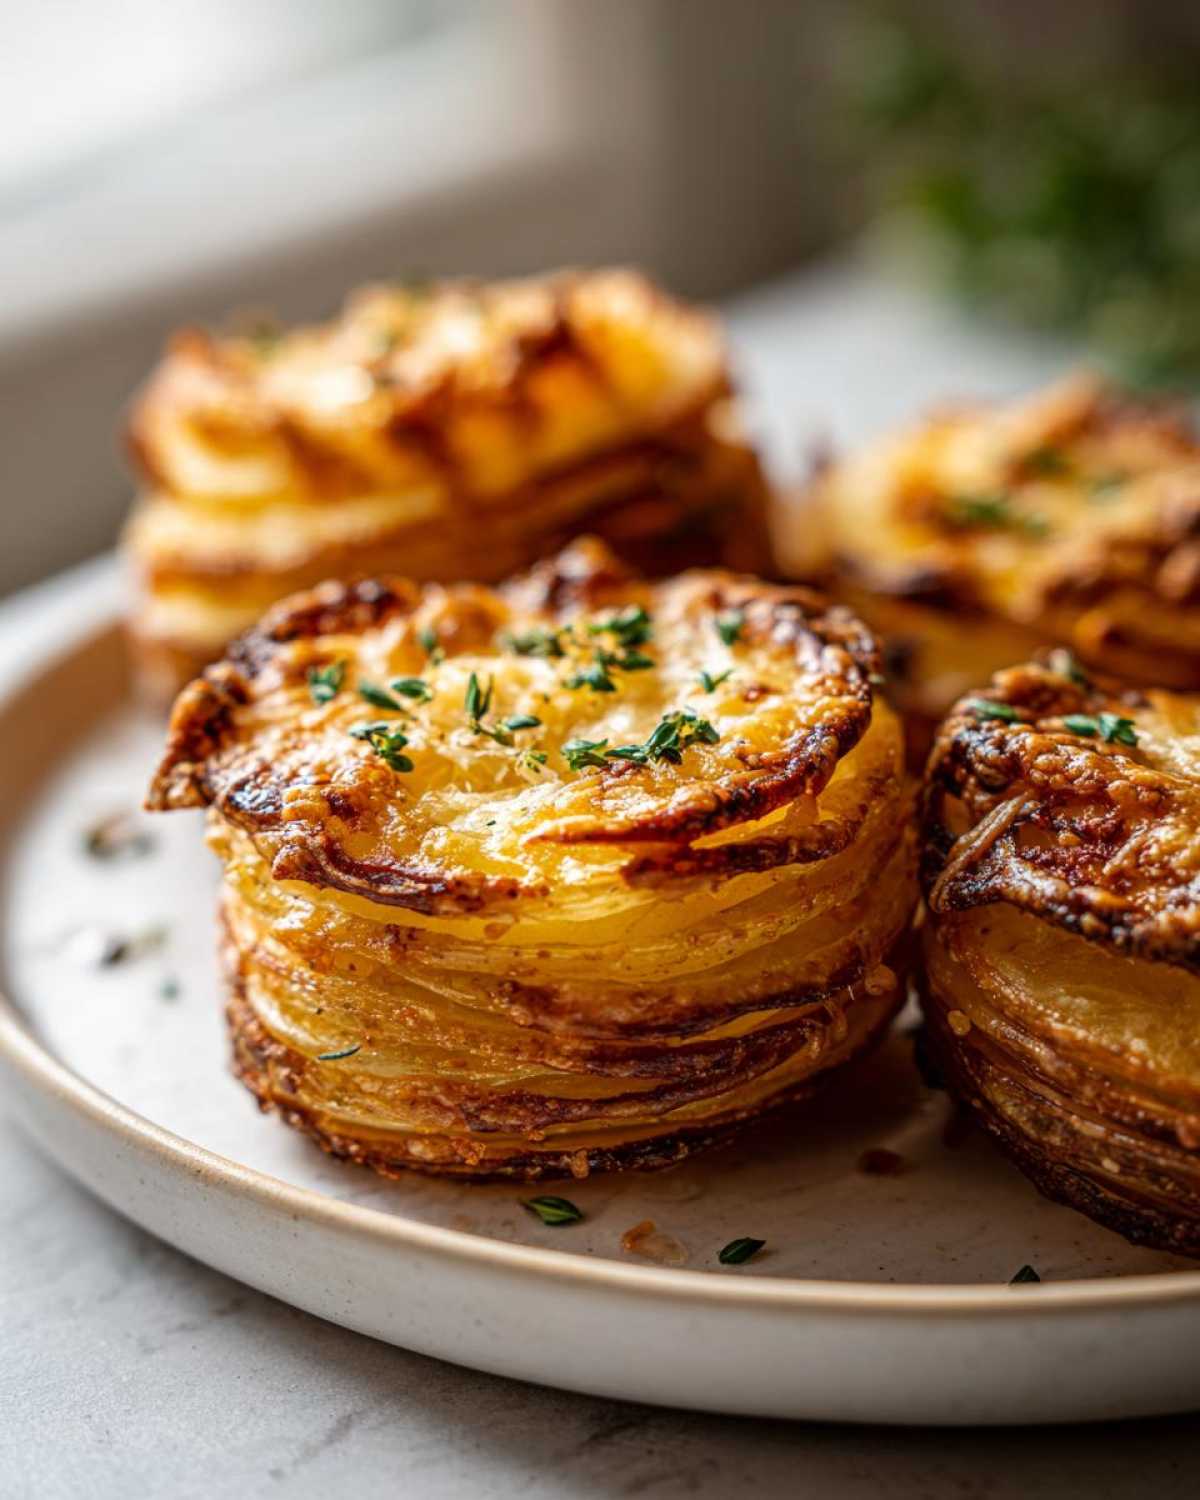
Why You Will Love These Crispy Potato Stacks
Seriously, these are the ultimate side dish hack. Once you try them, you might retire every other potato recipe you own. Here’s the quick rundown on why they are completely irresistible:
- Texture Town: You get that shatteringly crisp, golden edge, but the inside stays buttery soft—it’s the best of all worlds!
- Looks Fancy, Feels Easy: They look like something that took hours in a fancy restaurant kitchen, but we’re just using a muffin tin.
- Flavor Bomb: That savory punch from the garlic butter mixing with the salty Parmesan is incredible.
- Perfect Portions: Since they are individual, serving and portion control is a breeze. No messy slicing required!
Essential Ingredients for Perfect Parmesan Potato Stacks Recipe
Okay, gathering your supplies is easy, but we need to talk about the spuds. If you skim this part, your stacks might flop! For these golden layered potatoes, you absolutely must grab about two pounds of Yukon Gold potatoes. They hold their shape so much better than other varieties, which is key when you’re stacking them up.
You also need melted unsalted butter, some sharp garlic, and about a half-cup of grated Parmesan cheese—and I mean *real* Parmesan, not the dusty stuff in the green can if you can help it! Don’t forget salt, pepper, and a little fresh thyme for that amazing herby hit.
Ingredient Notes and Substitutions for Potato Stacks
Here is where the magic—or the mess—happens. The thickness of those potato slices is everything. Aim for about 1/16th of an inch. If they are too thick, they won’t cook through before the edges burn. If they are too thin, they just get mushy. I highly recommend using a mandoline slicer for this; it’s the only way to get that perfect, uniform cut for these layered potato slices.
If you can’t find fresh thyme (which is ideal!), dried thyme works fine. Just remember, dried herbs are stronger, so use about one-third of the amount called for. So, if the recipe says 1 teaspoon fresh, use about 1/3 teaspoon of dried. Don’t skip the herbs; they cut through the richness of the garlic butter beautifully!
Equipment Needed for Muffin Tin Potato Stacks
You don’t need a mountain of gadgets to make these incredible individual french potato stacks, but a couple of things really make the process smooth. First and foremost, you absolutely need a standard 12-cup muffin tin. That’s what gives us those perfect individual portions!
Second, if you value your ten fingers and perfect slices, grab a mandoline slicer. Seriously, slicing these layered potato slices by hand takes forever and it’s always uneven. The mandoline ensures every piece is thin enough to bake evenly and create a beautiful stack. A small offset spatula or a thin butter knife will also be super helpful for gently prying them out later. That’s it—easy peasy!
Step-by-Step Guide: How to Make Potato Stacks
This is where the fun begins! Don’t rush this part; a little care ensures you get the best final result for your potato stacks. First things first: crank that oven up to 400°F (200°C) and make sure you generously grease every single cup of your muffin tin. We want easy release later, remember?
Then, we move to flavor creation and coating! After that, it’s assembly time—just a few quick layering moves and they go right into that heat!
Preparing the Garlic Butter and Coating the Layered Potato Slices
Grab a small bowl and mix up your flavor bath: melted butter, your minced garlic, the fresh thyme leaves, salt, and pepper. Whisk it until it looks like one gorgeous, garlicky liquid. Now, take those super-thin potato slices—the ones you cut so perfectly (I hope!)—and dump them into a big bowl. Pour that amazing butter mixture over them immediately. Now, toss them gently! I mean it, use your hands and be careful not to really smash them up. You want every single slice saturated with that buttery goodness; this coating is what gives us the tenderness inside after baking.
Assembling and Baking Your Golden Layered Potatoes
Time to build! For each cup, I grab about four or five slices and just start overlapping them inside the tin, kind of fanning them out until the stack reaches the top of the cup. Don’t pack them too tight; we need space for the edges to crisp up! Once they are stacked, sprinkle about a teaspoon of that Parmesan cheese right over the very top of each one. They bake for about 35 to 45 minutes. You’ll know they’re done when the edges are deep golden brown and they feel tender if you poke them. Then, this is important: let them rest in the hot tin for exactly five minutes before you try to pull them out. That little wait helps them firm up perfectly!
Tips for Achieving Maximum Crispiness in Your Potato Stacks
Look, I know the whole reason you’re making these potato stacks is for that crisp edge, right? We don’t want soggy bottoms around here! The first step to incredible crispiness is using that mandoline slicer we talked about. Uniform thickness means uniform cooking, and that means every edge gets perfectly golden brown at the same time.
Here’s a trick I learned by accident: halfway through the baking time, when the edges are just starting to brown, pull them out quickly and brush the tops (and sides where you can reach) with just a tiny bit more melted butter. It sounds like overkill, but trust me, it boosts the crust!
My ultimate pro tip? When you are coating the slices in the butter mixture, make sure you are really working it into the very bottom layer that sits against the pan. If that bottom slice doesn’t get enough butter and Parmesan, it’ll stick or steam instead of crisping up. Don’t be shy coating that bottom layer; it’s the foundation for the best garlic butter potato stacks ever!
Serving Suggestions for Your Elegant Potato Side Dish
These little golden stacks are so versatile! They truly shine as an elegant potato side dish next to anything you’d put on a holiday table. Imagine them sitting next to a perfectly cooked prime rib or a beautiful roast chicken—they look so much more polished than mashed potatoes, don’t they?
But don’t save them just for fancy dinners! They are fantastic for weeknights too. Serve two or three alongside a simple grilled pork chop or serve smaller ones as a gourmet potato appetizer with a dollop of sour cream or chives right on top. Honestly, they are just as good plain, straight out of the muffin tin!
Storage and Reheating Instructions for Leftover Potato Stacks
I rarely have leftovers because my family devours these potato stacks the minute they come out of the cooling rack! But hey, if you manage to save a few of those 12 perfect portions, don’t panic about losing the crunch.
The best way to keep them is in an airtight container—no plastic wrap directly touching them! When you want to reheat them, skip the microwave entirely; that’s a guarantee for soggy potatoes. Pop them in a 350°F oven for about ten minutes, or use your air fryer for five minutes. That quick blast of dry heat brings back that amazing crispiness we worked so hard for!
Frequently Asked Questions About Potato Stacks
Even the best recipes sometimes leave us with little questions, right? It happens to me all the time, even after making the potato stacks recipe dozens of times! Here are a few things I hear readers asking about these lovely little cheesy potato sides.
Can I use Russet potatoes instead of Yukon Gold for these potato stacks?
That’s a great question! You *can* use Russets, but I wouldn’t recommend it if you want those perfect, structured stacks. Russets are starchier, which means they can get a little mushy or fall apart when you try to stack them so thinly. Yukon Golds are almost waxy, so they hold their shape beautifully when layered and baked. If you absolutely must use Russets, slice them just a hair thicker and be extra careful when transferring them into the muffin cups.
How do I prevent my individual french potato stacks from sticking to the tin?
Oh, sticking is the absolute worst when you’ve created something this golden and perfect! You already heard me rave about greasing, but let’s double down on insurance. Make sure you grease your tin right before you put the potatoes in; don’t grease it now and let it sit for an hour before filling. If you’re truly nervous, or if your muffin tin is older, I sometimes use a baking spray that contains flour—it acts like a light coating of flour and fat all at once! Silicone liners are also fantastic if you have them; they pop right out!
Are these potato stacks hard to get out of the pan?
They can be if you don’t wait those important five minutes! If you try right when they come out of the oven, they are too hot and too soft, and they will definitely stick or collapse. But after that five-minute rest, they firm up just enough. Use a thin spatula or a small paring knife and carefully run it around the edge of each stack before gently lifting the whole thing out. It works like a charm for this easy baked potato recipe variation!
Nutritional Estimates for Garlic Butter Potato Stacks
I always feel a little guilty eating something this delicious, but I’m happy to share the general estimates for these garlic butter potato stacks. Per one stack, you’re looking at around 140 calories, but remember, these numbers are just an approximation!
The nutritional breakdown depends totally on the exact Parmesan and how much butter might have soaked into the pan instead of the potatoes. We use about 8 grams of total fat and 3 grams of protein per serving. It’s a perfect, savory side dish, but always remember these estimates are general guidelines!
Share Your Experience Making These Potato Stacks
Whew! We made it to the incredibly satisfying end of the recipe. I really hope you give these elegant potato side dishes a try, whether it’s for a big Sunday dinner or just because you had a craving for something wonderfully cheesy and savory.
I’d absolutely love to hear what you think! Did the crispy edges turn out just how you wanted them? Tell me in the comments below! I want to know what you served them with—did you pair them with roast beef, or maybe just ate a few straight off the cooling rack? Don’t forget to snap a picture of your gorgeous stacks and tag me on social media! Seeing your golden, buttery creations is the best part of sharing recipes. Don’t be shy when you reach out via my contact page either if you have any last-minute questions. Happy baking!
PrintCrispy Parmesan Garlic Potato Stacks

Bake thin layers of potato with garlic butter and Parmesan cheese in a muffin tin to create individual, crispy-edged, and tender potato stacks.
- Prep Time: 15 min
- Cook Time: 45 min
- Total Time: 60 min
- Yield: 12 stacks
- Category: Side Dish
- Method: Baking
- Cuisine: American
- Diet: Vegetarian
Ingredients
- 2 lbs Yukon Gold potatoes, thinly sliced (about 1/16 inch thick)
- 6 tablespoons unsalted butter, melted
- 3 cloves garlic, minced
- 1 teaspoon fresh thyme leaves
- 1/2 teaspoon salt
- 1/4 teaspoon black pepper
- 1/2 cup grated Parmesan cheese
Instructions
- Preheat your oven to 400°F (200°C). Lightly grease a standard 12-cup muffin tin.
- In a small bowl, combine the melted butter, minced garlic, thyme leaves, salt, and pepper. Mix well.
- Place the thinly sliced potatoes in a large bowl. Pour the garlic butter mixture over the potatoes and toss gently until all slices are evenly coated.
- Take about 4 to 5 potato slices and layer them inside each muffin cup, slightly overlapping them to create a stack shape that reaches the top of the tin. Press the layers down gently.
- Sprinkle about 1 teaspoon of the grated Parmesan cheese over the top of each potato stack.
- Bake for 35 to 45 minutes, or until the edges are golden brown and crisp and the potatoes are tender when pierced with a fork.
- Let the stacks cool in the muffin tin for 5 minutes before carefully removing them with a small offset spatula or knife. Serve immediately.
Notes
- Use a mandoline slicer to get uniform, thin potato slices for even cooking and stacking.
- Yukon Gold potatoes work best because they hold their shape well during baking.
- For extra crispiness, you can brush the tops with a little extra melted butter halfway through baking.
Nutrition
- Serving Size: 1 stack
- Calories: 140
- Sugar: 1
- Sodium: 220
- Fat: 8
- Saturated Fat: 4.5
- Unsaturated Fat: 3.5
- Trans Fat: 0
- Carbohydrates: 15
- Fiber: 1.5
- Protein: 3
- Cholesterol: 12