

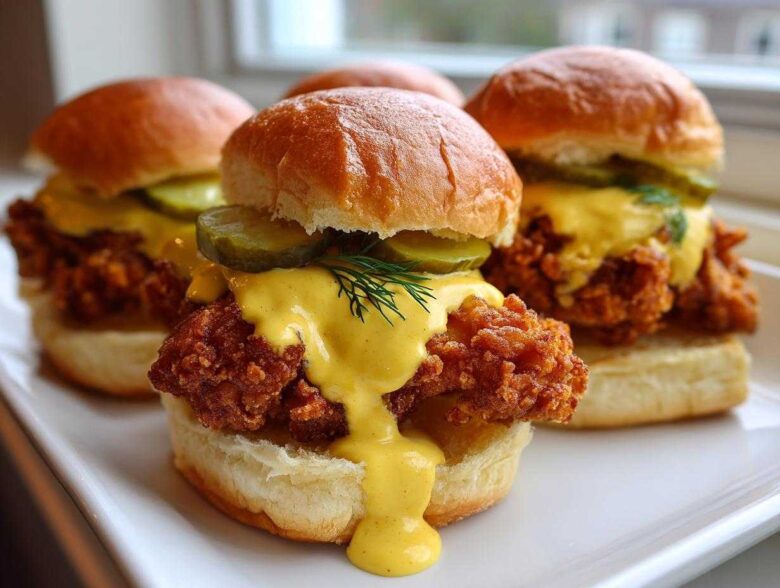
Okay, forget everything you thought you knew about party food because we are fixing that right now! If you’re like me, you want game-day snacks that actually pack a satisfying crunch, not some mushy little disappointment. That’s why these Crispy Chicken Sliders with Honey Mustard are my absolute go-to. Forget floppy coatings; I spent way too long perfecting the brine and the double-dredge technique so the chicken stays crackly even under a pile of toppings.
Seriously, the secret lies in making the coating angry when it makes contact with the chicken. We’re talking real, audible crunch in every single bite. I’ll walk you through the easy method below, including stirring up the best spicy honey mustard sauce you’ve ever dipped anything in. You’ll be a legend at your next gathering, I promise! For more incredibly simple appetizer ideas, check out my easy party sliders recipes collection.
Why You Will Love These Crispy Chicken Sliders with Honey Mustard
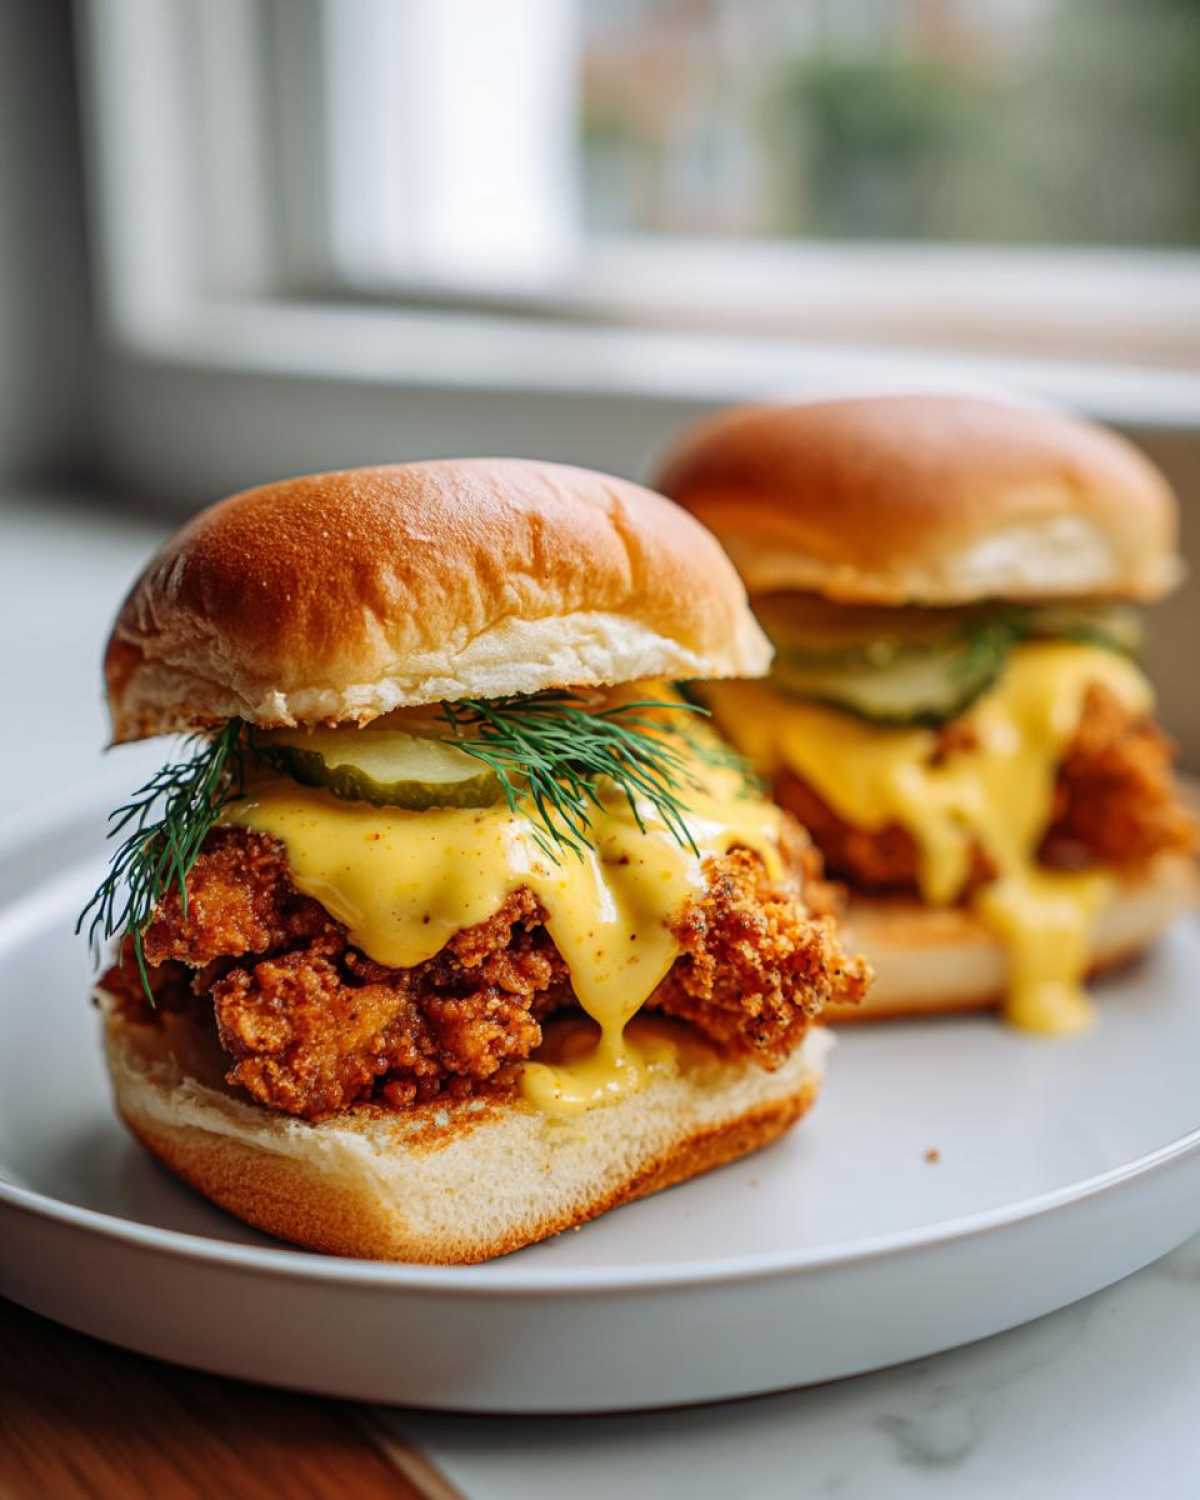
I’ll tell you honestly, this recipe is a winner for so many reasons. It hits all the right notes, and you don’t have to spend all day in the kitchen, which is a huge win for me! Here is why I think you’ll be making these Crispy Chicken Sliders with Honey Mustard over and over again:
- The Crunch Factor is Real: Thanks to the buttermilk soak and that crucial double-dredge, these sliders stay crispy even after sitting out on the party platter for a little while. They are truly crunchy chicken appetizers!
- The Perfect Flavor Balance: You get that savory, seasoned chicken kicking against the super satisfying sweet-and-tangy homemade honey mustard sauce. It’s a flavor explosion!
- So Speedy for Sandwiches: Because we cut the chicken into small, slider-friendly pieces right away, they cook super fast—way faster than a full-sized sandwich. Perfect for a quick weeknight chicken meal.
- Customizable Assembly: You can totally control the funk factor. Want extra pickles? Go for it. Need more cayenne in the sauce? A quick whisk and you’re done.
- Party Favorite Guaranteed: These look adorable, taste incredible, and they’re easy to handle. They disappear first at every potluck, trust me on this one.
Ingredients Needed for Crispy Chicken Sliders with Honey Mustard
Gathering the right components is half the battle when you want restaurant-quality crunch at home. For these Crispy Chicken Sliders with Honey Mustard, we break the ingredients down into three simple groups. Do not skip the prep work here—especially the buttermilk soak—because that’s what guarantees you get juicy insides under that rugged, crunchy exterior. If you want the full rundown on brining, I have a great explainer on buttermilk-soaked chicken recipes.
For the Chicken and Buttermilk Soak
The buttermilk step is non-negotiable in my kitchen for keeping the chicken tender! We need everything cut uniformly so it cooks evenly, whether you are frying or using the air fryer.
- 1.5 lbs boneless, skinless chicken breasts, cut into 12 small, uniform pieces (Think 1-inch thick coin shapes).
- 1 cup buttermilk (This tenderizes the meat beautifully!).
- 1 teaspoon hot sauce (Frank’s, Cholula—whatever you keep on hand for that subtle background heat).
- 1.5 cups all-purpose flour
- 1/2 cup cornstarch (This is crucial for an extra crispy coating!)
- 1 teaspoon salt
- 1 teaspoon black pepper
- 1 teaspoon paprika
- 1/2 teaspoon garlic powder
- Vegetable oil, for frying (about 2 inches deep for the skillet method).
For the Best Honey Mustard Sauce Recipe
Seriously, ditch the bottled stuff! Making the best honey mustard sauce recipe at home takes about two minutes and tastes a million times brighter. If you like a kick, trust me on the cayenne!
- 1/2 cup Dijon mustard (Make sure it’s Dijon, not the yellow ballpark kind).
- 1/4 cup honey (Use real honey for the best flavor).
- 2 tablespoons mayonnaise (This smooths out the bite of the Dijon).
- 1 teaspoon apple cider vinegar
- 1/2 teaspoon cayenne pepper (Optional, but this makes them sweet *and* savory sliders!)
For Slider Assembly
This is where everything comes together. Pick good buns; they matter when you’re serving something this delicious!
- 12 small slider buns (Hawaiian rolls are my absolute favorite here because they are slightly sweet and soft).
- 1/2 cup dill pickle chips (Get the crinkle-cut ones for extra texture!).
Mastering the Crispy Coating: How to Prepare Crispy Chicken Sliders
If you want this recipe to live up to its name—Crispy Chicken Sliders with Honey Mustard—you absolutely cannot rush the coating process. This technique is what separates an okay slider from the kind you’ll be bragging about later. The buttermilk soak is our first secret weapon here. It tenderizes the chicken beautifully, giving us juicy insides, but more importantly, it gives the flour something to really grab onto.
Once the chicken has marinated for at least 30 minutes, it’s time to build that fortress of crunch. We are going for layers, my friends! This method builds jagged, craggy spots in the crust where the oil can really cook up into glorious, crunchy bits. Trust me, taking the extra minute to complete that second dunk makes all the difference in the final texture.
Brining and Seasoning the Chicken
First things first: get your chicken pieces into that bowl of buttermilk and hot sauce. I usually let these sit while I clean up my prep station or mix the dry ingredients—aim for at least half an hour. When you’re cutting your chicken breasts, try to keep all the pieces close to the same size; this ensures they all hit that perfect internal temperature at almost the exact same moment, which is key for uniform cooking.
Remember, we’re seasoning the wet side (the brine) and the dry side (the flour mix) to get flavor deep into the chicken, not just on the surface!
The Double-Dredge Technique for Maximum Crunch
This is the step that puts us firmly in the ‘super crispy’ category. After pulling a chicken piece from the buttermilk (let the heavy drips fall off), you completely bury it in the flour/cornstarch mix. Really press that coating on. Then, here’s the magic: you give it a lightning-fast dip—just a quick dunk—back into the buttermilk, letting the excess run away!
Immediately, take that slightly wet, pre-coated piece and dredge it *again* through the flour mix. This second pass creates those beautiful, thick, uneven flakes on the exterior. When you press the flour on during this second coating, you are essentially gluing on the crunch. Don’t be gentle; you want to pat it and squeeze it right onto the chicken. For more crunchy coating inspiration, remember to check out my guide on making homemade chicken nuggets!
Cooking Methods for Perfect Crispy Chicken Sliders with Honey Mustard
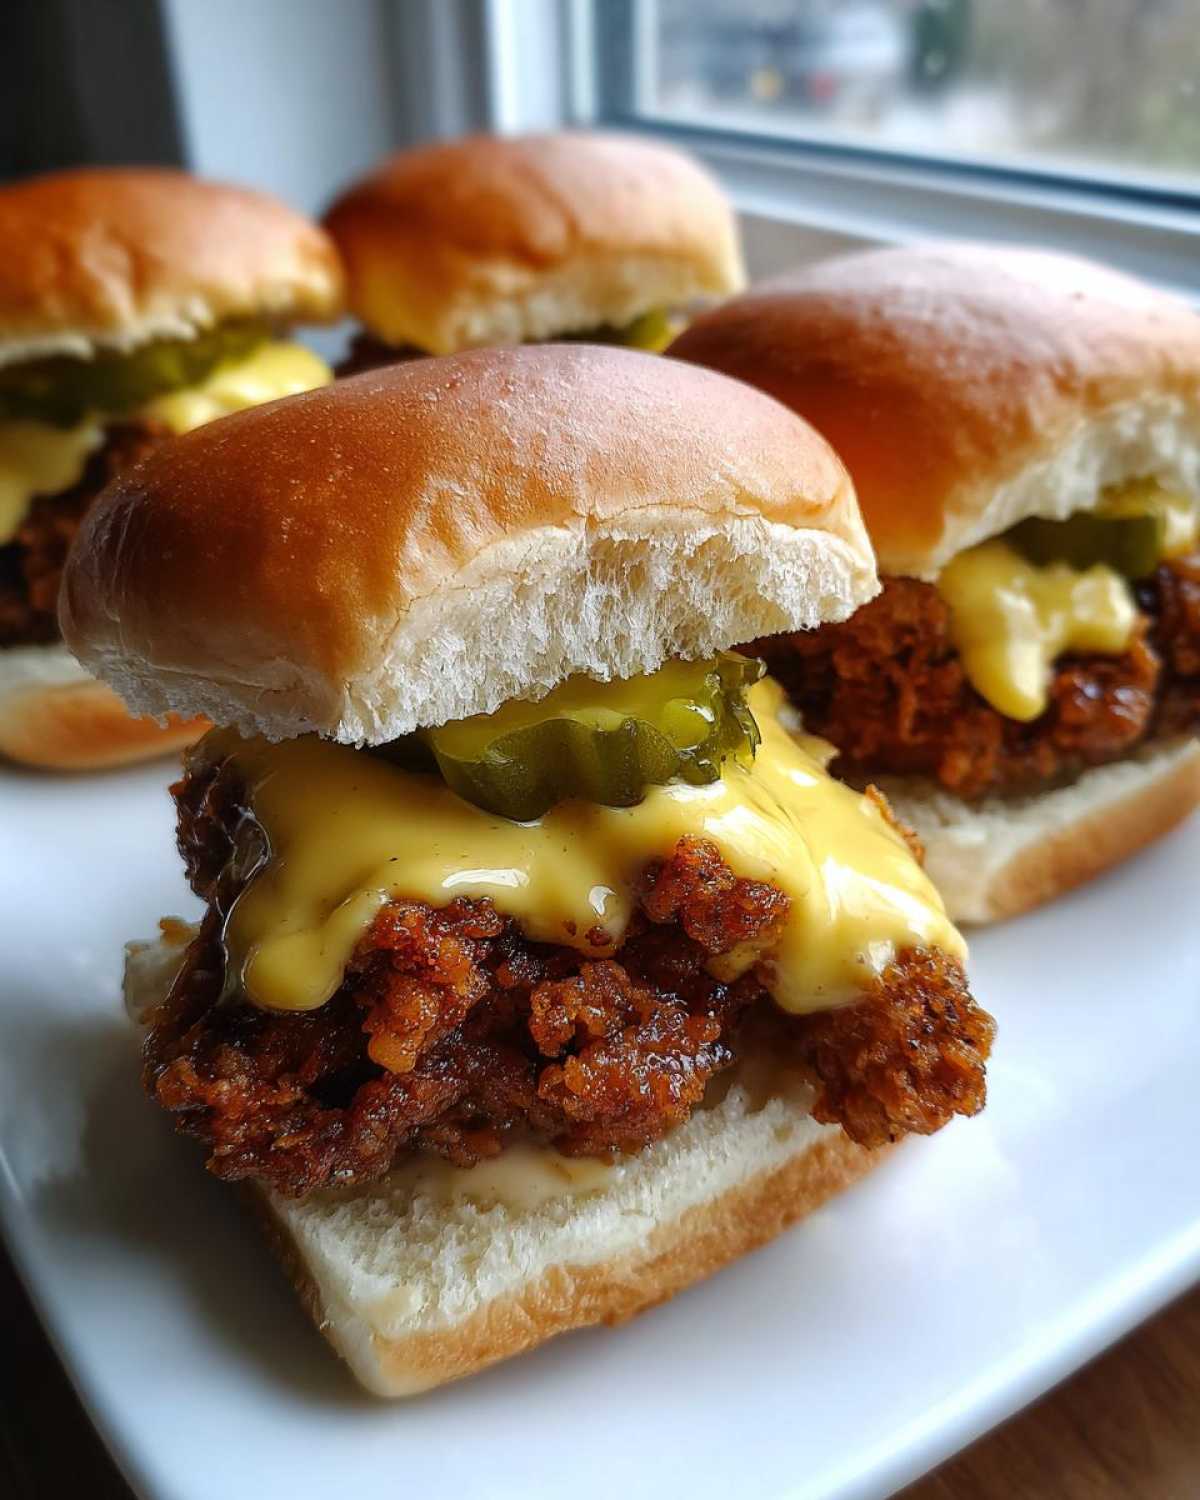
Now that we’ve built the perfect crunchy armor for our little chicken cutlets, it’s time to cook them! You have two fantastic options here for making these Crispy Chicken Sliders with Honey Mustard, depending on how much cleanup you want to deal with. I love the deep fry because it gives you that absolute best restaurant crunch, but honestly, the air fryer method is totally dependable for weeknights, and I use it all the time.
If you are going with the air fryer, make sure you are not overcrowding the basket—we need hot air circulating all around that coating if we want it to stay crisp! For faster cooking reference, I’ve got a whole guide on air fryer chicken wings recipes that shares all my basket-packing secrets.
Deep Frying for Classic Restaurant Crispiness
If you are going for that signature, show-stopping crunch, deep frying is the way to go. Heat about two inches of vegetable oil in a heavy skillet until it hits exactly 350°F (175°C). You really need a thermometer here, because if the oil isn’t hot enough, the coating just soaks it all up and gets greasy. Carefully lower the coated chicken pieces in, making sure not to crowd the pan, or the temperature drops instantly! Fry them for about 4 to 6 minutes, flipping them gently until they are beautifully golden brown and hit an internal temperature of 165°F. Pull them out immediately and place them on a wire rack—never paper towels—so the air can flow underneath and keep that bottom crisp!
Air Fryer Chicken Slider Recipe Instructions
This is my go-to when I’m making a smaller batch! Preheat your air fryer to 380°F (195°C). Remember those jagged edges we created with the double-dredge? We need to lightly spray those with cooking spray or a light drizzle of oil so they brown up nicely instead of staying dusty. Work in batches so you don’t overcrowd the basket—we need hot air circulating all around that coating if we want it to stay crisp! Pop them in and cook for 10 to 12 minutes total, making sure to flip them halfway through. They come out golden, crunchy, and ready for assembly!
Assembling Your Crispy Chicken Sliders with Honey Mustard
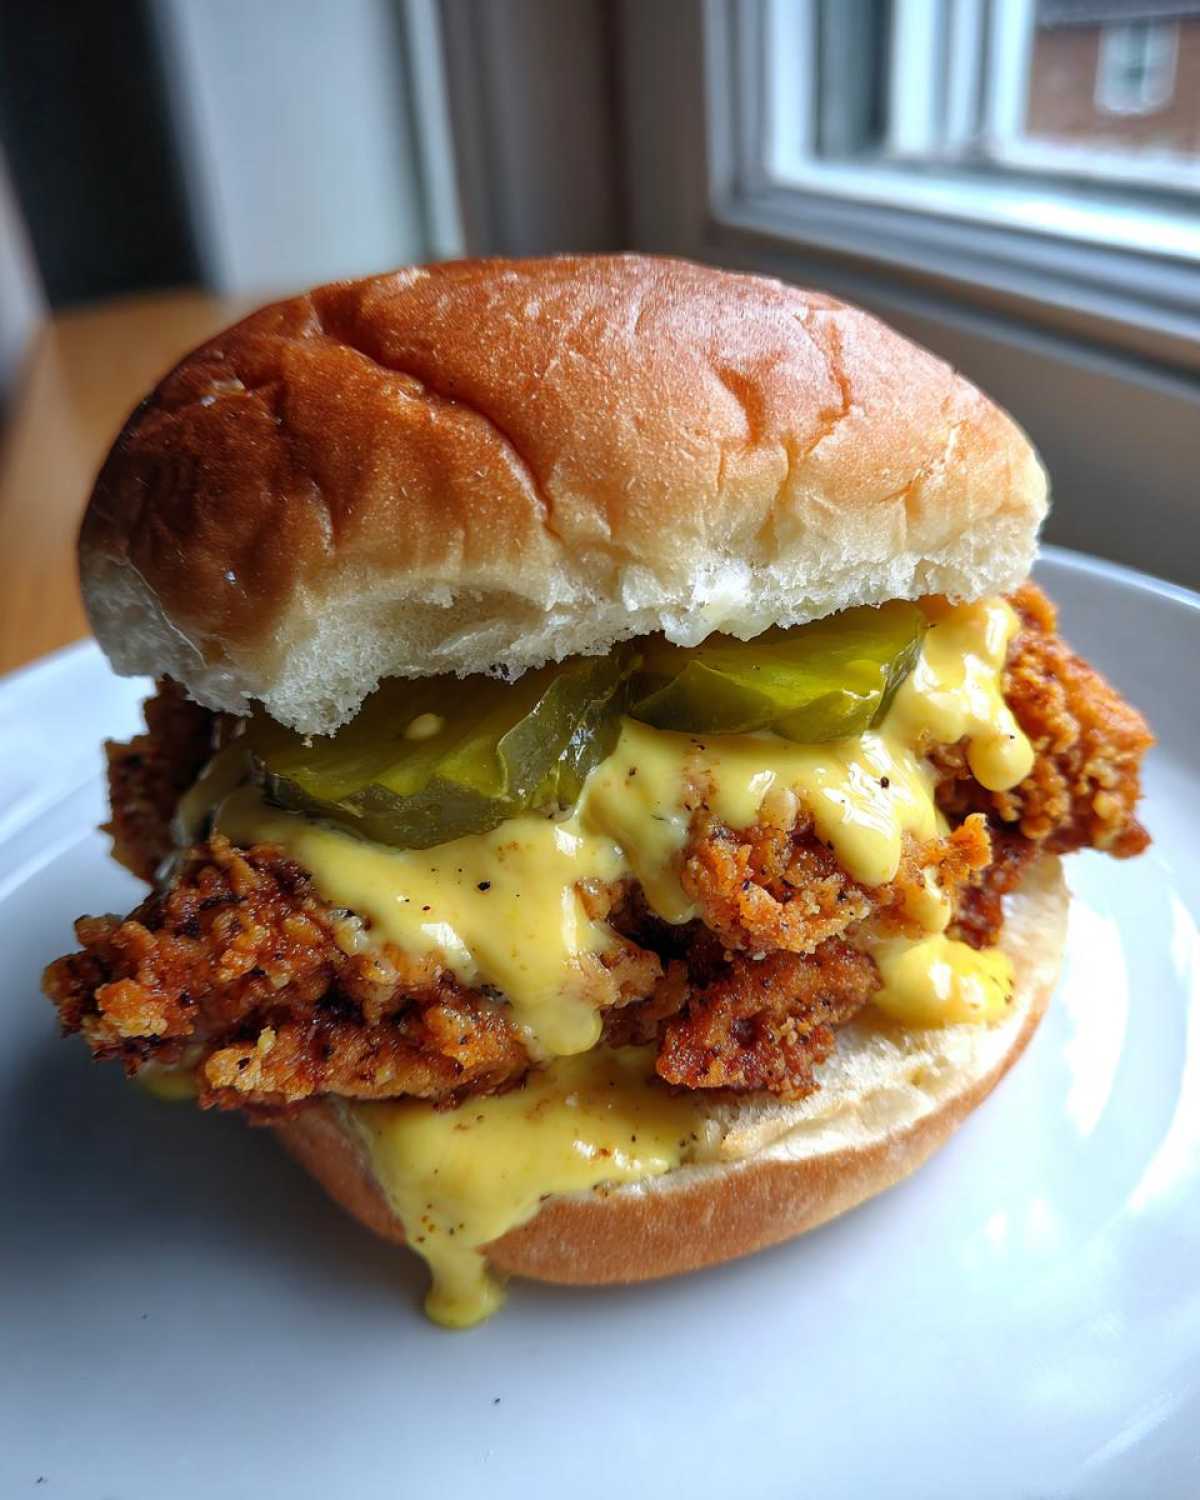
We made it! The chicken is perfectly crunchy, the sauce is zesty, and now it’s time for the best part: putting these amazing Crispy Chicken Sliders with Honey Mustard together. This stage should be fast, especially if you’re making these for a crowd. The key is to build the slider right before you serve it so that wonderful crust doesn’t absorb any moisture.
First, grab those slider buns—I am sticking with the Hawaiian rolls because their hint of sweetness is the perfect counterpoint to the savory chicken and tangy sauce. If you have a minute, I highly recommend slicing them open and giving them a quick minute under the broiler or in the toaster oven until they are just barely golden. This creates a little moisture barrier on the bun itself, saving your slider from sogginess later!
Now, layer them up! Place one perfectly cooked, piping-hot piece of crisp chicken onto the bottom bun half. Don’t be shy with my homemade honey mustard sauce—give it a good dollop right over the top of the chicken. It should start to drip down the sides just a tiny bit! Then, place two or three crinkle-cut dill pickle chips on top of the sauce. That acidity is necessary to cut through the richness.
Cap it off with the top bun. That’s it! Serve them immediately while the chicken is still hot and crackling. If you are having a big party and can’t assemble them all at once, keep all your cooked chicken warm in a low oven (around 200°F) on a wire rack, and assemble them just ten minutes before people start grabbing plates. If you want to see how I assemble other fun party foods, take a peek at my buffalo chicken sliders recipe for inspiration!
Tips for Success with Crispy Chicken Sliders
Even though this recipe is pretty straightforward, there are a few little insider tricks I use to make sure these are the absolute crunchiest things you’ve ever put on a slider bun. When you’re aiming for that perfect texture contrast, every little detail counts, especially when you’re planning ahead! Remember, the goal here isn’t just good, it’s audibly crispy!
Achieving the Crunchiest Coating Every Time
You’ve already done the hard work with the buttermilk soak and the double-dredge, but let’s talk about sealing the deal. The most important thing during that second dredging is that you **have** to press the flour mixture firmly onto the chicken. Don’t just toss it around; use your hands to really pat that flour onto the cutlet. It’s what creates those beautiful little jagged edges that turn into perfect crispy bits when they hit the hot oil!
Now, if you are trying to avoid deep frying altogether—maybe you’re worried about a big batch getting soggy while draining—you still want that crunch. My secret note was to mention baking, so here it is: if you choose to bake these, you absolutely must set the coated chicken on a wire rack placed over a baking sheet. Don’t lay them directly on the metal! This allows air to circulate underneath so the bottom doesn’t steam while the top gets glorious and crisp in the oven at 425°F for about 20 minutes. You can find more backup frying info over at my homemade chicken nuggets recipe page!
Make-Ahead and Serving Strategy for Parties
Hosting means you can’t always be right over the stove, right? If you’re worried about timing everything for guests, use this strategy: cook the chicken completely earlier in the day. Once they’re cooked through and drained, store the fried chicken in a single layer on a wire rack set inside a baking sheet. Pop that sheet into a really low oven—about 200°F—just to keep them warm. This prevents any moisture buildup that happens when you stack hot fried food in a container.
When it’s time to serve, lay out all your components buffet-style: toasted buns, warmed chicken, the honey mustard, and the pickles. This is the ultimate easy party sliders recipe setup! People can assemble their own, and I promise they’re much happier making their own perfect slider than eating one that’s been sitting around waiting for everyone else to show up. The sauce should always be the last thing added right before serving!
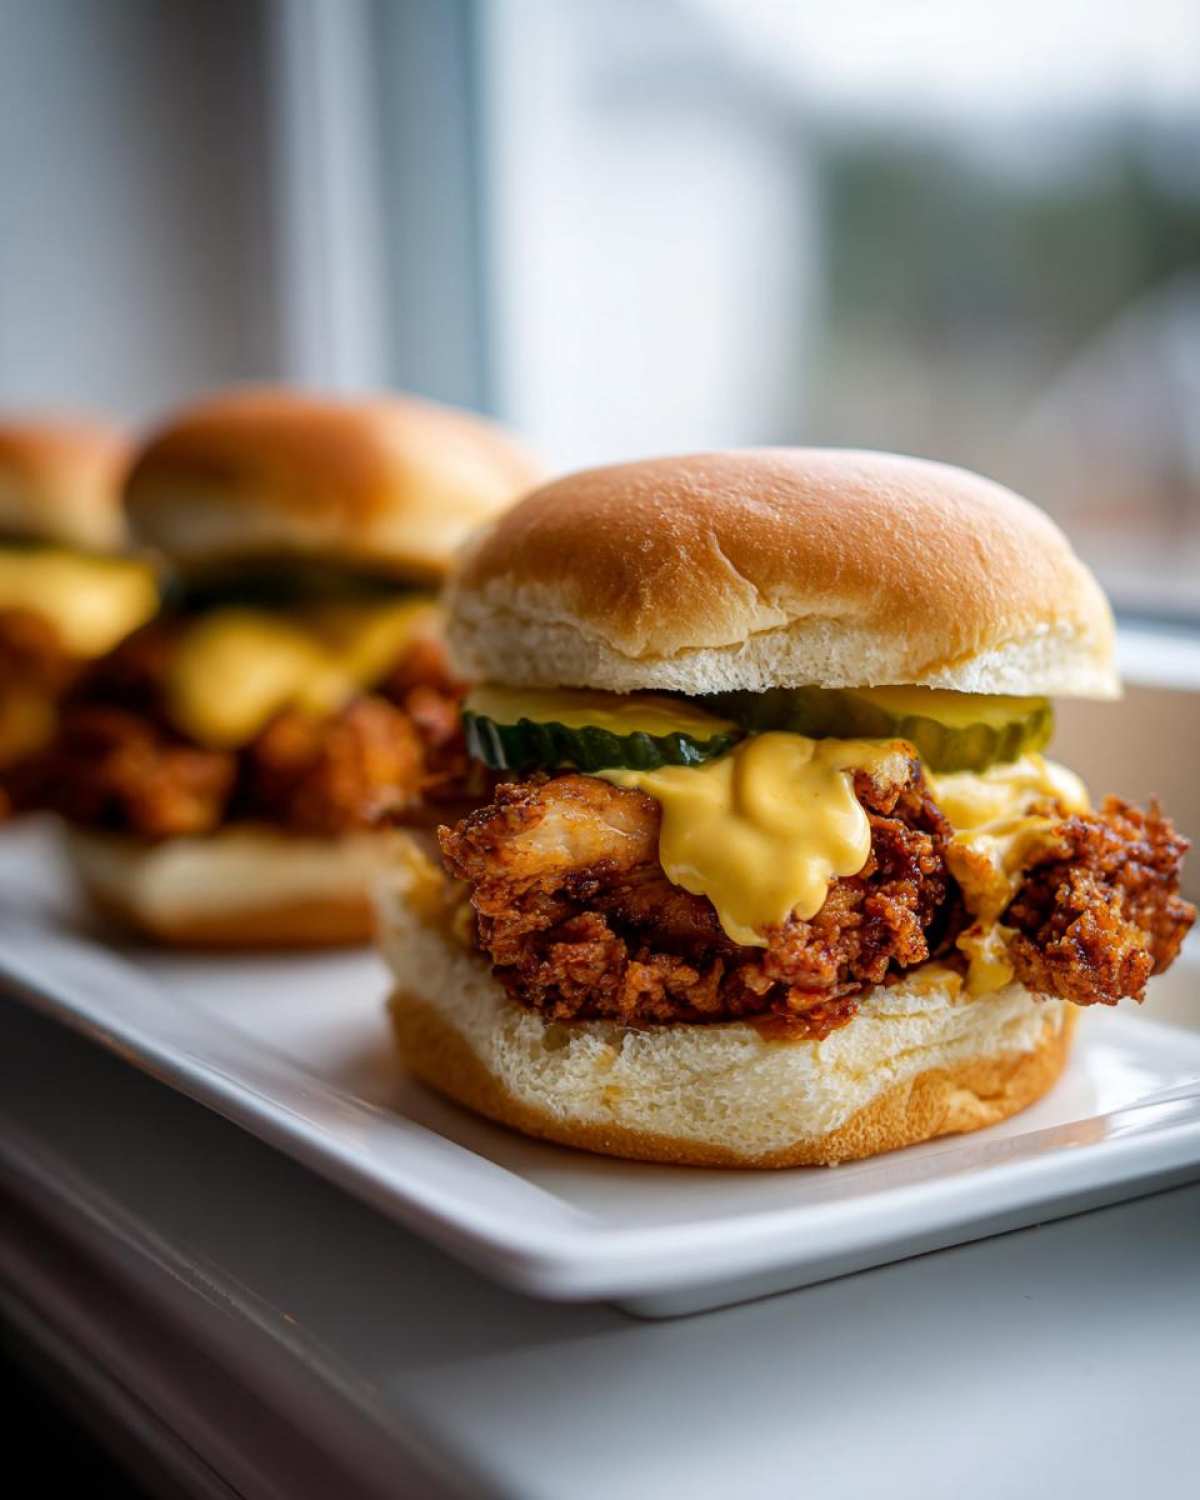
Variations for Sweet and Savory Chicken Sliders
I absolutely love that this base recipe for crispy chicken is so versatile. Once you nail that crunch, you can dress it up a million different ways! While the honey mustard is my number one, sometimes the mood calls for something totally different. Don’t feel like you have to stick to just one flavor profile for your slider bar!
When I’m looking to really turn up the heat—especially if I’m making these for a game day crowd—I go straight for a drizzle of hot honey. It’s not just about spice; it adds this amazing floral sweetness that plays perfectly with the savory coating. I have a fantastic recipe for hot honey feta chicken that gives you an idea of how to balance that sweet heat perfectly. You can use that same concept right here!
If you decided to leave the cayenne out of the honey mustard, you could easily transform these into a savory slider by making a quick garlic herb aioli instead. Just blend up some mayo, fresh parsley, a squeezed lemon wedge, and maybe a dash of smoked paprika. It’s a totally different vibe but just as delicious!
Another fun swap? Swap the dill pickles for thinly sliced bread-and-butter pickles. Those are seriously sweet, and when paired with the tangy Dijon in our original sauce, it really leans into that sweet and savory side of things. Or, for a real barbecue kick, skip the mustard entirely and top the chicken with a little shredded coleslaw and a sticky, smoky BBQ sauce. See? Endless possibilities once you have the perfect crispy foundation!
Frequently Asked Questions About Crispy Chicken Sliders with Honey Mustard
Whenever I share this recipe, people always have specific questions about keeping the crunch alive or swapping out ingredients. It’s totally normal! Making great mini chicken sliders how to make them last more than five minutes on the counter requires a little planning. Here are the things I get asked most often about these Crispy Chicken Sliders with Honey Mustard.
Can I make the honey mustard sauce ahead of time?
Oh, absolutely! That’s one of my favorite make-ahead tricks for party planning. You can whisk up that homemade honey mustard sauce—Dijon, honey, mayo, the works—and store it in an airtight container in the fridge for up to a full week. It’s great because it actually lets the flavors meld together a bit more the longer it sits. Just give it a good stir right before you pull those chicken pieces out of the fryer, and nobody will ever know you didn’t whip it up five minutes prior!
How do I prevent my Crispy Chicken Sliders with Honey Mustard from getting soggy?
This is the million-dollar question for any fried sandwich, right? The biggest culprit is usually assembly time. Rule number one: do not dress the chicken until you are ready to serve or until the guest is literally watching you assemble it. If you are making these for a lunch box or packing them up for a picnic, layer the components in this order: bottom bun, chicken, a layer of pickles, and then the sauce *only* on the top bun. That way, the sauce doesn’t directly saturate the bottom bread or the crust.
Also, remember draining the fried chicken on a wire rack? That’s critical. If you let it sit on paper towels, the trapped steam will soften the bottom crust instantly. Keep that air flowing!
What is the best bun substitute for this recipe?
While I preach the gospel of the Hawaiian roll because of its slight sweetness that complements the sauce, there are tons of good swaps! Brioche slider buns are fantastic because they are soft but hold up well to a little toasting. If you want something fluffier, small potato rolls work great, too. Honestly, even small sections of a good quality French baguette, sliced thick for a slightly rustic slider, can be amazing, though you’d probably want to skip the toasting step for those. If you’re feeling ambitious, I have a recipe for homemade refrigerator pickles that would elevate those toppings instantly!
Storage and Reheating Instructions
Okay, let’s talk about leftovers, which are rare because these sliders disappear so quickly! If you somehow manage to have extra crispy chicken pieces lying around, you absolutely must store them separately from the buns and the honey mustard sauce. Never, ever store an assembled slider if you intend to reheat it later; the chicken will turn into a sad, soggy mess overnight, and that is a tragedy we cannot allow!
For the extra chicken pieces, let them cool completely on the wire rack—that’s important! Once they are totally room temperature, transfer them to an airtight container. If you can fit them in a single layer with some paper towels underneath to catch any trace condensation, that’s ideal. They keep well in the fridge for about two or three days.
Reheating for Maximum Crispness
Listen up: The microwave is the enemy of crispy chicken. It heats the water molecules, making everything rubbery. We are reheating these the right way to bring back that crunch. If you have an air fryer, that’s hands-down the best tool for this job. Set it to about 375°F and pop the cold chicken pieces in for 4 to 6 minutes. They heat right back up, and that crust gets revitalized!
If you don’t have an air fryer, break out the good old oven. Preheat your oven to 400°F. Place the chicken pieces on a wire rack set over a baking sheet (just like we did when cooling them down!). Bake them for about 8 to 10 minutes. You want them piping hot all the way through, and the heat will help dry out that coating again. Once the chicken is hot, assemble it fresh with a new bun, a little sauce, and a pickle, and it’s just like eating them fresh!
Storing the Honey Mustard Sauce
The honey mustard sauce is super sturdy, which is great for leftovers! Since we used Dijon, honey, and vinegar, it holds up beautifully. Keep it covered tightly in the fridge; it’ll last easily for a week, maybe even ten days. If it seems a little stiff after sitting in the cold, just give it a really good whisk before you use it next time. If you decide you didn’t want to use the chicken right away, here is a link to our general culinary disclaimer just so you know how we handle ingredient sourcing and freshness advice!
PrintCrispy Chicken Sliders with Honey Mustard
Make crispy chicken sliders using a double-dredge method for maximum crunch. Serve them on small buns with homemade spicy honey mustard sauce and pickles.
- Prep Time: 20 min
- Cook Time: 15 min
- Total Time: 35 min
- Yield: 12 sliders
- Category: Appetizer
- Method: Frying or Air Frying
- Cuisine: American
- Diet: Low Lactose
Ingredients
- 1.5 lbs boneless, skinless chicken breasts, cut into 12 small, uniform pieces
- 1 cup buttermilk
- 1 teaspoon hot sauce (optional)
- 1.5 cups all-purpose flour
- 1/2 cup cornstarch
- 1 teaspoon salt
- 1 teaspoon black pepper
- 1 teaspoon paprika
- 1/2 teaspoon garlic powder
- Vegetable oil, for frying (or cooking spray for air frying)
- 12 small slider buns (Hawaiian rolls work well)
- 1/2 cup dill pickle chips
- For Honey Mustard: 1/2 cup Dijon mustard
- 1/4 cup honey
- 2 tablespoons mayonnaise
- 1 teaspoon apple cider vinegar
- 1/2 teaspoon cayenne pepper (optional)
Instructions
- Prepare the chicken: Place the chicken pieces in a bowl and cover them with buttermilk and hot sauce, if using. Let the chicken soak for at least 30 minutes, or up to 4 hours in the refrigerator.
- Mix the dry coating: In a separate shallow dish, whisk together the flour, cornstarch, salt, pepper, paprika, and garlic powder.
- Coat the chicken: Remove chicken pieces from the buttermilk, letting excess drip off. Dredge each piece thoroughly in the flour mixture, pressing firmly to adhere the coating. For extra crispiness, dip the coated chicken back into the buttermilk quickly, then dredge again in the flour mixture.
- Make the sauce: Whisk together the Dijon mustard, honey, mayonnaise, apple cider vinegar, and cayenne pepper (if using) in a small bowl until smooth. Set aside.
- Cook the chicken (Frying Method): Heat about 2 inches of vegetable oil in a deep skillet to 350°F (175°C). Carefully place chicken pieces into the hot oil, ensuring not to overcrowd the pan. Fry for 4-6 minutes, turning occasionally, until golden brown and cooked through (internal temperature of 165°F). Remove and drain on a wire rack.
- Cook the chicken (Air Fryer Method): Preheat the air fryer to 380°F (195°C). Lightly spray the coated chicken pieces with cooking spray. Air fry in batches for 10-12 minutes, flipping halfway, until golden and cooked through.
- Assemble the sliders: Slice the slider buns in half. Lightly toast the buns if desired. Place a piece of crispy chicken on the bottom bun. Top with a spoonful of honey mustard sauce and 2-3 pickle chips. Place the top bun on.
- Serve immediately.
Notes
- For the crispiest results, do not skip the double-dredge step. Press the flour onto the chicken firmly during the second coating.
- If you are baking these, place them on a wire rack set over a baking sheet and bake at 425°F (220°C) for 18-20 minutes, flipping halfway.
- For a party, serve the components buffet-style so guests can assemble their own sliders.
Nutrition
- Serving Size: 1 slider
- Calories: 350
- Sugar: 12
- Sodium: 650
- Fat: 18
- Saturated Fat: 3
- Unsaturated Fat: 15
- Trans Fat: 0
- Carbohydrates: 30
- Fiber: 1
- Protein: 18
- Cholesterol: 60