

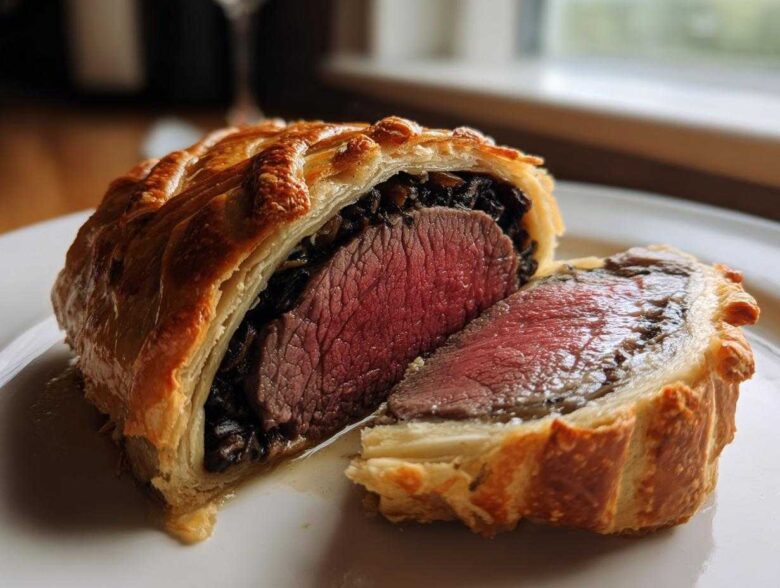
Oh, I love a dish that smells like serious luxury before it even hits the table! When folks talk about a true showstopper dinner, Beef Wellington is usually at the top of the list, right? It looks absolutely impossible, right? Like something only professional chefs attempt on TV. But let me tell you, after years of agonizing over holiday dinners and trying to impress everybody, I finally nailed down the beef wellington recipe so that *you* don’t have to stress. I’ve stripped away all the complicated fuss and figured out exactly where everyone messes up (hint: it’s usually the moisture!), so what you’re getting here is an approachable, yet undeniably elegant, version. Trust me, this is the one that earns you applause.
Why This Easy Beef Wellington Recipe Works for Any Occasion
I know what you’re thinking: Beef Wellington sounds like a whole weekend project! But this particular beef wellington recipe is designed to be your secret weapon for looking like a culinary genius without breaking a sweat. We’ve managed to keep the classic flavor profile—that earthy duxelles, the savory prosciutto, and the buttery crust—while making the process much less intimidating.
It’s all about setting yourself up for success. Here’s what makes this version consistently win at my dinner parties:
- You get that stunning, flaky puff pastry every single time.
- The beef stays perfectly tender and absolutely medium rare.
- The steps are broken down so clearly, you won’t feel lost.
- It’s an impressive dinner centerpiece that feels far more complicated than it actually is!
Achieving the Perfect Medium Rare Beef Wellington
This is the moment of truth, isn’t it? If you skip the searing magic, you’ll end up steaming the meat inside the pastry instead of roasting it. You absolutely must sear that filet hard and fast in a screaming hot pan until it gets a gorgeous dark crust. My biggest trick? After searing and cooling, I always poke it gently. If it feels firm on the outside but springs back softly when pressed, you know the inside is behaving itself regarding the internal temperature!
Essential Ingredients for Your Beef Wellington Recipe
Okay, now that you know this whole spectacular dish is achievable, we need to talk about what goes into it. Honestly, for a dish this grand, the quality of your starting lineup really matters, especially when tackling the classic beef wellington recipe. You can’t skimp on the main components if you want that showstopper result we’re aiming for. I’ve learned over the years that good technique is everything, but it only works if the ingredients are ready to cooperate!
Putting together the mushrooms, the beef, and the pastry requires attention long before it ever sees the oven. It’s all about preparing each piece perfectly, which we’ll cover in the steps to follow.
Ingredient Notes and Substitutions
Let’s focus on the star first: the beef tenderloin! You absolutely must choose the center-cut here. Why? Because it’s the most uniform thickness, which means it cooks evenly, giving you that beautiful medium-rare edge-to-edge. Don’t try to substitute with a cheaper cut; the texture just won’t hold up to the wrapping process. If you can’t find prosciutto—though I highly recommend it for flavor and fat—you can use very thin slices of good quality deli ham in a pinch. And that Dijon mustard slathered on the seared beef? That’s not just for flavor, folks; it helps that mushroom duxelles—our binding agent—stick tight to the meat!
Step-by-Step Instructions for the Classic Beef Wellington Recipe
Alright, let’s get down to business! This is where we build our spectacular dinner. Following the instructions for this beef wellington recipe involves four main acts: searing the beef, cooking the duxelles, wrapping the layers, and finally, the bake. I can’t stress this enough: the resting and chilling times aren’t suggestions; they are mandatory insurance policies against a soupy mess! I’ve learned through many failed attempts that getting everything dry before wrapping is the trick to an impressive dinner success story.
First, we season that gorgeous tenderloin really well with salt and pepper. Crank your skillet up high—I mean seriously hot—and get that olive oil shimmering. You’re not cooking the beef through here; you’re just putting a beautiful, deep brown armor on the outside. Two minutes per side is usually plenty before you pull it out. Once it cools just a touch, brush every single bit with that Dijon mustard. That layer seals in flavor and just helps everything stick beautifully in the next steps. Don’t forget to check out our disclaimer before you start messing with high oven temperatures!
Mastering the Mushroom Duxelles Recipe
If you remember one thing from this whole process, make it this: when cooking the mushroom duxelles, you must cook out every drop of water. I mean it! If that mushroom mixture is even slightly damp, I promise you, you will end up with a soggy bottom on your Wellington. Pulse your mushrooms, shallots, and thyme until they are super fine—like coarse sand. Then, spread it in your pan over medium heat and stir until it looks dry and almost paste-like. That little splash of white wine just concentrates the flavor before you spread it thinly over your prosciutto layer.
The Critical Chilling and Wrapping Process for Beef Wellington
Once you have the duxelles spread over the overlapping prosciutto blanket, carefully place your mustard-coated beef on one end. Now, grab that plastic wrap tight! This is your shaping tool. Roll the whole thing up super snugly, twisting the ends like you’re wrapping a giant, expensive piece of candy. That tension is what gives the final product its neat, elegant cylinder shape when we finally put it in the pastry. You must chill this tightly wrapped log for at least thirty minutes—honestly, an hour is even better—to let everything set up rock solid before we attempt the final pastry hug.
After the first chill, roll out that beautiful all-butter puff pastry. Take the plastic off the beef log and give it a roll in the pastry seam-side down. Make sure you brush those edges with egg wash! You want the pastry to seal completely so no steam escapes to ruin your beautiful crisp crust. A final 15-minute chill on the baking sheet helps the casing relax before it hits that hot oven. I always try to time my little chilling breaks with cleaning up all the knives and cutting boards—it keeps the kitchen calm!
Tips for a Flaky Pastry Main Course
If you’ve followed our rules about keeping the duxelles dry and chilling the wrapped beef, your pastry is already halfway to crisp perfection! However, the final moments before baking are where we can really seal the deal on that beautiful, flaky crust we all dream about. Nothing is sadder than a Wellington where the pastry looks pale or splits open too much—that means the dough got warm or we overworked those delicate layers.
A huge secret here is making sure your puff pastry stays cold right up until it hits the oven temperature. If your kitchen is warm, don’t hesitate for a second to pop the whole wrapped log back into the fridge for 15 minutes, even if you think it looks fine. Overworking the dough is just asking for the butter to melt into the flour, which stops that beautiful separation we need for flakiness. Keep your movements light and fast during the final wrap!
Scoring and Egg Wash for the Best Beef Wellington
Scoring the top isn’t just for looks, though mine always comes out looking like a fancy holiday gift! Those light cuts you make with your sharpest knife give the steam somewhere to escape so it doesn’t blow out huge seams elsewhere on the pastry. For the egg wash, ditch just using the yolk. A full beaten egg, maybe with a tiny splash of water or milk, gives you the richest, deepest golden shine. Brush it over the pastry generously, covering every inch, right before it goes into the preheated high heat.
How to Make Beef Wellington: Serving and Storage
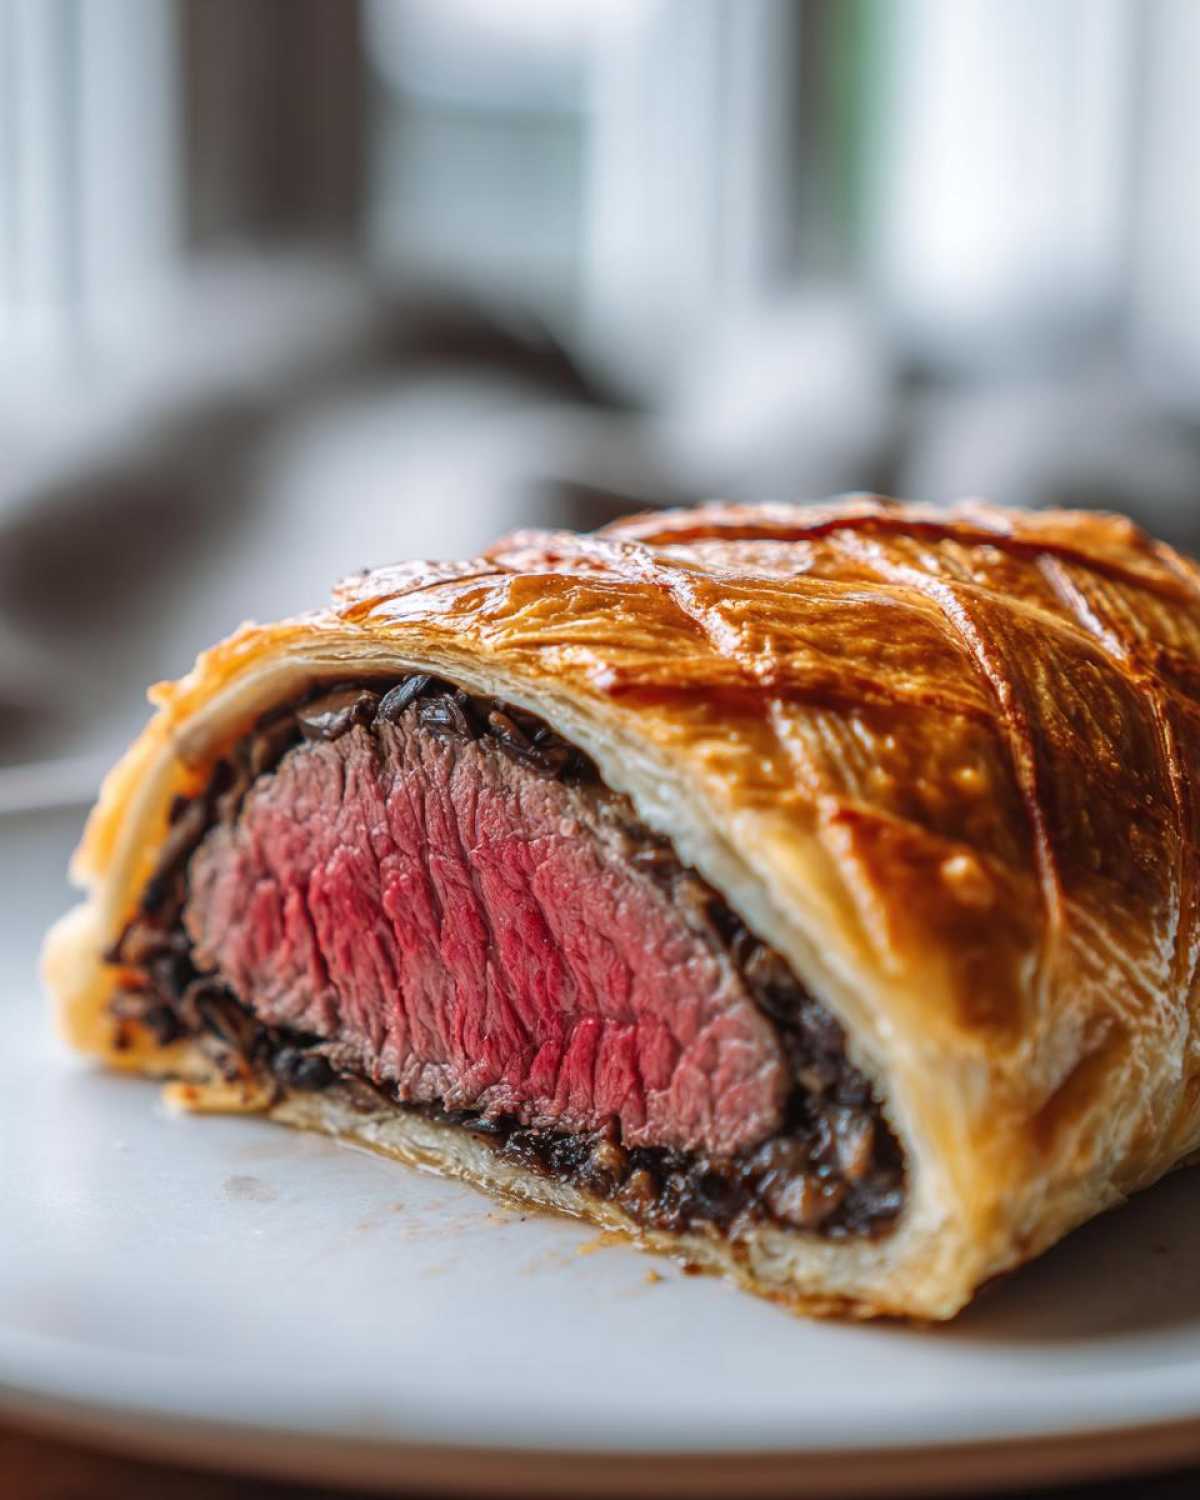
You’ve done it! Your beef wellington recipe has transformed into a golden masterpiece bubbling slightly at the edges. Now, brace yourself, because the hardest part is resisting immediate gratification. You absolutely must let this beauty rest! Taking it straight from the oven to the cutting board is a recipe for disaster. All those beautiful juices you worked so hard to keep inside will immediately flood out onto your counter, leaving you with dry beef and a soggy plate.
I insist on a strict 10-minute rest time. Tent it loosely with foil—don’t wrap it tightly, or the crust will steam and turn soft! Just let it sit there quietly while you make your sauce or toss a quick salad. That resting period allows the muscle fibers in the beef to relax and reabsorb all that wonderful moisture back into the meat. This is key to getting a tender, juicy slice every time you make this impressive dinner. This rest is non-negotiable for a perfect medium-rare beef wellington.
What about leftovers? Well, they happen, even though my family tries to polish the whole thing off! If you have any remaining cooked beef wellington recipe, the best way to store it is in an airtight container in the fridge. It’s good for about three days.
Reheating is always tricky because we want that flaky pastry back! Don’t dare put it in the microwave; you’ll regret it instantly. The absolute best way is to reheat slices (or the whole thing, if you dare attempt only slicing what you need) in an oven or toaster oven set low—around 300°F (150°C). Give it maybe 10 to 15 minutes. You’re aiming to gently warm the beef and crisp the pastry back up, not cook it further. Keep an eye on it, especially if your slices are thick, but this method brings back almost all of that initial glory!
Frequently Asked Questions About the Beef Wellington Recipe
I get so many messages about timing and temperature when folks try to make this dish, which is totally understandable since we want a successful Showstopper Dinner! While I tried to cram all my years of trial-and-error into the main recipe instructions, it’s always good to have a quick FAQ section just in case you hit a snag or need a last-minute reassurance on your Easy Beef Wellington Recipe.
Can I prepare the Beef Wellington ahead of time?
Oh yes, you absolutely can! This is one of my favorite things about this recipe, actually. You only need to make sure the Wellington is completely wrapped in the pastry shell, sealed well, and brushed with the egg wash. Once it’s fully assembled, wrap it tightly in plastic wrap—make sure that pastry has no air gaps—and pop it right into the fridge. I find it holds up beautifully for about 12 hours, maybe even up to 24 if your kitchen wasn’t too warm during assembly. Just make sure before baking, it sits on the counter for about 30 minutes so it’s not ice-cold straight from the fridge; that helps the pastry cook evenly. You can find more contact info if you need specific help right before baking over here: get in touch!
What temperature should the oven be for the best Beef Wellington?
We cook this dish hot and fast, that’s the secret to that gorgeous, crispy crust on the puff pastry main course! You should absolutely preheat your oven to 400°F (200°C). High heat shocks the pastry, causing the butter layers to instantly create steam, which lifts them up and makes them flaky. If you start it too low, the butter starts to melt before it steams, and then you end up with greasy, flat pastry instead of a beautiful, golden wrap around your medium-rare beef tenderloin in pastry. Don’t skimp on that preheat time!
Nutritional Estimates for This Gourmet Beef Recipe
So, let’s be real for a moment. When you’re making a showstopper meal like this, you aren’t really thinking about macros, are you? But since you asked, I went ahead and pulled the estimated numbers from the recipe details! Even though this is a Gourmet Beef Recipe, it’s surprisingly balanced if you stick to the leaner cuts we used.
Based on four generous servings, here is what you can generally expect. Remember, these figures are just estimates, folks! If you use heavier pastry or sneak in more buttery duxelles, those numbers are gonna jump up. I always find my leftovers are surprisingly low in sugar, which is a nice bonus!
- Calories: Around 550 per slice
- Fat: Roughly 35g (a little high, but hello, puff pastry!)
- Protein: A healthy 38g, thanks to that beef tenderloin!
- Carbohydrates: About 25g, mostly coming from the flour in the pastry.
It’s a rich meal, no doubt, but perfect for a special occasion centerpiece. And before you even think about what to serve alongside it, make sure you take a peek at our privacy policy just so you know how we cook up all our favorite tips!
Share Your Perfect Beef Wellington Recipe Experience
Now that you have all my insider secrets and the full breakdown on this incredible beef wellington recipe, I truly can’t wait to see what you create! Seriously, there is nothing better than getting a message from someone who was nervous about tackling this dish, only to smash it out of the park and send me a picture of their perfect, golden Wellington.
Did you nail the medium-rare center on your first try? Was your duxelles perfectly dry? I want the whole story! Don’t be shy; let me know how it went down in your kitchen.
Take a snap of your finished masterpiece—I love seeing them sitting proudly on the dinner table! Feel free to tag me on social media so I can celebrate with you. Or, just drop a comment right down below. Tell me what you thought of the process, and be sure to give the recipe a star rating so others know it’s worth the effort. Happy baking, and enjoy that showstopping dinner!
PrintThe Ultimate Easy Beef Wellington with Classic Mushroom Duxelles

Follow these steps to create a classic Beef Wellington featuring perfectly seared beef tenderloin wrapped in savory mushroom duxelles, prosciutto, and flaky puff pastry.
- Prep Time: 45 min
- Cook Time: 35 min
- Total Time: 90 min
- Yield: 4 servings
- Category: Dinner
- Method: Baking
- Cuisine: British
- Diet: Low Fat
Ingredients
- 2 lb beef tenderloin center cut, trimmed
- 2 tablespoons olive oil
- 1 tablespoon Dijon mustard
- 1 pound cremini mushrooms, roughly chopped
- 2 shallots, chopped
- 2 sprigs fresh thyme, leaves only
- 1/4 cup dry white wine
- Salt and black pepper to taste
- 12 thin slices prosciutto
- 1 (14 ounce) package all-butter puff pastry, thawed
- 1 large egg, beaten (for egg wash)
Instructions
- Season the beef tenderloin generously with salt and pepper. Heat the olive oil in a large skillet over high heat. Sear the beef on all sides until deeply browned, about 2 minutes per side. Remove the beef and let it cool slightly. Brush the cooled beef all over with Dijon mustard.
- Prepare the duxelles: Pulse the mushrooms, shallots, and thyme leaves in a food processor until finely chopped. Place the mixture in the same dry skillet over medium heat. Cook, stirring often, until all the moisture has evaporated, about 10 to 15 minutes. Add the white wine and cook until evaporated. Season with salt and pepper. Spread the duxelles mixture onto a plate to cool completely.
- Lay a large piece of plastic wrap on your work surface. Arrange the prosciutto slices on the plastic wrap, overlapping them slightly to form a rectangle large enough to wrap the tenderloin.
- Spread the cooled duxelles evenly over the prosciutto layer. Place the mustard-coated beef tenderloin at one end of the prosciutto.
- Use the plastic wrap to tightly roll the prosciutto and duxelles around the beef. Twist the ends of the plastic wrap to secure a tight cylinder shape. Refrigerate for at least 30 minutes, or up to 24 hours, to firm up the shape.
- On a lightly floured surface, roll out the puff pastry into a rectangle large enough to fully enclose the beef. Remove the plastic wrap from the beef log. Place the beef log onto the pastry. Brush the edges of the pastry with the beaten egg wash.
- Wrap the pastry tightly around the beef, trimming any excess pastry. Seal the seams well. Place the Wellington seam-side down on a baking sheet lined with parchment paper. Brush the entire surface with the remaining egg wash. Chill for another 15 minutes.
- Preheat your oven to 400°F (200°C). Score the top of the pastry lightly with a sharp knife in a decorative pattern, being careful not to cut all the way through.
- Bake for 30 to 35 minutes for medium-rare (internal temperature of 125°F or 52°C). Check the internal temperature using a meat thermometer inserted into the thickest part.
- Let the Beef Wellington rest on a cutting board for 10 minutes before slicing into thick portions and serving.
Notes
- For a perfect medium-rare, use a reliable meat thermometer. Cooking time varies based on the thickness of your tenderloin.
- If the pastry browns too quickly during baking, loosely tent the Wellington with aluminum foil.
Nutrition
- Serving Size: 1 slice
- Calories: 550
- Sugar: 2
- Sodium: 450
- Fat: 35
- Saturated Fat: 15
- Unsaturated Fat: 20
- Trans Fat: 1
- Carbohydrates: 25
- Fiber: 3
- Protein: 38
- Cholesterol: 130