

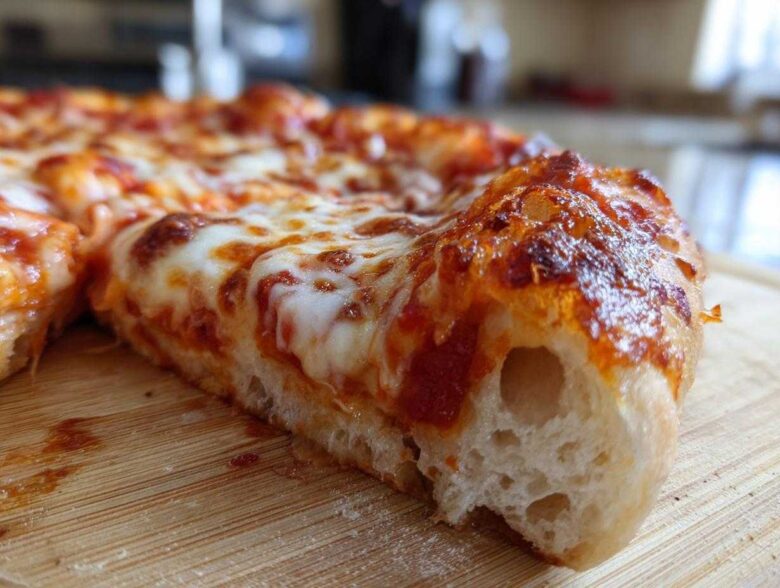
Oh, friend, let me tell you! There is nothing—absolutely nothing—that beats the smell of a perfectly baked homemade pizza filling your kitchen. Forget delivery! Once you nail the foundation, which is totally the dough, you realize this is actually way easier than people think. After years of testing every trick in the book, I finally landed on what I genuinely call the Best Easy Homemade Pizza Dough Recipe with Classic Red Sauce. Trust me, this recipe takes the panic out of from scratch pizza making. We aren’t doing long, complicated fermentation times here; we’re making real, delicious pizza tonight! If you want to know more about my journey in the kitchen, you can check out my story over at my little corner of the internet.
Why You Will Make This Easy Homemade Pizza Recipe Again and Again
This isn’t some fussy restaurant recipe that takes all day. I designed this recipe for real weeknights. It’s ridiculously satisfying, and you’ll be shocked at the results you get with minimal fuss. Here’s why this is going to become your go-to:
- It’s lightning fast! You get that incredible crust texture in under 90 minutes total.
- The dough is forgiving. It practically kneads itself, which is perfect if you’re new to making dough at home.
- The sauce is simple but bright—it tastes so much fresher than anything in a jar.
- It’s incredibly versatile; you can swap toppings every time you make it.
Essential Equipment for Your Homemade Pizza Night
Okay, so you don’t need a massive, imported brick oven, thankfully! But having the right gear makes the process so much smoother, especially when you’re dealing with sticky dough. I’ve pared down my tools list to only the essentials that really make a difference in the final bake.
You’ll definitely want a big, sturdy mixing bowl. When you’re activating the yeast, you need room for that foamy mixture to bubble up without overflowing everywhere. Trust me, I learned that the hard way!
For handling, a decent pastry cutter or bench scraper is a lifesaver when you are cutting the dough in half, but honestly, a heavy-duty spoon works wonders for the initial mixing stage. And please, get yourself a good non-stick baking sheet for now. If you’re feeling ambitious later, you can upgrade to a pizza stone or steel, which locks in that amazing heat for a crispier bottom, but the sheet pan is perfect for your first attempts.
- Large mixing bowl for activating yeast and initial dough mixing.
- Measuring cups and spoons—precision matters with yeast!
- A flat surface lightly dusted with flour for kneading.
- A plastic bench scraper (optional, but helps with sticky dough).
- A standard heavy-duty baking sheet or a pizza stone/steel, if you have one.
Ingredients for the Best Homemade Pizza Ever: Dough and Sauce
This is where the magic starts, and I can’t stress enough: measuring properly here makes or breaks your entire homemade pizza experience! We are not guessing with yeast or water temperature; this is the foundation, so treat these measurements with respect. We keep the sauce incredibly simple because fresh ingredients shine best, leaving the heavy lifting to that wonderful dough.
For the Homemade Pizza Dough
You need the absolute right temperature for the water—if it’s too hot, you kill your yeast, and if it’s too cold, they just sulk! Aim for that sweet spot, about 105 to 115 degrees Fahrenheit. You’re using all-purpose flour here; we save the fancy stuff for later if we get really adventurous later on.
- 1 1/2 cups warm water (Make sure it’s 105-115°F!)
- 2 1/4 teaspoons active dry yeast
- 1 teaspoon sugar (This feeds the yeast, so don’t skip it!)
- 3 3/4 cups all-purpose flour, plus more for dusting
- 2 tablespoons olive oil
- 2 teaspoons salt
For the Simple Pizza Sauce Recipe
I used to try to simmer sauces for hours, thinking that was the secret. Nope! For an easy, no-fuss recipe, high-quality crushed tomatoes stirred with strong, fresh flavors are all you truly need. Don’t skimp on the oregano; it gives it that classic pizza parlor aroma.
- 1 (15 ounce) can crushed tomatoes (Get fire-roasted if you can—wow!)
- 1 clove garlic, minced very finely
- 1 teaspoon dried oregano
- 1/2 teaspoon salt (for sauce)
- 1/4 teaspoon black pepper (for sauce)
- 1 1/2 cups shredded mozzarella cheese (Save this for assembly!)
Step-by-Step Instructions for Perfect Homemade Pizza Dough
Alright, let’s get our hands dusty! Making the dough is the most crucial part of getting a fantastic homemade pizza, but don’t let it intimidate you. We are focusing on three things here: waking up the yeast, mixing everything until it just comes together, and then giving it time to relax and grow. Follow these steps, and you’ll have a crust that’s got the perfect chew, guaranteed!
And here’s a little secret I learned from my friend Maria, who makes the best homemade pizza ever: If you have extra time—like an extra day—put the dough in the fridge after kneading and let it hang out overnight. That slow, cold rise develops so much more flavor and gives you that amazing, slightly charred, chewy pizza crust method everyone talks about. But if you’re dreaming of pizza tonight, don’t worry, the warm rise works great too!
Activating Yeast and Mixing the Homemade Pizza Dough
This is your moment of truth. If your yeast isn’t happy, your dough won’t rise. Start by grabbing that warm water—remember, not too hot!—and mix in the teaspoon of sugar right away. Sprinkle the yeast over the top, give it a gentle swirl, and just walk away for about ten minutes. You absolutely must wait for it to get foamy on top! If it looks like cappuccino foam, you’re golden. If it’s flat, toss it and start over; that yeast is dead, unfortunately.
Once you have that beautiful foam, it’s time to add the dry ingredients. Pour in the flour and the salt, along with your olive oil. I use a big wooden spoon here because I don’t want to overwork the gluten yet. Stir until it gets shaggy and it looks like a mess of flour chunks holding hands—that’s exactly what we want before we move to the counter. If you’re looking up a quick pizza night ideas, this is the step that saves you time later!
Kneading and Allowing the Homemade Pizza Dough to Rise
Now, dump that shaggy mess onto a surface you’ve dusted lightly with some extra flour—don’t use too much or your dough will end up stiff! This is where you get to “work out the kinks.” You need to push down and fold, push down and fold. You’re going to knead this for a solid five to seven minutes. I know it sounds like forever, but you’re looking for something totally transformed from that messy lump. It should feel soft, springy, and smooth; when you poke it, the dough should slowly spring back at you instead of staying indented. That means you’ve developed the gluten nicely!
When it’s perfectly smooth and elastic, lightly oil a clean bowl—I usually use whatever olive oil I have handy—and drop the dough ball in. Turn it over so it gets a nice slick coat of oil. Cover it tightly with plastic wrap or a kitchen towel. Now, find the warmest, draft-free spot in your kitchen. Let it sit for an hour to an hour and a half. We are waiting for it to double in size. If you want details on handling your dough after this first rise, feel free to check out my official baking disclaimer information, just in case things look a little strange!
Assembling and Baking Your Homemade Pizza
The dough is big and beautiful now—time for the fun part! Before we do anything else, crank that oven way up! Seriously, for this kind of homemade pizza, you want the heat screaming hot, right around 475°F (245°C). A hot oven is what gives you that crisp bottom you dream about.
Once preheated, gently punch all that beautiful air out of your risen dough. It almost feels wrong, but it’s necessary! Then, I usually cut the whole batch right down the middle because this recipe makes two medium pizzas, so let’s just focus on one for now. Don’t fight the dough if it tries to shrink back; cover the half you aren’t using while you work with the first piece.
Shaping the Crust and Applying Sauce for Homemade Pizza
Lightly oil your baking sheet—or dust your stone if you went that route—and gently stretch or roll out your first half of dough. I aim for about a 12-inch circle, but honestly, whatever shape fits the pan is fine by me. Make sure you leave a good inch border all the way around; that’s where you get that puffy, chewy edge!
Now, for the sauce! Remember that simple red sauce we mixed while the dough was rising? Take half of it and spread it evenly over the surface. You don’t want a soup layer, so go easy and aim to leave that border clean—that’s going to puff up into the crust. Finally, sprinkle half of your shredded mozzarella right over the sauce. Don’t add the toppings yet! Cheese goes down first to protect the dough from getting soggy underneath all those delicious toppings you’ll add next time.
Baking Time for Golden Homemade Pizza
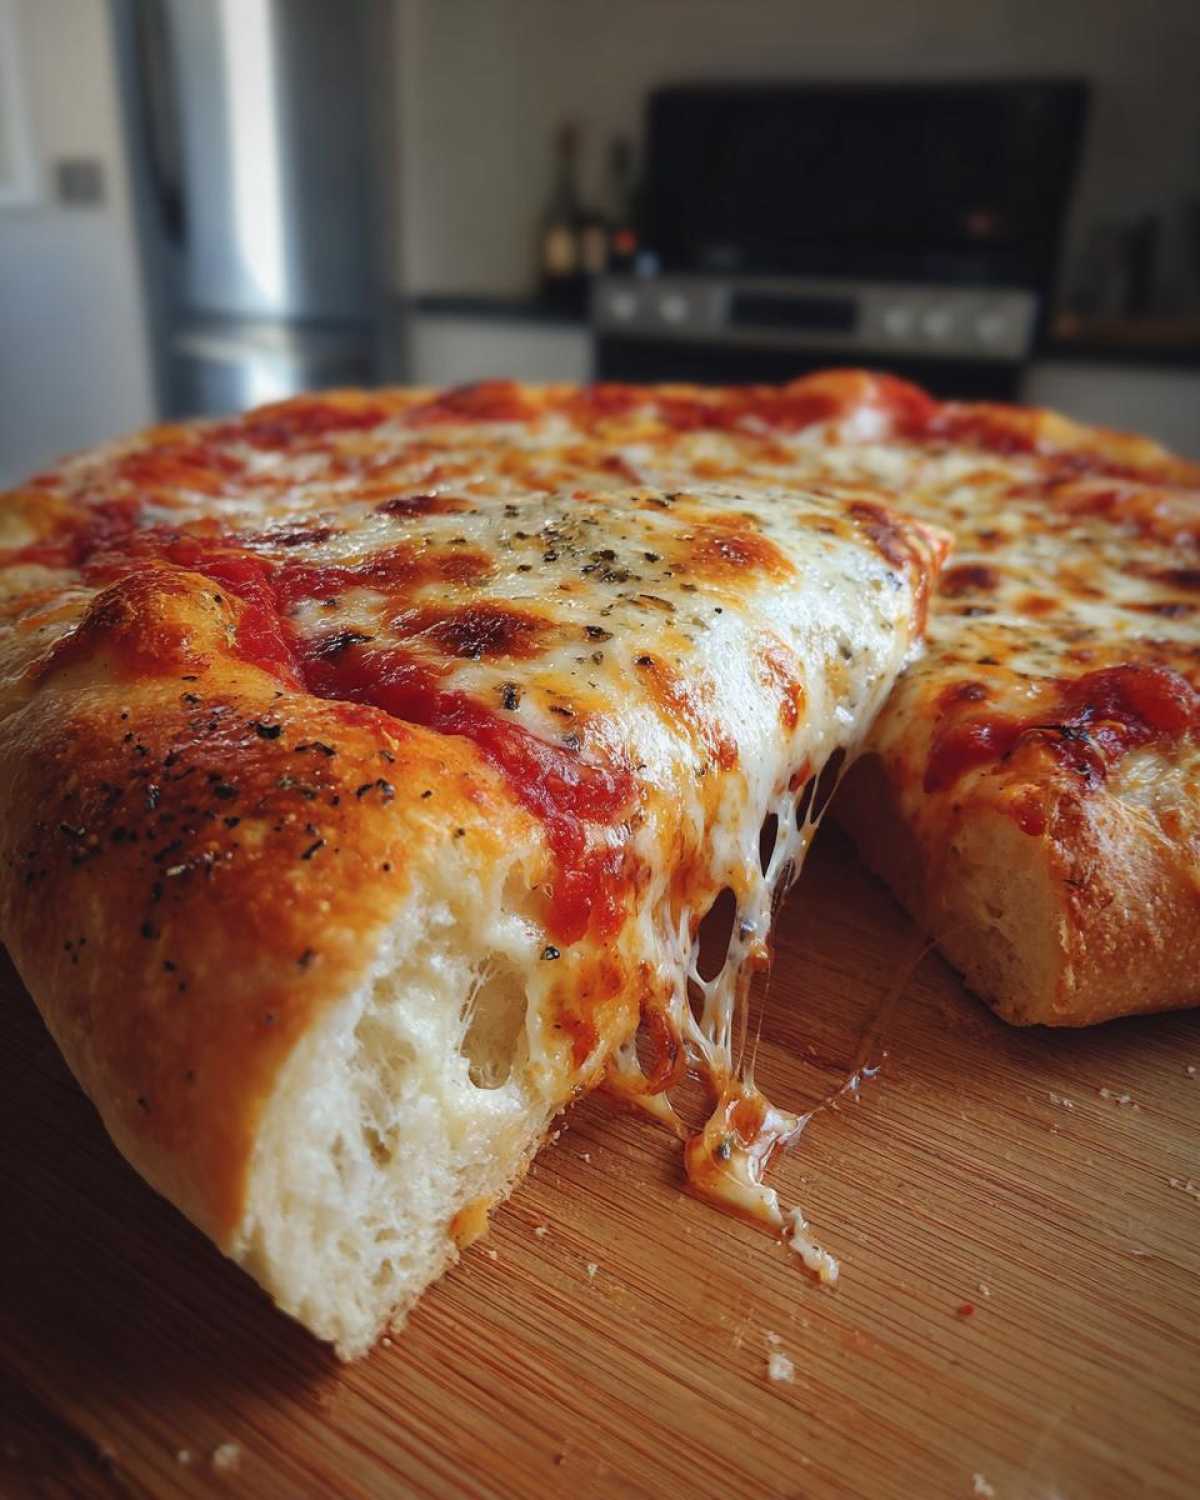
Slide that baby into that blazing hot oven. You are looking for a baking time of about 12 to 15 minutes. Seriously watch it! The visual cues are everything here. You want the crust edges to turn a deep, satisfying golden brown, and the cheese should be totally melted, bubbly, and maybe just starting to get those lovely little browned spots on top. If you’re making your homemade pizza for the first time, pull it out right when the cheese looks perfect. Once it’s out, let it cool on a wire rack for just a minute or two before slicing. That little bit of rest time helps the cheese set up so it doesn’t slide right off when you cut into it!
Ingredient Notes and Substitutions for Homemade Pizza
I know sometimes we don’t have exactly what’s listed, and running to the store for one ingredient is the worst. The good news is that with this basic dough recipe, you have a lot of flexibility! But remember, for truly spectacular homemade pizza, a few elements just shouldn’t be messed with. I’m thinking specifically about the heat you use on your yeast and, honestly, the tomatoes for the sauce.
If you are using crushed tomatoes for your sauce—which you should be!—please, try to grab the best quality you can find. My notes mention fire-roasted if you see them, but seriously, a truly good brand of crushed tomatoes just tastes cleaner and sweeter after baking. It makes a huge difference in the final flavor profile, trust me on this one.
Now, let’s talk about that crust texture! If you read my instructions and thought, “I don’t want pizza tonight, maybe tomorrow,” you’re in luck! That chewy pizza crust method I mentioned briefly? It’s my absolute favorite way to make dough. Instead of letting it rise for just an hour on the counter, you cover that oiled bowl and put it straight into the refrigerator. It slows everything down, letting those flavors deepen beautifully while the texture gets amazing. Cold fermentation is your best friend for any savory bread, including this dough. You can let it chill for up to three days, just pull it out about an hour before you plan to shape it so it warms up just enough to stretch easily.
As far as substitutions go, olive oil is pretty standard, but if you only have, say, canola oil, it will work in a pinch for the dough where the flavor matters less than the fat content. Similarly, if you only have bread flour instead of all-purpose, go ahead and use it! Bread flour just has slightly more protein, which can make the dough a little tougher, but for making pizza dough at home as a beginner, it’s a perfectly usable switch.
Delicious Pizza Toppings Ideas for Your Next Homemade Pizza
Since we’ve mastered the dough, now we get to the really fun part: deciding what amazing things we’re going to pile on top before baking! The beauty of this classic base is that it handles pretty much anything you throw at it. You can go totally simple or get really gourmet. This perfect canvas makes every topping combination taste amazing when you are making a true homemade pizza.
If you’re looking for some quick pizza night ideas to stop the family shouting match over pepperoni vs. veggies, here are a few tried-and-true combos that always disappear fast in my house:
The Classic Pepperoni (You Can’t Go Wrong!): This is the original for a reason, right? Keep the basic red sauce, add a good layer of mozzarella—I always add a little sprinkle of smoked provolone too, just for extra flavor depth!—and then load up the pepperoni. I put half the cheese down first, then layer half the pepperoni, then the rest of the cheese, and then whatever pepperoni is left on top. This keeps the crispiness while wrapping some slices in cheesy goodness.
BBQ Chicken (Messy and Wonderful): This is a fantastic way to use up leftover rotisserie chicken! Skip the crushed tomato sauce entirely. Instead, brush the dough lightly with olive oil (or maybe a thin layer of that leftover BBQ sauce directly onto the crust). Top with mozzarella, cooked diced chicken, thinly sliced red onion, and maybe some fresh cilantro if you like it. Skip the final baking sauce and just drizzle more BBQ sauce on top right after it comes out of the oven. It’s sweet, smoky, and absolutely addictive.
Veggie Supreme (Get Those Greens In): If you want to load up on color, this is your chance. Use the classic red sauce. I like to pre-sauté my mushrooms and onions for just five minutes before putting them on the pizza because raw veggies release too much water while baking and make the center soggy. Layer on sliced bell peppers, black olives, mushrooms, and maybe some thinly sliced zucchini. This is one of those family pizza night recipes that makes everyone feel like they got exactly what they wanted!
Remember to always check the moisture content of whatever topping you choose! If you are using watery ingredients, a quick sauté first or keeping the sauce layer thin is your secret weapon for keeping that wonderful crust crisp. Have fun experimenting with different delicious pizza toppings ideas!
Storage and Reheating Instructions for Homemade Pizza
So, you made the absolute best batch of homemade pizza the world has ever seen, and you still have a couple of slices left over? Lucky you! How you store and reheat this perfection makes all the difference in preserving that crust quality we worked so hard to achieve. Trust me, microwaving pizza is a crime against crust, so we are skipping that route entirely if we can help it!
First things first: you must let the pizza cool down slightly before you store it. If you wrap it up while it’s still piping hot, the steam gets trapped, and guess what? You’ll have a sad, soggy crust when you go to eat it later. Let those slices sit out on the counter for about thirty minutes until they are just warm, not hot.
How to Store Your Leftover Homemade Pizza
The key to keeping your leftovers tasting great is cutting off the air supply! If you just wrap the whole stack in foil, the cheese sweats against the crust, and you lose that crispness. For the best results when you revisit that from scratch pizza tomorrow, you need to stack them properly.
Take a sturdy, airtight container—a glass one works great, but any good container will do. Place a slice of pizza down, then put a small square of parchment paper or wax paper directly on top of the cheese. Then, add your next slice, another piece of paper, and so on. This barrier prevents the cheese stickiness from making the crust limp.
- Store cooled pizza in an airtight container.
- Separate slices with parchment or wax paper squares.
- It will keep perfectly well in the refrigerator for about three to four days. Don’t push it past day four if you want peak flavor!
Reheating Methods to Restore the Crust Quality
Okay, now for the revival process. We want that heat to hit the bottom of the crust directly to bring back the crunch, not steam it into submission like a microwave does. My favorite method is the skillet, but the oven works well if you have multiple slices.
The Best Way (Skillet Method for 1-2 Slices): Grab a non-stick skillet and place it over medium heat—no oil needed! Once the pan is warm, place your slices directly onto the dry surface. Let it heat for about 3 to 5 minutes until the bottom is sizzling and crisp. Once the crust is perfect, drop one tiny drop of water into the pan beside the pizza (not on it!) and immediately cover the pan with a lid for 30 seconds. That little bit of steam melts the cheese perfectly without making the base soggy. It’s genius for a quick pizza night idea!
The Oven/Toaster Oven Method (For Big Batches): If you’re warming up half a pizza or more, use your oven. Preheat it to 350°F (175°C). Place the pizza directly onto the oven rack—yes, the bare rack! This allows air to circulate fully underneath, crisping the bottom. Warm it for about 8 to 10 minutes, or until the cheese is melted through. This method keeps the overall texture solid and reminds you why you made this homemade pizza in the first place!
Whatever you do, remember that cold pizza straight from the fridge never tastes as good as leftovers that have been properly reheated. Enjoy those second servings!
Frequently Asked Questions About Making Pizza From Scratch
I get so many questions about dough because, let’s be honest, the dough is the scary part when you’re trying this from scratch pizza making thing for the first time! But don’t stress. If you’ve followed the recipe, you are already 90% there. Here are the questions I get asked the most after someone has tried this recipe!
Why didn’t my homemade pizza dough rise at all?
Ugh, the dreaded flat dough! Nine times out of ten, it’s the water temperature. If your water was too hot (above 120°F), it probably killed the yeast before it even had a chance to wake up. If it wasn’t foamy after 10 minutes, you need to start over with fresh yeast and cooler water. Another rare issue is old yeast, so if you’ve had that packet sitting in your pantry forever, toss it. For a quick pizza night idea, you absolutely need active yeast! If you want to ask me more specific questions about troubleshooting your dough, feel free to shoot me a message through my contact page!
Can I use canned tomato paste instead of crushed tomatoes for the sauce?
You can, but it changes the whole vibe! Canned tomato paste is super concentrated and thick; if you use it straight, your sauce will be intensely salty and pasty. If that’s all you have, you’ll need to thin it out significantly—maybe one part paste to two parts water—and then load up on the oregano and maybe a pinch of sugar to balance the acidity. For a true recipe for classic homemade pizza, stick with standard crushed tomatoes, which already have enough moisture to spread into a beautiful, bright layer.
How can I guarantee the crust is super crispy when using a sheet pan?
If you don’t have a stone, the sheet pan can sometimes trap steam, leading to a softer bottom crust. To combat this, preheat your oven ridiculously high, just like the recipe says (475°F is a must!). While the dough is rising, put your baking sheet *into the oven* to preheat with the air. When you assemble the pizza, you are gently transferring the dough directly onto that screaming-hot metal. The immediate high heat shock on the bottom gives you a much better, crispier result. It’s a game-changer for sheet pan pizza for families!
Can I make the dough recipe ahead of time?
Oh yes, that’s actually what I recommend for the best flavor! While the initial 90-minute rise gets you dinner on the table fast, the flavor profile of this dough deepens hugely if you use the cold proofing method. Once you finish kneading (Step 3), instead of covering it and leaving it on the counter, lightly oil a bowl and put that fresh dough right into the fridge. You can let it sit there, covered tightly, for up to three days. When you are ready to bake, pull it out and let it sit on the counter for about an hour so it warms up enough to stretch before shaping and baking!
PrintThe Best Easy Homemade Pizza Dough Recipe with Classic Red Sauce

Follow these steps to create a simple, flavorful homemade pizza dough and a basic red sauce for a satisfying pizza night.
- Prep Time: 20 min
- Cook Time: 15 min
- Total Time: 1 hour 45 min
- Yield: 2 medium pizzas
- Category: Dinner
- Method: Baking
- Cuisine: American
- Diet: Vegetarian
Ingredients
- 1 1/2 cups warm water (105-115°F)
- 2 1/4 teaspoons active dry yeast
- 1 teaspoon sugar
- 3 3/4 cups all-purpose flour, plus more for dusting
- 2 tablespoons olive oil
- 2 teaspoons salt
- 1 (15 ounce) can crushed tomatoes
- 1 clove garlic, minced
- 1 teaspoon dried oregano
- 1/2 teaspoon salt (for sauce)
- 1/4 teaspoon black pepper (for sauce)
- 1 1/2 cups shredded mozzarella cheese
Instructions
- Activate the yeast: In a large bowl, combine the warm water, yeast, and sugar. Let stand for 5 to 10 minutes until foamy.
- Mix the dough: Add the flour, olive oil, and 2 teaspoons of salt to the yeast mixture. Mix with a wooden spoon until a shaggy dough forms.
- Knead the dough: Turn the dough out onto a lightly floured surface. Knead for 5 to 7 minutes until the dough is smooth and elastic.
- First rise: Place the dough in a lightly oiled bowl, turning to coat. Cover the bowl with plastic wrap or a clean towel and let it rise in a warm place for 1 to 1.5 hours, or until doubled in size.
- Make the sauce: While the dough rises, combine the crushed tomatoes, minced garlic, oregano, 1/2 teaspoon salt, and pepper in a small bowl. Stir well and set aside.
- Preheat and shape: Preheat your oven to 475°F (245°C). Punch down the risen dough and divide it in half. On a floured surface, stretch or roll one half into a 12-inch circle or desired shape for a sheet pan.
- Assemble the pizza: Place the dough on a lightly oiled baking sheet or pizza stone. Spread half of the prepared sauce over the dough, leaving a 1-inch border. Sprinkle with half of the mozzarella cheese.
- Bake: Bake for 12 to 15 minutes, or until the crust is golden brown and the cheese is melted and bubbly. Repeat with the remaining dough and sauce.
Notes
- For a chewier crust, let the dough rise slowly in the refrigerator overnight instead of at room temperature.
- If you prefer a thinner crust, press the dough out thinner before the final bake.
- Use high-quality crushed tomatoes for the best sauce flavor.
Nutrition
- Serving Size: 1 slice (1/8 of pizza)
- Calories: 250
- Sugar: 3
- Sodium: 450
- Fat: 7
- Saturated Fat: 3
- Unsaturated Fat: 4
- Trans Fat: 0
- Carbohydrates: 38
- Fiber: 2
- Protein: 10
- Cholesterol: 15