

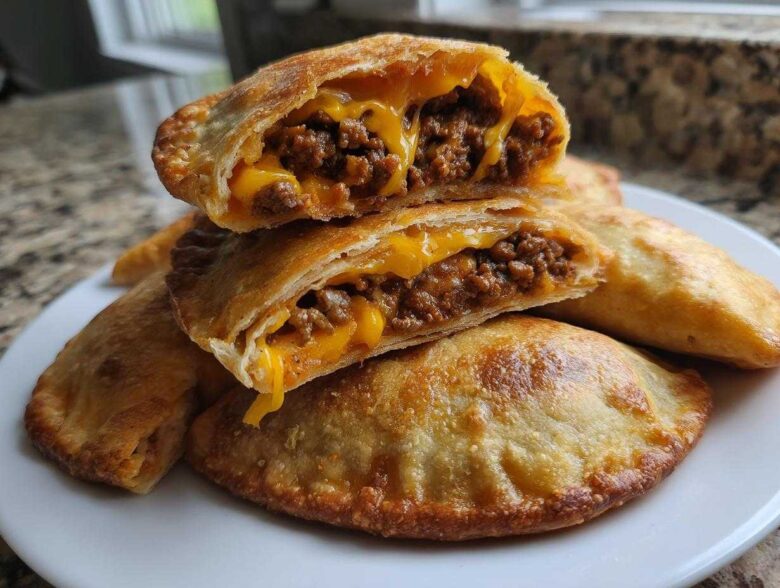
Oh, believe me, when the 5 o’clock scramble hits and you realize you need dinner on the table *fast*, my **cheesy pocket tacos** are the answer to every busy cook’s prayers! We’re talking about the ultimate comfort food upgrade here. Forget everything you know about flimsy, messy tacos; these are handheld packages of crispy, golden-brown perfection stuffed with savory meat and the absolute best gooey, melted cheese blend. My kids practically stand by the oven waiting for these! This recipe is our secret weapon for weeknights, game days, or honestly, any time I just need something super satisfying in under 30 minutes. I learned a lot about finding incredible, reliable recipes from my time working with the team over at FlavorZine, and this one is truly top-tier. Trust me, you’re going to want to bookmark this one.
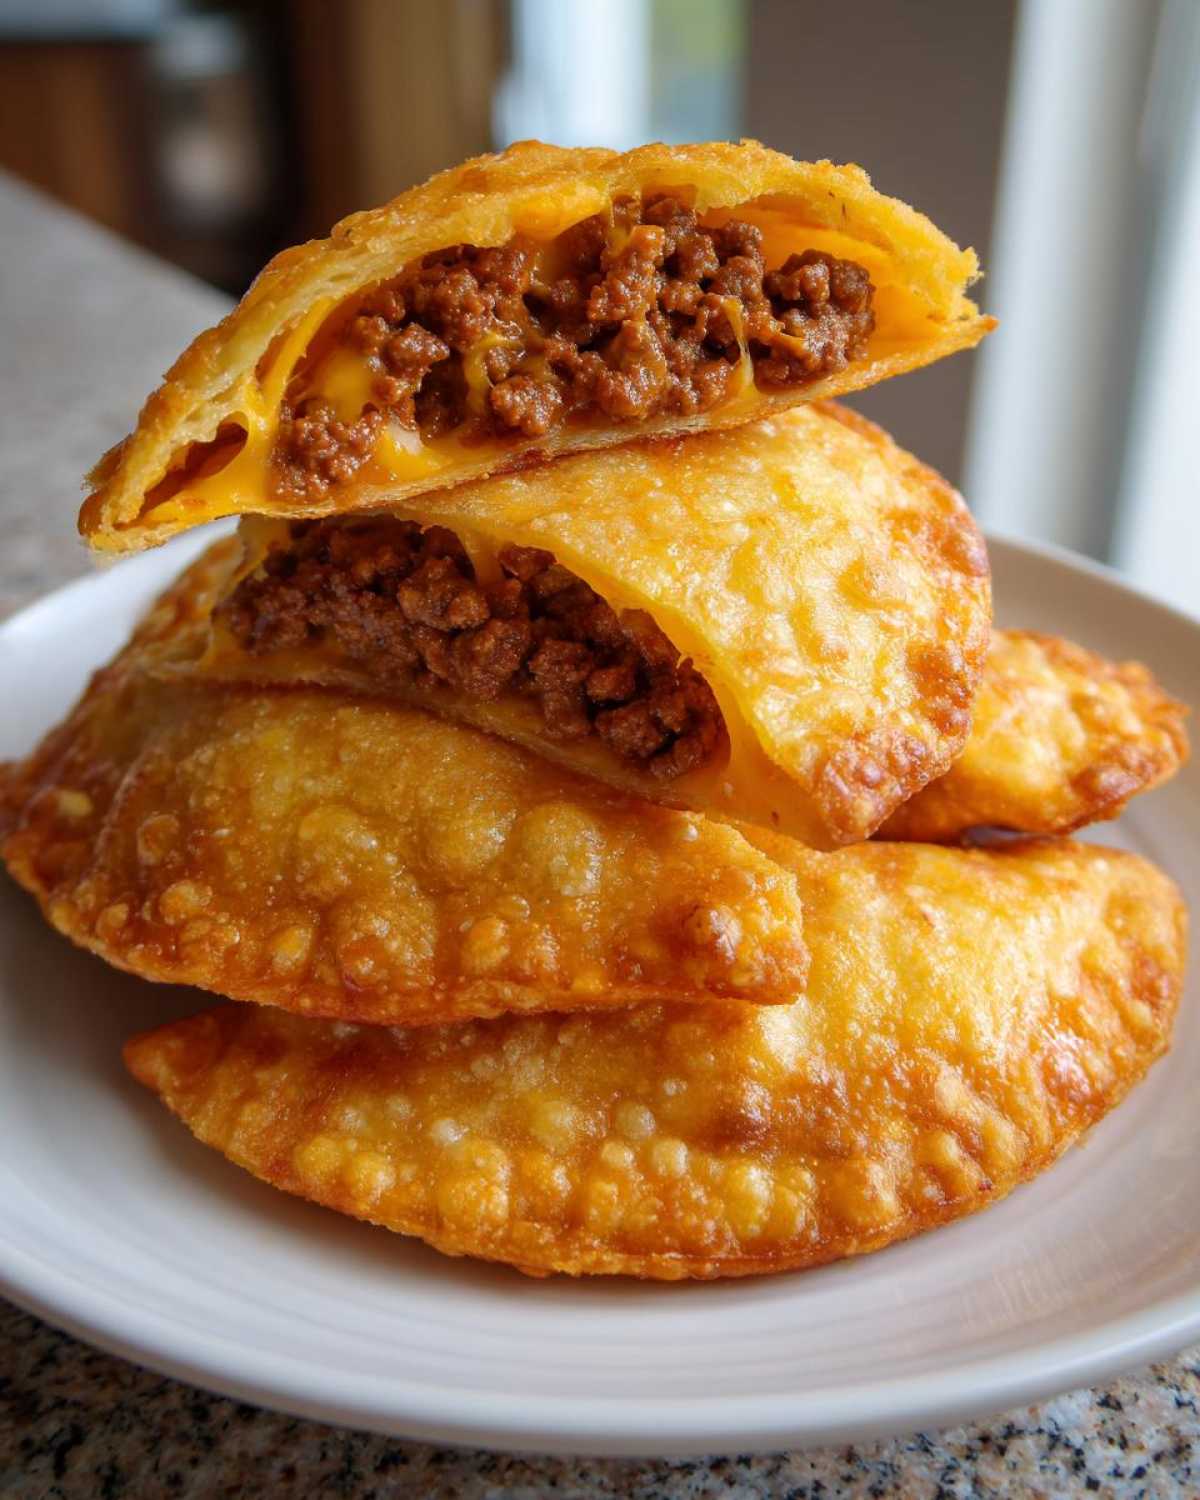
Why You Will Love These Cheesy Pocket Tacos
Seriously, these **cheesy pocket tacos** check every single easy-dinner box. They are minimal fuss from start to finish, which is what makes them perfect for those crazy evenings. I promise you’ll be shocked at how quickly you get dinner served!
- They are unbelievably quick! Prep time is barely 15 minutes, so we’re talking dinner in half an hour.
- That crispy exterior, folks! Baking them gives you that crunch without deep-frying drama.
- The cheese factor is non-negotiable. It melts perfectly around every pocket of seasoned beef.
- Super family-friendly—even the picky eaters love that they can hold them without much mess.
Gathering Ingredients for Your Cheesy Pocket Tacos
Okay, let’s talk supplies! The beauty of these **cheesy pocket tacos** is that they use such simple stuff you probably already have lurking in the pantry or fridge. We’re not going fancy here, just good, solid flavor builders that make this truly comfort food. If you’re making sure to get those ingredients fresh, you’re already halfway to victory.
But listen, if you take one piece of advice from me, make it this part: focus on that cheese blend! We need real melt potential here. I use a mix of cheddar for flavor depth and Monterey Jack because that stuff stretches for days. Don’t skimp; that super gooey center is what separates an okay pocket taco from a legendary one.
Essential Components for Cheesy Ground Beef Pockets
For these **cheesy ground beef pockets**, you need to grab:
We start with a solid pound of ground beef—drain it well after browning, that’s crucial! Then we season it up perfectly using one packet of taco seasoning mix along with about half a cup of water to make a nice, thick sauce. For the cheese, make sure you have a full cup of shredded cheddar and another full cup of Monterey Jack ready to go. Finally, grab a dozen of those smaller flour tortillas—the standard taco size works best—and just a tiny splash of olive oil for brushing those tops before they hit the oven to make them golden.
Equipment Needed for Perfect Baked Taco Pockets
You don’t need a million fancy gadgets for these **baked taco pockets**! Honestly, if you’ve got a standard kitchen setup, you’re all set. Having these few things ready means cleanup is super fast later, too. It just streamlines the whole process of turning out those delicious, **handheld taco recipes**!
- One good skillet for browning that ground beef mixture perfectly.
- A standard rimmed baking sheet—this is where all the magic happens!
- A fork! This is my main tool for making sure those edges are sealed tight.
Step-by-Step Instructions for Simple Taco Pockets
Alright, let’s get cooking! Since we want these **cheesy pocket tacos** ready in a jiffy, preparation is everything. The first thing you should always do is get the oven fired up. We’re looking for a nice hot 400 degrees Fahrenheit, and make sure you quickly grease that trusty baking sheet—we don’t want any sticking incidents later, especially when they look this golden!
Preparing the Ground Beef Taco Filling
Now for the heart of the matter! Get that ground beef browning in your skillet over medium heat. Once it’s all cooked through, you absolutely must drain off every bit of excess grease. Nobody wants a soggy, greasy pocket taco, right? Once drained, stir in your taco seasoning packet and about half a cup of water. Bring that mixture up to a gentle simmer and let it bubble away for about five minutes. You want the liquid to reduce down until the sauce thickens up nicely around the meat. Then, pull it right off the heat so it settles down a bit before we start stuffing those tortillas.
Assembling Your Crispy Cheesy Tacos
This is the fun part where everything comes together. Lay one tortilla flat. Take about two tablespoons of that fabulous meat mixture and place it slightly off-center. Now, dump about two tablespoons of your amazing cheese blend right on top of the meat. You want to make sure the cheese doesn’t ooze right to the edges, or it won’t seal! Fold that tortilla over so you have a perfect half-moon shape. You have to press those edges together firmly—really press them! If you’re nervous, go around and crimp the edges with a fork, just like you would a pie crust. That extra seal security is key to keeping all that goodness contained. Repeat until all 12 pockets are formed and place them seam-side down on that baking sheet.
Baking for Golden Perfection in Your Cheesy Pocket Tacos
Before they go into that hot oven, take maybe a tablespoon of olive oil and just lightly brush the tops of the pockets. This is the secret little step that guarantees they bake up beautifully golden and crispy instead of pale and dry. Pop them in for 10 to 12 minutes. Watch them closely! You’re looking for that shell to look richly golden brown and sound wonderfully crisp when you tap it lightly. If you happen to see any adventurous cheese trying to escape, don’t worry, that just means you truly loaded them up—and honestly, those little crispy cheese bits stuck to the pan are the best part! As you read in the disclaimer before starting, always use caution around hot pans!
Tips for Success with Your Cheesy Pocket Tacos
You want these **cheesy pocket tacos** to be absolutely perfect, right? It all comes down to technique right before they go into the oven. My biggest piece of advice for amazing results? Don’t overcrowd that baking sheet! If the pockets are touching, they steam instead of crisp up, and we are aiming for crunch all around. Leave a little space between each one, even if it means baking in two batches.
Also, if your flour tortillas have been sitting in the fridge, take five minutes to warm them up slightly on a hot skillet or even in the microwave under a damp paper towel. Cold tortillas crack when you try to fold them, leading to those annoying leaks we talked about. A warm tortilla is flexible and seals like a charm. That light olive oil brush we did earlier really helps them crisp up beautifully and gives them that gorgeous golden finish.
Variations for Loaded Cheesy Pockets
The base recipe for these **cheesy pocket tacos** is fantastic, but honestly, I rarely make them exactly the same way twice! That’s what makes them such a great base for **weeknight tacos ideas**—you can raid whatever you have left in the fridge. My favorite swap when I’m trying to keep things lighter is using leftover shredded rotisserie chicken instead of ground beef. It mixes into the remaining taco seasoning beautifully!
If you want to sneak in some extra veggies, you absolutely should! A cup of rinsed black beans or some frozen corn kernels that you microwave quickly before adding them to the meat mixture works wonders. Also, don’t stop at just cheddar and Jack! Next time you are shopping, grab some Pepper Jack for a spicy kick, or even some smoked Gouda for an unexpected, rich flavor in your **stuffed tortilla recipes**.
Serving Suggestions for Taco Pockets Dinner
The great thing about these **cheesy pocket tacos** is that they are perfectly self-contained meals, but you still need the right supporting cast for dipping and eating! Since they are handheld wonders, you want dips that are easy to scoop with the crust or just drizzle right over the top.
For classic richness, you cannot beat a dollop of cool sour cream right on the side. My go-to is always chunky salsa—the thicker the better so it doesn’t drip everywhere! For something a little more indulgent for your **Taco Pockets Dinner**, creamy guacamole is amazing, or even a quick drizzle of plain Greek yogurt mixed with a little lime juice if you are watching richness.
If you’re trying to make it a fuller meal, keep it simple! A small bowl of lightly dressed shredded lettuce or some quick-cut avocado slices are perfect.
Storage and Reheating Instructions for Cheesy Tortilla Pockets
Even the best batch of **cheesy tortilla pockets** sometimes has leftovers, and trust me, you absolutely want to save these! If you have any of these beauties left over, store them in a single layer in an airtight container. They keep perfectly well in the fridge for up to three days. Don’t let them sit longer than that, though; the crispness starts to fade after the third day.
Now, about reheating—this is important if you want them to taste fresh-baked! Please, please, avoid the microwave if you can. The microwave turns that beautiful, crispy shell sort of sad and chewy. Instead, pop those **cheesy pocket tacos** right back onto a baking sheet at about 350 degrees Fahrenheit. Give them about 8 to 10 minutes to crisp up again. You’ll almost forget they were leftovers!
Frequently Asked Questions About Cheesy Pocket Tacos
I know you still might have questions swirling around after all that cheese and beef goodness! That’s totally normal when you’re trying out a fantastic new recipe like these **cheesy pocket tacos**. I’ve pulled together the most common things people ask me about making these **simple taco pockets** turn out perfectly every time.
Can I make these cheesy pocket tacos ahead of time?
You absolutely can prepare them ahead, which is great for busy days! What I recommend is completely assembling the pockets—meat, cheese, folded, and sealed—and then laying them on that baking sheet covered tightly with plastic wrap. Keep them in the fridge for up to 24 hours. When you’re ready to eat, just brush them with oil and add 2 or 3 extra minutes to the baking time since they are starting cold. Don’t bake them ahead and try to reheat later if you want that signature crisp!
What is the best tortilla to use for crispy results?
For the crunch factor, you really need small flour tortillas, usually the 6-inch or 8-inch taco size. They fold up perfectly into that tight half-moon, and because they are thinner than large burrito wraps, they get nice and crisp in that 400-degree oven. Corn tortillas tend to crack when you fold them like this, so stick to soft flour tortillas for your best **crispy cheesy tacos**!
Can I use different fillings besides ground beef?
Oh yes, please experiment! While the ground beef version is my classic, these are incredible with pulled, shredded chicken breast mixed with the seasoning packet. If you’re looking for a vegetarian option for your **stuffed tortilla recipes**, just skip the meat altogether! Mix the taco seasoning with a splash of water and a can of drained, rinsed black beans. Add some corn, too, and make sure your cheese is extra melty!
Hope that clears everything up! We want you to have the best **Taco Night Upgrade** possible. Remember to check out our privacy policy here if you have any further concerns: FlavorZine Privacy Policy.
PrintLoaded Baked Cheesy Pocket Tacos

Make simple, crispy, handheld tacos stuffed with seasoned ground beef and melted cheese.
- Prep Time: 15 min
- Cook Time: 15 min
- Total Time: 30 min
- Yield: 12 pockets
- Category: Dinner
- Method: Baking
- Cuisine: Mexican-American
- Diet: Low Lactose
Ingredients
- 1 lb ground beef
- 1 packet taco seasoning mix
- 1/2 cup water
- 1 cup shredded cheddar cheese
- 1 cup shredded Monterey Jack cheese
- 12 small flour tortillas (taco size)
- 1 tablespoon olive oil
Instructions
- Preheat your oven to 400 degrees Fahrenheit. Lightly grease a baking sheet.
- Brown the ground beef in a skillet over medium heat. Drain off any excess grease.
- Stir the taco seasoning mix and water into the cooked ground beef. Bring to a simmer and cook for 5 minutes, stirring until the sauce thickens slightly. Remove from heat.
- In a small bowl, mix the cheddar and Monterey Jack cheeses together.
- Lay a tortilla flat. Place about 2 tablespoons of the meat mixture slightly off-center on the tortilla. Top the meat with about 2 tablespoons of the cheese mixture.
- Fold the tortilla in half to create a half-moon shape, pressing the edges firmly to seal. You can crimp the edges with a fork if needed.
- Place the sealed pocket seam-side down on the prepared baking sheet. Repeat with the remaining tortillas and filling.
- Brush the tops of the pockets lightly with olive oil.
- Bake for 10 to 12 minutes, or until the tortillas are golden brown and crispy.
- Serve immediately.
Notes
- For extra crispiness, you can lightly spray the pockets with cooking spray before baking.
- Use your favorite type of shredded cheese blend.
- Serve with salsa, sour cream, or guacamole for dipping.
Nutrition
- Serving Size: 1 pocket
- Calories: 250
- Sugar: 1
- Sodium: 450
- Fat: 12
- Saturated Fat: 6
- Unsaturated Fat: 6
- Trans Fat: 0.2
- Carbohydrates: 22
- Fiber: 1
- Protein: 15
- Cholesterol: 45