

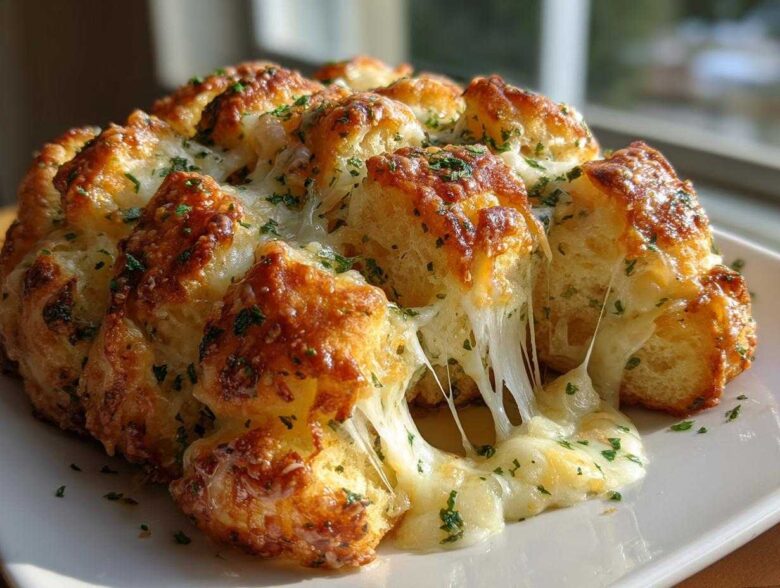
There are some foods that just wrap you up in a warm hug, right? For me, nothing says comfort quite like seriously ooey-gooey, buttery, and garlicky bread hot out of the oven. Forget complicated dinner sides; we are making the very best comfort food tonight! I am talking about my Ultimate Cheesy Garlic Pull Apart Bread.
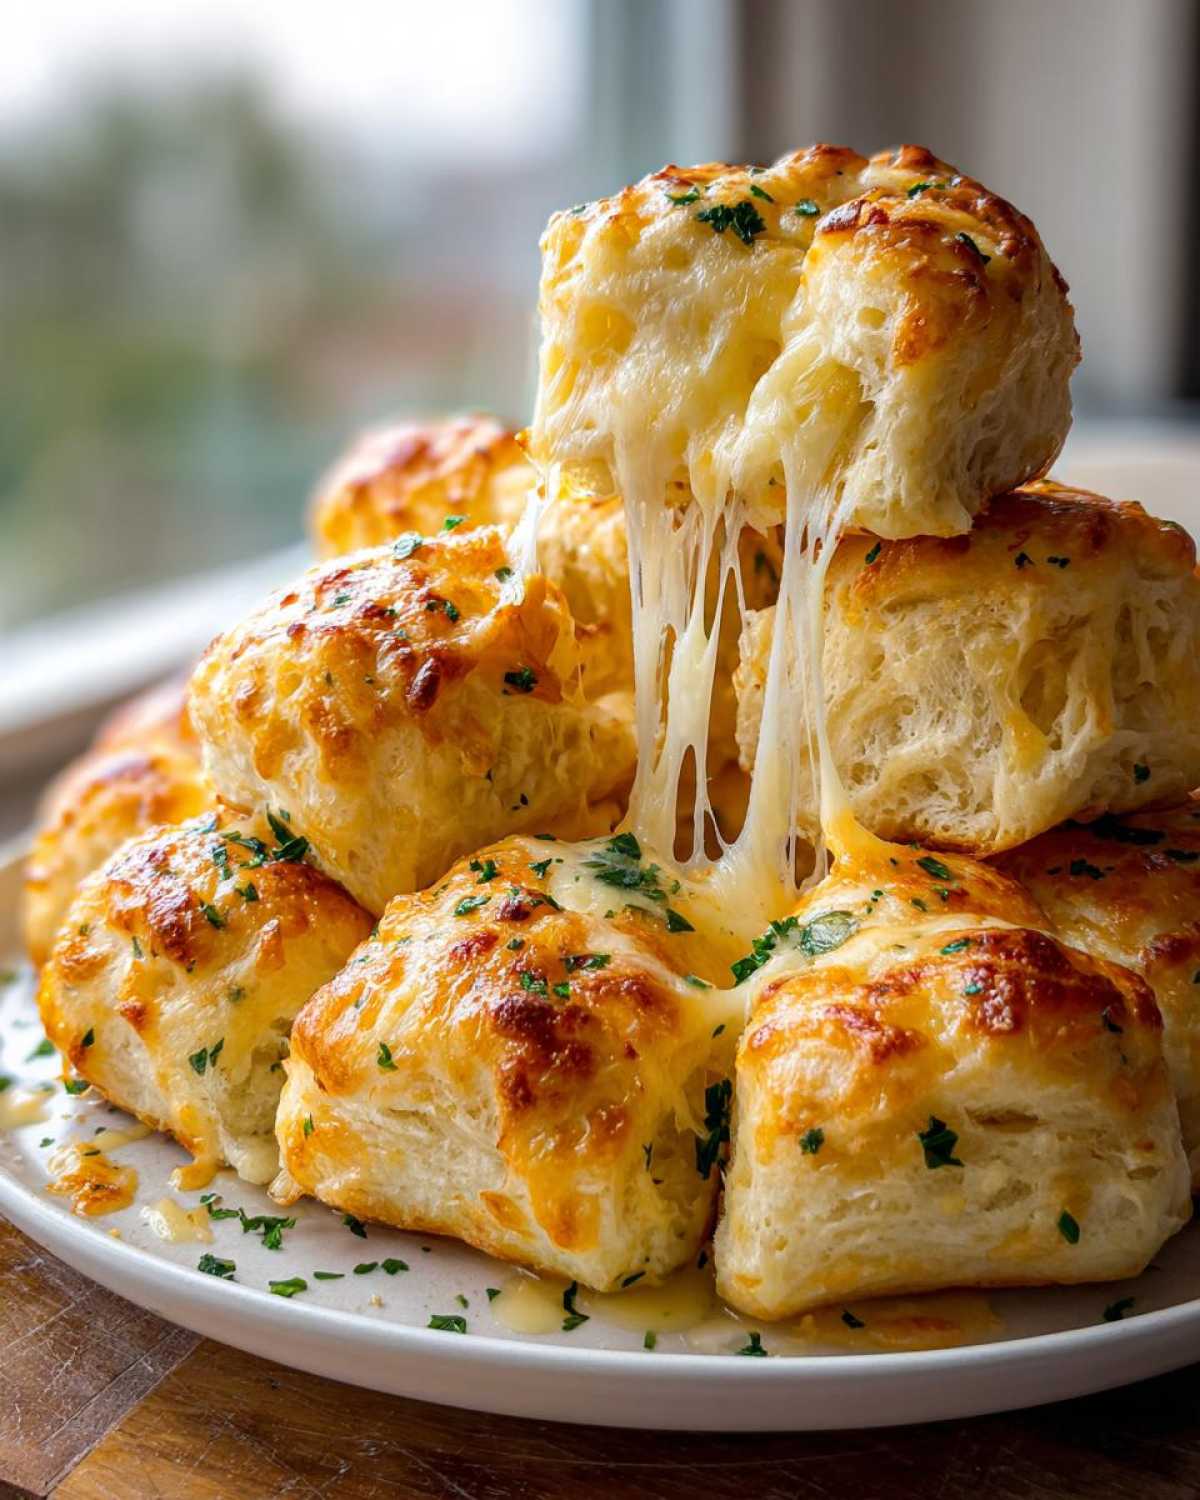
This isn’t just any snack; this is the ultimate homemade cheese bread that disappears the second it hits the table. Seriously, you won’t even get leftovers, and that’s okay! It’s ridiculously simple since we’re using biscuit dough, but don’t let that fool you—the flavor is deep, savory, and incredibly satisfying. I tested this exact method—the layering, the butter ratio, the cheese blend—over and over again on game nights and holidays until I truly nailed the perfect, irresistible pull-apart texture.
If you’re looking for a reliable, crowd-pleasing appetizer that requires almost no real skill, stick with me. You can find out more about who we are and why we test our recipes so thoroughly over at our About Us page. Now, let’s get this buttery goodness going!
Why This Ultimate Cheesy Garlic Pull Apart Cheese Bread Works
I know there are a million garlic bread recipes out there, but this one truly stands out because it delivers huge restaurant flavor without demanding hours in the kitchen. When you need a guaranteed win, this is the cheese bread recipe you reach for.
- It’s ready to bake in under 15 minutes. Who needs that kind of speed? Anyone who wants an immediate, savory hit!
- The combination of butter, fresh garlic, and herbs perfumes the whole house—it’s the best kind of baking smell.
- The texture is honestly unforgettable—soft biscuit interior meeting golden, slightly crisp edges. You just don’t get that with standard sliced bread.
Quick Assembly for Maximum Flavor
The secret weapon here is using those refrigerated biscuit cans. No kneading, no fuss, no waiting for yeast to get happy! You just snip them into fourths, and voilà—you’ve got perfect little dough pieces ready to soak up all that amazing butter. This speed makes it the perfect, low-stress item for when you need a Quick Bread for Dinner Sides without stressing out your entire evening plan.
Achieving That Gooey Melted Cheese Bread Texture
This is where we turn delicious into legendary. I use a mix of mozzarella for the perfect stretch and sharp cheddar for that necessary tang. The layering technique is everything! By tossing some cheese in with the butter coating and saving the rest for the top, you ensure you have that beautiful, bubbly, Gooey Melted Cheese Bread effect from top to bottom. No dry spots, just pure cheesy goodness!
Essential Ingredients for Perfect Cheese Bread
When you’re working with something this simple, the quality of your few ingredients really shines through! I always lay everything out right beside the stove before I even think about preheating the oven. Trust me, having everything measured and ready makes the assembly process so smooth. This is our foundation for a truly great slice of cheese bread!
Here is what you’ll need sitting on your counter before we start cutting up those biscuits:
- 1 package (13.8 ounces) refrigerated biscuit dough
- 1/2 cup unsalted butter, melted
- 4 cloves garlic, minced (don’t even think about jarred stuff here!)
- 2 tablespoons fresh parsley, chopped (fresh is non-negotiable for that vibrant color)
- 1 teaspoon dried Italian seasoning
- 1/2 teaspoon salt
- 1 1/2 cups shredded mozzarella cheese
- 1/2 cup shredded sharp cheddar cheese
Ingredient Notes and Substitutions for Your Cheese Bread
Okay, now let’s talk substitutions because I get asked about cheese all the time! The mozzarella is crucial because it gives you that incredible, long, satisfying cheese pull. If you skip it, you miss that iconic part of the experience.
For the cheddar, if you’re looking to elevate this beyond the standard, swap it out! Monterey Jack melts beautifully and gives a milder flavor, or try a smoked Gouda if you want your Buttery Cheese Bread Recipe to have a deeper flavor. Speaking of butter, make sure it’s real unsalted butter. Margarine just doesn’t brown the same way when it gets bubbly in the oven, and we really want that lovely golden crust.
The Italian seasoning is the backbone of the savory flavor profile. If you happen to only have oregano and basil, feel free to mix a teaspoon of those instead. But honestly, the Italian blend is the easiest way to guarantee this tastes like proper savory side bread!
Step-by-Step Instructions for Soft Fluffy Cheese Bread
You are going to be shocked at how fast this all comes together. Seriously, you can have this amazing cheese bread ready for the oven before your main dish is even halfway cooked! Time management in the kitchen is everything, and this recipe wins awards for speed.
First things first: Get that oven hot! You want to preheat to 350 degrees Fahrenheit (175 degrees Celsius). Next, grab your pan. I love using a Bundt pan because it makes for such a gorgeous presentation when you flip it out later, but make sure you grease it really well. A standard loaf pan works too, but you need to be generous with that grease or baking spray!
Preparing the Garlic Butter Coating for the Cheese Bread
This coating is where the magic starts, so don’t rush this part! You need to melt down your butter first—make sure it’s fully liquid. Then, you’re tossing in your freshly minced garlic. Please, please try to mince that garlic as finely as you can. If you leave big chunks, some pieces of dough will be overwhelmed with garlic, and others won’t get any at all. We want even flavor distribution!
Once the garlic is mingled in, sprinkle in your Italian seasoning and salt. Give that a good stir just to incorporate everything—that savory, herby smell is already amazing, isn’t it? Set that bowl aside for just a second while we prep the dough.
Assembling and Baking the Best Pull Apart Cheese Bread
Open up your biscuit dough and take every single biscuit and cut it right into quarters. Put those dough quarters into a big bowl. Now, pour about half of your garlic butter mixture over the dough pieces, and gently toss them until they look shiny and coated. Dump half of your shredded cheese in there now and give it one final, light toss.
Carefully transfer all those buttery dough pieces into your prepared pan. After you get the dough in there, sprinkle the rest of your cheese right over the very top layer. This way, that top layer gets super golden and bubbly!
Bake it for about 25 to 30 minutes. You’re looking for the biscuits to puff up and turn a nice, deep golden brown color. You’ll know it’s done when the cheese on top is completely melted and bubbling away happily. Don’t forget to let it sit for five minutes before flipping it out—that keeps your beautiful Best Pull Apart Cheese Bread intact!
Tips for Making Bakery Style Cheese Bread at Home
Even though this recipe is super straightforward, there are a few little tricks I’ve picked up over the years that take it from “good” to that actual “Bakery Style Cheese Bread at Home” level you’re dreaming of. It’s all about managing the heat and making sure your preparation is flawless so you don’t end up fighting your pan later!
One thing I always preach is don’t overcrowd the pan! These little biscuit pieces need room to breathe and expand upwards. If you pack them too tight, they steam instead of bake, and then you’re left with soft, doughy centers instead of that fluffy texture we want in our cheese bread.
Pan Choice Matters for Your Cheese Bread
The pan you choose honestly changes the whole experience. When I make this for a simple family dinner, I’ll grab a 9×5 inch loaf pan because I just slice it up like a loaf cake. It cooks very evenly that way, but the texture is mostly soft all the way around.
However, if this is for a party, it absolutely has to be the Bundt pan. Yes, it’s more work to grease, but flipping out that centerpiece looks incredible! The exterior pieces that touch the hot metal get that amazing caramelized crust, which is fantastic. But, if you are worried about sticking, I highly recommend moving to a 9×13 baking dish. It won’t look as dramatic when you serve it, but you get much more surface area contact with the heat, which results in crispier edges on almost every single piece—perfect for a true Crowd Pleasing Appetizer Bread!
Serving Suggestions for Your Cheesy Garlic Bread Recipe
The best part about this cheese bread is that it’s practically a food group all on its own, but if you want to dress up the table a little, it pairs beautifully with a few fresh flavors.
Since this bread is so rich, buttery, and warm, you need things that cut through that richness. If you’re serving it as a side dish for dinner, try pairing it with something bright. A big green salad with a sharp vinaigrette is the perfect counterpart. It balances out all that gooey cheese perfectly!
If you’re using this as an appetizer—which, let’s be honest, is what it’s best for—don’t get too complicated. Set it right in the middle of the coffee table while it’s still piping hot! But, if you want an extra dipping sauce, try a small dish of warm marinara sauce on the side. Just a hint of tomato acidity makes the savory herbs in the bread pop even more.
And seriously, use good serving tongs, but don’t be surprised if people just reach in with their fingers. It’s that irresistible! Make sure you serve it immediately—this flavor profile is best enjoyed when the cheese is still stretchy.
Storage and Reheating Instructions for Leftover Cheese Bread
Now, I *say* there won’t be any leftovers, but sometimes my family surprises me! If you do manage to save some of this glorious cheese bread, storing it correctly is key to getting that soft, fluffy texture back the next day. It’s all about locking in what little moisture is left!
First rule for storage: You must tuck it away while it’s still room temperature, not hot. If you seal up hot bread, the steam gets trapped, and you end up with soggy bottoms, which is the enemy of great bread. Place any leftover pieces into a large zip-top bag or an airtight container. Make sure they fit snugly so air can’t dry them out overnight.
It keeps great at room temperature for about a day, but if you have more than that, tuck it into the fridge for up to four days. Do not freeze it—frozen biscuit dough gets weird when thawed!
The Best Way to Reheat Your Cheese Bread
Microwaving this is fast, but honestly, it turns it rubbery almost instantly. We want to revive that buttery, fresh-baked feel, so skip the microwave if you can! The oven is definitely our hero here. Set your oven to 350 degrees Fahrenheit (175 degrees Celsius)—a medium heat is what we need.
If you have a whole loaf structure, you can wrap the piece loosely in aluminum foil first. The foil traps enough steam to re-moisten the inside dough while the oven heat warms up the cheese. Pop it in for about 8 to 10 minutes. You’ll know it’s ready when the bread feels soft when you squeeze it!
If you are just reheating a few loose pieces, you can skip the foil. Just lay them out on a small baking sheet and warm them for about 5 minutes until that cheese gets bubbly again. Enjoy those second-day bites—they are almost as good as the first batch!
Frequently Asked Questions About Homemade Cheese Bread
I get so many questions about this recipe, which just tells me you all love good, cheesy carbs as much as I do! It’s honestly such a flexible recipe, but here are the few things readers ask me about most often when they are making their first batch of cheese bread.
Can I use fresh yeast dough instead of refrigerated biscuits for this cheese bread?
Yes, you totally can, but it requires a bit more planning! You’ll need about 1.5 pounds of your favorite homemade yeast dough, cut into small squares just like the biscuits. The trick is that you have to let that dough proof (or rise) in the pan for about an hour after you coat it and put it in there. If you bake it right away, it won’t get the light texture we’re looking for; it will be dense.
What is the best cheese for an ‘Over The Top Cheese Bread’ version?
If you want to take this straight into the magnificent excess territory and make an Over The Top Cheese Bread, you need maximum melt! I highly recommend adding a layer of Provolone or Fontina to your mix. They melt smoother than almost anything else and give you that incredible, almost liquidy texture we chase. Just make sure you use them in combination with the low-moisture mozzarella, or it can get oily!
How can I make this a ‘Savory Cheddar Quick Bread’ without the pull-apart format?
Oh, a loaf! That’s a great idea if you want something sliceable for toasting later. To make this a Savory Cheddar Quick Bread, just skip cutting the biscuits into quarters, and instead, gently arrange the whole or half biscuits snugly in your loaf pan. Because the dough is more compressed, you might need to add about 5 to 8 extra minutes to the baking time, and definitely check the center with a tester!
Estimated Nutritional Details for This Cheese Bread
Now, let’s talk about fueling up! I always want to be transparent about what we’re eating, even when it involves this much glorious melted cheese. Remember that these numbers are just a friendly estimate based on how I make the bread using standard ingredients. For the most accurate count, you’d have to calculate based on the specific brands of biscuits and cheese you grab!
Here is the breakdown per slice, based on 8 servings:
- Serving Size: 1 slice
- Calories: 280
- Fat: 16g (with 9g of that being saturated fat—worth it!)
- Carbohydrates: 25g
- Protein: 9g
- Sugar: Just 2g, which is great since most of the sweetness comes naturally from the biscuits.
- Sodium: 550mg (That’s the butter and the cheese talking, naturally!)
Just a quick note, because we love transparency here at the blog: These figures are estimates based on the ingredients used in this particular cheese bread recipe. For the full details on how we calculate our nutritional information, you can always check out our ingredient disclaimer page. Enjoy every single bite of this savory treat!
Share Your Ultimate Cheese Bread Experience
Okay, that’s it! The Ultimate Cheesy Garlic Pull Apart Bread is out of the oven, cooled slightly, and ready to be devoured. I seriously cannot wait for you to try this recipe!
Once you’ve pulled those amazing, buttery, cheesy pieces apart, I want to hear all about it! Did the sharp cheddar give it the kick you hoped for? Did your family appreciate the speed of this simple appetizer? Please, don’t be a stranger!
Head down to the comments section below and leave me a rating—five stars if you’re feeling the cheesy love! I read every single comment because your feedback helps me know which recipes to perfect next. If you snap a picture of your beautiful, bubbly loaf, please tag me on social media! Seeing your creations pop up on my feed is seriously the best part of my whole week. You wonderful bakers crack me up!
And if you ever have a burning question or just want to share a cooking emergency (we all have them!), you can always reach out directly through our Contact Page. Happy pulling and happy eating!
PrintUltimate Cheesy Garlic Pull Apart Bread

Make this soft, buttery, and gooey pull apart cheese bread flavored with garlic and Italian herbs. It is a simple, crowd-pleasing appetizer or side dish.
- Prep Time: 10 min
- Cook Time: 30 min
- Total Time: 40 min
- Yield: 8 servings
- Category: Appetizer
- Method: Baking
- Cuisine: American
- Diet: Vegetarian
Ingredients
- 1 package (13.8 ounces) refrigerated biscuit dough
- 1/2 cup unsalted butter, melted
- 4 cloves garlic, minced
- 2 tablespoons fresh parsley, chopped
- 1 teaspoon dried Italian seasoning
- 1/2 teaspoon salt
- 1 1/2 cups shredded mozzarella cheese
- 1/2 cup shredded sharp cheddar cheese
Instructions
- Preheat your oven to 350 degrees Fahrenheit (175 degrees Celsius). Lightly grease a bundt pan or a 9×5 inch loaf pan.
- Open the biscuit dough and cut each biscuit into quarters. Place the pieces into a large bowl.
- In a small bowl, combine the melted butter, minced garlic, chopped parsley, Italian seasoning, and salt. Stir well.
- Pour the butter mixture over the biscuit pieces in the bowl. Toss gently until all pieces are coated.
- Sprinkle half of the mozzarella and cheddar cheese over the coated biscuit pieces. Toss lightly again to distribute the cheese.
- Transfer the coated dough pieces into the prepared pan, arranging them loosely.
- Sprinkle the remaining cheese over the top layer of the dough.
- Bake for 25 to 30 minutes, or until the biscuits are puffed up, golden brown, and the cheese is melted and bubbly.
- Let the bread cool in the pan for 5 minutes before inverting it onto a serving plate. Serve warm.
Notes
- For a crispier exterior, bake in a 9×13 inch baking dish instead of a bundt pan.
- You can substitute the cheese blend with Gruyère or Monterey Jack for a different flavor profile.
- If you prefer a stronger garlic flavor, use garlic powder instead of fresh garlic in the butter mixture.
Nutrition
- Serving Size: 1 slice
- Calories: 280
- Sugar: 2
- Sodium: 550
- Fat: 16
- Saturated Fat: 9
- Unsaturated Fat: 7
- Trans Fat: 0.5
- Carbohydrates: 25
- Fiber: 1
- Protein: 9
- Cholesterol: 35