

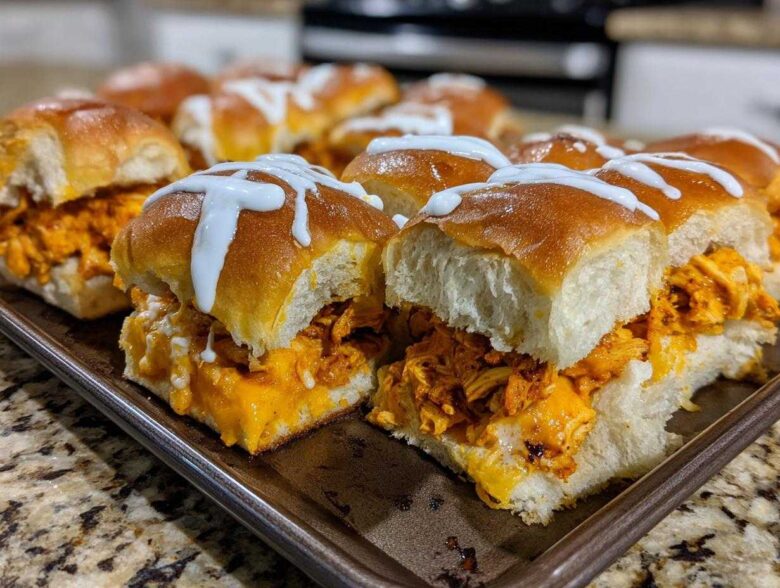
Oh my goodness, if you are hosting anyone for the big game—or just need comfort food fast—you absolutely have to ditch the complicated recipes! We all know the struggle: you want the flavor of wings but need something easily portable that doesn’t require a mountain of napkins. That’s why these ultra-easy sheet pan buffalo chicken sliders, baked right on those sweet Hawaiian rolls, became my signature game day food years ago. Seriously, my Super Bowl parties rely on them!
When I tell you these come together in less time than it takes to find parking at the stadium, I’m not exaggerating. They are the perfect balance of spicy, tangy, savory, and that melt-in-your-mouth sweetness from the rolls. I’ve tried fussy slow cooker versions that take all day, but nothing beats pulling this single baking dish out of the oven. They disappear almost instantly, trust me. If you want crowd-pleasing appetizers that require zero fuss, look no further!
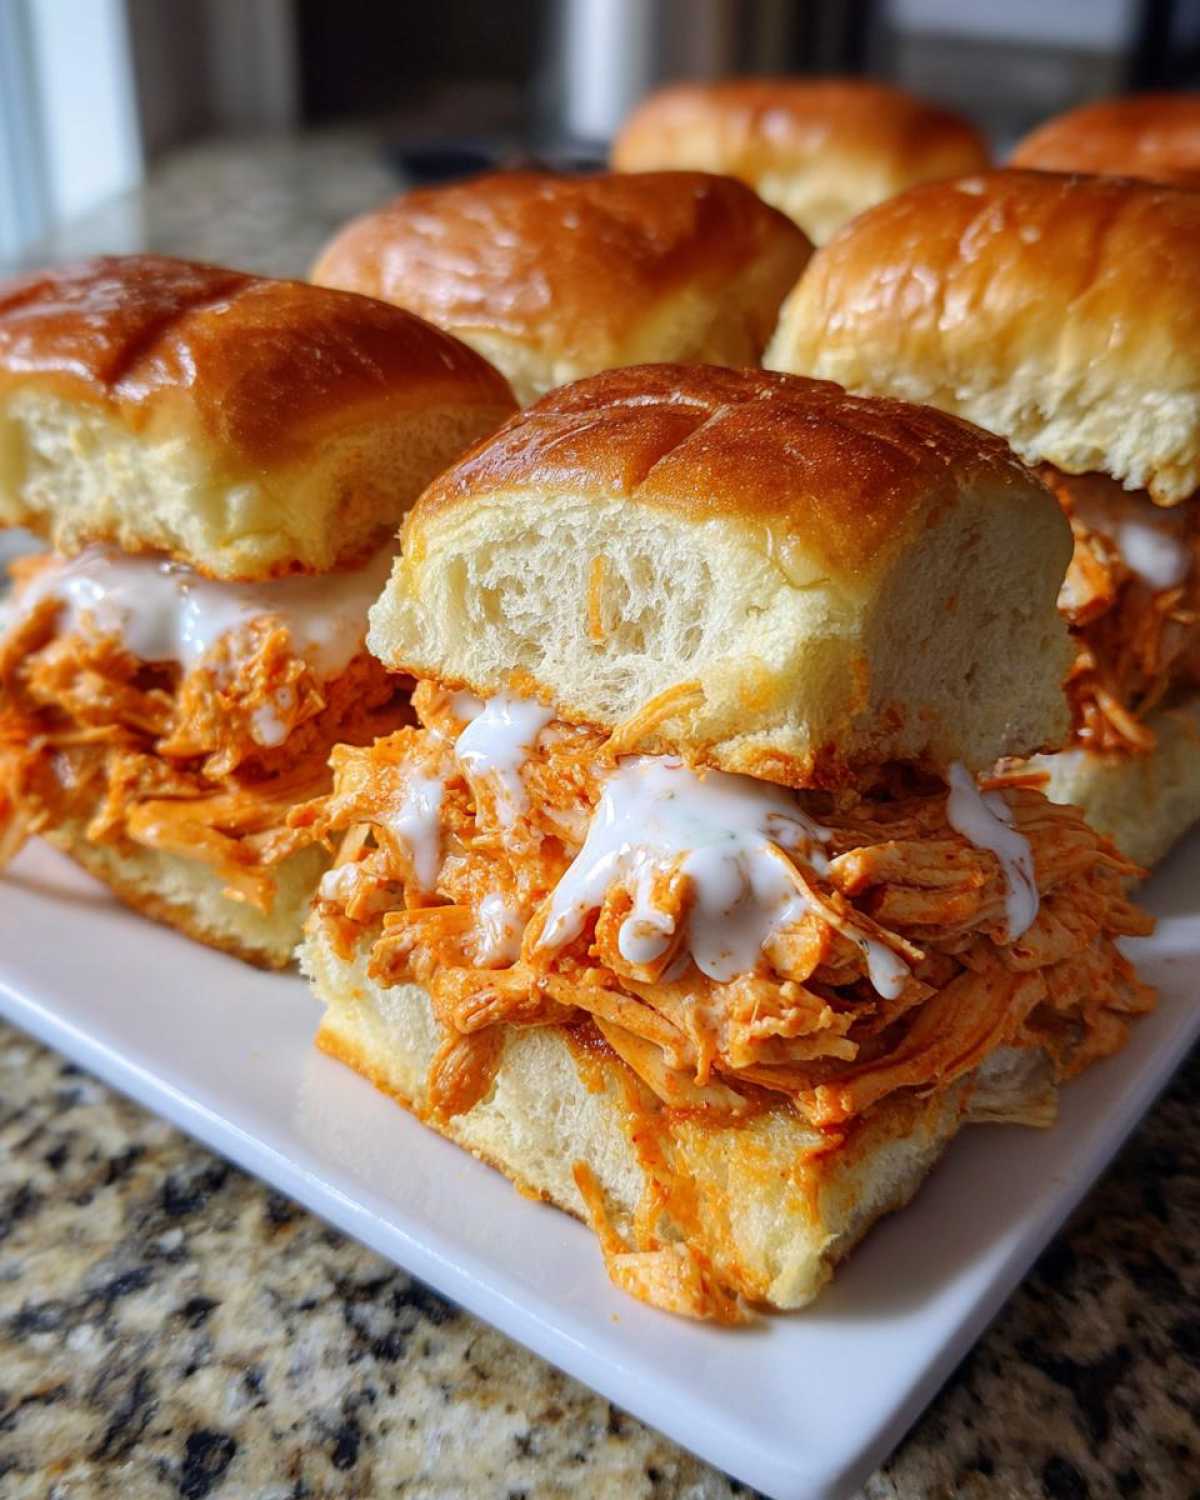
If you want to learn more about the folks behind the scenes here at FlavorZine, you can pop over to our quick ‘About Us’ page; but honestly, your time is better spent prepping the chicken for these amazing sliders!
Why These Buffalo Chicken Sliders Are Perfect Party Food Ideas
You know me, I love a good food coma, especially during football season, but who has time to slave over the stove when the kickoff is near? That’s why I swear by this sheet pan method. It minimizes the dishes dramatically, which is basically my favorite culinary innovation!
These sliders hit all the right notes for any gathering. They are completely adaptable, unbelievably cheesy, and that little pop of sweetness from the Hawaiian rolls is just genius against the spicy sauce. Honestly, they are some of the best party food ideas I have ever tested because they manage to be both impressive and incredibly simple.
- They are built in one standard 9×13 pan, meaning cleanup is a breeze!
- The Hawaiian rolls keep them soft and slightly sweet, which balances the heat perfectly.
- They serve a crowd easily, making them top-tier crowd pleasing appetizers—you just bake and slice!
Gathering Your Ingredients for Cheesy Chicken Appetizers
Okay, getting the ingredients ready for these wonders is shockingly fast if you follow my lead. Since these are designed to be quick, we are absolutely cheating and starting with about one full pound of pre-cooked, shredded chicken. If you haven’t learned this trick yet, grabbing a rotisserie chicken is the secret to making these easy appetizer recipes appear out of thin air when guests show up unexpectedly.
Next up, you’ll need your flavor base: that wonderful buffalo wing sauce mixed with a little melted butter, some Worcestershire sauce for depth, and my little magic touch—the ranch seasoning mix. Don’t forget the rolls! It has to be one full package of those sweet, soft Hawaiian rolls, the 12-count size works perfectly for a standard dish. Finally, grab a real mountain of cheese. I use a full cup of shredded Monterey Jack and about half a cup of sharp cheddar scattered generously over the filling to ensure it gets ultra gooey.
Ingredient Notes and Substitutions for Spicy Chicken Sliders
Now, let’s talk flexibility. If you aren’t a huge ranch fan, swap it out! Grandma always said you should use what you love. Blue cheese dressing is the classic pairing that cuts through the tang of the buffalo sauce beautifully, so feel free to go that route instead of dressing. But the real time-saver here is the chicken—rotisserie is absolutely the way to go. It’s already seasoned and juicy, and it saves you at least an hour!
If you want these to be extra spicy chicken sliders, add a splash of your favorite hot sauce to the chicken mixture, or maybe even swap out half the regular buffalo sauce for a super-hot variety. Just be sure those seasonings are well incorporated before everything hits the rolls!
Step-by-Step Guide to Making Baked Sliders Recipe
Follow these steps, and you’ll have the best baked sliders recipe on the block, guaranteed! The timing is what trips people up sometimes, so stick close to the temperatures and times I give you. Remember, we are aiming for gooey cheese and that perfect, slightly crisp top layer!
First things first: go ahead and get your oven preheated to 375 degrees Fahrenheit. While that’s warming up, lightly grease your 9×13 inch baking dish. Trust me, you don’t want to skip the grease! We want these minis to slide right out when they’re done cooking.
Preparing the Tangy Buffalo Chicken Filling
This is where the flavor magic happens! Grab a medium bowl—don’t worry about making it spotless afterwards; it’s all going into the oven anyway. Toss in your already shredded chicken. Then pour over that gorgeous buffalo wing sauce, the melted butter, that tiny bit of Worcestershire sauce, and the ranch seasoning mix. You need to mix this really well.
I mean really dig in there until every single shred of chicken is coated in that spicy, buttery goodness. You want every bite of your final buffalo chicken sliders to taste like the best part of a wing. The butter helps everything stick together instead of just sliding around when you try to cut them later.
Assembling and Baking Your Buffalo Chicken Sliders
Okay, the most satisfying part! Take your package of Hawaiian sweet rolls and slice them horizontally right down the middle, keeping them connected as one big sheet. Place the bottom half—the foundation of our empire—into your prepared baking dish.
Spread that tangy chicken mixture out evenly over the bottom layer. Try not to overload one side! Once the chicken looks perfect, it’s time for the cheese blanket. Sprinkle both the Monterey Jack and the cheddar right over the filling. Then, top it gently with the other half of the rolls. Give the whole top a little light press—not smashing it, just enough to settle it in place.
Now, here’s the crucial two-step bake for these ranch chicken sliders. Cover the dish tightly with aluminum foil and pop it into that 375°F oven for 15 short minutes. This steam bath melts the cheese perfectly and warms everything through beautifully. After 15 minutes, pull off the foil! Let them bake again uncovered for about five to seven more minutes until the tops look golden brown and enticing. Seriously, that golden color is key!
Tips for Perfect Game Day Snacks Preparation
Even though these are super simple, a couple of little tricks can send these from great to legendary game day snacks! The biggest thing is temperature control. When you remove the foil for those final five to seven minutes, that’s when you watch them carefully. If you let them go too long uncovered, the tops of the rolls can dry out before the cheese is perfectly molten. We want melty cheese oozing out, not crusty bread!
Also, don’t skip the make-ahead tip! If you mix up that chicken filling ahead of time—up to two days, yes!—you’ve already saved yourself precious minutes right before kickoff. Just keep the filling sealed tight in the fridge. When it’s time to assemble, let the filling sit on the counter for about 15 minutes while the oven heats up. That slightly warmer filling helps the whole assembly bake evenly. These end up being the most excellent comfort food sandwiches you’ll put out all season!
Equipment Needed for Sheet Pan Appetizers
Since this recipe is focused on keeping things easy, you don’t need a whole arsenal of specialized gadgets. Having your tools ready makes the 5-minute assembly go smoothly! I always pull these items out first so I’m not scrambling once the chicken is mixed.
You absolutely need a sturdy medium mixing bowl. This is where you’ll combine the saucy chicken before it goes onto the rolls, so make sure it’s big enough that you can mix without splattering everything onto your counter—we’re trying to avoid extra apron cleaning!
The heart of this setup is your baking vessel. You’ll be using a standard 9×13 inch baking dish. If you use anything smaller, the sliders will be ridiculously thick and won’t cook through evenly. And of course, you must have a large sheet of aluminum foil. That foil is your secret weapon for trapping steam during the initial bake, which is what makes the cheese so perfectly gooey. Keep it handy!
Serving Suggestions for Your Ranch Chicken Sliders
Okay, once these beautiful, bubbly, cheesy wonders are sliced and ready to go, what do you serve them with? Because these are rich, savory, and a little tangy, you need palate cleansers nearby! I find that anything cool and crunchy really sets off the spicy chicken perfectly. It makes the whole spread feel more complete, too, especially if you’re serving these as part of a whole game day snacks lineup.
My number one recommendation is always raw veggies. Have a big platter of celery sticks and maybe some crisp carrot sticks right next to the ranch chicken sliders. They give you that satisfying crunch without adding any more heavy components to the plate. Plus, they’re great for cooling your mouth down if you went a little heavy on that buffalo sauce!
If you’re turning this into more of a dinner situation—maybe these are your quick dinner ideas for a busy weeknight—you need something substantial but refreshing. A simple, slightly sweet, vinegar-based coleslaw is incredible. It’s tangy, so it mirrors the buffalo sauce a bit, but the fresh cabbage is so cooling. Seriously, make a batch of slaw while the sliders are baking; it’s the perfect sidekick for your amazing spicy chicken sliders!
For dips, keep it classic. You can’t go wrong with a side bowl of extra ranch dressing, of course, but if you’re feeling fancy, a nice, thick blue cheese dip is always a winner. Sometimes I even throw out a little bowl of kettle-cooked potato chips—the plain salted kind—because sometimes, you just need that simple, salty texture contrast with your amazing mini sandwiches!
Storage and Reheating Instructions
Believe it or not, these beautiful little sandwiches taste almost as good the next day, provided you store them correctly! My biggest rule here is minimizing air exposure. Once everything has cooled down completely after baking, wrap the entire block of sliders tightly in plastic wrap, or simply transfer them into a sturdy, airtight container. They stay fresh perfectly on the counter for about a day, but if you’re anything like me and make a huge batch, definitely stash them in the fridge.
They usually hold up beautifully for two to three days in the refrigerator. Don’t leave them longer than that, though; that beautiful sweet roll starts to get a little sad after three days, even sealed up tight.
Now, reheating is where you have to be careful! The microwave is fast, I know, but it turns bread soggy faster than anything, and we certainly don’t want that mushy texture on our perfect little sandwiches. Skip the microwave entirely if you can manage it!
For the best results, you want to use the oven. Preheat your oven to about 325 degrees Fahrenheit, just a bit lower than when we originally baked them. Place the sliders (still in a single piece if possible) in a lightly greased baking dish and cover them loosely with foil. Pop them in for about 10 to 12 minutes. The foil keeps the rolls from drying out while the heat gently melts that yummy cheese and warms the spicy chicken filling all the way through. If you absolutely must use a microwave for just one or two sliders, only heat them for about 20 seconds total, but be warned—the texture won’t be quite as good as the oven version!
Common Questions About These Quick Dinner Ideas
It’s funny how many things pop into your head once you start making a recipe, especially when you’re in a rush planning quick dinner ideas for the family! I’ve gathered up a few of the main questions I always get asked about these sliders. Hopefully, this settles any worries you have before you start assembling!
Can I use different rolls besides Hawaiian rolls?
That’s a great question! While I genuinely think the Hawaiian rolls are essential because that sweetness is the perfect foil for the tangy buffalo sauce, you technically *can* substitute them. If you’re out of the sweet rolls, dinner rolls or even brioche rolls will work okay. However, you might need to adjust the baking time slightly, and you absolutely must brush the tops with melted butter mixed with a tiny pinch of brown sugar, or they won’t get that signature golden sheen we love.
Can I make these slow cooker chicken sliders style instead?
You certainly can try! The slow cooker method is fantastic when you need something to sit out warm for hours, like if you’re having a huge party that lasts all afternoon. If you want to switch this to a slow cooker chicken sliders recipe, mix your cooked chicken, buffalo sauce, butter, and seasonings just as normal. Put it all into the slow cooker on low for about two hours, stirring occasionally. Once it’s hot and saucy, you’ll need to layer it onto the rolls, top with cheese, and then bake it open-faced under the broiler for just 3–5 minutes to melt that cheese nicely. It’s an extra step, but totally doable!
What if I want my sliders to be much spicier?
I love your attitude! If you want more kick in your tangy buffalo chicken, you have a few easy avenues that don’t mess with the overall structure of the recipe. I usually just add an extra tablespoon of hot sauce directly into the chicken mixture when I’m combining everything. If you want a cleaner spice, add a dash of cayenne pepper! For next-level heat, try swapping out your standard buffalo sauce for a hotter variety—just make sure you taste the filling before you spread it on the bottom layer of rolls, so you don’t accidentally make them inedible for your guests!
Are these leftovers okay for lunch the next day?
Absolutely! I mentioned storage above, but yes, these are fantastic for lunch the next day. To keep them tasting their best, make sure you are reheating them in the oven, not the microwave. The oven keeps the bread structure intact, which is crucial for enjoying these mini sandwiches perfect for parties (and lunch boxes!) the following day.
For reference on general site policies and disclaimers, you might want to check out our site disclaimer page.
Nutritional Estimates for One Slider
Now, I always tell people that tracking calories while making something this comforting is a bit like counting snowflakes in a blizzard—it defeats the purpose! But for those of you who like keeping an eye on the numbers, I pulled the standard estimates for one of these cheesy chicken appetizers when made exactly as written (that means using the ranch dressing drizzle and the full cheese blend). Please remember, these numbers are just a guide, since the exact brand of buffalo sauce or the size of your rotisserie chicken can change things a tiny bit!
Here is the breakdown per serving (which is one glorious slider):
- Calories: 350
- Fat: 18 grams
- Carbohydrates: 28 grams
- Protein: 20 grams
It’s good stuff, packed with protein to keep you full through the fourth quarter! Watch out, the sodium is pretty high (around 750mg), and that’s mostly thanks to the buffalo sauce and that wonderful, salty cheese we load on top. If you’re trying to cut back on saturated fat, you could always use low-moisture part-skim mozzarella instead of the Monterey Jack, but honestly, where is the fun in that?
For more information about how we handle visitor data and privacy here at FlavorZine, you can always review our Privacy Policy!
PrintEasy Sheet Pan Buffalo Chicken Sliders with Ranch Drizzle

Make these simple, crowd-pleasing buffalo chicken sliders on a sheet pan for your next party or quick meal. They use Hawaiian rolls and bake up fast with melted cheese.
- Prep Time: 10 min
- Cook Time: 22 min
- Total Time: 32 min
- Yield: 12 sliders
- Category: Appetizer
- Method: Baking
- Cuisine: American
- Diet: Vegetarian
Ingredients
- 1 pound cooked, shredded chicken
- 1/2 cup buffalo wing sauce
- 1/4 cup unsalted butter, melted
- 1 tablespoon ranch seasoning mix
- 1 tablespoon Worcestershire sauce
- 1 package (12 count) Hawaiian sweet rolls
- 1 cup shredded Monterey Jack cheese
- 1/2 cup shredded cheddar cheese
- 2 tablespoons ranch dressing, for drizzling
Instructions
- Preheat your oven to 375 degrees Fahrenheit. Lightly grease a 9×13 inch baking dish.
- In a medium bowl, combine the shredded chicken, buffalo sauce, melted butter, ranch seasoning mix, and Worcestershire sauce. Mix until the chicken is fully coated.
- Slice the package of Hawaiian rolls horizontally, keeping the rolls connected in one piece. Place the bottom half of the rolls in the prepared baking dish.
- Spread the buffalo chicken mixture evenly over the bottom layer of rolls.
- Sprinkle the Monterey Jack and cheddar cheeses over the chicken mixture.
- Place the top half of the rolls over the cheese layer. Gently press down.
- Brush the tops of the rolls lightly with any remaining melted butter mixture, if desired.
- Cover the baking dish tightly with aluminum foil. Bake for 15 minutes.
- Remove the foil and bake for another 5 to 7 minutes, or until the cheese is fully melted and the tops are lightly golden brown.
- Remove from the oven. Slice the sliders apart between the rolls. Drizzle the tops with ranch dressing before serving hot.
Notes
- You can substitute blue cheese dressing for ranch dressing if you prefer that flavor profile.
- For make-ahead preparation, mix the chicken filling and store it covered in the refrigerator for up to two days. Assemble and bake just before serving.
- Use pre-cooked rotisserie chicken to save time on cooking the chicken.
Nutrition
- Serving Size: 1 slider
- Calories: 350
- Sugar: 10
- Sodium: 750
- Fat: 18
- Saturated Fat: 9
- Unsaturated Fat: 9
- Trans Fat: 0
- Carbohydrates: 28
- Fiber: 1
- Protein: 20
- Cholesterol: 65