

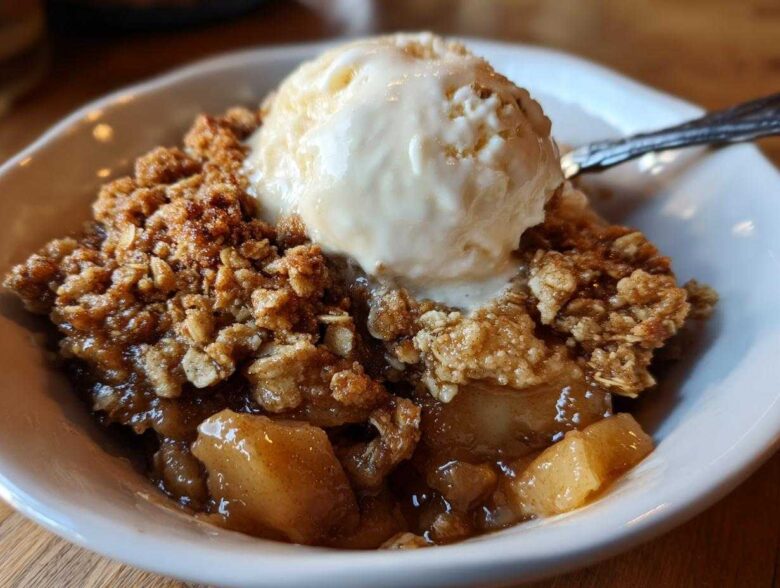
Oh, friend, when the air gets that crisp chill and you can practically smell woodsmoke starting up, that’s when you know it’s time for true comfort food. Forget those fussy layered cakes for a minute; what we really need is something warm, something bubbling, and something topped with pure, crispy gold. This, right here, is my absolute favorite, the Best Apple Crisp Recipe you will ever—and I mean *ever*—make. We’re talking about impossibly tender, cinnamon-spiced apples smothered under a perfectly buttery oat topping that stays crunchy right down to the last bite. I’ve been baking this homemade apple crisp for cozy autumn evenings since I was tall enough to reach the counter, and trust me, this recipe never lets me down. It’s perfect for a weeknight treat or when company drops by unexpectedly!
Why This Easy Apple Crisp Recipe Stands Out
I know there are tons of recipes out there, but this one keeps coming back because it just plain works, and it works fast! If you need a fantastic Comfort Food Dessert that doesn’t require you to spend an hour stirring or folding, you’ve found it. This is my go-to because it truly delivers on texture contrast. You get that warm, soft fruit underneath meeting that incredible crunch on top.
Quick Prep Time for Your Apple Crisp
Seriously, I can walk into the kitchen, gather the ingredients, toss everything together, and have this in the oven in about fifteen minutes flat. That’s why I call it my favorite Quick Baked Apple Dessert. You don’t need a fancy pastry contraption or hours of chilling time. You just mix, top, and bake. It’s perfect when you suddenly realize you need a dessert for a dinner party that starts thirty minutes away!
Achieving the Perfect Buttery Oat Topping
This is where all the magic lives, folks. So many crumbles turn into sad, soggy blankets, right? Not here! The secret weapon is using *actual* cold, cubed butter and rubbing it in just enough. We’re aiming for varying sizes in that Buttery Oat Topping—some sandy bits, some bigger clumps. When it bakes, those clumps caramelize and stay separate instead of melting into each other. That means satisfying crunch every single time!
Gathering Ingredients for Your Homemade Apple Crisp
Okay, let’s get down to business! The best part about this Easy Apple Crisp is that you probably have most of what you need hanging out in your pantry already. No fancy trips to specialty stores required—this is truly Simple Fall Baking at its finest. We unlock a lot of flavor just by using basic brown sugar and warm spices, which is going to make your house smell heavenly.
Apple Selection and Preparation Details
For the fruit base, you want apples that hold up well and give you that perfect balance of tart and sweet. I always go with about six medium apples, tossing them together—usually a mix of Granny Smith for tartness and maybe some Honeycrisp or Fuji for sweetness. Whatever you pick, make sure they are peeled, cored, and sliced; don’t worry about making them perfectly uniform, just aim for about ¼ inch thick. Toss those slices with a little granulated sugar, flour, cinnamon, nutmeg, and just a splash of lemon juice. That lemon juice is vital because it brightens up the flavor and helps keep those Tender Spiced Apples from turning brownish-gray while they bake!
Assembling the Crunchy Apple Crumble Topping
Now we move to the star of the show: the topping! For this to turn into that amazing Crunchy Apple Crumble, you need to pay attention to the oats. You absolutely must use rolled oats—the old-fashioned kind—not the quick-cook instant stuff, or it turns mushy too fast. Mix those oats with brown sugar, a little flour, and salt. The key, though, is integrating that 1/2 cup of cold unsalted butter, which you should cut into small, cool little cubes. You’re crumbling this mixture together, aiming for something that looks like coarse sand with some pea-sized clumps of butter still visible. Those clumps are going to turn into pockets of buttery delight in the oven, guaranteeing the ultimate apple crisp texture.
Step-by-Step Instructions for the Best Apple Crisp Recipe
Alright, let’s get baking! The assembly process for this apple crisp is beautiful because it’s so straightforward. You don’t need complicated folding or layering techniques, which is great if you’re nervous about your first attempt at a buttery oat topping. We’re basically making two separate bowls of magic and then bringing them together for the oven—it’s so satisfying to watch it come together this quickly.
Preparing the Apples and Baking Dish
First things first, give your oven time to heat up! We’re baking this at 375 degrees F. Grab an 8×8 inch baking dish and just give it a quick light grease—nothing fancy needed here. Now, take those spiced apples we already tossed together in the previous step; they should look wet and fragrant from the cinnamon and nutmeg. Gently spread that entire apple mixture into your prepared dish. You need to make sure they are in one nice, even layer across the bottom. This even spreading is important so that every serving of your finished apple crisp gets the same amount of fruit and cooks down evenly.
Mixing the Buttery Oat Topping for Your Apple Crisp
Time to finish that topping! Remember the dry mix we put together? Go grab that bowl. Now, take the cold butter pieces we cubed up and start working them in. I always use my fingertips for this because you can really feel the texture change best, though a pastry blender works great too if you have one. You want to pinch and rub the butter into the flour and sugar mixture until it no longer looks like distinct butter chunks but has morphed into coarse crumbs. Don’t overmix! I look for plenty of pea-sized pieces still hanging around—those little chunks are the secret to a truly crunchy apple crumble that doesn’t turn into one giant cookie on top when it bakes.
Baking and Resting the Warm Apple Dessert
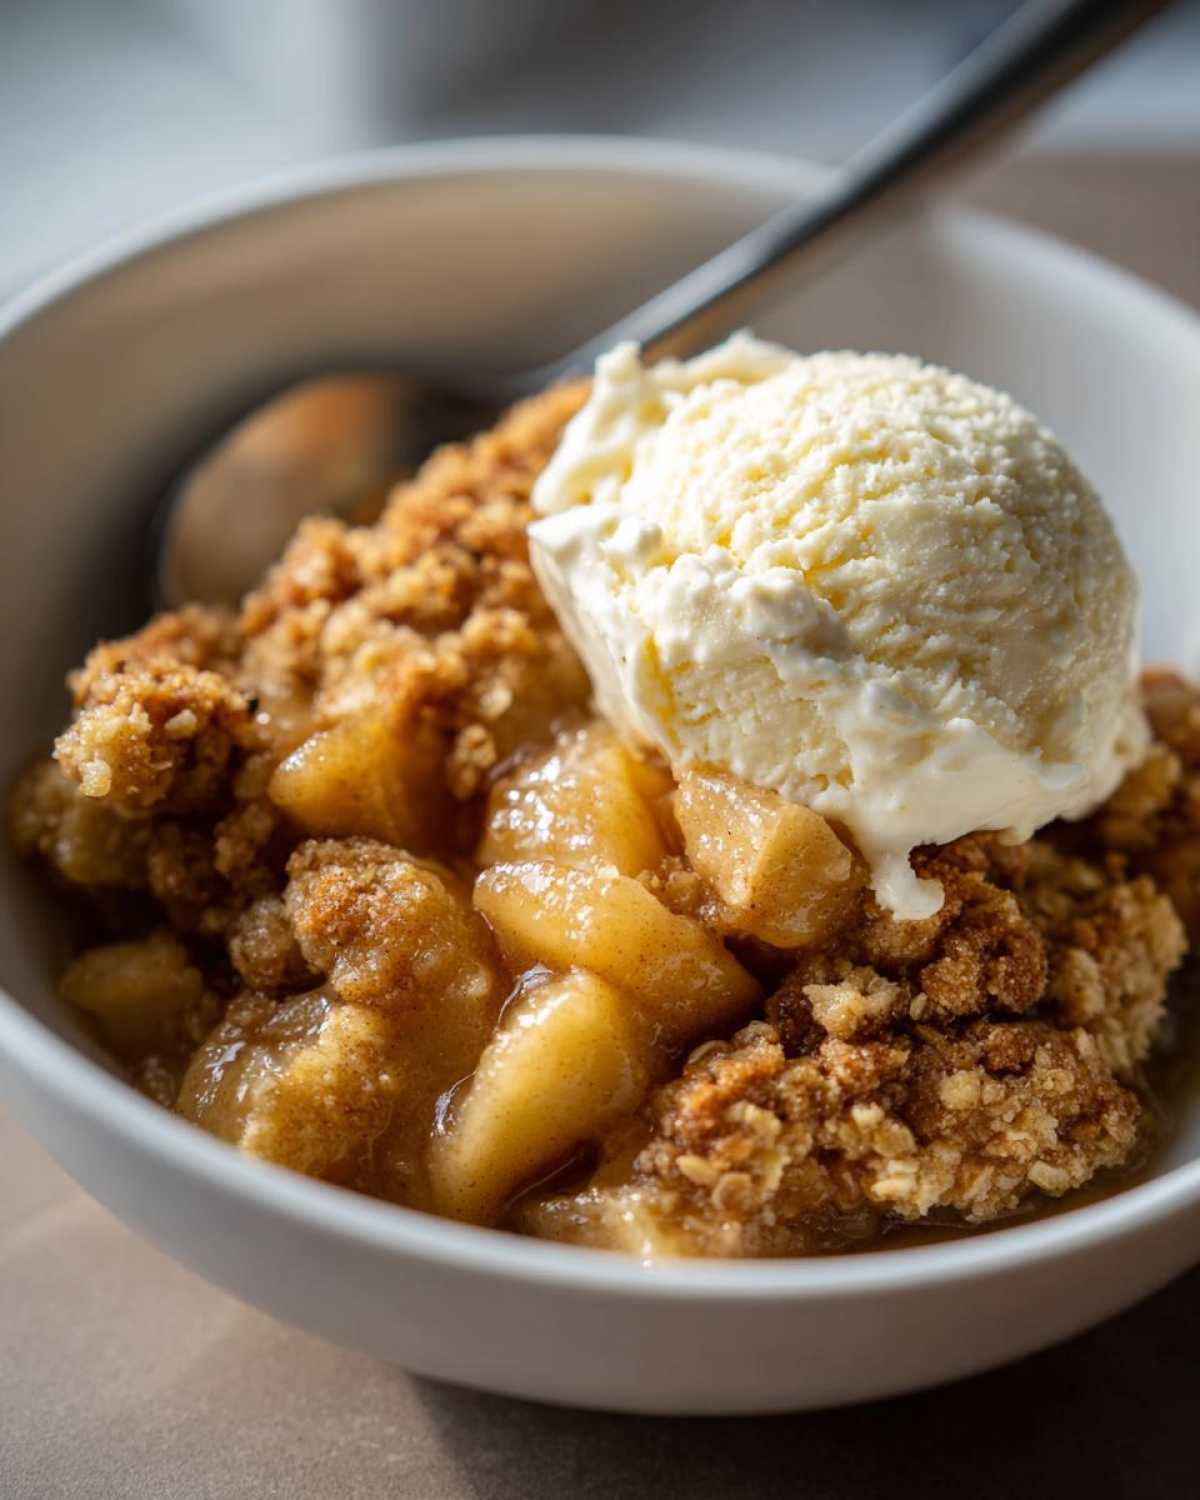
Once your oat topping is perfectly crumbly, sprinkle it right over the apples. Try to keep it relatively even, but don’t stress if one side has a slightly thicker patch; that just means you get an extra-crunchy section there! Pop it into that preheated 375-degree oven. We are looking to bake this for about 35 to 45 minutes. You’ll know it’s done when the topping is golden brown and you can easily pierce the center apples with a fork—they should be totally tender. Here’s the hardest part: let this warm apple dessert rest on the counter for at least 15 minutes once it comes out. If you cut into it immediately, all those delicious juices will run everywhere. Letting it rest lets everything set up beautifully.
Tips for Success with Your Apple Crisp
I’ve made this apple crisp dozens of times, and I’ve learned a few little tricks along the way that take it from being just ‘good’ to being absolutely unforgettable. These aren’t huge changes—they are just small baker’s secrets that really help maintain that classic texture we’re aiming for. You want this to be the apple crisp recipe people ask for year after year, right?
Ingredient Temperature Matters for the Apple Crisp Topping
I always preach about this: your butter must be COLD. If you’re rushing, don’t even bother trying to use softened butter in that topping—it melts too fast when you mix it in, and then you just end up with a greasy paste instead of beautiful crumbs. If you’re like me and sometimes you forget to cube the butter ahead of time, here’s a fantastic pro tip: once you have mixed all your topping ingredients together—the flour, oats, sugar, and cold butter—cover that bowl with plastic wrap and stick it in the freezer for about 15 minutes.
Trust me on this one! Giving that topping a quick chill time ensures those little butter pockets stay rock solid until they hit the hot oven. That rapid change in temperature is what guarantees you’ll have that superior Crunchy Apple Crumble texture we talked about. It’s a small step, but it makes a huge difference!
Flavor Variations for This Cinnamon Apple Dessert
While this recipe is perfect as an Old Fashioned Apple Crisp tribute, sometimes you want to mix things up! The beauty of a simple Cinnamon Apple Dessert like this is how easily the spices can be adapted. If you want something a little deeper and warmer than just cinnamon and nutmeg, try mixing in about ¼ teaspoon of ground cardamom with your spices. It gives a lovely subtle floral note that pairs surprisingly well with the cooked apples.
Also, if you happen to have some pecans or walnuts hiding in the pantry, toss in about a half cup of coarsely chopped nuts right into your oat topping mixture. They toast up perfectly in the oven and add another layer of crunch and richness, making the topping even bolder! Just make sure when you add nuts, you still keep that butter super cold so the texture doesn’t get heavy.
Serving Suggestions for Your Apple Crisp
Okay, you’ve pulled that glorious apple crisp out of the oven—the smells are intoxicating, and the topping is sizzling just a tiny bit. Now comes the essential part: deciding how to serve it! While you absolutely can eat this all by itself (and I won’t judge you if you plan to go straight back for seconds), the way you dress up this Fall Dessert Idea really elevates it.
The classic, non-negotiable pairing, in my opinion? A big, frosty scoop of vanilla ice cream. There is simply nothing better than the extreme temperature contrast you get with these Apple Desserts with Ice Cream. The cold, creamy vanilla melts slowly down into the warm spiced apples and soaks into the buttery oat topping. It’s pure heaven!
But if you want to get a little fancy, I have two other favorite ways to serve it up:
- Heavy Cream Drizzle: If you don’t want ice cream, a simple drizzle of heavy cream—just straight from the carton—works wonders. I like to whisk mine first just a tiny bit to make it slightly thicker and pourable across the portion.
- Caramel Swirl: Heat up some good quality caramel sauce—the thicker the better—and drizzle that generously over your warm crisp, right before serving. The saltiness of the caramel is incredible with the cinnamon and apples!
Honestly, no matter what you choose, serve it warm. That’s non-negotiable for the best results!
Storage and Reheating Instructions for Leftover Apple Crisp
It’s rare that we actually have leftovers of this apple crisp because it disappears so fast, but when we do, I need to make sure the second day isn’t a sad, mushy experience. The main goal here is protecting that gorgeous, crunchy oat topping we worked so hard to create!
If you have any leftover apple crisp, forget about leaving it covered on the counter overnight. The steam that gets trapped will absolutely sabotage your topping’s texture. You need to get it into the fridge, but not before you let it cool down completely—and I mean totally room temperature—first. Once cool, cover the dish tightly with plastic wrap or foil and pop it in the refrigerator. It stays perfectly good for about three or, if you’re lucky, four days.
Reheating for That Fresh-From-the-Oven Experience
The microwave is your enemy when reheating crisp, folks. I know it’s fast, but microwaving turns that beautiful oat topping into something soft and chewy, and we want crispness!
For the absolute best results—the kind that tastes like it just came out of the oven—you have to use the oven or even an air fryer if you have one. Set your oven to about 325 degrees F. Place the portion you want to eat onto a small baking sheet or just put the lid back on the dish (if it’s oven-safe, otherwise foil). Heat it up for about 10 to 15 minutes. This slow, gentle heat warms the apples right through while gently toasting the topping back to life.
When You Absolutely Need Crisp *Right Now*
Okay, sometimes you’re craving dessert and you just can’t wait 15 minutes for the oven to warm up. If you’re in that real hurry, the microwave is permitted, but you have to cheat a little bit. Only reheat the apple portion first, maybe for 45 seconds until the apples are warm. Then, grab a tiny bit of plain raw oat topping (if you saved any spare from the original batch, or just mix a teaspoon of oats and a tiny bit of cold butter together). Sprinkle that on top of your warmed portion and microwave for just 10 more seconds. It won’t be as crunchy as the oven method, but it saves you from eating cold fruit, and that’s a win!
Frequently Asked Questions About Making Apple Crisp
I always get asked the same questions about this recipe, especially when people are trying it for the very first time. It’s totally normal! Baking is chemistry, but these little tweaks make all the difference between a good dessert and a spectacular one. I’ve gathered the most common things people wonder about when they are making their own Homemade Apple Crisp right here. Before you jump in, remember to always check out our disclaimers over at our official page!
Can I make this apple crisp without oats?
That’s a tough one, because let’s be honest, the oats are what make it an apple crisp rather than just a regular apple crumble! If you absolutely can’t use oats for whatever reason, you can try this—though I need to warn you, the texture will change. You can substitute the 1/2 cup of rolled oats with an additional 1/4 cup of all-purpose flour and increase your brown sugar slightly by about 2 tablespoons. This will create a finer, more crumbly topping, which is closer to what my Aunt Carol called her ‘Old Fashioned Apple Crisp.’ It still tastes great because of that buttery richness, but you lose that signature hearty chewiness from the oats.
What is the best way to prevent a soggy bottom on my apple crisp?
Oh, the dreaded soggy bottom! No one wants that when serving up their Warm Apple Dessert. This happens for two reasons: too much liquid from the apples or not enough heat getting to the bottom layer. First, always make sure the apples are only coated, not swimming, in their spice/sugar mixture. You want to tap off any excess liquid before you spread them in the pan. Also, make sure your baking temperature is exactly right; we bake this at 375 degrees F. Baking right away at a lower temperature lets the moisture leech out before the crust sets. Don’t forget that 15-minute resting period; it lets the juices re-absorb instead of running everywhere!
Estimated Nutritional Data for This Apple Crisp
I feel like I really ought to give you folks some numbers, just so you know what you’re getting into when you dig into this wonderful treat! Now, please know that these figures are just my best estimations based on using standard ingredients and dividing the recipe exactly into six servings. Since we all use apples of different sizes and butter brands vary, these are a baseline guide, not gospel, so take them with a grain of salt (a little salt in the topping is good, too, wink!). You can check out our full policy details over at my privacy policy page if you’re ever curious about how we handle information!
Here’s a rough breakdown for one serving of this amazing dessert:
- Calories: 350
- Fat: 18g
- Carbohydrates: 48g
- Protein: 4g
- Sugar: 30g (Mostly natural fruit and brown sugar, which is fine, right?)
Remember, these numbers assume you’re eating it plain! If you top it with a giant scoop of vanilla ice cream, that number is going up, but trust me, it’s worth every single extra calorie when that cream starts melting down the warm spiced apples. Enjoy it, and don’t stress too much about the details when something tastes this much like autumn!
Share Your Experience with This Apple Crisp
I truly hope this recipe has brought as much warmth and comfort to your kitchen as it has to mine over the years! We’ve covered all the secrets to getting that unbelievably tender fruit and that perfect, shatteringly crunchy oat topping. Now, it’s your turn. I am dying to know how your batches turn out!
When you make this apple crisp, please don’t be shy about sharing your results. Hop down to the comments section below and leave me a star rating—let me know if it was four or five-star fall perfection for you! Tell me what apples you used; sometimes your local varieties make a huge difference!
Also, if you snap a picture of your bubbling, beautiful dessert—especially if you’ve smothered it with ice cream like you should—please tag me on social media! Seeing your Cozy Autumn Treats pop up in my feed makes my whole week. It takes a village to keep these old, treasured recipes alive, and your feedback helps me know I’m sharing something truly wonderful. Anytime you need the contact form or want to ask a follow-up question, you can always reach out via the contact page. Happy baking, my friends!
PrintThe Best Easy Apple Crisp with Buttery Oat Topping

Make this simple, classic apple crisp featuring tender, spiced apples beneath a perfectly buttery and crunchy oat topping. It is a quick dessert ideal for fall gatherings.
- Prep Time: 15 min
- Cook Time: 40 min
- Total Time: 55 min
- Yield: 6 servings
- Category: Dessert
- Method: Baking
- Cuisine: American
- Diet: Vegetarian
Ingredients
- 6 medium apples (like Granny Smith or Honeycrisp), peeled, cored, and sliced
- 1/4 cup granulated sugar
- 1 tablespoon all-purpose flour
- 1 teaspoon ground cinnamon
- 1/4 teaspoon ground nutmeg
- 1 tablespoon lemon juice
- 1/2 cup all-purpose flour
- 1/2 cup rolled oats (not instant)
- 1/2 cup packed light brown sugar
- 1/4 teaspoon salt
- 1/2 cup (1 stick) cold unsalted butter, cut into small pieces
Instructions
- Preheat your oven to 375 degrees F. Lightly grease an 8×8 inch baking dish.
- In a large bowl, toss the sliced apples with the 1/4 cup granulated sugar, 1 tablespoon flour, cinnamon, nutmeg, and lemon juice. Spread the apple mixture evenly into the prepared baking dish.
- In a separate medium bowl, combine the 1/2 cup flour, rolled oats, brown sugar, and salt for the topping.
- Cut in the cold butter using a pastry blender or your fingertips until the mixture resembles coarse crumbs with some pea-sized pieces remaining.
- Sprinkle the oat topping evenly over the apples.
- Bake for 35 to 45 minutes, or until the topping is golden brown and the apples are tender when pierced with a fork.
- Let the crisp cool for at least 15 minutes before serving warm.
Notes
- Serve this warm apple crisp with a scoop of vanilla ice cream or a drizzle of heavy cream.
- For a crunchier topping, chill the topping mixture for 15 minutes before sprinkling it over the apples.
- You can use a mix of apple varieties for a more complex flavor.
Nutrition
- Serving Size: 1 serving
- Calories: 350
- Sugar: 30g
- Sodium: 120mg
- Fat: 18g
- Saturated Fat: 11g
- Unsaturated Fat: 7g
- Trans Fat: 0.5g
- Carbohydrates: 48g
- Fiber: 5g
- Protein: 4g
- Cholesterol: 45mg