

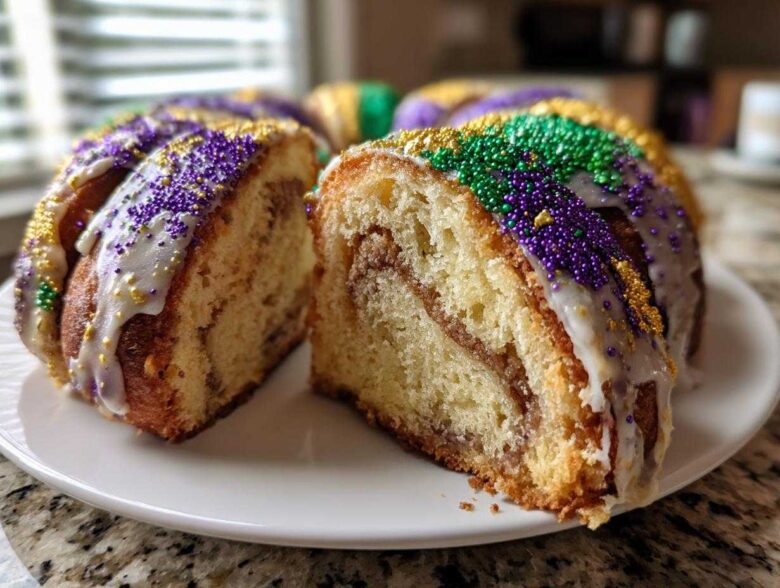
The air gets buzzing when Mardi Gras season rolls around, right? You can almost smell the beignets and hear the brass bands even if you’re miles away from the Crescent City! For us, celebrating Carnival Season Desserts means one thing: baking the ultimate **king cake** from scratch. I’m Mateo, and after years of testing, I think I’ve finally cracked the code on a truly authentic New Orleans Style King Cake. Forget those dense, store-bought versions; this one uses a soft, buttery brioche dough that I worked tirelessly to perfect so it stays wonderfully moist. It captures all that festive spirit in one glorious, jewel-toned ring. If you want to know more about how we capture life in our kitchen, check out our story here. Get ready for some seriously delicious Louisiana Desserts!
Why This New Orleans Style King Cake Recipe Works (EEAT Focus)
When you’re aiming to make a truly authentic **king cake**, you can’t skimp on the fundamentals. This *New Orleans Style King Cake* isn’t just a bread ring; it’s an experience! We built this recipe around three main things that make it stand out from every other Carnival Season Dessert you’ve tried.
- We master the soft brioche texture that melts in your mouth.
- We give you the option to add a truly decadent cream cheese filling.
- We stick to that classic, buttery, cinnamon-forward flavor profile.
The real magic? It’s the patience we put into the rise. That slow, steady process is what guarantees that pillowy, perfect crumb that makes this **king cake** a showstopper. Trust me, this technique beats rushing it any day. If you’re looking for other dough mastery secrets, check out my tips on pizza dough—it uses some of the same principles!
The Secret to a Soft Brioche King Cake Dough
For brioche, the dough needs to be handled delicately. The biggest rule here is checking your ingredient temperatures. Your milk needs to be warm, not hot, and your eggs must be at room temperature. If they hit that yeasty mixture too cold, you’re slowing down the whole party!
Then there’s the kneading. You absolutely must knead this dough for a solid 8 to 10 minutes. I remember the first time I nailed it—it was evening, and I was about to quit, but then I felt it change. It went from sticky and sullen to silky smooth and elastic under my hands. That’s when you know it’s ready to rise perfectly and behave itself when you roll it out later. It’s an incredible feeling!
Gathering Your Ingredients for the Perfect King Cake
Okay, now that we understand *why* this **king cake** is going to be better than anything you’ve bought, let’s talk about what you need to pull this off. Because this is a yeast dough, attention to detail matters, especially with temperature. Don’t just grab eggs from the fridge and dump them in! For the best rise, you always want your milk and eggs to be nice and cozy—room temperature—before they meet the yeast. If you check out my honey wheat bread recipe, you’ll see I’m obsessed with that step in all my yeast bakes!
We’ve broken the list down by section. Keep it handy! The butter quality really shines through in a rich dough like this, so splurge a little if you can.
The King Cake Dough Needs:
- 1 cup warm milk (aiming for about 110°F—test it with a careful finger!)
- 2 1/4 teaspoons active dry yeast
- 1/2 cup granulated sugar, divided
- 2 large eggs, room temperature! (Seriously, warm them up slightly if needed.)
- 1/4 cup unsalted butter, softened
- 1 teaspoon salt
- 4 cups all-purpose flour, plus more for dusting
- 1 teaspoon vanilla extract
For the Cinnamon Swirl Filling:
- 1/2 cup (1 stick) unsalted butter, melted, for brushing
- 1/2 cup packed light brown sugar, for swirl
- 2 tablespoons ground cinnamon, for swirl
- 1/4 cup granulated sugar, for swirl
- 1/4 cup all-purpose flour, for swirl
Optional Cream Cheese Filling:
- 1 (8 ounce) package cream cheese, softened
- 1/4 cup powdered sugar
- 1 tablespoon milk
For the Glaze and Decoration:
- Powdered sugar and milk/water for glaze
- Purple, green, and gold sanding sugars or sprinkles!
Ingredient Notes and Substitutions for Your King Cake
Listen, sometimes we don’t have everything on hand, and that’s life! If you only have instant yeast instead of active dry, that’s fine—you can skip the foamy activation step entirely and just mix the instant yeast right in with the flour and other dry ingredients. It’ll still work its magic, but you might need a tiny bit more liquid later on since the hydration process starts immediately.
Also, that butter? If you have to reach for margarine, go ahead, but I won’t lie, the flavor won’t be quite as deep and rich. This brioche dough demands that real butter flavor to really sing. We need that fat to keep things soft!
Step-by-Step Instructions for Making Your Homemade King Cake
Alright, time to get our flour on! Baking a yeast **king cake** can seem fussy, but if we take it one simple step at a time, it’s actually super relaxing. Think of the yeast rising time as your designated chill time—use it to prep your fillings or just put your feet up! We’re going to walk through mixing the dough, getting that beautiful swirl in, and forming the perfect ring shape. If you’ve ever struggled with bread before, don’t worry; this process should feel familiar! For extra proofing guidance, peek at how I get high rises on my Yorkshire puddings—the science of heat and yeast is surprisingly similar, as you can see in my tips over at this post.
Preparing the Dough and First Rise for the King Cake
First things first, we wake up that yeast! In a big bowl—I actually use my stand mixer bowl just to get started—combine your warm milk, the yeast, and just one tablespoon of sugar. Don’t use hot milk or you’ll kill the poor little organisms! Wait about 5 to 10 minutes. If you see foam on top, success! Your yeast is alive and ready to party.
Next, we add the rest of the sugar, your room-temperature eggs, the softened butter, salt, and vanilla. Gradually start adding the flour until it comes together into a shaggy ball of dough. Now, the real work begins: kneading! Turn that dough out onto a lightly floured surface. You need to work that gluten for a solid 8 to 10 minutes. Keep pushing, folding, and turning, and suddenly, it won’t feel sticky anymore. It will feel smooth, almost satiny, ready to stretch without tearing. That’s how you know you got it right!
Tuck the dough into an oiled bowl, cover it up tight, and find a warm spot in your kitchen—maybe near the oven if it’s running—and just let it chill out. It needs 1 to 1.5 hours, or until it’s doubled its size. Don’t touch it during this time!
Shaping and Second Rise: Forming the Classic King Cake Ring
Once the dough has puffed up big and beautiful, gently punch it down—just deflate it slightly. Flour your surface lightly, and roll that dough out into a big rectangle, roughly 12 by 18 inches. Now, brush every inch of that surface with your melted butter. This is what keeps the cinnamon swirl from getting powdery.
For the swirl, mix all your brown sugar, cinnamon, 1/4 cup of white sugar, and 1/4 cup of flour together until it’s crumbly. Sprinkle this mixture evenly right over that buttery layer. If you are going for that ultra-rich **Cream Cheese Filled King Cake**, now is when you gently spread that softened cream cheese mixture on top, leaving about an inch bare along one of the long edges. This border is your glue later!
Starting on the long side *opposite* that border, roll that dough up super tight, like a jelly roll. You want it snug! Pinch the seam closed really well. Then, gently curve the long log around to form a circle, overlapping the ends by about an inch. This overlap is super important—you need to pinch those two ends together firmly, making sure they are sealed! If they pop open in the oven, your beautiful swirl will ooze out completely.
Place your ring gently onto a baking sheet lined with parchment paper. Cover it loosely again and let it hang out for another 45 to 60 minutes until it looks wonderfully puffy. Time to preheat that oven to 375°F (190°C) during the last 15 minutes of this rise. We want it ready when the cake is!
Mastering the King Cake Decoration Ideas
The final chapter of our **king cake** story is the most fun—the decorating! This is when your beautiful, buttery brioche turns into a sparkling showstopper worthy of any parade route. There is a real tradition here, and once you know the colors, you’ll never look at this **purple green gold dessert** the same way again.
First, and this is a big one, your cake MUST be completely cool before you touch it with glaze. If you pour that glaze over a warm cake, it will just soak right in, turn translucent, and look sad. We want an opaque, bright coat!
The Meaning Behind Purple, Green, and Gold
When you’re picking out your sanding sugars, remember that these colors aren’t random. They are the official colors of Mardi Gras, chosen way back in 1872, and they actually mean something significant. I love explaining this to friends!
- Purple: This represents Justice.
- Green: This stands for Faith.
- Gold: This symbolizes Power.
So, when you’re sprinkling them on, you are literally dressing your cake in the true spirit of Carnival!
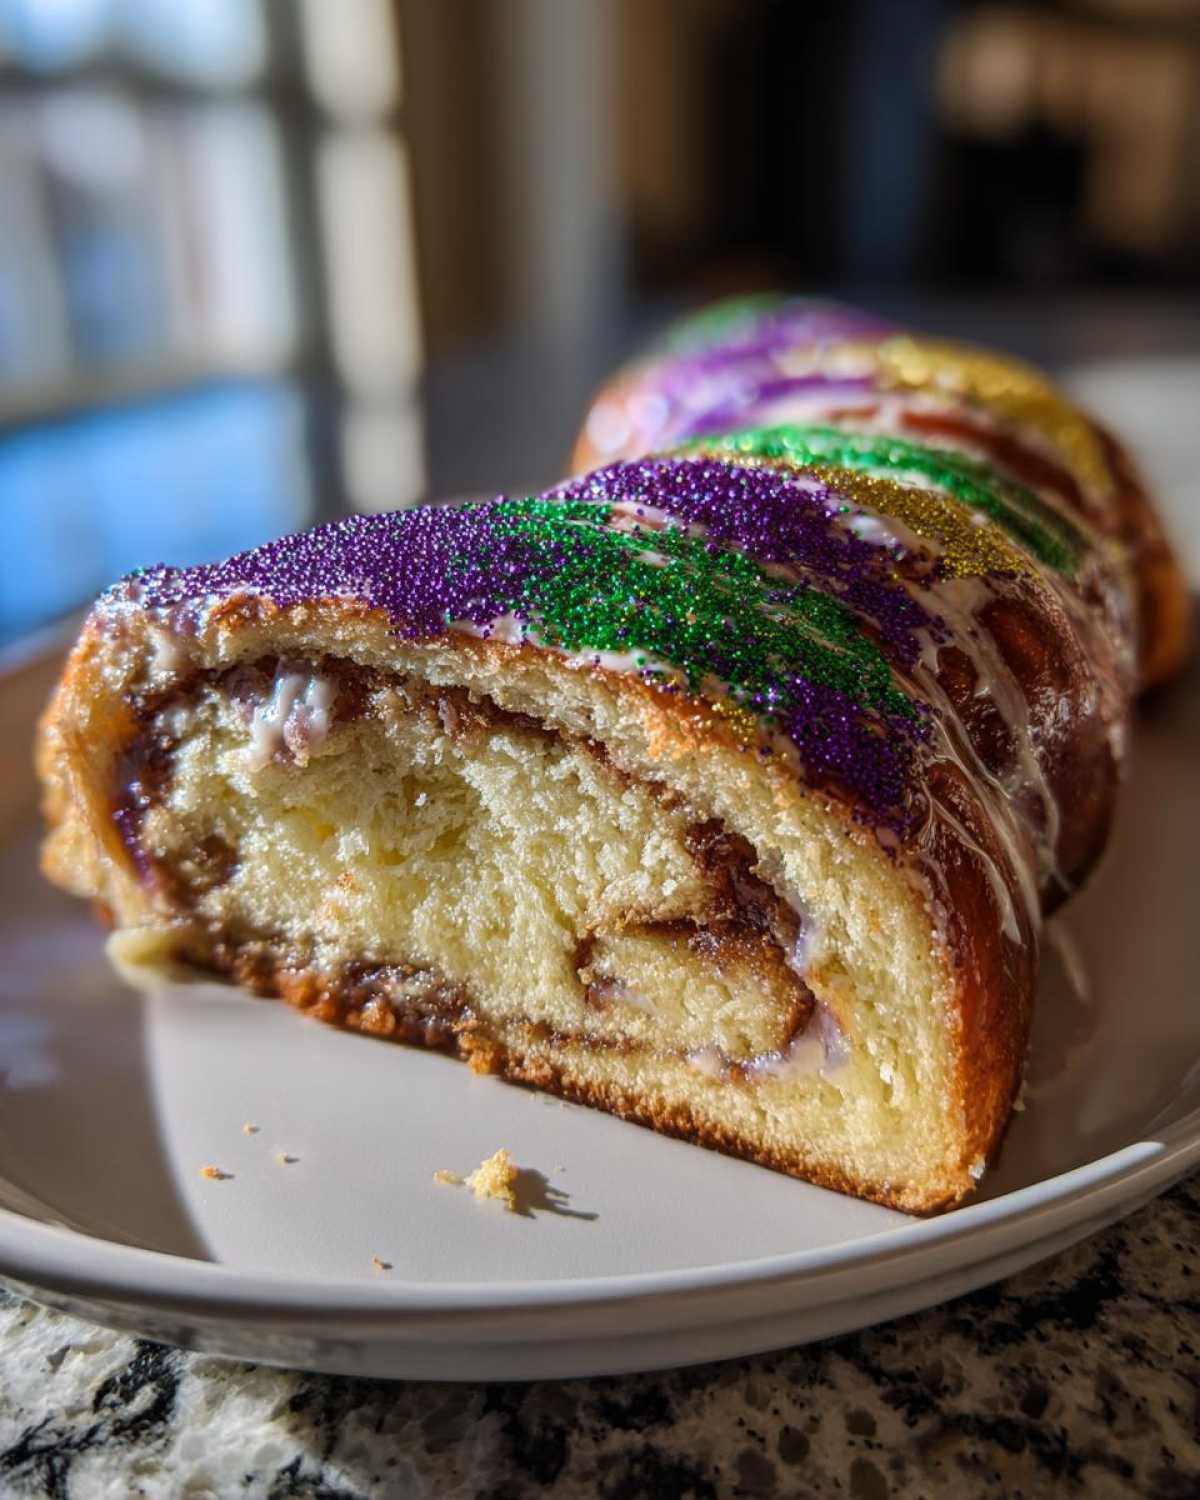
Achieving the Perfect King Cake Glaze
Don’t try to make a fussy icing here; we need something that sets up firmly so the sanding sugars stick but doesn’t get brittle. For a simple yet effective **Glazed King Cake**, I usually just whisk together powdered sugar with just enough milk or water to get it thick. If you are making a huge **king cake**, you might need to double the glaze batch!
You want the glaze to be thick enough that when you dip a spoon into it, it takes a full second or two for the glaze that dripped off to settle back into the bowl. It should slowly coat the back of the spoon. Use a spatula or the back of the spoon to quickly spread an even layer over the entire top surface of the now cooled cake.
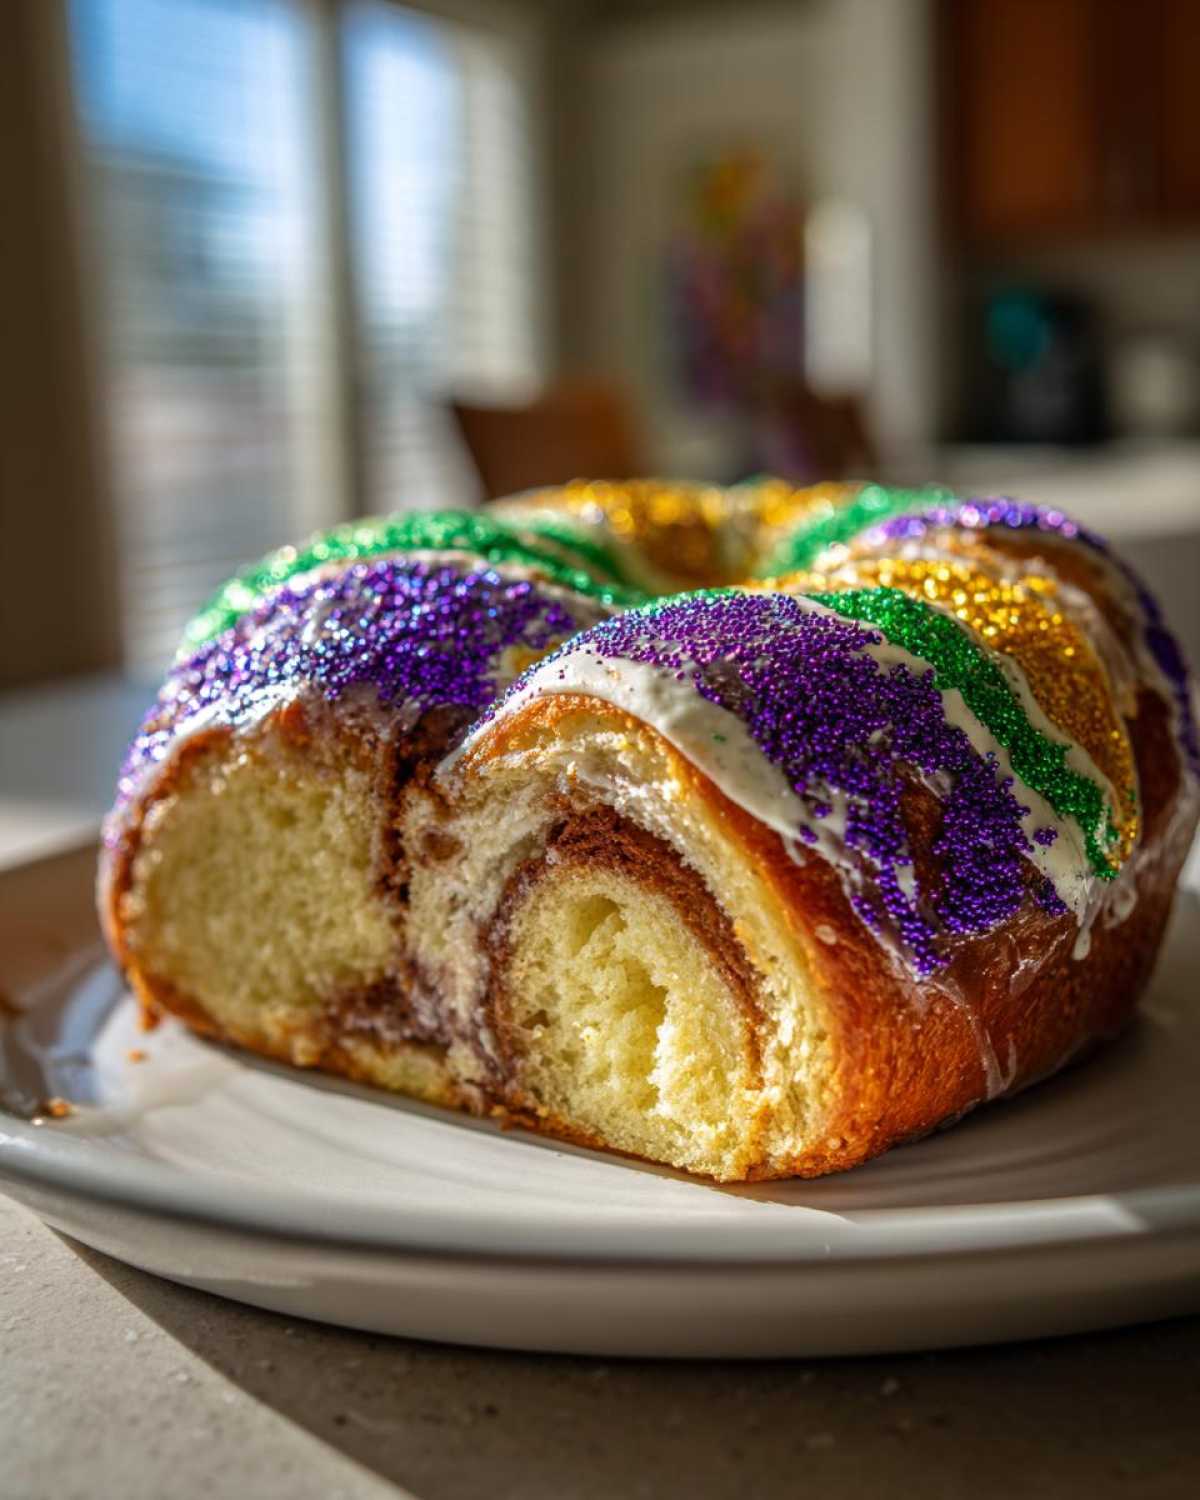
The trick for the colors is speed! As soon as you get the glaze on, immediately start showering the cake with the purple, green, and gold sugars. Don’t try to do one color perfectly across the whole cake; instead, try to evenly distribute the mix overall. If you want more defined stripes, you can glaze in sections, but honestly, a mixed, festive pile of colors always looks more authentic to me!
If you want to see some incredibly detailed cookie versions inspired by this exact tradition, check out some ideas over here. It’s amazing how one theme inspires so much creativity!
Tips for Success When Baking a King Cake
Whew! Making a **king cake** from scratch is totally worth the effort, but I’ve learned a few tricks along the way that can save you some stress, especially when the Mardi Gras calendar is tight. Baking this classic bread is rewarding, but it requires a bit of foresight. Don’t stress the timing, though; we can totally plan ahead!
My biggest piece of advice, which I mentioned before but it needs repeating louder: Wait until that cake is fully, completely, totally cool before you even *think* about the glaze. Seriously, put it on the rack and walk away for an hour. If you’re making this for a big party, remember that fun, slightly mischievous little tradition? Make sure you hide that plastic baby inside *before* the final rise, but *after* you’ve shaped the ring. If you bake it with the baby in there, you risk melting it or cracking the dough, so timing that placement is key!
Make Ahead King Cake Strategy for Fat Tuesday
If you want to get ahead of the **Carnival Season Desserts** rush, this brioche dough is actually fantastic for freezing! You can tackle the first rise, knead the dough, and then brush it with a little oil, place it in a big Ziploc bag, and tuck it into the freezer for up to a month. This is perfect if you want to bake fresh for Fat Tuesday without spending two days mixing!
When it’s time to bake, defrost the dough slowly overnight in the fridge. Then, here’s the crucial part: You need to let it come up to room temperature on the counter for at least an hour or two before you proceed with shaping and adding the filling. If the dough is cold when you roll it out, it will fight you and tear during the rolling process.
You can also refrigerate the shaped, unbaked **king cake** overnight after the second rise, covered tightly. Just pull it out about 45 minutes before you preheat the oven to let it warm up just slightly before baking. This makes your actual party morning so much less frantic! If you love making things ahead of time, I always share tips on everything from freezer burritos to cookies over at this post!
Serving Suggestions for Your Festive King Cake
Now that you’ve got this gorgeous, colorful **king cake** sitting on the cooling rack, looking like it just rolled off a parade float, what do you serve it with? Honestly, this rich, buttery brioche is perfect all by itself, but we’re all about making every moment feel special! If you’re looking for the perfect beverage pairing, skip the regular stuff.
Since this is a sweet, yeast-raised bread, it pairs perfectly with something bold to cut through that richness. My favorite is a strong cup of coffee. If you can find some authentic New Orleans chicory coffee? Even better! That slight earthiness meshes beautifully with the cinnamon swirl and the sugary glaze.
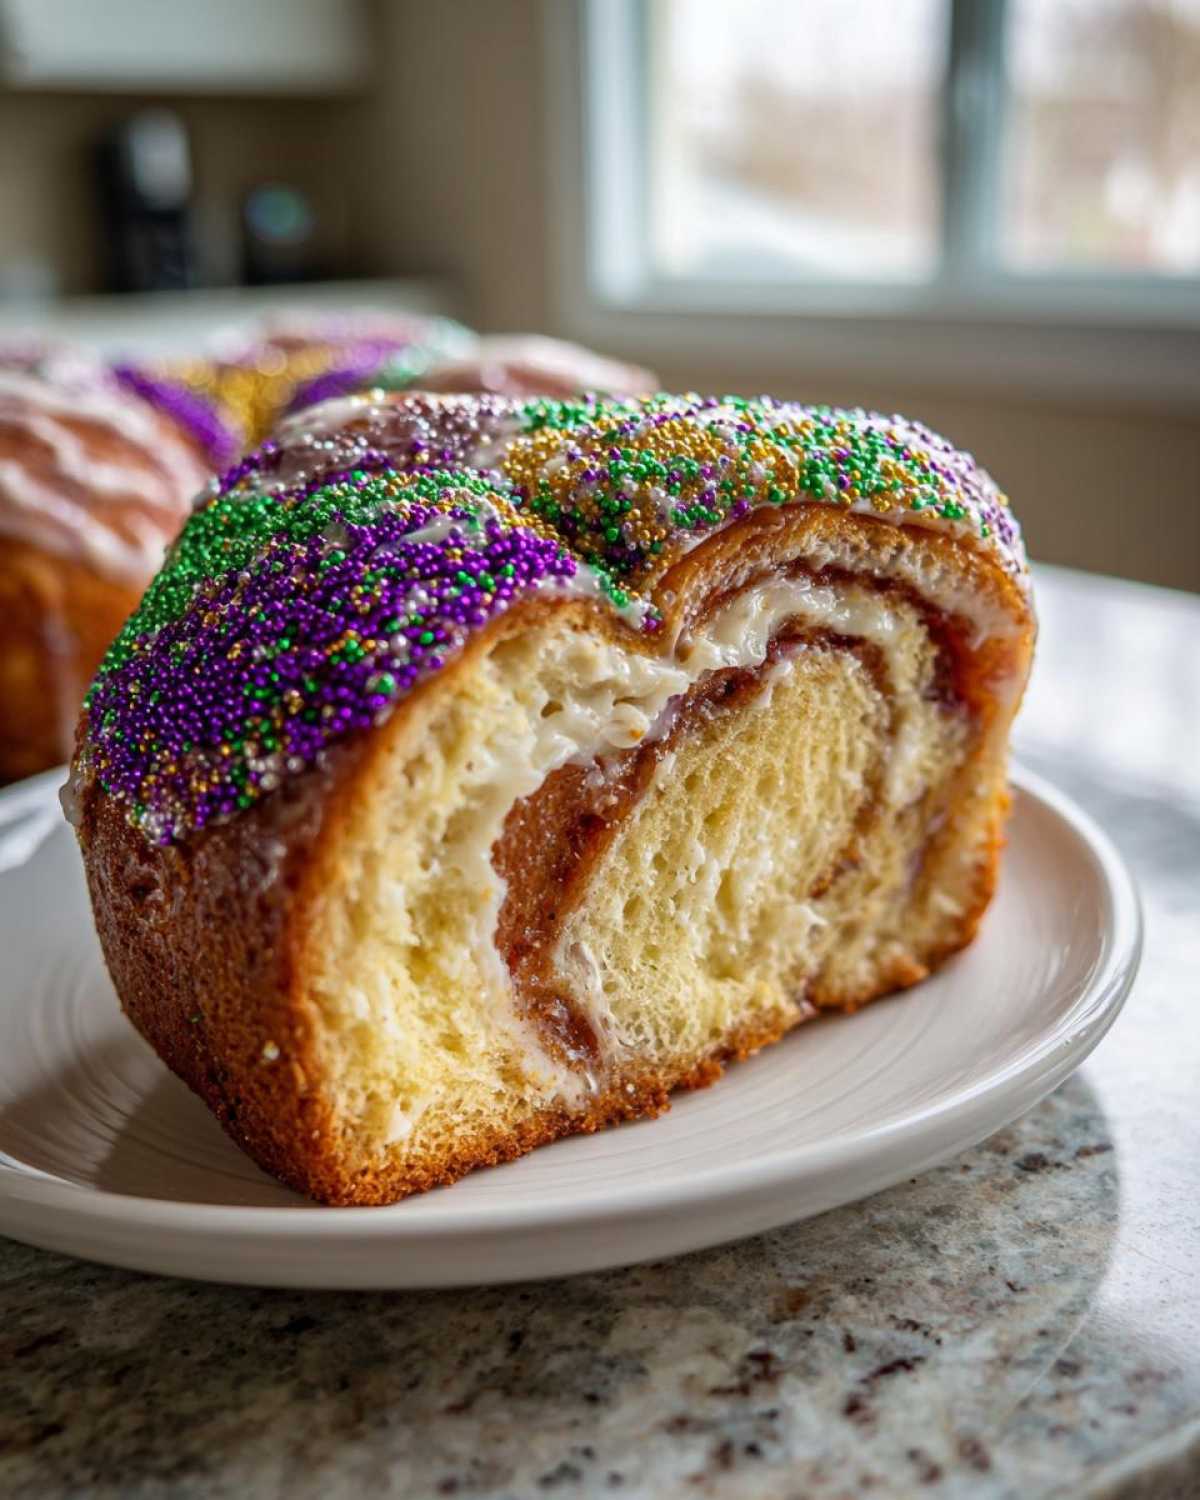
If you’re serving it during the day, perhaps for a brunch gathering, a little side of something bright is nice. We sometimes slice up some fresh oranges or pineapple as a palate cleanser between rich slices. It’s simple, and it looks great contrasted against the purple, green, and gold!
For presentation, you don’t need fancy platters. Just placing the ring on a big white plate—or even better, your grandmother’s china—where the colors can really pop is all it takes. It’s beautiful chaos, just the way we like it here at Flavor Zine! If you’re looking for other great breakfast bakes, you have to see how fluffy my buttermilk pancakes turn out!
Storing Leftovers of Your Delicious King Cake
So, you have an entire beautiful, colorful **king cake** left over? Congratulations, you’re set for breakfast all week! But storing this kind of yeast bread is a little different than tucking away a dense pound cake. Since this is a brioche-style dough, it just doesn’t stay perfectly soft forever, no matter how good the initial bake was.
If you’ve got that bright, sugary glaze on top, the best place for short-term storage—say, the next 24 hours—is right on the counter. Never put a glazed **king cake** in the fridge unless you absolutely have to! Cold air dries out sweet doughs so fast, and that beautiful glaze will get hard and crackly. Just cover the whole ring loosely with plastic wrap or place it under a big cake dome to keep the air off.
After about 24 hours, you’ll notice the texture changing a little. It might feel slightly firmer, but don’t worry! That’s when we bring in a little heat to bring that softness back to life. For the absolute best texture, I always go piece by piece, rather than reheating the whole ring, which can throw off the glaze.
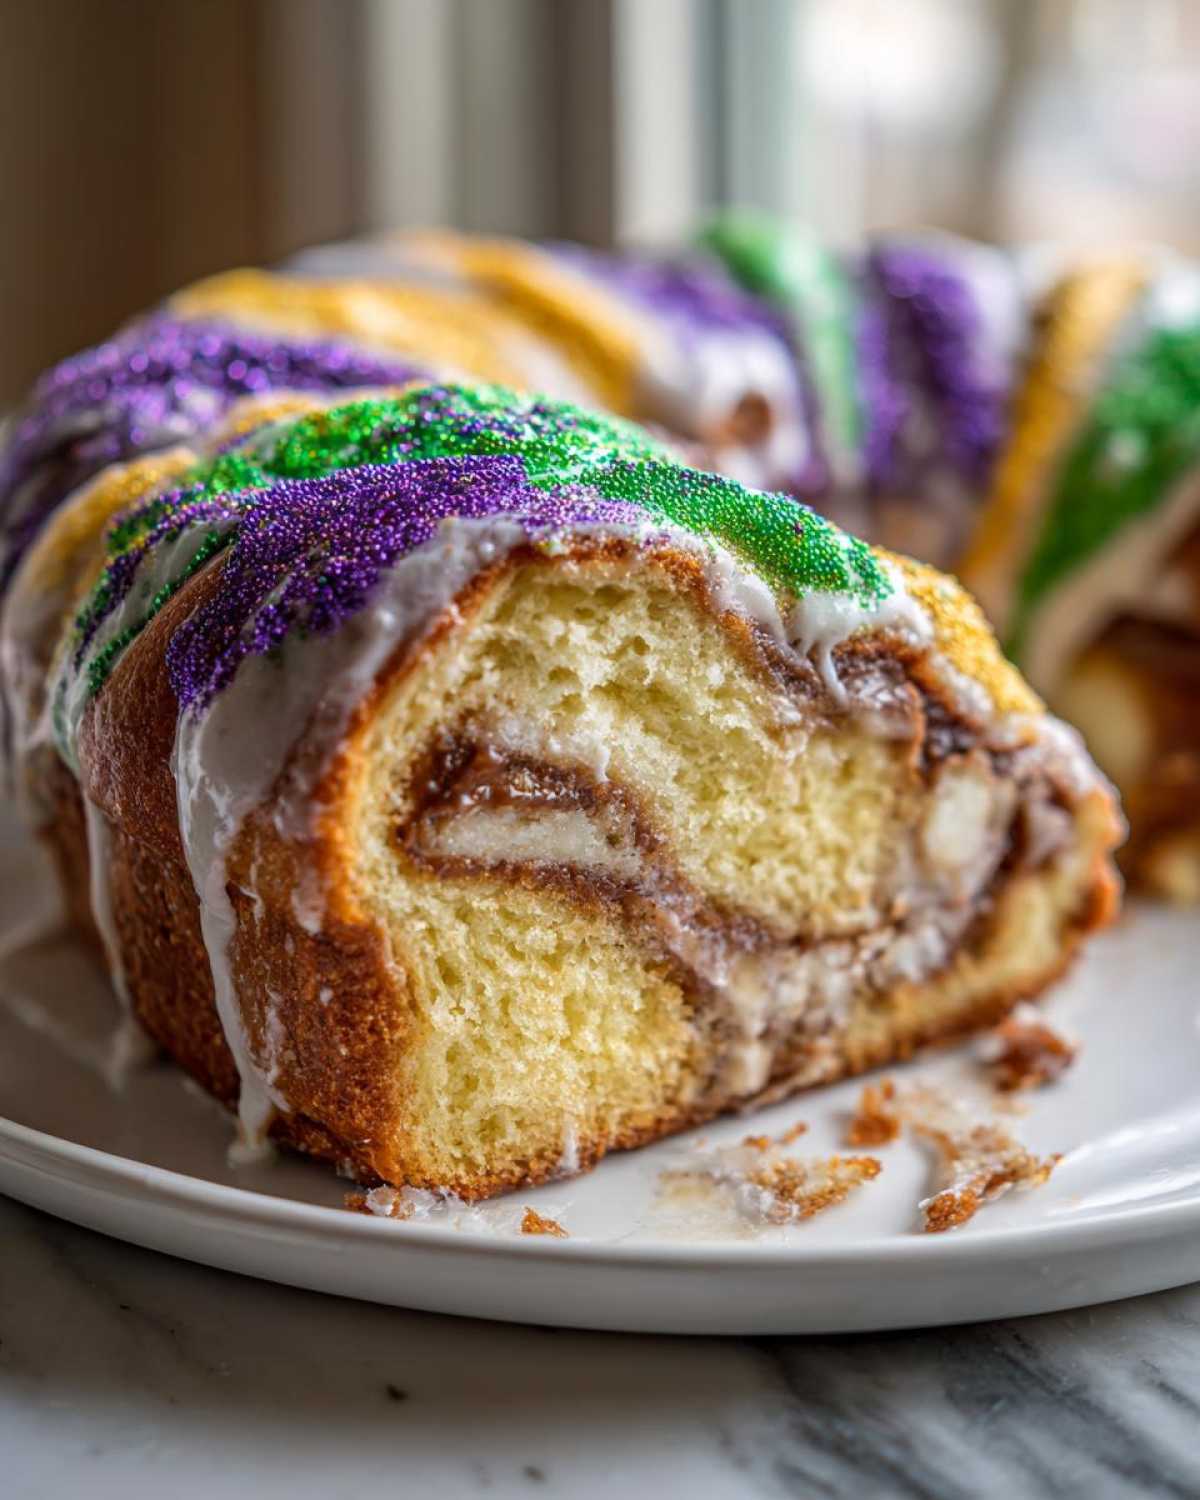
Here’s my trick for reviving those leftover slices. Wrap an individual slice snugly in a tiny square of damp paper towel—just lightly damp, don’t drown it! Then, microwave that wrapped slice for about 10 to 15 seconds on medium power. It steams the bread perfectly, making the crust soft again without turning the inside gummy. It comes out tasting like it was just baked!
If you’re not going to eat it within two days or you’re facing a heatwave, then yes, you need the fridge. Seal the naked cake (if you managed to scrape some glaze off first) or tightly wrapped slices in an airtight container. When you pull it out, let it sit on the counter for an hour to take the chill off before trying the microwave trick. If you’re looking for other great make-ahead recipes that hold up well, check out my tips on cool whip cookies—those freeze like a dream!
Frequently Asked Questions About the King Cake Recipe
I know you’ve put in the work to get this gorgeous, sweet **king cake** baked, but sometimes little questions pop up right before that final decorating step or when you’re planning the next party. That’s totally normal! Mateo and I get asked these things all the time, so I’ve gathered the most common queries right here to make sure your Carnival celebration is stress-free.
Can I make this an Easy King Cake without the filling?
Absolutely, you don’t *have* to use a filling! If you’re aiming for an **Easy King Cake**, or maybe you just love the pure, buttery flavor of the brioche dough itself, skip both the cream cheese and the cinnamon swirl layers. Just roll the dough out, brush generously with melted butter, and dust it liberally with the cinnamon-sugar mixture we prepared. Pinch it closed and let it rise. It will bake up flatter and slightly less tall, but it’s still fantastic and cuts down on prep time immensely!
What is the difference between Louisiana and New Orleans Style King Cake?
That’s a super common question regarding **King Cake Traditional** recipes! While many people use the terms interchangeably, especially outside of the area, generally speaking, the “New Orleans Style” cake is what most people picture today: the soft, yeast-risen brioche dough, often filled (like ours!), and covered in icing and sanding sugars. The older, broader “Louisiana King Cake” can sometimes refer to less embellished versions or even cakes made with cake batter instead of yeast dough. We are definitely aiming for that iconic, soft, yeasted style that defines NOLA celebrations!
What is the significance of the colors on a King Cake?
This is my favorite piece of trivia that always impresses guests when I talk about **King Cake Decoration Ideas**! The purple, green, and gold aren’t just pretty choices; they represent the official heraldic colors of Mardi Gras, chosen way back in 1872. Purple stands for Justice, Green is for Faith, and Gold symbolizes Power. So when you’re sprinkling, you’re decorating with meaning!
If I don’t have sanding sugar, what is the best alternative for decoration?
If you can’t get your hands on the coarse sanding sugars, don’t panic! You still need that color contrast. Your next best bet is using colored sprinkles, though they tend to dissolve into the glaze faster since they have less texture. The other great option is making colored icing! You can separate your basic glaze into three small bowls and mix in a drop or two of gel food coloring—purple, green, and gold. Then you can drizzle them on just before the glaze sets. If you want to see how some other folks tackle this, check out the variety of recipes linked—I love how much creativity people bring to their King Cake presentation!
If you have any other burning questions that weren’t covered here, please feel free to reach out through our contact page. We love hearing from our readers!
Nutritional Estimates for This King Cake
Okay, friends, here’s the reality check! While this **king cake** is pure joy and tradition, it’s definitely a treat—a real Carnival Season indulgence! I wanted to give you a rough idea of what you’re looking at calorie-wise so you can plan your Fat Tuesday feasting accordingly. Remember, this is just an estimate, and it can swing wildly depending on one huge factor: did you go all-in with that glorious cream cheese filling or keep it simpler with just the cinnamon swirl?
All these numbers assume you’re getting one generous slice of the full recipe (yields 10 servings).
- Serving Size: 1 slice
- Calories: 450
- Sugar: 45g (Yep, that glaze adds up!)
- Sodium: 250mg
- Fat: 22g
- Saturated Fat: 13g
- Unsaturated Fat: 9g
- Trans Fat: 0.5g
- Carbohydrates: 58g
- Fiber: 2g
- Protein: 7g
- Cholesterol: 65mg
If you’re keeping track of ingredients and want to check out how we handle reader data privacy while you’re here, take a look at our privacy policy. Bottom line: enjoy this **Mardi Gras King Cake Recipe** responsibly, and may the calories count as virtue since you baked it with love!
PrintAuthentic New Orleans Style King Cake with Cream Cheese Swirl
Bake this soft, brioche-style King Cake, perfect for Mardi Gras. This recipe features a rich cinnamon swirl filling and a cream cheese option, finished with traditional purple, green, and gold decoration.
- Prep Time: 45 min
- Cook Time: 30 min
- Total Time: 3 hours 45 min
- Yield: 10 servings
- Category: Dessert
- Method: Baking
- Cuisine: American (Louisiana)
- Diet: Vegetarian
Ingredients
- 1 cup warm milk (about 110°F)
- 2 1/4 teaspoons active dry yeast
- 1/2 cup granulated sugar, divided
- 2 large eggs, room temperature
- 1/4 cup unsalted butter, softened
- 1 teaspoon salt
- 4 cups all-purpose flour, plus more for dusting
- 1 teaspoon vanilla extract
- 1/2 cup (1 stick) unsalted butter, melted, for brushing
- 1/2 cup packed light brown sugar, for swirl
- 2 tablespoons ground cinnamon, for swirl
- 1/4 cup granulated sugar, for swirl
- 1/4 cup all-purpose flour, for swirl
- 1 (8 ounce) package cream cheese, softened (optional filling)
- 1/4 cup powdered sugar (optional filling)
- 1 tablespoon milk (optional filling)
Instructions
- Activate the yeast: In a large bowl, combine the warm milk, yeast, and 1 tablespoon of the granulated sugar. Let stand for 5 to 10 minutes until foamy.
- Mix the dough: Add the remaining granulated sugar, eggs, softened butter, salt, and vanilla extract to the yeast mixture. Gradually mix in the flour until a soft dough forms.
- Knead the dough: Turn the dough out onto a lightly floured surface and knead for 8 to 10 minutes until smooth and elastic. Place the dough in a lightly oiled bowl, turning to coat. Cover the bowl and let it rise in a warm place for 1 to 1.5 hours, or until doubled in size.
- Prepare the filling: If using the cream cheese filling, beat the softened cream cheese, powdered sugar, and 1 tablespoon of milk until smooth. Set aside. For the cinnamon swirl, mix the brown sugar, cinnamon, 1/4 cup granulated sugar, and 1/4 cup flour in a small bowl.
- Shape the cake: Punch down the risen dough. Roll it out on a lightly floured surface into a large rectangle, about 12×18 inches. Brush the entire surface with the melted butter. Sprinkle the cinnamon sugar mixture evenly over the buttered dough. If using cream cheese, spread the cream cheese mixture over the dough, leaving a 1-inch border on one long edge.
- Roll and form the ring: Starting from the long edge opposite the border, tightly roll the dough into a log. Pinch the seam closed. Gently curve the log into a circle, overlapping the ends by about an inch. Pinch the ends together firmly to seal the ring.
- Second rise: Place the ring on a parchment-lined baking sheet. Cover loosely and let it rise again in a warm spot for 45 to 60 minutes, or until puffy. Preheat your oven to 375°F (190°C) during the last 15 minutes of the rise.
- Bake: Bake for 25 to 30 minutes, or until golden brown. Let the cake cool completely on a wire rack.
- Decorate: Prepare a simple glaze using powdered sugar and a little milk or water until you reach a thick, pourable consistency. Drizzle the glaze over the cooled cake. Immediately sprinkle with purple, green, and gold sanding sugars or sprinkles to achieve the traditional Mardi Gras colors.
Notes
- For the best brioche texture, make sure your milk and eggs are at room temperature before mixing.
- If you are short on time, you can use the dough setting on a stand mixer for kneading, which cuts down on manual effort.
- Hide a small plastic baby inside the cake before baking for good luck, a classic Carnival tradition.
Nutrition
- Serving Size: 1 slice
- Calories: 450
- Sugar: 45g
- Sodium: 250mg
- Fat: 22g
- Saturated Fat: 13g
- Unsaturated Fat: 9g
- Trans Fat: 0.5g
- Carbohydrates: 58g
- Fiber: 2g
- Protein: 7g
- Cholesterol: 65mg