

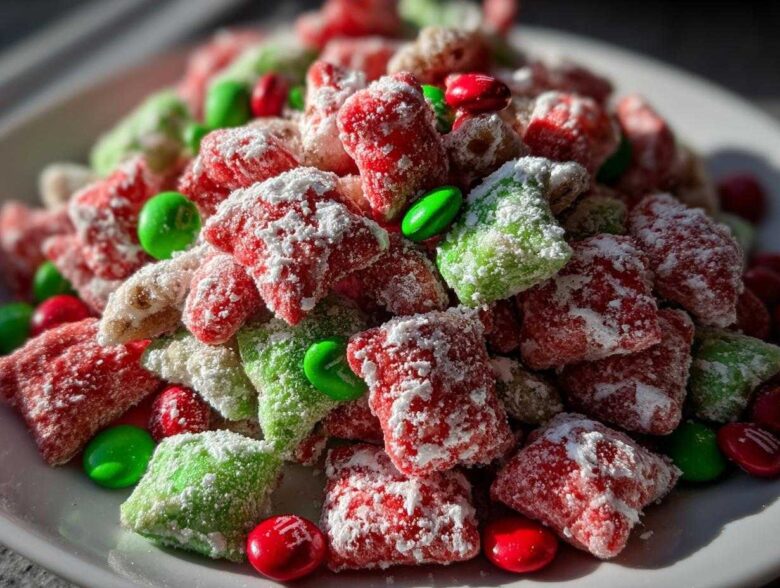
Let’s be honest, the holidays are fun, but the pressure to constantly bake elaborate desserts can zap all the joy out of it! If you’re anything like me, sometimes you need a fantastic, crowd-pleasing item that requires zero oven time and comes together faster than you can wrap a present. That’s why my absolute favorite, go-to holiday treat ever since I was a kid helping my mom is this incredible, festive Christmas Puppy Chow. Seriously, it’s the easiest, most colorful snack mix you will ever make, and I’ve been whipping up batches of this specific mix for family parties for what feels like forever now. I even wrote about our family’s favorite holiday traditions over at our story page!
It uses that classic chocolate-peanut butter base but gets all dressed up in red and green. If you need something quick for a last-minute party favor or just want that amazing chocolate dusting without turning on the stove, this recipe is your lifeline. I actually learned how to make these Holiday Muddy Buddies when I was about eight, and it’s stuck with me because it never fails to deliver that perfect crunch and sugary coating. Trust me when I say this is the ultimate stress-free holiday recipe you need in your arsenal!
Why This Easy No Bake Christmas Snack Shines
When the holiday schedule gets crazy busy, you need snacks that work hard without making you sweat! This festive treat is a total winner because it solves three huge holiday cooking problems right away. It means less time cleaning and more time actually enjoying the season.
- It’s genuinely no-bake! No messing with oven temperatures or worrying about timing when everything else is burning.
- Cleanup is practically nonexistent—mostly just one bowl and a plastic bag. Seriously revolutionary for a holiday treat!
- It’s incredibly scalable. Need more for an office party? Just double the batch!
Quick Prep Time for Your Christmas Puppy Chow Recipe
This is where the magic happens. You can have this amazing Christmas Puppy Chow recipe mixed, coated, and ready to cool in under 15 minutes of active work. I mean, come on! In the time it takes you to find where you put the cookie cutters, you’ve already made enough snack mix to fill half your gift jars.
Because it’s so fast to make, it’s perfect for realizing at 8 PM that you forgot a treat for tomorrow’s cookie swap. No stress here, just chocolate, peanut butter, and pure holiday cheer!
Gathering Ingredients for Festive Chex Mix
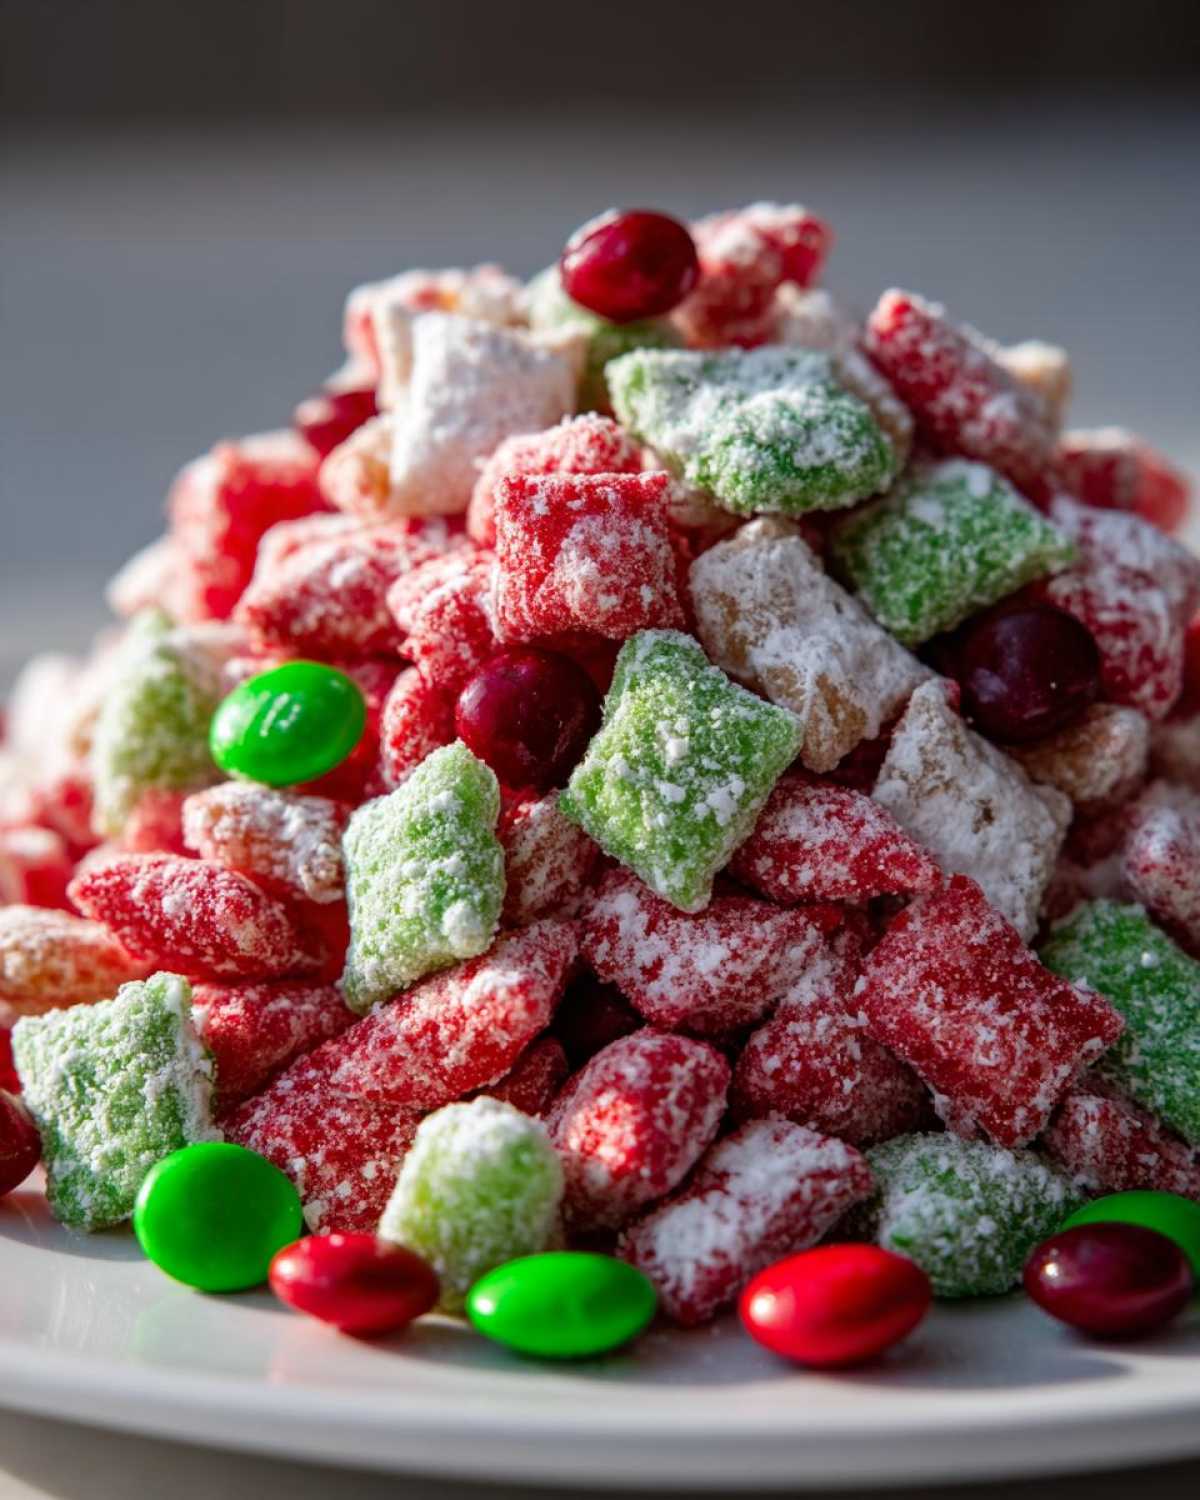
Okay, let’s talk about what you need to grab from the pantry to make this festive Chex Mix happen. The beauty of this recipe is that it relies on simple things you probably already have, plus a few holiday extras to make it pop. I always lay out my ingredients before I even start melting anything. It keeps me organized and stops me from scrambling when things get hot!
We start with the base: you need exactly 6 cups of Chex cereal. I usually mix it up—half Rice Chex and half Corn Chex—because I love that slight variation in texture, but you can stick to just one type if that’s what you have on hand. Use whatever you prefer for your Holiday Muddy Buddies!
Now for the coating, which is incredibly rich. We’re using 1 cup of semi-sweet chocolate chips, 1/4 cup of butter, and 1/2 cup of peanut butter. Here’s where I toss in my first little secret for better results! When you buy your chocolate chips, don’t cheap out here. Using a decent quality semi-sweet chip really makes a difference in how smooth that coating gets when it melts. Low-quality chips can sometimes scorch or separate, and we definitely don’t want that powdery texture!
Don’t forget the finishing touches: 1 teaspoon of vanilla extract and 1 1/2 cups of powdered sugar for the coating dust. Then, you toss in 1/2 cup of red and green M&Ms or holiday sprinkles at the very end. Perfect!
Ingredient Notes and Substitutions for Christmas Puppy Chow
You might have questions about some of these components, especially if you’re trying to adjust things for allergies or flavor preferences. Let’s clear up the sticky stuff. The peanut butter isn’t just for flavor, by the way! It adds essential fats and thickness to the chocolate mixture, helping it cling beautifully to every single piece of cereal. If you skip it, the chocolate coating will be way too thin and just slide right off in the bag, leaving you with sad, naked crackers.
If you really love that cool, minty holiday zing, I highly recommend swapping out that vanilla extract for peppermint extract. Just a tiny splash goes a long way! You’ll end up with an amazing peppermint-chocolate snack mix that is just as festive, if not more so. Remember, since this is a Quick Christmas dessert, simplicity is key, but small swaps like this make it your own family favorite holiday snack!
Step-by-Step Instructions for Perfect Christmas Puppy Chow
Alright, here’s the game plan for assembly. Because this is an Easy no bake Christmas snack, the method is super straightforward, but we have to respect the melting part so that coating sticks perfectly. Grab your largest mixing bowl—the one you use for tossing big salads—because we need room to move that cereal around later!
First things first, you need to get your 6 cups of Chex cereal sitting patiently in that big bowl. We’ll leave that alone for just a minute while we deal with the rich, gooey heart of this Christmas Puppy Chow recipe.
Melting the Coating for Your Holiday Muddy Buddies
This is where you have to be a little mindful in the microwave. Take your chocolate chips, peanut butter, and butter and pop them all into one microwave-safe dish. Do not try to melt it all at once! That’s how you get scorched chocolate that tastes bitter. I heat mine in 30-second bursts. After each 30 seconds, pull it out and stir it—even if it still looks chunky. You want to stir until every last bit of butter and chocolate has melted together and you have a completely smooth, glossy mixture. That’s the sign of success!
Once it’s silky smooth, take it off the heat entirely and stir in your vanilla extract right away. Remember, we want that smooth coating on our Christmas Puppy Chow, not separating chocolate! Keep stirring until everything is uniform before you pour it over the cereal.
The Powdered Sugar Coating Technique for Christmas Puppy Chow
Once the cereal is coated in that chocolatey goodness, it’s time for the snow! Get a large, high-quality plastic bag—the zip-top gallon bags are best because they seal securely. Dump your coated cereal into that bag. Now, here is my number one tip for the best texture: close the bag, push out most of the extra air, and then shake gently!
If you shake too aggressively trying to get that sugar everywhere, you’ll crush the Chex pieces, and suddenly your beautiful work turns into sugary cereal dust at the bottom. We want structure! Shake just enough to ensure every piece of your Christmas Puppy Chow is completely covered in that sweet white dust. After shaking, you’ll spread it out immediately to cool and dry before we add those bright festive colors.
Tips for Success Making Your Red and Green Snack Mix
Even though this is such an easy no bake Christmas snack, there are tiny things you can do during the drying and finishing stages that transform it from good to absolutely perfect. We are aiming for perfectly separated, fully powdered pieces, not one giant chocolate clump stuck together!
After you finish shaking all that powdered sugar into your bag, you must take the time for the drying step. Don’t rush it! Spread the coated cereal out in a single, thin layer across a parchment-lined baking sheet. This lets the residual heat from the chocolate evaporate and allows the powdered sugar to adhere permanently. If you skip this cooling step, the pieces will stick together in the container later on, turning into one big block of Holiday Muddy Buddies.
The crucial moment is when you add the decorations. I know it’s tempting to toss those gorgeous red and green M&Ms in while the chocolate is still super warm, but please don’t! If the cereal is still warm, those little candies will start to melt their color onto the powdered sugar coating, and you’ll end up with a weird, streaky mess instead of vibrant spots of color. Wait until the cereal has cooled down—cool to the touch, maybe just lukewarm—before you gently fold in those M&Ms or sprinkles. A gentle toss with your hands works best here; you want to be loving to the cereal so it doesn’t break!
This attention to timing means your final product looks exactly like the picture, and you get that satisfying, gritty coating in every single bite. It really proves that even the simplest recipes benefit from a little bit of learned technique.
Presentation Ideas: Puppy Chow for Gifting
One of my favorite things about making this snack mix is that the final product looks so amazing, it practically wraps itself! If you’re trying to figure out Edible Christmas gifts that feel special but don’t take all day, this is the answer. It travels beautifully and always gets rave reviews from neighbors and teachers.
The easiest way to package it up for gifting is using clear cellophane bags. They let everyone see those gorgeous red and green hits right away! You just funnel the cooled Christmas Puppy Chow inside—don’t pack it too tightly or you’ll crush it—and then tie the top shut with some festive plaid ribbon or actual twine. Trust me, a simple bow elevates this from a bowl snack to a thoughtful present instantly.
If you’re taking these Puppy Chow for gifting ideas to a big party, consider using small mason jars instead of bags. Layer the snack mix in the jar, alternating dark chocolate clusters with the bright colored bits if you want a real visual pop. Seal the lid tight, and maybe tie a small tag around the neck of the jar with a baking instruction reminder. It’s such a wonderfully nostalgic, sweet way to share a little holiday cheer!
Storage and Freshness for Your Holiday Treat Mix
Okay, you’ve made a huge batch of this incredible Holiday Treat Mix, and now you have to put it away! The absolute worst thing is having to toss leftover snacks because they went stale after two days, especially when this recipe is so good.
The good news is, because of that heavy powdered sugar coating, this snack mixture keeps remarkably well! You need to make sure when you put it away that it is totally, one hundred percent cool and dry. If you put a warm batch into a container, the melted chocolate residue on the bottom will turn into sticky goo, and the sugar will dissolve, giving you that funky, damp texture we absolutely worked so hard to avoid earlier.
Make sure you grab a good, sturdy, airtight container. I prefer the clear plastic ones or glass jars where I can see exactly how much is left! Once sealed tight, this mixture stays fresh and perfectly crunchy at room temperature for up to a full week. Yes, a whole week!
That long shelf life is one of the best parts of this Easy no bake Christmas snack. It means you can totally make a massive batch on the first weekend of December, store it properly, and still pull out something delicious and ready to serve for Christmas Eve without any last-minute scrambling. That peace of mind alone is worth the effort, I promise you. You can check out more about how we maintain quality standards across our recipes on our Disclaimer page, but honestly, this recipe is reliably awesome day after day.
Just make sure you keep it away from heat sources—like sitting right next to the oven while you bake actual cookies—and keep that lid firmly snapped shut. If the air gets in, the crispiness goes out!
Frequently Asked Questions About Christmas Puppy Chow
Can I make this without peanut butter?
Oh, that’s a very common question, especially with allergies running around during the holidays! Yes, you definitely can change it up, but you have to replace that binding power. If you can’t use peanut butter, you need to substitute it with an equal amount of sun butter or even another nut/seed butter that works for your needs. However, you might need to add a tiny bit more butter (say, an extra teaspoon) to keep the coating from getting too stiff when it cools down. The peanut butter adds a lot of texture stability to this Chocolate powdered sugar snack, so be mindful when substituting!
Can this be made ahead of time for holiday parties?
Absolutely, and I highly encourage it! This is why this Quick Christmas dessert is my favorite—it’s a make-ahead dream. As long as you follow the storage instructions we talked about (completely cool and sealed in an airtight container), this mix stays fantastic for up to a week at room temperature. You can make a huge batch right after Thanksgiving and still pull it out for Christmas Eve snack duty looking and tasting perfectly fresh. It saves so much stress when you’re trying to juggle pies and main courses!
What is the difference between this and Reindeer Chow?
That is such a good question because they sound so similar! Typically, a standard Reindeer Chow recipe relies heavily on pretzels, Chex, and sometimes cereals like Cheerios, coated in chocolate, and then tossed with a mix of plain and often colorful mini marshmallows or sometimes even Chex Mix items. The recipe I gave you is the classic structure for Christmas Puppy Chow, focusing purely on the sugary, shake-in-a-bag method with M&Ms for the red and green pop. While Ingredient A is crucial for both, Holiday Muddy Buddies usually skip the pretzels and marshmallows that define classic Reindeer Chow.
Do I need to use both Rice and Corn Chex?
Not at all! Use what you have or what you prefer. I love the mix because the Rice Chex tends to absorb the chocolate coating really well, while the Corn Chex seems to hold that final powdered sugar coating a little better, giving you a great overall texture. But if your pantry only has one type, go for it! It will still be a delicious Festive Chex Mix. Don’t let needing a specific cereal stop you from making this easy treat!
Estimated Nutritional Data for This Quick Christmas Dessert
Now, I know what you’re thinking when you see a big bowl of chocolate and powdered sugar—you’re probably wondering *how* bad this is for you, right? Haha! Me too! Since this is such a wonderful, festive item, we rarely worry about nutrition when we make it, but I always like being upfront about what’s in a serving, just in case you’re counting.
Keep in mind that this data is just an estimate based on standard store brands for the chocolate, peanut butter, and Chex cereal we used when testing. Recipes like this can swing wildly based on whether you use dark chocolate or milk chocolate, so think of this as a good general ballpark for one serving.
For the recipe yield of about 10 cups in total, here’s the breakdown per 1-cup serving:
Nutrition Snapshot (Per 1 Cup Serving Approx.):
- Calories: 250
- Sugar: 20g
- Fat: 14g
And for those who track the details, here are the rest of the numbers:
- Sodium: 150mg
- Saturated Fat: 5g
- Unsaturated Fat: 9g
- Trans Fat: 0g
- Carbohydrates: 30g
- Fiber: 1g
- Protein: 4g
- Cholesterol: 5mg
I always tell people that if you’re serving this at a holiday party, people are going to grab a small handful, not eat a full cup, so it’s probably not as intense as it looks! But for proper tracking, always keep that Serving Size of 1 cup in mind.
Because we are using ingredients that vary slightly from brand to brand, I like to be totally transparent and mention that these figures are based on an average calculation. If you’re super interested in the exact numbers for your specific ingredients, you might want to run them through a database yourself! But honestly, when it comes to this delicious Quick Christmas dessert, I choose joy over detailed data analysis almost every time!
Share Your Experience Making This Christmas Puppy Chow Recipe
Now that you’ve seen just how sneaky-easy this recipe is, I genuinely want to know what you think! Making this Christmas Puppy Chow is meant to be fun, fast, and stress-free, so if you tried it out, please buzz back and tell me how it went. Did it make it to your party bowl? Did you use it as one of your cute Edible Christmas gifts?
If you followed the instructions, I’d be thrilled if you left a rating right here on the page. Five stars for supreme holiday snacking? I sure hope so!
I also love hearing what kind of fun you had with the variations. Did you go with the peppermint extract swap we talked about? Or maybe you crushed up some shortbread cookies and added them in for an extra layer of crunch? Seriously, don’t be shy about your creative twists on this Christmas Puppy Chow recipe—that’s how traditions evolve!
If you snapped a picture of your amazing finished product—especially if you packaged it up beautifully in those clear bags—please tag us on social media! Seeing your festive creations brings me so much holiday joy. It helps me see how this family favorite recipe is spreading cheer in other kitchens!
And hey, if you have any lingering questions about ingredients or storage that I missed, shoot them over using the contact form. I check in there often and love helping fellow bakers troubleshoot their holiday treats!
PrintEasy No-Bake Christmas Puppy Chow

Make this simple, festive Puppy Chow mix featuring red and green colors, perfect for holiday parties or edible gifts.
- Prep Time: 15 min
- Cook Time: 1 min
- Total Time: 16 min
- Yield: About 10 cups
- Category: Dessert
- Method: No Bake
- Cuisine: American
- Diet: Vegetarian
Ingredients
- 6 cups Chex cereal (Rice or Corn)
- 1 cup semi-sweet chocolate chips
- 1/2 cup peanut butter
- 1/4 cup butter
- 1 teaspoon vanilla extract
- 1 1/2 cups powdered sugar
- 1/2 cup red and green M&Ms or holiday sprinkles
Instructions
- Place the Chex cereal in a large bowl. Set aside.
- In a microwave-safe bowl, combine the chocolate chips, peanut butter, and butter. Microwave in 30-second intervals, stirring well after each, until completely smooth.
- Stir the vanilla extract into the melted chocolate mixture.
- Pour the chocolate mixture over the cereal. Gently stir until the cereal is evenly coated.
- Place the powdered sugar in a large plastic bag. Add the coated cereal to the bag. Seal the bag and shake well until the cereal is fully coated with sugar.
- Spread the coated cereal onto a baking sheet lined with parchment paper to cool and dry for about 15 minutes.
- Once cool, gently toss the mix with the red and green M&Ms or sprinkles.
- Store in an airtight container or package for gifting.
Notes
- For extra flavor, you can substitute peppermint extract for vanilla extract.
- If you are making this for gifting, layer the mix in clear cellophane bags and tie with a festive ribbon.
- This mix stays fresh in an airtight container at room temperature for up to one week.
Nutrition
- Serving Size: 1 cup
- Calories: 250
- Sugar: 20
- Sodium: 150
- Fat: 14
- Saturated Fat: 5
- Unsaturated Fat: 9
- Trans Fat: 0
- Carbohydrates: 30
- Fiber: 1
- Protein: 4
- Cholesterol: 5