

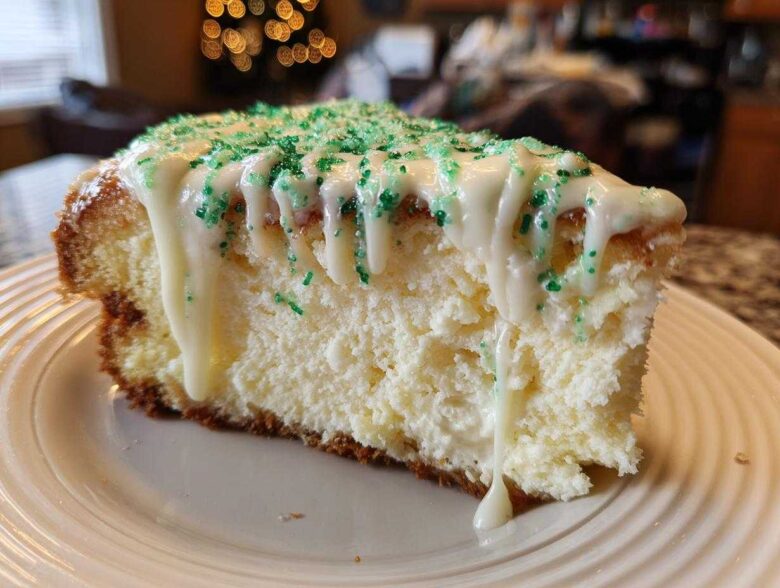
Oh, the holidays! They are magical, but let’s be real—the pressure to create that perfect, stunning dessert centerpiece can make anyone want to hide under the tree skirt until January. Mateo and I have been there, staring down massive menus, thinking, “Is this *really* worth the stress?” That’s why I am so thrilled to introduce you to our latest obsession: the ultimate **Christmas Tree Cheesecake**. It’s that perfect blend of effort and pure, happy nostalgia because we’re folding in those iconic Little Debbie Christmas Tree Cakes!
This isn’t just another rich dessert; it’s a shortcut to feeling like the most organized host at the party. Seriously, this recipe does all the heavy lifting so you can focus on, you know, enjoying the season. It brings that wonderful, cozy childhood flavor right into a sophisticated, creamy cheesecake. If you’re looking for a recipe that screams ‘Christmas’ without keeping you chained to the oven for three days, stick with me. You can learn more about our other holiday quick wins, like this Christmas Puppy Chow, while the cheesecake chills!
Why This Christmas Tree Cheesecake is Your New Holiday Must-Make
Look, the holidays get hectic fast. We developed this recipe because we needed something that looked amazing but didn’t require us to pull an all-nighter. This beauty is packed with payoff!
- It’s the ultimate Festive Dessert Centerpiece—it looks like hard work but it’s surprisingly straightforward.
- It absolutely qualifies as one of our top Easy Christmas Desserts because the main flavor comes pre-packaged!
- It guarantees a creamy texture every single time, making it one of the few Christmas Cheesecake Recipes you can trust year after year.
Nostalgic Flavor Meets Creamy Perfection
Who doesn’t love a burst of childhood memory in a dessert? We take our rich, vanilla-forward cheesecake base and stud it with those iconic Little Debbie Christmas Tree Cakes. It’s a truly unique combination. This Christmas Tree Cheesecake variation is rich, slightly sweet, and totally comforting.
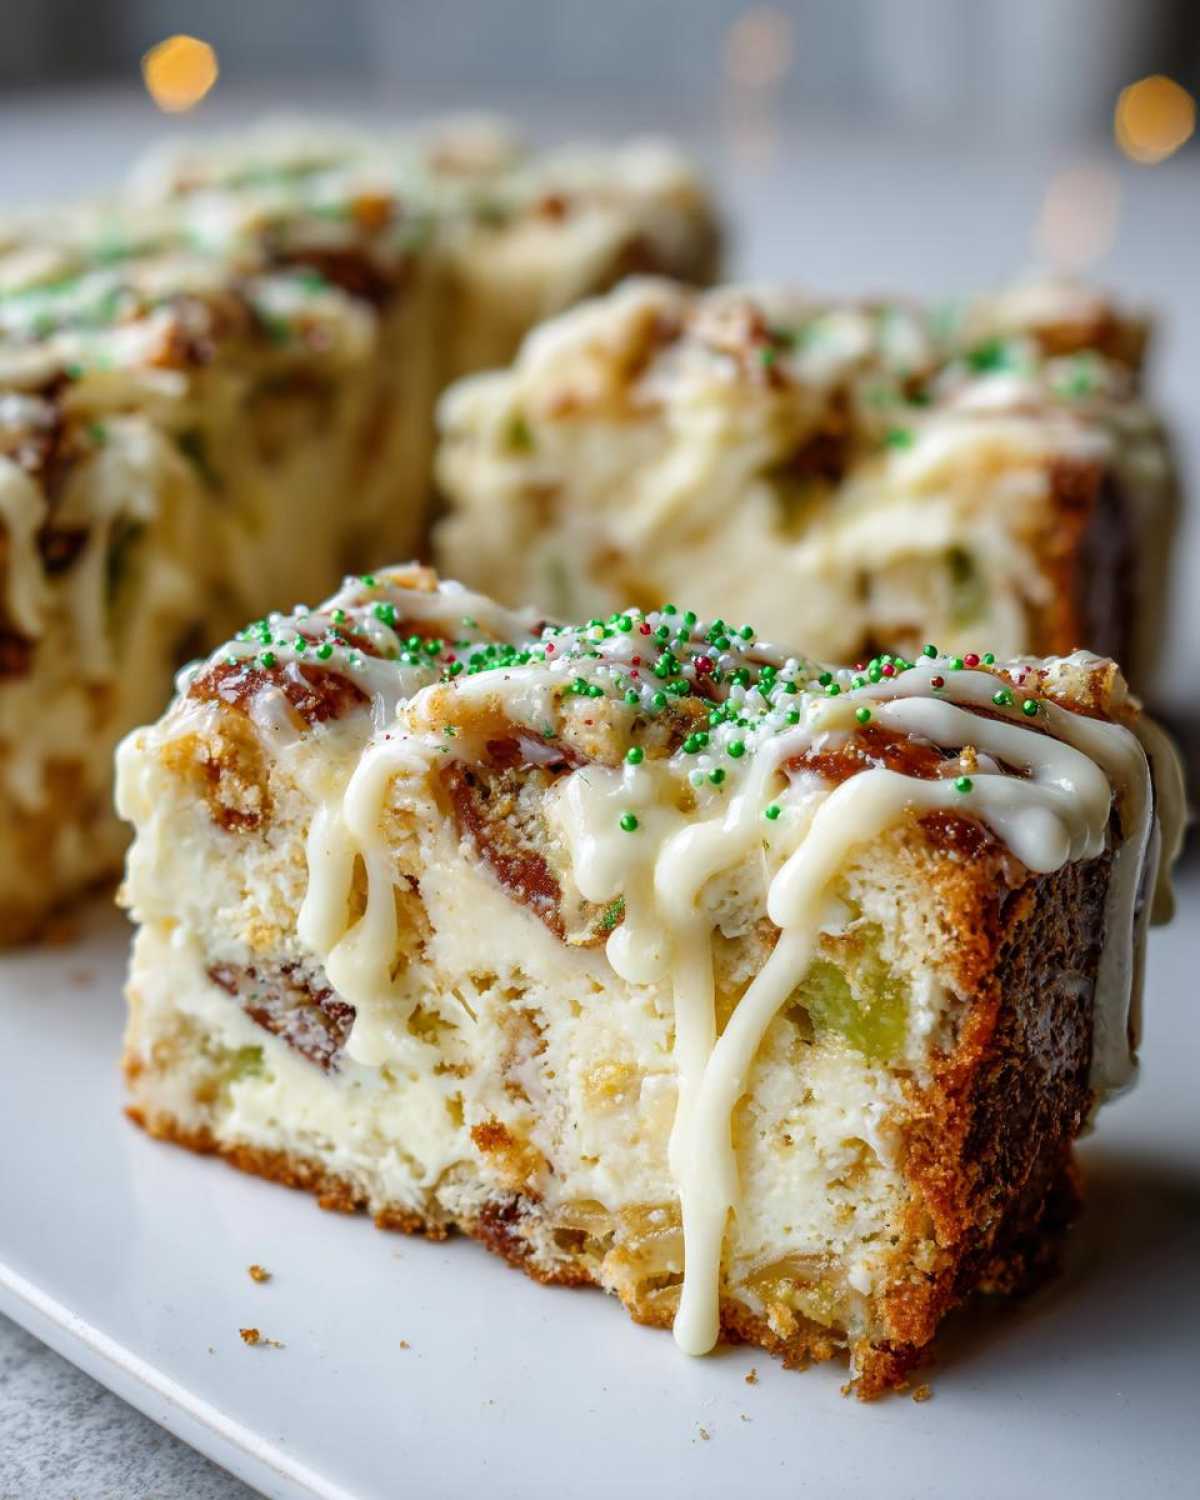
Simple Steps for a Showstopper Holiday Bakes
While we do use a water bath (I promise it’s worth it!), the assembly is so fast, especially since the cakes are already made! You fold them in, bake, chill, and then decorate. It truly qualifies as one of the best Christmas Cheesecake Recipes you’ll find for guaranteed looks and minimal stress.
Gathering Supplies for Your Christmas Tree Cheesecake
Okay, let’s get our gear together before we start mixing. This part is crucial, honestly, because if your pan leaks during that water bath, the whole operation goes sideways! Mateo always laughs because I treat assembling the water bath setup like securing a submarine hatch. We only want creamy cheesecake, not soggy crackers!
Essential Equipment for a Perfect Christmas Tree Cheesecake
You don’t need a thousand fancy gadgets, but these few items are total must-haves for this specific recipe:
- A sturdy 9-inch springform pan. This is non-negotiable for cheesecake removal.
- Heavy-duty aluminum foil—don’t skimp here! You need at least three tight wraps around the exterior.
- A large roasting pan. This is what holds the water for the bath.
- Your trusty electric mixer (handheld or stand mixer works fine).
And while a traditional Christmas Tree Shaped Desserts pan is cool, trust me, a round one decorated beautifully like we plan to do is just as gorgeous and way easier to work with!
Ingredient Notes and Substitutions
The most important tip I can give you about the ingredients is the cream cheese. It absolutely *must* be completely softened—room temperature, not slightly cool. If it has any lumps when you start beating it, your filling will be lumpy. Don’t try to microwave it fast, either; that cooks the edges!
When you fold in the chopped Little Debbie cakes, go easy! This is the time to treat the mixture like silk. If you want a faster version—one of those wonderfully easy No Bake Christmas Treats—you can forget the eggs and the oven entirely. You’d need to use a stabilizer like a mix of whipped topping and extra cream cheese instead of the eggs, setting it firmly in the fridge. That’s a great backup plan if you’re short on oven space!
Speaking of quick fixes, if you ever need help prepping ingredients for things like our cream cheese brownies, doing it all at once definitely saves time!
Step-by-Step Instructions for Your Christmas Tree Cheesecake
Alright, now for the fun part! We’re taking these simple ingredients and turning them into a showstopper. I remember the first time I tried a water bath—I was terrified of leaks! But seriously, taking the extra minute to wrap that pan means you get that beautifully smooth, Creamy Holiday Cheesecake texture without any scary leaks or scorched bottoms. Trust me on the foil!
Building the Crust and Preparing for the Water Bath
First thing: oven goes up to 325°F (160°C). Mix up your graham cracker crumbs and melted butter until it looks like damp sand. Press that firmly into the bottom of your 9-inch springform pan. Pop it into the oven for just 8 minutes to set it, then pull it out to cool a bit while you whip the filling.
Now for the “submarine” step! Tear off several huge sheets of heavy-duty foil—I use three layers—and wrap the outside of the springform pan completely. Make sure it comes up the sides high enough to stop any water from creeping in when we set it in the roasting pan later. It needs to be snug!
Mixing the Creamy Holiday Cheesecake Filling
In a clean bowl, start beating your softened cream cheese until it is totally smooth, no lumps allowed! Add the sugar gradually, then the vanilla. Here’s my big warning: mix the eggs in one by one, and only on low speed! Once the eggs are in, stop mixing the second they disappear. Overbeating those eggs incorporates too much air, and that’s how you get cracks when it cools down. After that, gently fold in most of your chopped Little Debbie Christmas Tree Cakes. You want to protect those tasty air bubbles we just fought to create!
Baking and Slow Cooling the Christmas Tree Cheesecake
Pour that lovely batter over your cooled crust. Place the foil-wrapped pan inside the larger roasting pan. Now, carefully pour hot water into the roasting pan until it comes about halfway up the sides of the cheesecake pan. Bake for about 50 to 60 minutes. You’re looking for the edges to look firm, but the absolute center should still have a gentle wiggle, like jelly. Don’t pull it out yet! Turn the oven off, crack the door open just a smidge, and let it sit in that cooling oven for a full hour. This slow transition is the secret to preventing sad, sunken tops. If you need a refresher on technique, check out how meticulously we treat our cookie dough—it’s the same patience we apply here!
Chilling and Final Decoration
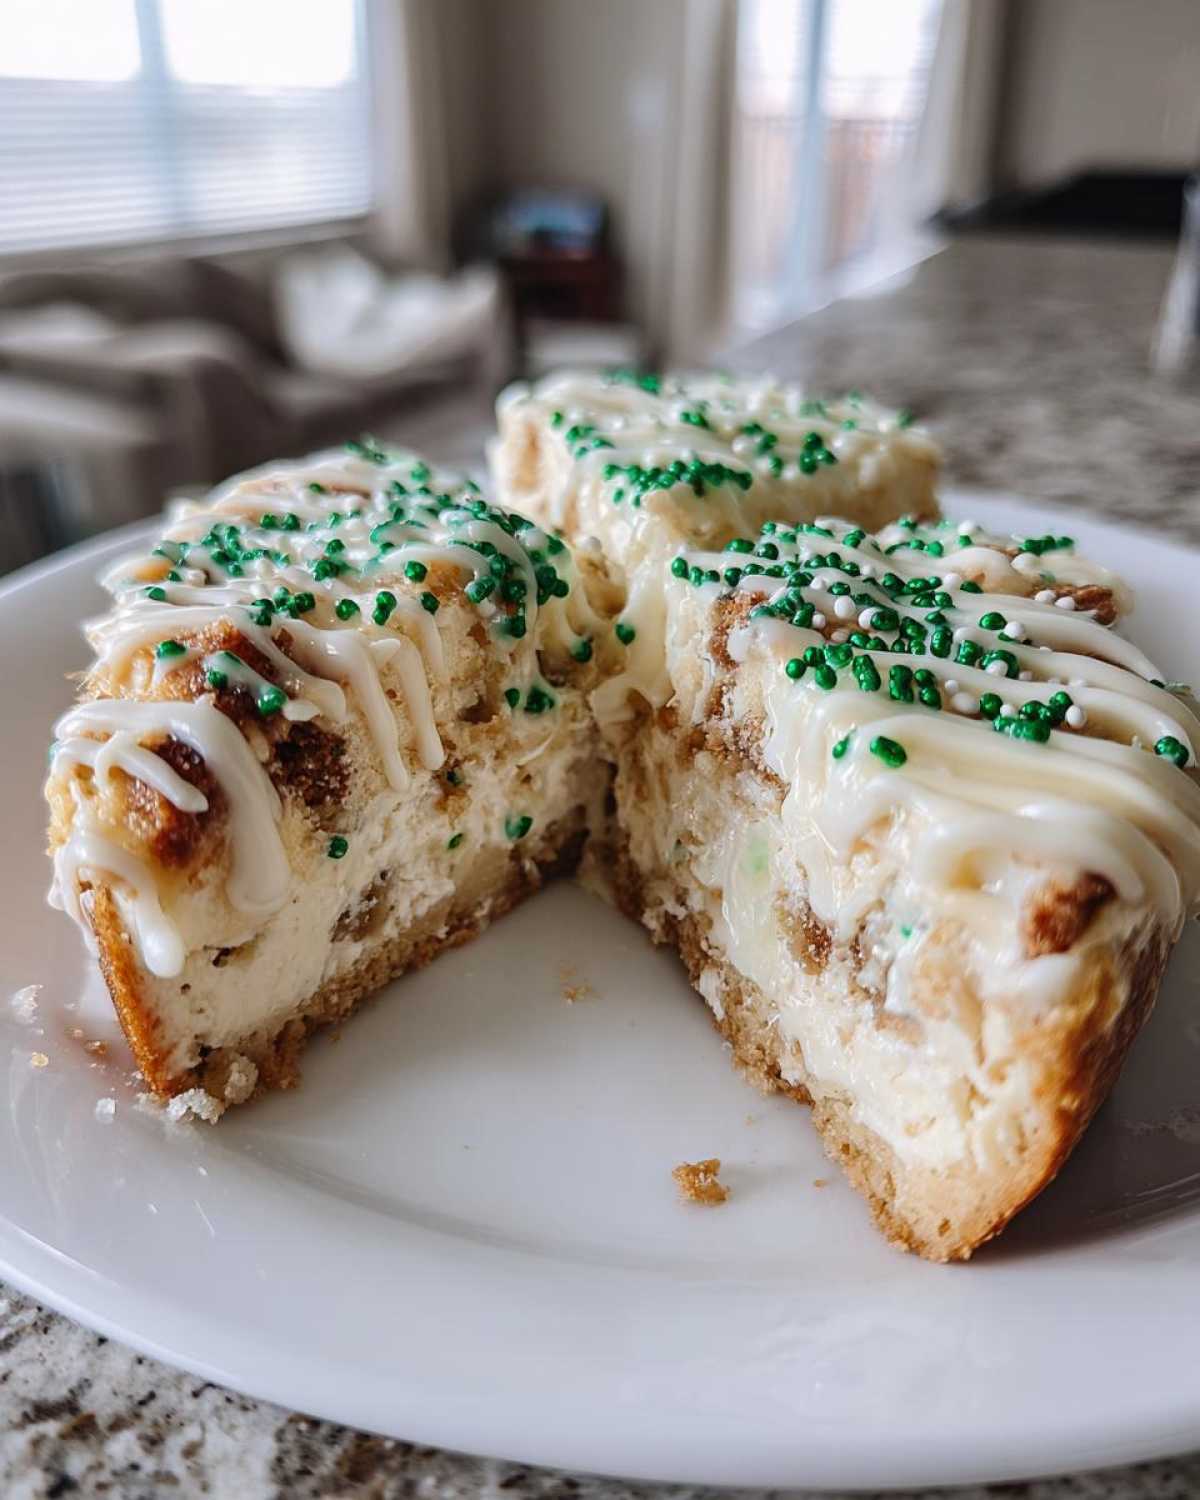
Once it’s cooled down to room temperature on a rack, cover it and put it in the fridge for at least six hours—though overnight is always better for that firm, sliceable texture. When you’re ready to serve this beautiful centerpiece, gently remove the sides of the springform pan. Drizzle that white chocolate ganache over the top—I like to swirl it a bit, which you can see a great example of right here! Finally, press those reserved chopped pieces around the edges and scatter green sprinkles everywhere to finish your gorgeous christmas tree cheesecake!
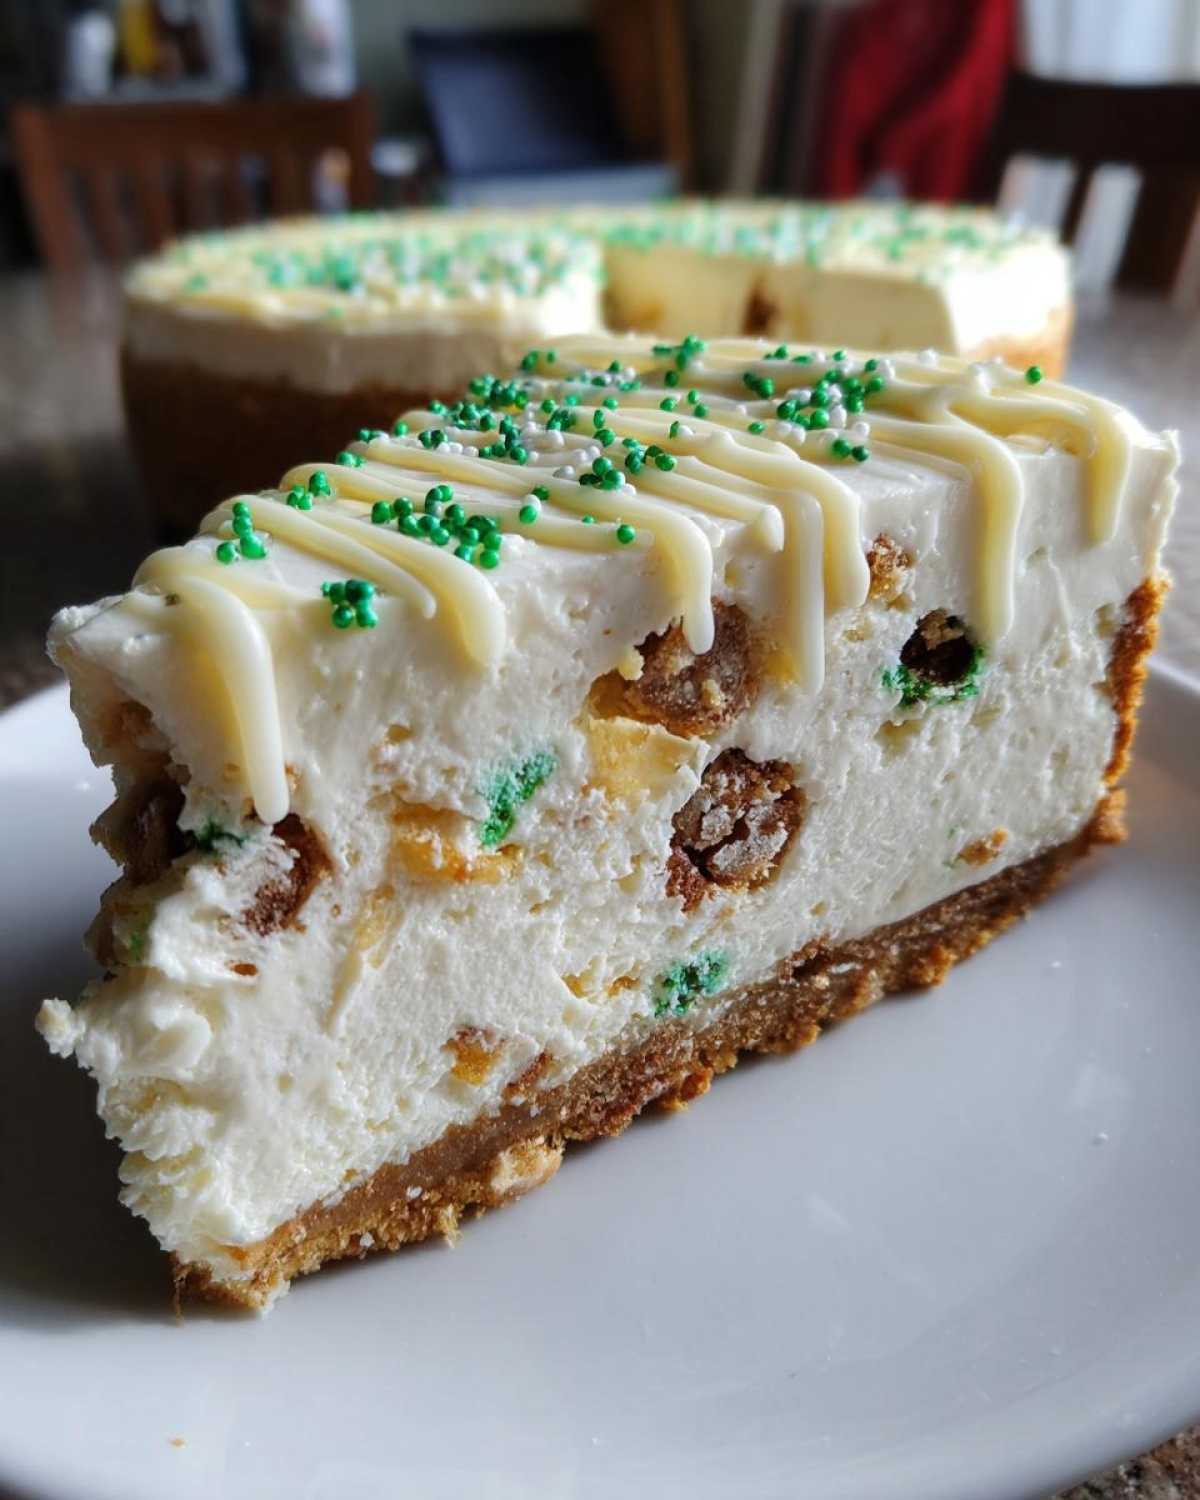
Tips for Making a Showstopper Holiday Bakes
Even with a fantastic recipe, sometimes these glorious holiday bakes can throw a little tantrum. We aren’t aiming for perfect here at Flavor Zine, but we definitely want to avoid those sad moments when the center sinks or cracks open like the earth!
Troubleshooting Common Christmas Tree Cheesecake Issues
Let’s talk about the two biggest disasters: Cracks and soggy crusts. If your top cracks, 99% of the time it’s because the cheesecake cooled down way too fast after baking, or goodness forbid, you mixed those eggs too aggressively. We already talked about the slow cooling trick in the oven, but remember: patience after baking is key to keeping that beautiful surface intact for decorating.
A soggy crust just means your water shield failed. That aluminum foil wrap needs to be tight, ladies and gents! If water gets to the crust, the magic holding those crumbs together dissolves. I learned the hard way you need to check the foil wraps *before* you even start pouring the water in.
Expert Tips for the Best Christmas Tree Cheesecake Texture
To guarantee that signature Creamy Holiday Cheesecake quality, ingredient temperature is everything. I’m nagging you again—your cream cheese must be soft enough to smash easily with a spoon when you start. Cold spots mean lumps, and lumps mean trouble.
Mateo jumped in here—he’s the one who monitors the oven temp because sometimes our old oven lies! He says if you have an oven thermometer, use it. Inconsistent oven heat can mess with the setting time. Also, once those eggs hit the bowl, stop the mixer unless you want to beat all the air out and deflate your gorgeous cake!
If you’re looking for visuals on how other bakers manage their holiday presentation, check out this absolute stunner of a decorated cheesecake here. Keep experimenting, and don’t forget to try out our tips for making amazing caramelized onions; sometimes a savory side just balances out all this sweetness!
Storage and Serving Suggestions for Your Festive Dessert Centerpiece
So you’ve got this incredible, show-stopping dessert sitting pretty in your fridge. Now what? When do you pull it out, and how do you keep it looking absolutely perfect until it’s time to slice? We want this beautiful christmas tree cheesecake to be as stunning for the last guest as it was for the first!
The main thing to know is that cheesecake is a chilly dessert. It’s meant to be served straight from the refrigerator. Pulling it out an hour before serving is perfect—it lets the chill take the absolute hardest edge off, making it slice beautifully, but keeps the texture firm and those rich vanilla and Tree Cake flavors shining through.
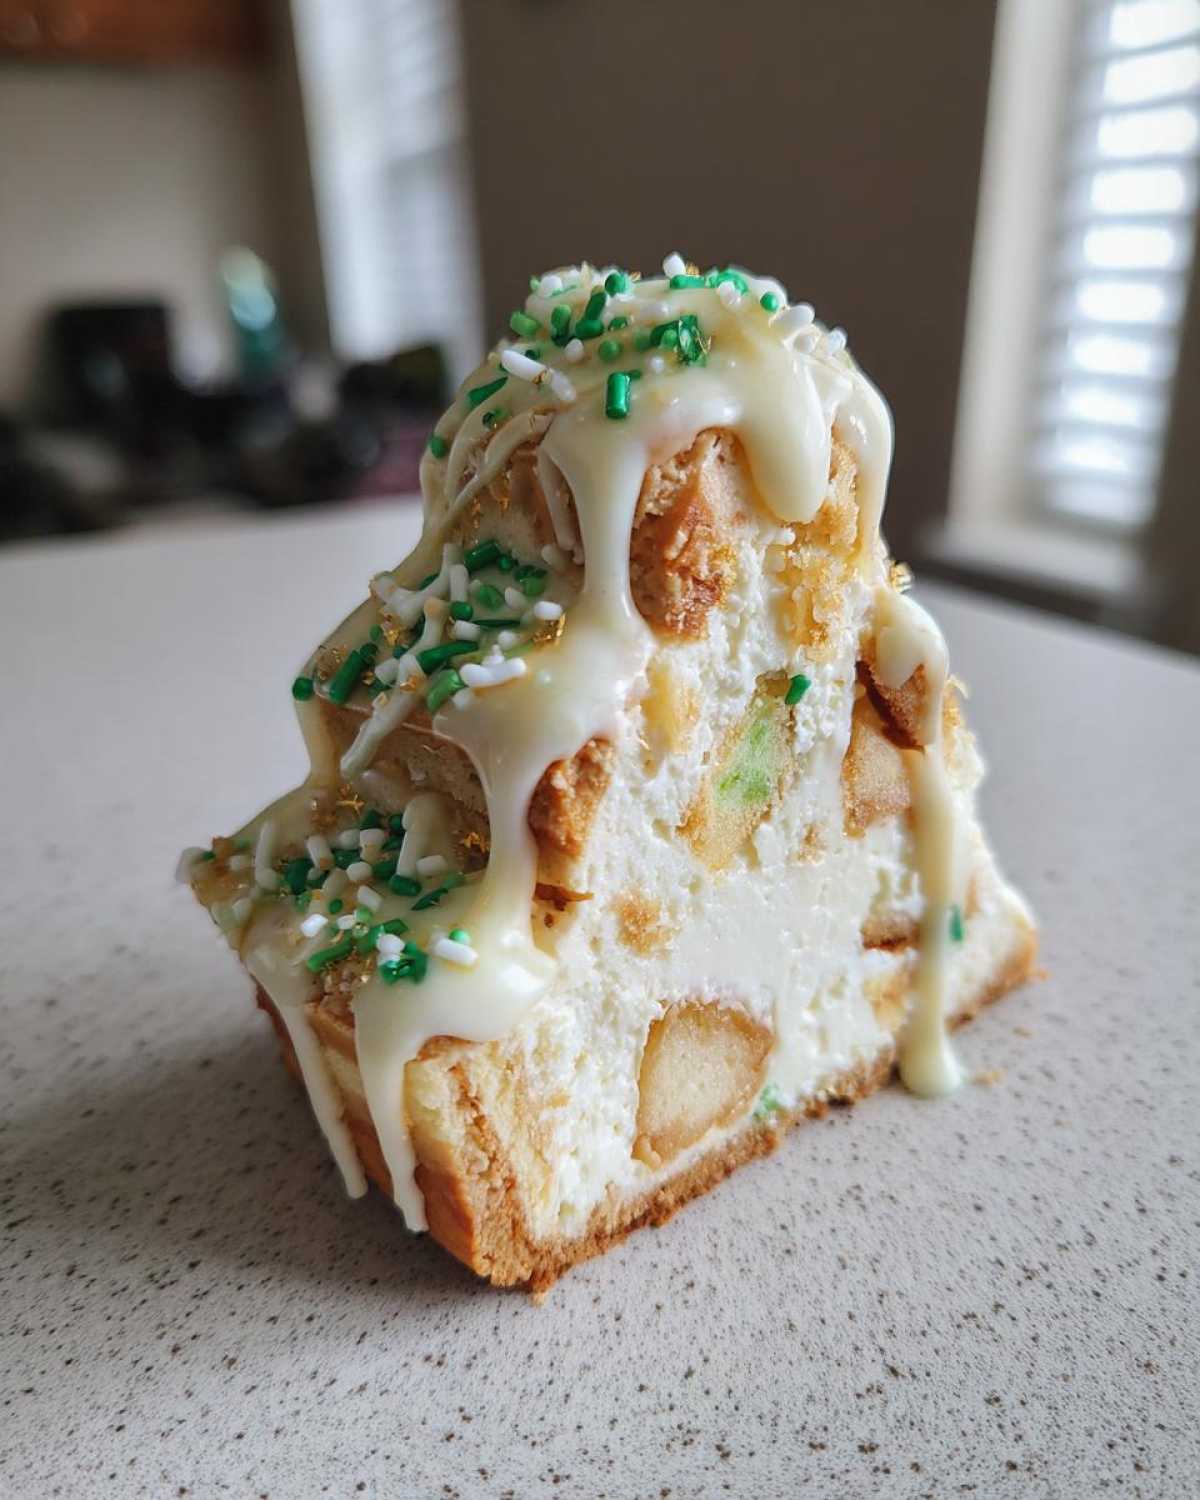
These rich flavors pair wonderfully with a warm beverage. If you’re looking for something cozy to cut through the richness, try making our whipped hot chocolate recipe! It’s decadent but light enough not to make your guests feel too full after a big holiday meal. This is definitely one of those phenomenal Festive Food For Parties that people talk about for weeks!
Make-Ahead Strategy for Holiday Ease
This recipe is truly a baker’s best friend because it thrives on advanced planning. You absolutely *must* make this a day-ahead bake. The minimum chill time is six hours, but trust me, overnight chilling lets the filling settle into that perfect, creamy consistency. You just can’t rush perfection with cheesecake!
While you can bake the crust and the whole cheesecake the day before you plan to serve it, I usually hold off on the decoration until the last possible minute. You can easily whip up the white chocolate ganache a day ahead and keep it covered at room temperature—it’ll be fine. But the Tree Cakes, the sprinkles, and those adorable little ornaments go on right before serving to keep them crisp and vibrant. This makes your heavy lifting happen the day *before* the party, leaving you free to just decorate and serve your glorious christmas tree cheesecake!
If you want to see how beautiful the final decorated result looks when chilling, peek at this amazing styled photo from another baker here!
Frequently Asked Questions About Little Debbie Holiday Recipes
It’s funny, once you start baking with these nostalgic snacks, you suddenly have a million questions! Cheesecake recipes always bring out the curious side in people, since we want that perfect texture. I’ve gathered a few of the most common things people ask me about making sure this dessert stays a huge hit at their parties.
Can I make a Christmas Tree Shaped Desserts version without a water bath?
If you’re aiming for that super rich, velvety, Creamy Holiday Cheesecake style that we love, I really hate to say it, but no, you shouldn’t skip the water bath. The bath creates steam, which keeps the egg proteins from setting too fast and turning rubbery or cracking. It’s the key to getting a flawless, professional-looking Christmas Tree Cheesecake centerpiece.
However, if you’re worried about the water bath setup—and totally understand if you are!—that’s when you should switch gears and look into the No Bake Christmas Treats version I mentioned earlier. If you skip baking entirely, you skip the need for steam, and it sets up beautifully in the fridge. That’s definitely the best low-risk option for beginners wanting great results!
How far in advance can I prepare this **christmas tree cheesecake**?
This is definitely a make-ahead champion, which is perfect for your planning around Festive Food For Parties! You should plan for a minimum of six hours in the refrigerator, but honestly, I find that overnight chilling is the absolute sweet spot. When the cheesecake sits overnight, the flavors of the Little Debbie cake really melt into the cream cheese, and the texture firms up perfectly for slicing.
If you want to peek at how others are styling their seasonal bakes, check out this inspiration guide here! And remember, if you’re making something fun like our slow cooker cranberry meatballs the day before, the cheesecake can often sit right beside them in the fridge, getting better by the hour!
Sharing Your Flavor Zine Issue
And there you have it! You’ve published a delicious, hilarious, and ultimately stress-free issue of Flavor Zine with this Show-Stopping Christmas Tree Cheesecake. Mateo and I truly believe that the best things we create in the kitchen are the ones we share, and that’s why we call this space a zine—it’s all about the messy, wonderful story of getting to the final bite!
We absolutely live for seeing your holiday table creations! Did you find the perfect little candy ornaments for the top? Did you sneak-taste the chopped Tree Cakes before folding them in (I always do)? Please, please tell us all about it!
Drop a comment below. Let us know how the water bath went, how long you chilled yours, and what your family thought of this nostalgic twist on a classic Christmas Cheesecake Recipes favorite. If you managed to get a picture of your finished product, tag us on social media so we can celebrate your publishing success!
Don’t forget, if you have questions about any step—maybe you tried a different crust, or maybe you just want to share a funny kitchen disaster that happened while baking—head over to our contact page. We’re always here to chat about the chaos. Happy holiday baking, everyone!
Estimated Nutritional Snapshot for This Holiday Cheesecake
Alright, time for the quick facts! Now, before you look at these numbers and think I’ve suddenly turned into a registered dietitian, remember what we talked about: this is Flavor Zine. We are all about sharing the story, not publishing glossy health magazines! These values are just an estimate based on the ingredients listed, so they are truly just a snapshot.
We used the standard recipe numbers, but if you use premium white chocolate or a different brand of graham crackers, things might shift a little. That’s the beauty of making it yourself—you control the ingredient quality! For the full, detailed discussion on how we approach nutrition claims on the blog, you can check out our official disclaimer page.
Think of this chart less as a rigid rulebook and more as context for what you’re serving up for dessert. It’s a rich treat, meant for celebrating, not for eating every single day!
- Serving Size: 1 slice
- Calories: 450
- Sugar: 35g
- Sodium: 300mg
- Fat: 30g (18g Saturated Fat)
- Carbohydrates: 40g
- Protein: 7g
It’s definitely a heavy hitter, but you only serve this kind of gorgeous Festive Dessert Centerpiece once a year, right? Enjoy it!
PrintShow-Stopping Little Debbie Christmas Tree Cheesecake
Create a festive centerpiece with this creamy, rich cheesecake loaded with nostalgic Little Debbie Christmas Tree Cakes. This recipe delivers a showstopper holiday dessert that is simple to assemble.
- Prep Time: 25 min
- Cook Time: 60 min
- Total Time: 7 hours 25 min
- Yield: 12 servings
- Category: Dessert
- Method: Baking
- Cuisine: American
- Diet: Vegetarian
Ingredients
- 180 g graham cracker crumbs
- 85 g unsalted butter, melted
- 675 g cream cheese, softened
- 100 g granulated sugar
- 1 package (12 count) Little Debbie Christmas Tree Cakes, chopped
- 1 teaspoon vanilla extract
- 3 large eggs
- 1/2 cup white chocolate ganache, for topping
- Green sprinkles and small candy ornaments, for decoration
Instructions
- Preheat your oven to 325°F (160°C). Wrap the outside of a 9-inch springform pan tightly with heavy-duty aluminum foil to prevent water seepage during the water bath.
- Prepare the crust: Mix the graham cracker crumbs and melted butter in a bowl until combined. Press this mixture firmly into the bottom of the prepared springform pan. Bake the crust for 8 minutes. Let it cool slightly.
- Prepare the filling: In a large bowl, beat the softened cream cheese until smooth. Gradually add the granulated sugar and beat until fully incorporated. Mix in the vanilla extract.
- Beat in the eggs one at a time, mixing on low speed just until each egg is combined. Do not overmix the batter once the eggs are added.
- Gently fold in most of the chopped Little Debbie Christmas Tree Cakes, reserving some for the top layer.
- Pour the cheesecake batter over the cooled crust. Place the springform pan into a larger roasting pan. Carefully pour hot water into the roasting pan until the water reaches halfway up the sides of the springform pan to create a water bath.
- Bake for 50 to 60 minutes, or until the edges are set but the center still has a slight jiggle.
- Turn off the oven, crack the door open slightly, and let the cheesecake cool inside the oven for 1 hour. This slow cooling prevents cracking.
- Remove the cheesecake from the water bath and let it cool completely on a wire rack. Once cool, cover and refrigerate for at least 6 hours, or preferably overnight.
- Decorate before serving: Gently remove the cheesecake from the springform pan. Drizzle the top with white chocolate ganache. Press the reserved chopped Tree Cakes around the edges or scatter them across the top. Finish with green sprinkles and small candy ornaments to resemble a decorated Christmas tree.
Notes
- For a truly show-stopping holiday dessert, use a small offset spatula to create swirls in the white chocolate ganache before adding the sprinkles.
- If you want a no-bake version, substitute the eggs and baking steps with a mixture of whipped topping and cream cheese, setting it in the refrigerator until firm.
- You can use a springform pan shaped like a tree if you have one, but a round cheesecake decorated like a tree works just as well for a festive food for parties.
Nutrition
- Serving Size: 1 slice
- Calories: 450
- Sugar: 35
- Sodium: 300
- Fat: 30
- Saturated Fat: 18
- Unsaturated Fat: 12
- Trans Fat: 0.5
- Carbohydrates: 40
- Fiber: 1
- Protein: 7
- Cholesterol: 100