

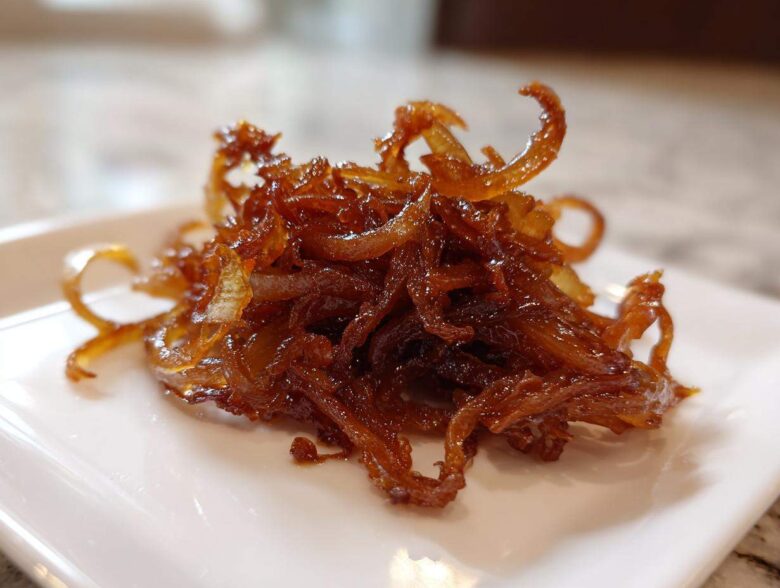
Oh, you have to understand the magic that happens when you take something as humble and sharp as an onion and just let time work its wonderful spell. It’s pure alchemy! For years, I messed this up—burning the edges or ending up with sad, floppy onions that were neither sweet nor brown. But trust me, I’ve finally figured out the trick to achieving those ultimate, jammy caramelized onions that restaurants guard so closely. This guide shows you the glorious, slow cook method for unbelievable depth, and I even sneak in a fast trick if you absolutely can’t wait 60 minutes. Seriously, this is the best onion cooking technique you will ever need! I learned so much about patience while developing this over the years, you can read a bit more about my philosophy right here on my site.
Why You’ll Love This Caramelized Onions Recipe
Honestly, once you master this process, you’ll never look at sad, raw onions the same way again. These aren’t just cooked onions; they are flavor bombs waiting to happen!
- You get that incredibly deep, rich flavor—they transform into truly savory sweet onions without being overly sugary.
- This slow cook method is mostly hands-off; you just have to stir occasionally. Low effort, HUGE payoff!
- They are super versatile! Think beyond burgers—these are the secret ingredient for amazing appetizer dips.
- The texture is unmatched: perfectly soft, jammy, and spreadable, making the ultimate homemade onion condiment.
- You gain complete control over the color and sweetness, which you just don’t get with quicker methods.
- This caramelized onion recipe is your foundation for incredible sides and main dishes!
- We manage to keep the process clean and simple, avoiding major stovetop splatter emergencies.
Essential Ingredients for Perfect Caramelized Onions
You can’t rush flavor, and for that, we need the right starting line-up. The quality of your basic ingredients really shines through when you cook them this long, so don’t skimp here! Remember, we are turning these humble vegetables into something luxurious, so treat them right from the start. I have always found that using standard yellow onions works just fine, but if you find them, grab some sweet ones for an even more intense natural sweetness.
Here is exactly what you need to have ready before the heat even goes on:
- 3 large yellow onions, thinly sliced
- 2 tablespoons unsalted butter
- 1 tablespoon olive oil
- 1 teaspoon salt
- 1/2 teaspoon sugar (optional, for faster browning)
- 2 tablespoons water or beef broth (for deglazing)
Ingredient Notes and Substitutions for Caramelized Onions
Because I believe everyone should enjoy these, let’s chat about swaps. If you happen to know you have access to Vidalia or Walla Walla onions, definitely use those—they are full of sugar and make achieving that dark color so much easier.
What if you are avoiding dairy? No problem at all! For vegan caramelized onions, just swap the two tablespoons of butter out for two tablespoons of a neutral, high-heat oil or a reliable vegan butter substitute. The fat content is really what matters here for smooth cooking.
And regarding that little bit of sugar I mentioned? It’s totally optional, but if you are on a tight schedule and relying on the quick trick, adding it helps kickstart the Maillard reaction a little faster. If you’re going for the full 60-minute slow cook, you usually don’t even need it!
The Best Onion Cooking Technique: Slow Cooked Onions Method
This is where the magic truly happens, and honestly, this is the best part of the entire process for me—it’s quiet time in the kitchen! The key to achieving those deep, rich, restaurant-style caramelized onions is relentless, but gentle, heat management. You absolutely cannot rush this; if you crank the heat up high, you’re just frying them, and we want them to slowly surrender their water and sugar, not burn!
First things first: Slice those onions thinly and try to keep the pieces uniform. I use a big, heavy skillet because it distributes heat better, preventing hot spots.
- In your skillet, combine the butter and olive oil over medium-low heat. Medium-low! I cannot stress that enough.
- Toss in your sliced onions and the salt. Give everything a good stir until it’s coated in that glorious fat mixture.
- Now, we cook. For the first 20 to 30 minutes, you only need to stir them every 5 or 10 minutes. They will soften, wilt down dramatically, and start releasing all their moisture.
- Once the onions are soft and have released their liquid, if you opted for the sugar, you sprinkle it in now to help things along.
- Keep them going for another 30 to 45 minutes. They will start sticking a little bit to the bottom—this is CRUCIAL! Those sticky brown bits are pure flavor gold!
- When you see that sticking, splash in a tiny bit of water or broth—just a tablespoon—and scrape up all those dark spots. That’s called deglazing, and it builds layers of flavor.
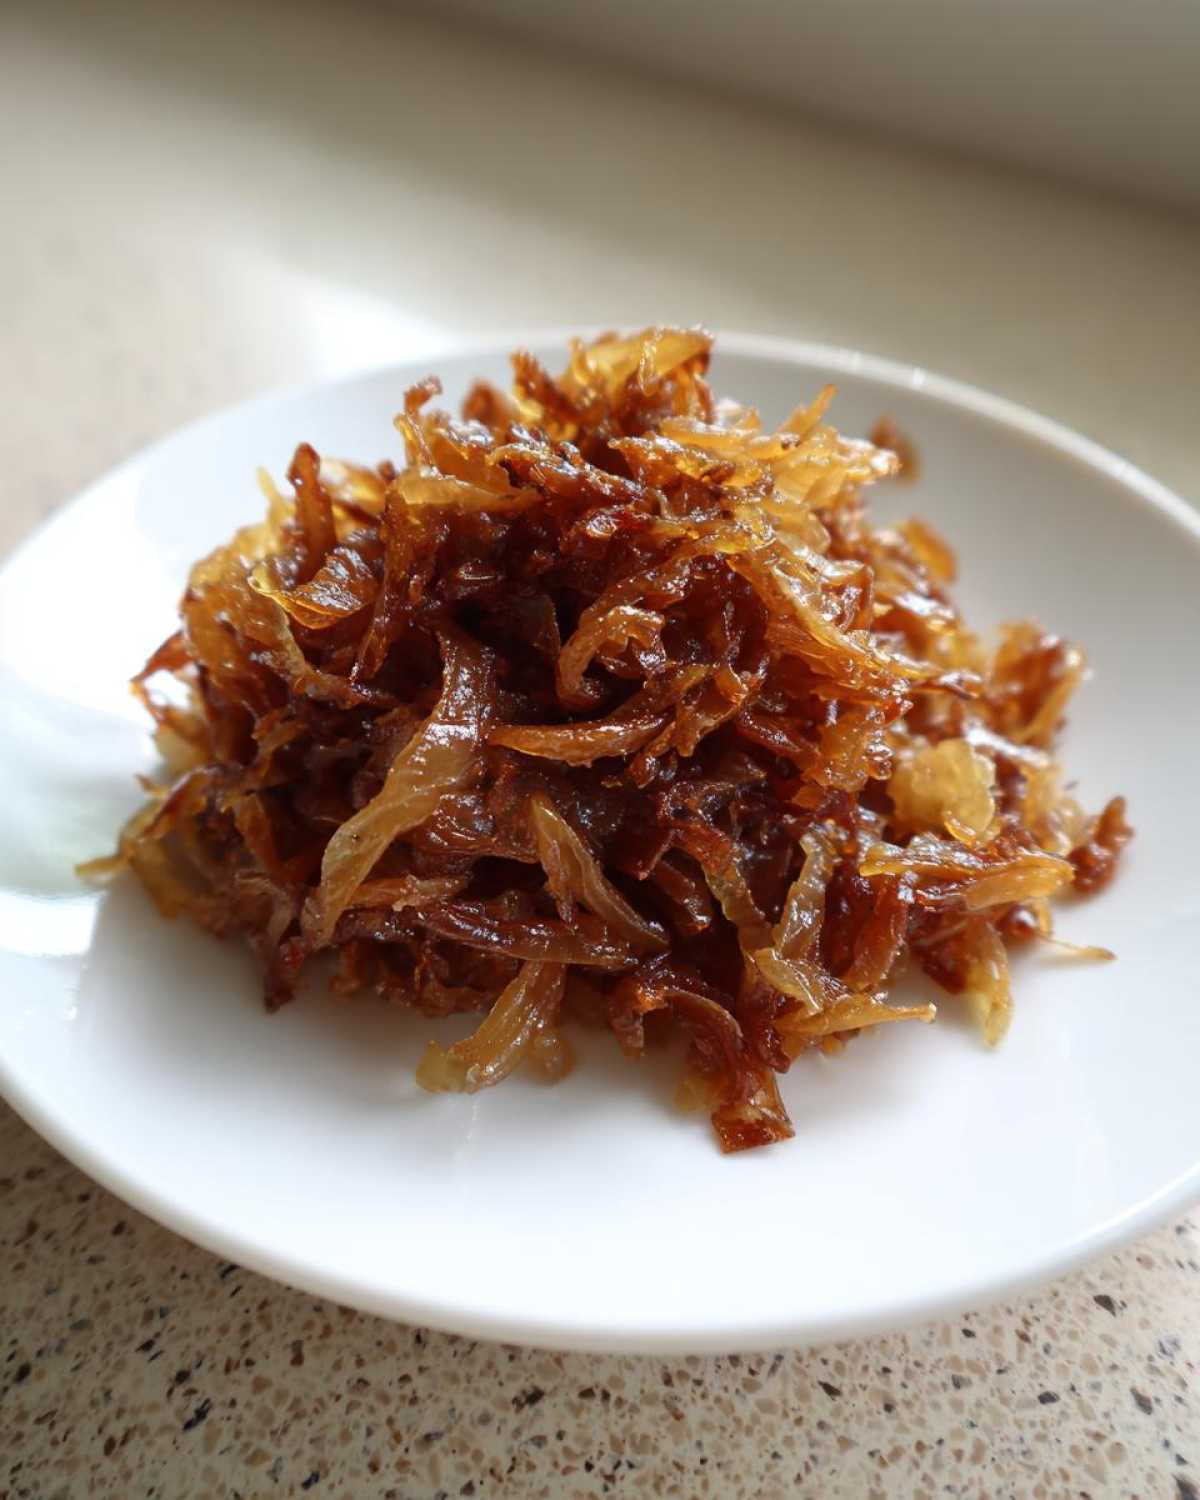
- You know they are done when they look like a deep, mahogany-colored jam, sticky and utterly concentrated.
My biggest expert tip? When you feel impatient around the 40-minute mark, that’s when most people accidentally bump the heat too high. Instead of doing that, just stir a little more often, maybe every 3 minutes. That aeration helps cook them without burning the sugars that have already formed.
If you need to consult the recipe details or want to check our disclaimer info while you wait patiently, feel free to look here.
Achieving Restaurant Style Caramelized Onions with the Quick Trick
Okay, I know life gets busy! If you are making my creamy onion pasta tonight and realize you skipped this step earlier, we have the ‘quick trick.’ After those initial 30 minutes when the onions are totally soft and watery, you can increase the heat to medium. Crank it up, but now—and I mean *now*—you must stir constantly.
You’ll only need another 15 to 20 minutes this way, but you cannot walk away! You are actively encouraging deep browning now, but because the heat is higher, the scorching happens fast. This method gives you great flavor, but it won’t achieve that ultimate, melt-in-your-mouth jamminess of the true slow cook method. It’s a trade-off, but it still delivers far better results than just frying them quickly from the start. This is how you salvage a meal and still get fantastic caramelized onions!
Tips for Success Making Caramelized Onions
Knowing the method is one thing, but knowing the little tricks that keep you from disaster is another entirely. I’ve learned a few hard-won lessons on the stovetop over the years, and I’m thrilled to save you the panic of watching your beautiful onions turn black!
Here are the four things that changed the game for me when I started making these consistently:
- Use a wide, heavy pan. Seriously, throw out that flimsy thin skillet for this job. A heavy-bottomed Dutch oven or even a cast-iron pan holds and distributes heat beautifully. Thin pans create hot spots that scorch the onions immediately before they have a chance to soften properly.
- Don’t be shy with the fat at the start. We need enough butter and oil to coat every single onion slice nicely in the beginning. Fat helps conduct that gentle, low heat and prevents them from immediately steaming themselves into a mush pile. Remember, you can always add more liquid later, but fixing dry, burnt onions is nearly impossible.
- Embrace the fond (and know when to lift it!). That brown, sticky crust forming on the bottom? That’s called the fond, and it’s concentrated sugar and flavor. You *want* it to form, but if it starts looking charcoal black or smells acrid, hit it immediately with a splash of water or broth and scrape! That deglazing liquid incorporates all that flavor back into the onions instead of letting it burn.
- Low heat isn’t a suggestion; it’s the law. If you see aggressive bubbling, your heat is too high. We are slowly cooking, coaxing the moisture out. If you see steam pouring off instead of gentle simmering, turn the dial down. Patience here turns sharp alliums into sweet perfection.
How to Use Your Homemade Onion Condiment: Onion Topping Ideas
Now that you’ve spent an hour coaxing magic out of those humble onions, the question is: what do you *do* with this jammy gold? Finishing the cooking part is satisfying, but seeing how these luxurious caramelized onions transform an ordinary meal is the real reward! They instantly elevate anything you put them on, pushing simple food into the realm of something truly special and gourmet.
Personally, I am weak for anything involving cheese and these onions. They are your secret weapon for adding incredible depth. Here are a few ways I absolutely insist you try using your fresh batch of savory sweet onions:
- The Ultimate Sandwich Spread: Forget thin slices—spread a generous layer on sourdough before grilling a cheese sandwich. They pair unbelievably well with sharp cheddar or creamy Gruyere. They also make a fantastic warm onion burger topping that makes people ask where you ate last!
- Appetizer Dreams: You have to make a classic caramelized onion dip. Just fold a cup or so of these into good quality sour cream or Greek yogurt, add a fresh crack of pepper, and maybe a little thyme. It is addictive and pulls together faster than any store-bought mix.
- Gourmet Garnish Base: Use them as a base layer on puff pastry with goat cheese and fresh herbs, or simply spoon a dollop over roasted meats for a beautiful, sweet counterpoint. They are gorgeous as a gourmet onion garnish.
If you have any questions about the process or need to get in touch with me about recipe feedback, my contact page is just here.
Making Creamy Onion Pasta with Caramelized Onions
This application is what I turn to when I want something cozy but deeply flavorful without much fuss. For creamy onion pasta, you don’t need a fancy sauce recipe. You just need to treat your caramelized onions like the base flavor—the aromatic soul of the dish!
After you drain your pasta (like rigatoni or penne), toss the hot noodles right back into the pot. Now, stir in a dollop of mascarpone or cream cheese, a little reserved pasta water to create that emulsion, and then fold in about half a cup of your finished caramelized onions. The heat of the pasta melts the cheese, and the onions dissolve slightly into the sauce, giving it that beautiful, slightly browned hue and an intensely savory-sweet flavor that screams comfort food. It’s so much better than just stirring in garlic!
Storage and Reheating Instructions for Caramelized Onions
Listen, sometimes you make a double batch because, really, why wouldn’t you? These onions are so good they vanish fast, but if you somehow manage to have leftovers—which, kudos to your willpower!—you need to know how to store and reheat them correctly.
The great news is that this homemade onion condiment freezes beautifully, but keeping them fresh in the fridge is even easier.
Pop your cooled, finished onions into a really clean, airtight container. Don’t just cover the bowl with foil; you want a proper seal. They will keep perfectly well in the refrigerator for up to a full week. Because they have such concentrated sugars, they stay moist, but they do get denser when cold.
When it comes time to reheat them—maybe you’re making a spontaneous onion topping idea for burgers tonight—be careful! If you try to blast them in the microwave on high heat, those sugars will instantly burn the edges. That’s a tragedy, isn’t it?
The best way to revive them is to put them back in that heavy-bottomed skillet you used to cook them. Add a tiny splash of broth or water—just enough to coat the bottom of the pan, maybe a teaspoon. Warm them gently over very low heat, stirring often, until they become soft and glistening again. This gentle heating rehydrates them slightly and brings back that perfect, jammy texture without scorching the outside.
If you need to look up my privacy guidelines while you’re putting those leftovers away, that information is available here. Happy storing!
Frequently Asked Questions About Caramelized Onions
I know sometimes I just want the quick answer, especially when the craving for something savory and sweet hits hard! Here are the few cooking questions I always get asked when people try making this truly amazing onion side dish for the first time.
Can I use white onions for this caramelized onion recipe?
You absolutely can use white onions! Yellow onions are my go-to because they have a slightly higher sugar content than white ones, which helps them brown nicely. White onions work fine, but they do tend to have that sharper flavor come through a little more, even after cooking for an hour. If you use white onions, I definitely recommend adding that optional 1/2 teaspoon of sugar to help boost the browning process and ensure you get those deep, complex flavors we are looking for in a classic caramelized onion recipe.
How long do these homemade onion condiments last in the fridge?
They last surprisingly long, which makes batch cooking them totally worthwhile! If you store them properly in a sealed, airtight container, my batch usually stays fantastic in the refrigerator for about one week. Because the sugars are so concentrated, they act as a natural preservative. Just remember, they firm up when they get cold, so always reheat them gently using low heat with a little splash of liquid, as discussed before, to bring them back to that perfect jammy consistency.
What is the purpose of stirring every 5 to 10 minutes?
That’s all about heat distribution and preventing burning! If you leave the onions alone for too long, the parts touching the bottom of the pan will start to scorch before the rest of the onions have even softened up. Stirring frequently ensures that all the onions get a chance to cook gently in the fat and release their moisture slowly. It’s the key technical step in mastering the slow cooked onions method and getting that even, rich brown color every single time.
Are these caramelized onions good for vegan diets?
Yes, 100%! Even though my favorite way involves rich butter flavor, the final result is still incredibly flavorful when you swap out the dairy. As I mentioned earlier, just substitute the butter with an equal amount of a neutral cooking oil, like avocado oil, or a good quality vegan butter in the first step. It works just as well. They will remain fully plant-based and delicious for topping burgers or mixing into vegetarian pasta dishes. If you want to review our full cookie policy while you’re here, you can check it out here.
Estimated Nutritional Data for Caramelized Onions
Now, I know some of you really care about diving into the numbers, and while I’m really more focused on how delicious these caramelized onions taste, it’s only fair to share what I have! Since what you use definitely changes the final count—like if you use broth versus using extra butter—these are just my best estimates based on the standard recipe above. I always recommend taking these numbers with a grain of salt, as different brands of butter or oil can slightly alter the final profile for your batch.
To get these numbers, I based the serving size on about 1/4 cup, which yields you about 1.5 cups total from the recipe. Pretty decent return for an hour of low-and-slow cooking!
Here’s the breakdown:
- Serving Size: 1/4 cup
- Calories: 85
- Fat: 5g (This includes the butter and oil we start with!)
- Carbohydrates: 10g
- Sugar: 7g (Thank goodness most of that used to be sharp onion flavor!)
- Fiber: 2g
- Protein: 1g
- Sodium: 390mg (A lot of this comes from the salt we intentionally add for flavor extraction.)
A little word of warning: Because we are concentrating the natural sugars in the onion and sometimes we add that optional little pinch of sugar to help things along, the sugar content can seem high to some folks. But that’s what makes them so sweet and jammy, right? Use these figures as a guideline for your meal tracking. If you want to double-check my site’s official terms and conditions while you’re reading the macros, you can peek at them right over here. Happy cooking!
Share Your Gourmet Onion Garnish Creations
Okay, this is the best part! You’ve done the work, you’ve waited patiently, and now you have a jar of the most intensely flavorful, jammy, caramelized onions known to humankind sitting on your counter. What now? I want to see them shine!
Your beautiful batch of savory sweet onions deserves an audience! Please, when you whip up a batch of caramelized onion dip or pile them high on a burger, snap a picture and tag me! I absolutely love seeing how you use these in your kitchen. Whether you’re using them as a gourmet onion garnish or folding them into a comforting meal, sharing your creations keeps the inspiration flowing for everyone.
If you found this guide helpful and feel like this is the best technique you’ve ever used for getting perfect results, please leave a quick rating below. It means the world to me when I know my hard-won lessons help you cook better! If you want to review how we handle data privacy in relation to site feedback and ratings, that document is available here. Now go enjoy those gorgeous onions!
PrintThe Ultimate Guide: How to Perfectly Caramelize Onions
Learn the slow cooking method to achieve deep, sweet, jammy caramelized onions, plus a quick trick for faster results.
- Prep Time: 10 min
- Cook Time: 60 min
- Total Time: 70 min
- Yield: About 1.5 cups
- Category: Side Dish
- Method: Slow Cooking
- Cuisine: General
- Diet: Vegetarian
Ingredients
- 3 large yellow onions, thinly sliced
- 2 tablespoons unsalted butter
- 1 tablespoon olive oil
- 1 teaspoon salt
- 1/2 teaspoon sugar (optional, for faster browning)
- 2 tablespoons water or beef broth (for deglazing)
Instructions
- Slice the onions thinly and uniformly. Uniformity helps them cook evenly.
- In a large, heavy-bottomed skillet, combine the butter and olive oil over medium-low heat.
- Add the sliced onions and salt. Stir to coat the onions evenly with the fat.
- Cook the onions slowly, stirring every 5 to 10 minutes. Keep the heat low to prevent burning. The goal is slow evaporation and browning, not frying.
- After about 30 minutes, the onions will have softened significantly and released most of their liquid. If you are using the optional sugar, add it now.
- Continue cooking, stirring more frequently as they begin to brown, usually another 30 to 45 minutes. If brown bits stick to the bottom of the pan, add 1 tablespoon of water or broth and scrape them up (deglazing).
- Once the onions are a deep, rich brown color and have a jammy consistency, remove them from the heat.
- For the quick trick: If you need them faster, after the initial 30 minutes of softening, increase the heat to medium and cook, stirring constantly, until the desired color is reached, about 15 to 20 minutes more. Watch closely to prevent scorching.
Notes
- Use sweet onions like Vidalia or Walla Walla for the sweetest results.
- For vegan caramelized onions, substitute the butter with an equal amount of high-heat oil or vegan butter substitute.
- These onions store well in an airtight container in the refrigerator for up to one week.
- Use these as an onion topping idea for burgers or mix them into a creamy onion pasta sauce.
Nutrition
- Serving Size: 1/4 cup
- Calories: 85
- Sugar: 7
- Sodium: 390
- Fat: 5
- Saturated Fat: 2
- Unsaturated Fat: 3
- Trans Fat: 0
- Carbohydrates: 10
- Fiber: 2
- Protein: 1
- Cholesterol: 6