

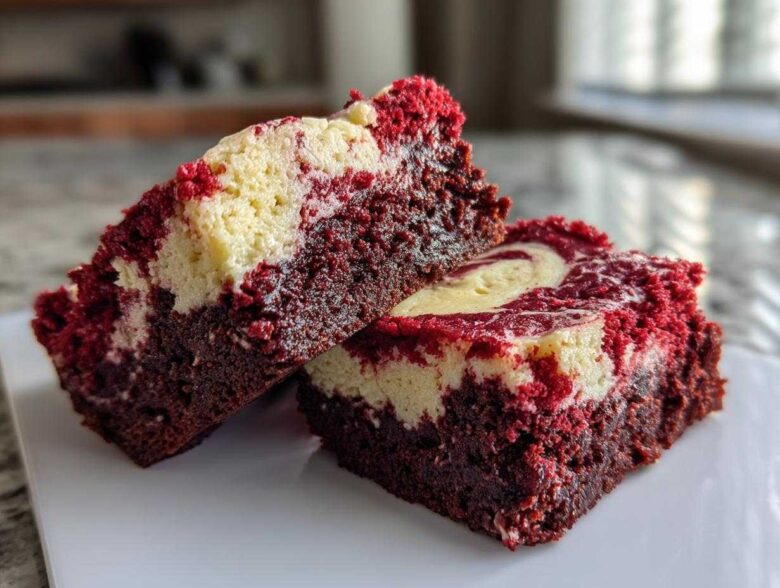
Oh my goodness, listen to me: when you take the rich, fudgy drama of a classic brownie, marry it with the tangy luxury of cheesecake, and then add that stunning, vibrant red velvet flavor? It’s dessert heaven, honestly. These red velvet cheesecake brownies are my go-to when I need something that looks totally gourmet but comes together surprisingly fast. I remember the first time I tried to swirl them—it looked like muddy water! But trust me, I’ve found the trick to getting that gorgeous, marbled effect on the first try. If you want to know more about my kitchen philosophy, check out my ‘About Us’ page!
We are making what I call “The Easiest, Most Decadent Red Velvet Cheesecake Brownies with Perfect Cream Cheese Swirl,” and they are about to blow your mind. Forget complicated multi-step cakes; this is pure, decadent fusion in one perfect square.
Why You Will Love These Red Velvet Cheesecake Brownies
Honestly, why wouldn’t you love these? They hit every single sweet spot a dessert lover could hope for. These aren’t just treats; they are showstoppers. Here’s the breakdown of why I think this recipe is absolutely essential:
- The Fudgiest Base Ever: I’m not messing around with cakey brownies here. This recipe guarantees a dense, moist, almost gooey texture that melts in your mouth.
- Perfect Tangy Contrast: That cream cheese swirl cuts right through the richness. It’s that perfect zip of tanginess you crave when eating something super chocolatey.
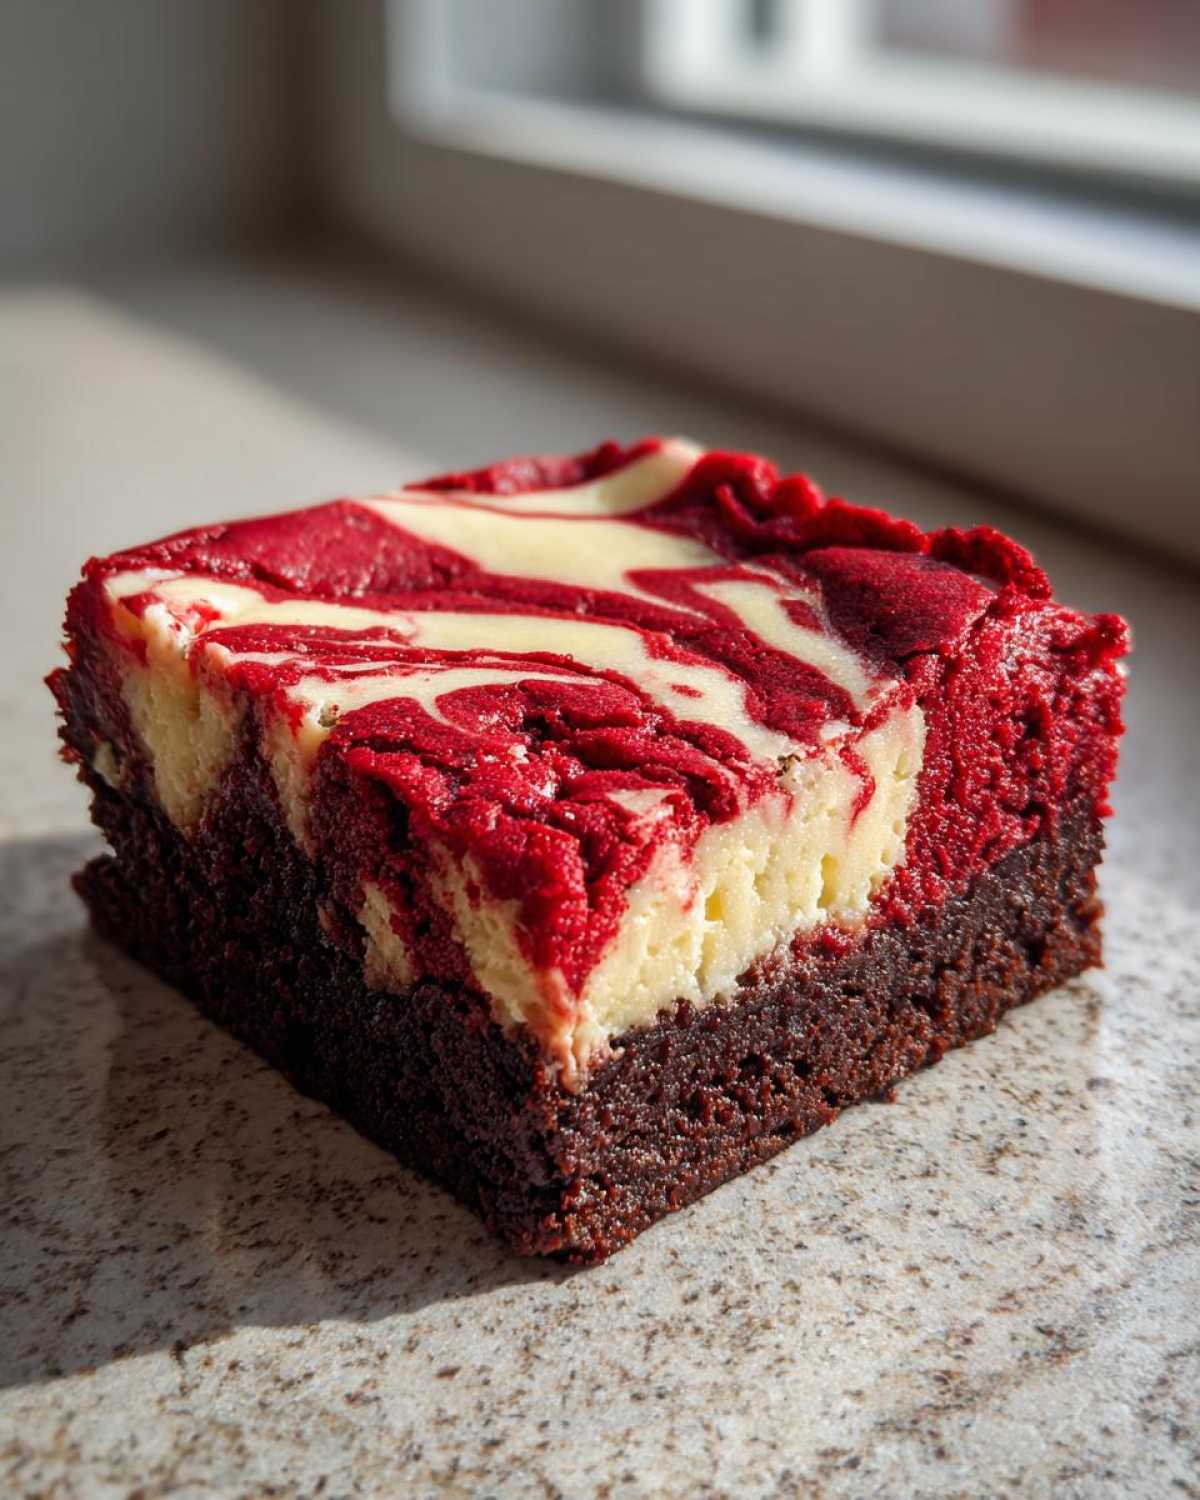
- Visually Stunning: When you cut into these Red Velvet Cheesecake Brownies, the vibrant red marbled with the creamy white? Wow! They’re total showstopper desserts perfect for holidays or last-minute plans.
- Simplicity Wrapped in Gourmet: You get that gourmet, two-layer brownie look without needing to master both a brownie recipe and a cheesecake recipe separately. We mix the components right here!
- Festive and Versatile: Perfect for Valentine’s Day because of that deep red, but equally amazing as Holiday Brownies—I’ve made these for Christmas parties every year.
- Amazing Texture Fusion: You aren’t just dealing with chocolate; you’re dealing with cocoa, vanilla, tang, and that signature mild chocolate note that separates red velvet from the pack.
Essential Ingredients for Decadent Red Velvet Cheesecake Brownies
When you’re combining three powerhouse desserts into one, you can’t just throw anything in the bowl, right? The integrity of this Cheesecake Brownie Recipe relies on having the exact ratios for both the fudgy base and the creamy topping. I’ve listed everything you see here because I want your beautiful marbled brownies to turn out perfectly the first time. These quantities make a perfect batch for a 9×13 pan—one of the best pan sizes for this kind of treat.
For the Red Velvet Brownie Base
This is where we get our fudginess and that famous color. You will notice I ask for melted butter—that’s a trick for keeping the brownies dense and rich, not cakey. And please, if you can find it, use gel food coloring. Liquid drops tend to water down the batter just enough to fight against that fudgy texture we are after.
- 1 cup (2 sticks) unsalted butter, melted
- 1 3/4 cups granulated sugar
- 3/4 cup unsweetened cocoa powder
- 1 teaspoon salt
- 1 teaspoon vanilla extract
- 4 large eggs
- 1 cup all-purpose flour
- 1 tablespoon red food coloring (gel preferred!)
For the Cream Cheese Swirl Layer
This layer is critical for that tangy lift. The most important tip here is that your cream cheese absolutely must be softened to room temperature. If you try to beat cold cream cheese, you’re going to end up with little hard chunks that you cannot swirl smoothly into the brownie mix. Nobody wants a hard bite of cold cheese in their fudgy square!
- 8 ounces cream cheese, softened (this means it should give easily when pressed)
- 1/4 cup granulated sugar (for the cheesecake layer)
- 1 large egg (for the cheesecake layer)
- 1/4 teaspoon vanilla extract (for the cheesecake layer)
Equipment Needed for Perfect Red Velvet Cheesecake Brownies
You don’t need a professional bakery setup for these Decadent Dessert Squares, thankfully! Having the right tools just makes the process so much calmer, especially when you are layering batters that want to fight each other.
Here is the short list of things I always pull out before starting this recipe. Make sure your mixing bowls are big enough—we are combining a lot of ingredients for that awesome fudgy base!
- A 9×13 inch baking pan. This is the classic size for a good batch of these Red Velvet Cheesecake Brownies.
- Parchment paper! This is non-negotiable. It creates handles so you can lift the whole block out later for those clean slices.
- A large mixing bowl for the brownie batter and a medium bowl just for the cheesecake swirl ingredients.
- A whisk or an electric hand mixer for creaming the cheesecake filling smoothly.
- A rubber spatula for scraping down the sides—we don’t want any wasted red batter!
- A butter knife or a thin wooden skewer for creating that signature swirl pattern.
Step-by-Step Instructions for the Ultimate Red Velvet Cheesecake Brownies
Now we get to the truly fun part—the assembly! When you’re making these incredible red velvet cheesecake brownies, the order matters a lot for achieving that fudgy bottom and beautiful top. We want distinct layers that dance together, not one big mud puddle, so we need to take our time during the mixing and swirling phases. Don’t worry if you think you messed up the swirl; a little extra light is actually desirable! If you need more general information about our recipe standards before diving in, please see our disclaimer.
Preparing the Pan and Brownie Batter
First thing’s first: heat up that oven to 350°F (175°C). You cannot skip lining that 9×13 pan with parchment paper. Leave the overhang edges sticking up—those are your handles later! Okay, for the batter, start by whisking that melted butter with all the sugar first until it looks right. Then we introduce the dry stuff: cocoa powder and salt. After that, beat in those four eggs one by one until everything is gorgeous and glossy. Finally, stir in the flour and—the dramatic moment—the red food coloring until you have that deep, vibrant hue. That’s your first layer!
Making the Cream Cheese Swirl and Layering
While that red velvet batter is just waiting patiently, let’s get the cheesecake filling ready in a separate small bowl. You just need to whip the softened cream cheese until it’s silky smooth. Add the smaller amount of sugar, that single egg, and the 1/4 teaspoon of vanilla, and beat it just until it comes together smoothly. Now, pour half of your red velvet batter into the prepared pan and spread it out. Next, gently drop spoonfuls of that creamy cheesecake filling all over that first layer. Then, pour the rest of the red velvet batter right on top of those cream cheese dollops.
Achieving the Perfect Marbled Brownies and Baking
This is the crucial artistic step! Take a butter knife or a skewer and gently drag it through the top of the batter just a few times to create that gorgeous marbling. Seriously, do not overmix this part, or you lose the two-layer effect! Pop the pan into the oven for about 30 to 35 minutes. When you test for doneness, you are looking for moist crumbs clinging to your toothpick, not wet batter. Once they pass that test, let them cool completely. Cooling is the secret to slicing those beautiful squares!
Tips for Success with Your Red Velvet Cheesecake Brownies
Listen, getting these red velvet cheesecake brownies right is all about restraint, not rushing! Seriously, if you treat these layers gently, they reward you ten times over with incredible texture. I’ve learned a few things over the years that turn these from good to absolutely legendary, especially when it comes to baking time and that swirl. Trust me, these little details make all the difference in your Gourmet Brownies.
Secret to Fudgy Red Velvet Brownies Texture
The absolute number one rule for that fudgy texture is to stop baking before you think they are done. Remember, we want moist crumbs, not dry crumbs! As soon as that toothpick comes out looking slightly stained but not wet, pull them out of the oven immediately. Also, when incorporating the flour, mix it in just until you can’t see any white streaks anymore. Overmixing those dry ingredients activates gluten, and that’s what turns your brownie fudgy base into a chewy—or worse, cakey—brick. We want dense and delicious!
Mastering the Cream Cheese Swirl Technique
When it comes time to swirl, think gentle waves, not an aggressive ocean storm! You’ve already layered the cheesecake mix on top of the first half of the batter, then poured the rest of the red velvet over that. Now, take your knife and make maybe three or four gentle figure-eights across the top layer. That’s it! You want pockets of distinct cream cheese sitting next to rich pockets of red velvet. If you keep swirling and mixing, you defeat the purpose of having those beautiful Swirled Desserts. A light hand makes for beautiful presentation.
Storing and Reheating Your Red Velvet Cheesecake Brownies
Okay, this is a crucial safety and quality step, especially because we have that beautiful, tangy cream cheese layer in here. Can you leave these precious red velvet cheesecake brownies sitting out all day? Nope! Because the cheesecake layer has dairy, these need to chill out in the fridge when you’re not actively serving them.
The very first step, even before you think about wrapping them up, is letting them cool completely on the counter. I mean completely cool! And here’s that tip again, because it’s important: If you want those unbelievably clean, professional-looking squares, wrap the completely cooled slab tightly in plastic wrap and pop the whole thing in the refrigerator for at least two hours. Seriously, chilling makes cutting so much easier—you won’t get those crumbly edges.
Once you’ve managed to cut them (and trust me, that’s a struggle; they smell so good!), store the squares in an airtight container. I usually put a small sheet of wax paper between layers if I stack them, just to make sure that lovely cream cheese doesn’t stick to the layer above it. They stay perfectly delicious in the fridge for about four days. They taste great straight from the cold, too, almost like an Easy Cheesecake Bar!
Now, what if you want one soft and gooey again? You can usually just leave a square out on the counter for about 20 minutes before serving, and it will soften right up to that perfect fudgy texture. If you are in a real rush, you can microwave one square for maybe 10 seconds max—but be careful! Too long, and that beautiful cheesecake layer might start weeping. Enjoy them!
Variations for Red Velvet Cheesecake Brownies
I love that this recipe for red velvet cheesecake brownies is practically foolproof, but honestly, the best recipes are the ones you can make your own! Once you nail down the basic technique—especially keeping that brownie base fudgy—you can start experimenting to make these truly your own Gourmet Brownies. I always encourage people to look for ways to add a little extra wow factor, turning them into even more spectacular Swirled Desserts.
Don’t feel restricted by my list! Try one or two of these ideas next time you bake a batch. They are all simple enough that they won’t throw off your oven time or your swirl consistency too much. Remember, baking is fun!
Toss in Some White Chocolate Chips
If you are making these for a crowd, or honestly, just because you love white chocolate (like me!), try folding about a half cup of white chocolate chips right into the red velvet batter before you pour the first half into the pan. The white chocolate seems to complement the subtle tang of the cream cheese layer beautifully, giving you little pockets of melted sweetness scattered throughout the fudgy chocolate base. It really elevates the whole flavor profile!
Switch Up the Extract Flavor
Vanilla is classic, but what if you want a little something extra? This is an easy win. Instead of using just 1/4 teaspoon of vanilla in the cheesecake layer, swap it out! Try a half-and-half mix of vanilla and almond extract. Almond extract is potent, so start small, but it adds this beautiful, old-fashioned richness that makes the cream cheese taste absolutely divine. Or, for a real chocolate boost, try adding a tiny splash of coffee extract to the brownie layer—it just deepens the chocolate flavor, trust me on this one.
Add a Chocolate Ganache Drizzle
Sometimes, you need just a little *more* chocolate. If you want to take these over the top, especially for a major gathering, whip up a simple chocolate ganache. It’s just cream and chocolate chips, heated until smooth! Once your Cheesecake Brownie Recipe squares have cooled completely, drizzle that glossy ganache over the top. It’s an extra layer of decadence that makes them look like they came straight from a fancy bakery case. You can even speckle the top with a few chopped pecans for crunch right after you drizzle!
Make Them Festive with Extracts for Celebrations
Since these are fantastic Holiday Brownies or Valentine Desserts, you can tailor the extracts to the holiday. For Valentine’s Day, you could add a tiny drop of peppermint extract to the cream cheese layer instead of vanilla—that cool mint paired with the deep red velvet is stunning. For Christmas, stick to the almond or maybe even try orange extract in the brownie batter. It’s amazing how a simple extract change gives you a whole new version of these Two Layer Brownies!
Frequently Asked Questions About Red Velvet Cheesecake Brownies
I get so many questions about these decadent squares! It’s totally normal; when you combine three amazing things, you worry you might mess up the balancing act. Don’t stress! Most issues come down to temperature or mixing, but we can fix those right now. If you have other concerns about how we handle your data on the site, please check out our Privacy Policy.
Can I use liquid food coloring instead of gel for these Red Velvet Brownies?
You absolutely *can*, but I highly recommend sticking with the gel food coloring if you can grab some! Here’s the deal: gel colors are super concentrated. You use just a tiny bit, maybe a teaspoon or two, and you get that deep, beautiful red color that makes these Red Velvet Brownies so striking. If you use liquid drops, you have to add way more to get the same intensity, and all that extra liquid messes with the ratio of your dry ingredients to your wet ingredients. That extra liquid slowly pushes your brownie texture toward being more cakey and less fudgy. We are going for fudgy, remember? So, use liquid only if you absolutely have to, and use it sparingly!
What is the best way to get clean cuts on my Cheesecake Brownie Recipe?
This is the secret everyone wants to know! If you try to cut these beauties while they are still warm or even room temperature, you end up with a gooey mess because the cheesecake layer is still too soft and the brownie is too tender. You just need patience! After they have cooled completely on the counter, wrap the whole thing up tight in plastic wrap—handles and all—and put it in the refrigerator for at least two hours, or even overnight. The cold firms everything up. When you pull out that chilled slab, use a long, sharp knife that you wipe clean between every single cut. You’ll get stunning, perfect slices of your Cheesecake Brownie Recipe every time. It’s worth the wait, trust me on this one!
Can these be frozen later on?
Yes, they freeze surprisingly well! Since these are such amazing Showstopper Desserts, sometimes you can’t eat them all right away. Once they are completely cooled and sliced, I like to wrap each individual brownie tightly in plastic wrap first. Then, I place those wrapped squares into a heavy-duty freezer bag. They keep beautifully for about two months this way. When you want one, just pull it out of the freezer and let it thaw on the counter for about an hour. You won’t even believe they were frozen!
Do I have to use cocoa powder if my primary flavor is red velvet?
That’s a smart question! Traditional red velvet recipes actually use just a little bit of cocoa powder—not a ton, but enough to give it that signature faint chocolate background. If you skipped the cocoa powder entirely, you’d just end up with a vanilla cake batter that’s red. The cocoa powder mixed with the vinegar (which reacts with the baking soda) gives red velvet its unique, subtle flavor profile. So yes, for true Red Velvet Baked Goods flavor, a little bit of cocoa is necessary, even when making these Marbled Brownies!
Nutritional Estimates for These Decadent Dessert Squares
So, let’s talk calories for a minute, because face it, these aren’t diet food! When you eat a red velvet cheesecake brownie, you are indulging in pure joy, and you should embrace it fully. However, for those of you who like to keep track, I put together a quick estimate based on the ingredients listed. Remember, this is definitely just an estimate. The actual numbers depend a lot on your exact brands, how much you swirled (did more brownies go into your serving than cheesecake?), and exactly how you cut your final squares.
If you are scrutinizing the details, you can check out our full Terms and Conditions page! But for a general idea of one glorious, fudgy serving of these Decadent Dessert Squares, here is what my calculations look like:
- Serving Size: 1 square (Yields 16 servings)
- Calories: Around 350
- Total Fat: About 22g (with 13g Saturated Fat)
- Total Carbohydrates: Roughly 35g
- Sugar: Heavy hitter here—expect about 35g
- Protein: Approximately 5g
- Sodium: Around 180mg
See? Worth every single bite! Because we use full-fat cream cheese and butter to get that incredible richness, the fat and sugar content reflects that decadence. These are best enjoyed with a huge glass of milk or a strong cup of coffee to balance out the richness. Don’t worry about the numbers; just enjoy the amazing flavor fusion you created!
PrintDecadent Red Velvet Cheesecake Brownies with Perfect Cream Cheese Swirl
Make rich, fudgy red velvet brownies topped with a tangy, creamy cheesecake swirl for a showstopping dessert.
- Prep Time: 20 min
- Cook Time: 35 min
- Total Time: 55 min
- Yield: 16 servings
- Category: Dessert
- Method: Baking
- Cuisine: American
- Diet: Vegetarian
Ingredients
- 1 cup (2 sticks) unsalted butter, melted
- 1 3/4 cups granulated sugar
- 3/4 cup unsweetened cocoa powder
- 1 teaspoon salt
- 1 teaspoon vanilla extract
- 4 large eggs
- 1 cup all-purpose flour
- 1 tablespoon red food coloring (gel preferred)
- 8 ounces cream cheese, softened
- 1/4 cup granulated sugar (for cheesecake layer)
- 1 large egg (for cheesecake layer)
- 1/4 teaspoon vanilla extract (for cheesecake layer)
Instructions
- Preheat your oven to 350 degrees F (175 degrees C). Line a 9×13 inch baking pan with parchment paper, leaving an overhang on the sides for easy removal.
- In a large bowl, whisk together the melted butter and 1 3/4 cups sugar until combined.
- Whisk in the cocoa powder and salt until smooth. Stir in 1 teaspoon vanilla extract.
- Beat in the 4 eggs one at a time, mixing well after each addition.
- Mix in the flour until just combined. Stir in the red food coloring until the batter is uniformly red.
- Pour half of the red velvet batter into the prepared pan and spread evenly.
- Prepare the cheesecake layer: In a separate bowl, beat the softened cream cheese until smooth. Add the 1/4 cup sugar, 1 egg, and 1/4 teaspoon vanilla. Beat until the mixture is creamy and lump-free.
- Drop spoonfuls of the cheesecake mixture evenly over the brownie batter in the pan.
- Pour the remaining red velvet batter over the cheesecake dollops.
- Use a knife or skewer to gently swirl the two layers together to create a marbled effect. Do not overmix.
- Bake for 30 to 35 minutes, or until a toothpick inserted near the edge comes out with moist crumbs attached, but not wet batter. The center should be mostly set.
- Let the brownies cool completely in the pan on a wire rack before lifting them out using the parchment paper overhang.
- Cut into squares and serve.
Notes
- Use gel food coloring for the most intense red color without adding too much liquid to the batter.
- For the fudgiest texture, do not overbake the brownies. The center should still look slightly soft when removed from the oven.
- Chill the brownies for at least two hours before slicing for cleaner cuts.
Nutrition
- Serving Size: 1 square
- Calories: 350
- Sugar: 35
- Sodium: 180
- Fat: 22
- Saturated Fat: 13
- Unsaturated Fat: 9
- Trans Fat: 0.5
- Carbohydrates: 35
- Fiber: 1
- Protein: 5
- Cholesterol: 90