


You know those nights? Game day is coming, or maybe a last-minute potluck pops up, and you need something incredibly satisfying that doesn’t require a ton of fuss? I have got you covered, friend! Forget fiddling with tons of spices and complicated binders. For years, the absolute go-to in my house for anything party-related—from Christmas Eve appetizers to Tuesday night snacks—has been the classic, foolproof bisquick sausage balls recipe. Seriously, if you can mix three things in a bowl, you can nail these. They come out golden, cheesy, and perfectly savory every single time. I’m going to share my tried-and-true method with you today, so you never have to stress about appetizers again.
If you want to learn more about how we put these recipes together, you can check out our About Us page, but right now, let’s get to the good stuff!
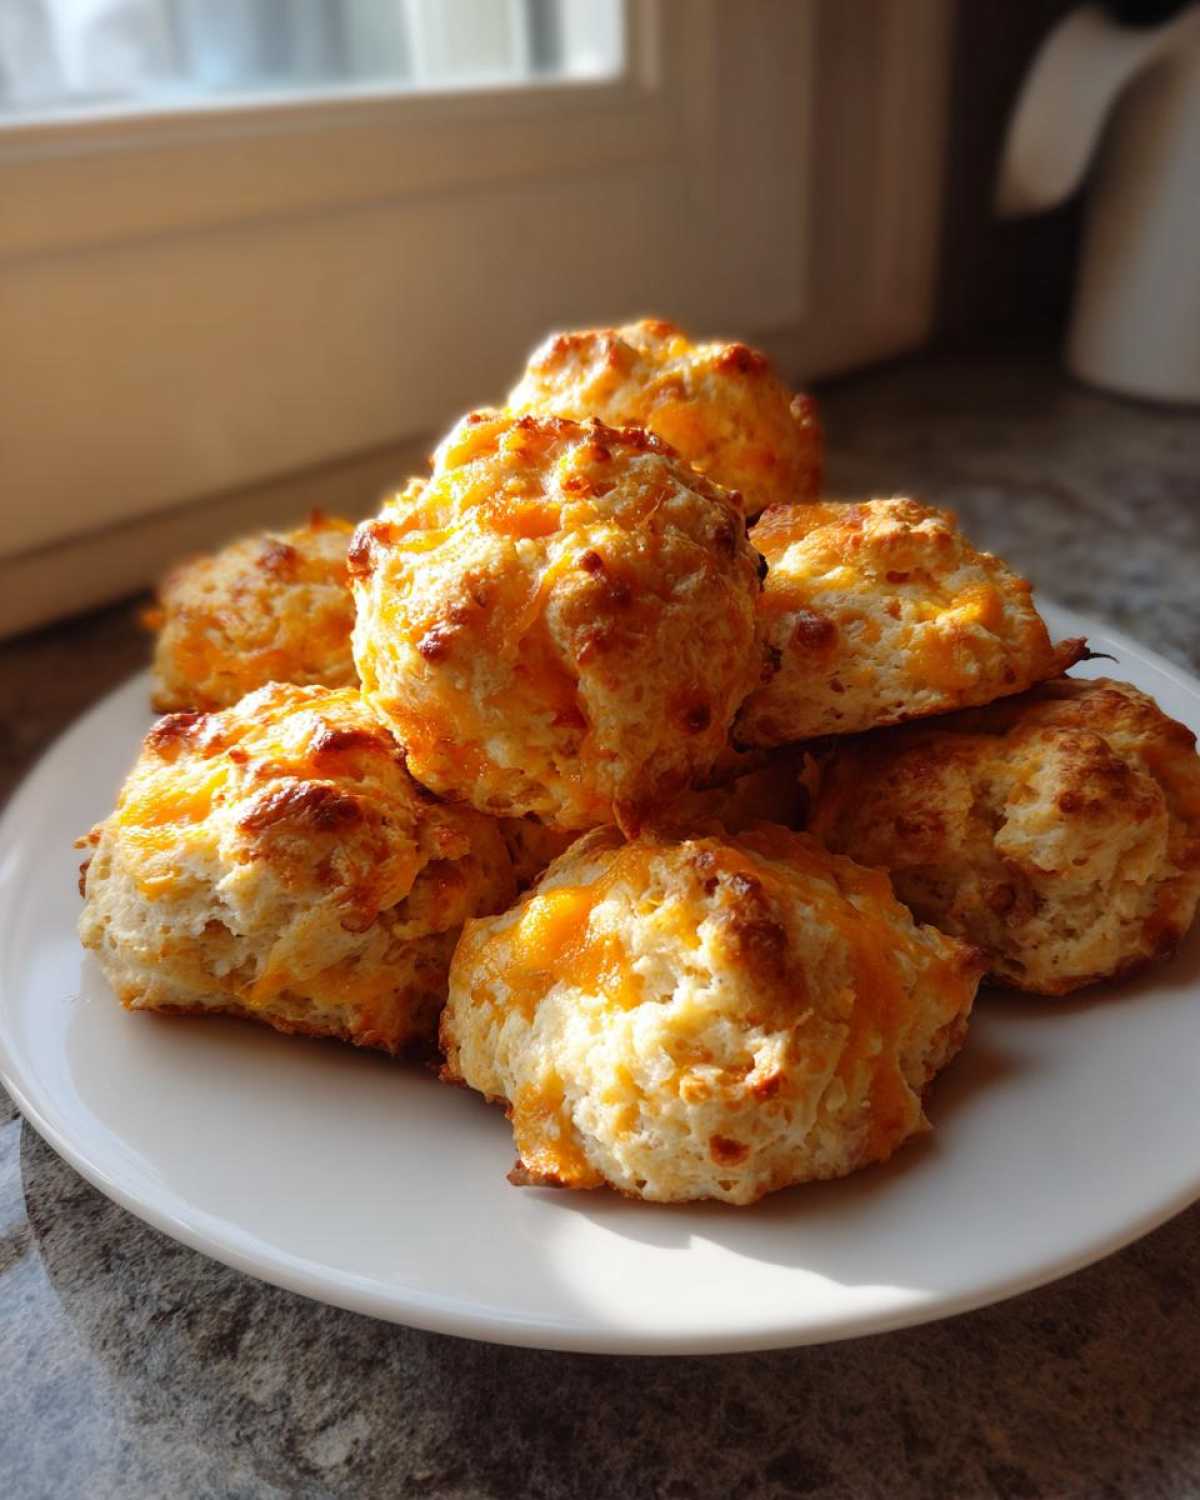
Why This Classic 3-Ingredient Bisquick Sausage Balls Recipe Works (Easy Sausage Balls Recipe)
I’m telling you, the beauty of this recipe is that it respects your time! When you’re trying to coordinate five different dishes for a gathering, anything that cuts down on prep makes your life easier. This is why I always default to this Easy Sausage Balls Recipe; it truly shines because of its minimal requirements. We’re talking about just three core things, which automatically makes it a perfect 3 Ingredient Appetizer.
The secret weapon here, obviously, is Bisquick. It’s not just flour, see? It’s already got the leavening agents and the salt mixed in perfectly for you. That’s where the expertise comes in—it acts as the ideal binder that keeps these bites sturdy and fluffy without needing milk, eggs, or extra seasoning fuss. It holds the sausage and cheese together so nicely when they bake up.
The Power of Simplicity: Making Perfect Bisquick Sausage Balls
Honestly, the fewer ingredients you have, the less chance there is for something to go wrong, right? You just mix, roll, and bake. That short ingredient list means you can whip up a huge batch for the crew in under ten minutes of active work. Trust me, when people ask what’s in these cheesy bites, they always look shocked when I tell them it’s only three things!
Gathering Ingredients for Your Bisquick Sausage Balls
When you are keeping things this simple, every ingredient has to pull its weight, and these three really deliver! The magic truly happens when you use the right cheddar cheese. I’ve tried mild cheddar before, and while it’s fine, it lets the overall flavor fall a little flat. You really need that sharp cheddar in your Cheddar Sausage Mix to cut through the richness of the pork sausage and provide that signature pop we all look for.
Trust me on this: getting your ingredients measured out before you start mixing is key. When you only have three things, you need the ratios spot on so they hold together perfectly when rolling. These exact measurements are what make this recipe so dependable for all my game days.
Essential Components for the Cheddar Sausage Mix
Here is exactly what you need for about two dozen perfect bites:
- 1 pound ground pork sausage (raw—don’t pre-cook it!)
- 1 cup Bisquick Original Pancake & Baking Mix
- 1 cup shredded sharp cheddar cheese
That’s it! See what I mean? No eggs, no extra spices required. This simple combination guarantees you’ve got the perfect base for a classic Southern Sausage Appetizer.
Step-by-Step Guide to Making Perfect Bisquick Sausage Balls
Now that you have your simple ingredients ready, let’s talk about how to put them together without ruining the texture! The instructions sound easy—and they are—but there is one critical step concerning how you combine everything that makes these the Best Party Snack instead of just okay snacks. Seriously, don’t rush the mixing part!
We’re aiming for that perfect dense but light texture that means these are great for dipping or just grabbing while mingling. If you overwork the mixture, you’ll end up with dense little hockey pucks because you’ll activate too much in the Bisquick. We want gentle incorporation only!
Preparation and Mixing for the Best Bisquick Sausage Balls
First things first, you need to get your oven hot! Preheat it to 350 degrees Fahrenheit. I like to line my baking sheet with parchment paper because cleanup is already my least favorite part of cooking, and this keeps things tidy. If you don’t have parchment handy, a light spray of non-stick cooking oil works absolutely fine.
In a big bowl—and I mean big, because you need room to work!—toss in your raw sausage, the cup of Bisquick, and that lovely sharp cheddar. Now, the key step: use your hands! Get right in there and mix everything until it’s just combined. You should no longer see streaks of white Bisquick or massive clumps of cheese separate from the meat. Once it looks mostly uniform, STOP mixing! I can’t stress that enough. You want to gently work it together, not mash it like bread dough.
Shaping, Baking, and Achieving Golden Brown Results
Next up is rolling them out, which is always fun! Scoop small portions of the mixture and roll them gently between your palms into little balls that are about one inch across. You want them small enough so people can pop one in their mouth easily as a quick appetizer, but big enough to be satisfying.
Lay those little guys out on your prepared baking sheet, making sure you leave about an inch of space between them so they don’t fuse together while baking. Pop the tray into that 350°F oven for about 15 to 20 minutes. You’ll know they’re done when they look golden brown all over and the sausage inside is cooked through completely. A little grease will render out, which is normal, so let them cool just a minute on the pan before moving them to a serving platter. You might want to check out our disclaimer page if you are curious about ingredient sourcing!
Expert Tips for Your Crowd Pleasing Potluck Food
Okay, so you’ve mastered the classic three-ingredient version, which is already fantastic, right? But sometimes you need to tweak things just a little for different guests or just because you’re feeling adventurous. That’s what makes these sausage bites your new favorite Crowd Pleasing Potluck Food—they are so adaptable! I’ve picked up a few little tricks over the years to make them even better or cater them to picky eaters, ensuring every batch is the Best Party Snack on the table.
Sometimes you just don’t have sharp cheddar on hand, or maybe someone in the crowd prefers a milder flavor. Don’t sweat it! You absolutely can swap out that cheese without messing up the structural integrity of the ball at all. That Bisquick is doing most of the heavy lifting for binding, thank goodness!
Ingredient Swaps for Your Cheddar Sausage Mix
First off, let’s talk cheese again. If you aren’t feeling the sharp cheddar, you can definitely swap it out entirely! Monterey Jack melts beautifully and gives you that beautiful, gooey pull when you bite into it. Or, if you want something in the middle, grab a bag of Colby-Jack blend. They both work just as well structurally as the sharp cheddar.
Also, I know some people find the standard ratio a tiny bit rich, especially if you’re serving them alongside heavy dips or creamy sides. If that’s the case, you can totally dial back the cheese just a bit. Try reducing the cheddar from one full cup down to about three-quarters of a cup. You’ll notice the sausage flavor comes through slightly stronger, but they still hold together perfectly fine. Just remember, cheese equals flavor insurance, so don’t slash the amount too much!
Make Ahead Sausage Bites: Storage and Reheating Instructions
This might be my absolute favorite thing about being able to rely on a Simple Sausage Appetizer like this: you can make them way ahead of time! Who wants to be standing over the oven right when guests are walking in the door? Not me! These turn into amazing Make Ahead Sausage Bites, which makes them perfect for busy weekends or when you need a reliable Freezer Friendly Appetizer stashed away for an impromptu gathering.
If you make them and they hang around for a day or two, they are still delicious dipped in something spicy. But if you want to save them longer, freezing is the way to go. I rely on the freezer for half my holiday appetizers, honestly. The Bisquick mix holds up so remarkably well, and you don’t lose any of that wonderful cheesy flavor!
If you’re wondering how to handle any leftovers or want to prep for a huge event, make sure you review our privacy policy—just so you know we keep all your kitchen secrets safe!
Freezing Instructions for Future Bisquick Sausage Balls
If you plan on freezing these, the key is to treat them like little nuggets of delicious, savory gold. After you roll them into those one-inch balls, do **not** bake them yet! Lay the raw balls out on a baking sheet—you’ll want them spaced apart like they were ready for the oven. Stick that entire tray into the freezer for maybe an hour or two until they are rock solid.
Once they are frozen solid—we call it “flash freezing”—carefully transfer those hard little balls into a zip-top freezer bag. Make sure you push out as much air as possible before sealing them up tight. They keep beautifully this way for two to three months!
When you’re ready to bake them from frozen, there’s no need to thaw them out first! Just arrange them on your greased or lined baking sheet (still leaving that small space between them) and pop them into the 350°F oven. Because they are frozen, you just need to add a little extra time. They usually take about 5 to 10 minutes longer than the recipe calls for, so plan for 20 to 30 minutes total, until they are nice and browned and cooked all the way through.
Serving Suggestions for This Quick Brunch Idea
Once these beauties are out of the oven, the real fun starts: deciding how to serve them up! Because they are such a reliable, savory base, they fit into almost any meal plan you have going on. They look fantastic piled high on a simple wooden board, which is my go-to for game day spreads because it feels casual and inviting.
If you are serving these as a Game Day Food Idea, I always keep a little bowl of hot sauce or maybe a tangy honey mustard nearby. People love dipping! The slight spice or sweetness just plays so nicely against that salty sausage and cheese combination.
For a slightly more elegant presentation—maybe you’re serving them as a Quick Brunch Idea alongside fruit or bagels—try adding a tiny sprig of fresh chopped parsley over the top right before you put them out. It gives them a lovely pop of green color and looks like you spent way more time on them than you actually did! They are fantastic served warm, but honestly, they hold up really well at room temperature too, which is crucial when you’re setting up a buffet line.
Frequently Asked Questions About Bisquick Sausage Balls
I get so many questions when people see how easy this recipe is! It always amazes me how much reliable information you can pack into just three ingredients. I’ve gone ahead and answered a few of the things I hear most often about making these perfect savory bites for parties or breakfast. If you have more questions after reading these, feel free to reach out on my contact page!
Can I use a different type of sausage besides pork in my sausage balls?
Yes, you absolutely can switch up the meat! If you’re looking for a lighter option, ground turkey or ground chicken both work fine here. Just know that pork sausage has a particular fat content that helps keep the balls moist and flavorful—it’s what gives us that authentic, rich taste we look for in a great Southern Sausage Appetizer. The poultry options will be a little leaner, so you might notice a slight change in the final texture, but they still taste yummy!
What temperature should I bake the bisquick sausage balls at?
This is super important for food safety and achieving that golden crust! You MUST preheat your oven completely—350 degrees Fahrenheit is the magic number for these. Baking them at this steady temperature ensures that the raw pork sausage cooks all the way through to the center before the outside gets too dark or burns. We don’t want any raw centers in our amazing bisquick sausage balls, right?
Why shouldn’t I overmix the sausage ball dough?
Oh, that’s a classic mistake! When you overmix mixtures that contain flour or baking mix—like our Bisquick—you start developing gluten. Developing gluten too much is great for big bread loaves, but terrible for something delicate like this. Overmixing makes your finished sausage balls dense, tough, and a little chewy rather than light and tender. I always stop mixing the second I can’t see any pockets of dry mix remaining. It should look slightly shaggy and uniform, but not overworked!
How do I make these a great Quick Breakfast Bake instead of just an appetizer?
That’s an easy switch! If you’re thinking of serving these alongside scrambled eggs or fruit salad for brunch, I suggest rolling them slightly bigger—closer to one and a half inches instead of one inch. You might need to add about 3 to 5 extra minutes to the baking time since they are bigger. They are fantastic served warm straight from the oven alongside a maple syrup drizzle for a sweet and savory combo!
Estimated Nutritional Breakdown for Savory Baked Bites
I always feel a little bit better about serving up these delicious little snacks when I have a rough idea of what’s in them, even though they are totally indulgent! Since these Savory Baked Bites are made of simple components—sausage, cheese, and Bisquick—the numbers aren’t too scary for an appetizer, especially if you stick to just one or two!
You have to remember that sausage varies quite a bit, so these numbers are based on using standard pork sausage and full-fat cheese. Think of this as a general guide, not a guarantee, since everyone’s sausage choice is a little different. We’ve kept the sugar super low here, which is great for a savory game day treat!
If you are curious about how we handle data on the site in general, please take a peek at our Terms and Conditions page!
Here is the estimated breakdown per single, one-inch sausage ball:
- Calories: Around 110
- Fat: About 9 grams (with 3.5 grams being saturated fat)
- Total Carbohydrates: Just 3 grams
- Protein: A respectable 5 grams
You can see that the fat content is the highest contributor, which is expected since we’re using fatty sausage and cheddar cheese. But hey, for a three-ingredient snack that disappears instantly at parties, I think this is a pretty solid trade-off for keeping everyone happy!
Share Your Experience Making This Simple Sausage Appetizer
I absolutely live for hearing how these turn out in your kitchens! Seriously, if you’ve whipped up a batch of these for your family or served them as a Simple Sausage Appetizer at your next event, I want to know everything. Did they disappear as fast as mine do? Did your husband sneak an extra one while they were cooling?
Don’t be shy! Leave a star rating right down below so other folks can feel confident making this recipe for their own gatherings. I really value your feedback because it helps me know which recipes are making your lives just a little bit easier and tastier.
And please, please, if you snap a picture of your beautiful, golden-brown sausage balls—maybe dipped in some comeback sauce or sitting next to a football—tag me on social media! Seeing your photos is truly the best part of sharing these recipes that I love so much. It connects us all over great, simple food.
If you want to check out the details on how we handle your interaction data here on the site, you can read our Cookie Policy. Now go on, let me know what you think of this game-day staple!
PrintClassic 3-Ingredient Bisquick Sausage Balls

Make these simple, savory sausage balls using only three ingredients: sausage, Bisquick mix, and cheddar cheese. They are perfect for parties, breakfast, or game day.
- Prep Time: 10 min
- Cook Time: 20 min
- Total Time: 30 min
- Yield: About 24 balls
- Category: Appetizer
- Method: Baking
- Cuisine: American
- Diet: Low Lactose
Ingredients
- 1 pound ground pork sausage (raw)
- 1 cup Bisquick Original Pancake & Baking Mix
- 1 cup shredded sharp cheddar cheese
Instructions
- Preheat your oven to 350 degrees Fahrenheit. Lightly grease a baking sheet or line it with parchment paper.
- In a large bowl, combine the raw sausage, Bisquick mix, and shredded cheddar cheese.
- Mix the ingredients thoroughly with your hands until they are fully incorporated. Do not overmix.
- Roll the mixture into small balls, about 1 inch in diameter. Place them onto the prepared baking sheet, leaving about 1 inch of space between each ball.
- Bake for 15 to 20 minutes, or until the sausage balls are golden brown and cooked through.
- Remove from the oven and let them cool slightly on the pan before serving.
Notes
- For a freezer-friendly option, prepare the balls, place them on a baking sheet, and freeze until solid. Transfer the frozen balls to a freezer bag. Bake directly from frozen, adding 5 to 10 minutes to the baking time.
- You can substitute the sharp cheddar with Monterey Jack or a Colby-Jack blend for a different flavor.
- If you prefer a slightly less rich flavor, reduce the cheese to 3/4 cup.
Nutrition
- Serving Size: 1 ball
- Calories: 110
- Sugar: 1
- Sodium: 280
- Fat: 9
- Saturated Fat: 3.5
- Unsaturated Fat: 5.5
- Trans Fat: 0
- Carbohydrates: 3
- Fiber: 0
- Protein: 5
- Cholesterol: 30