

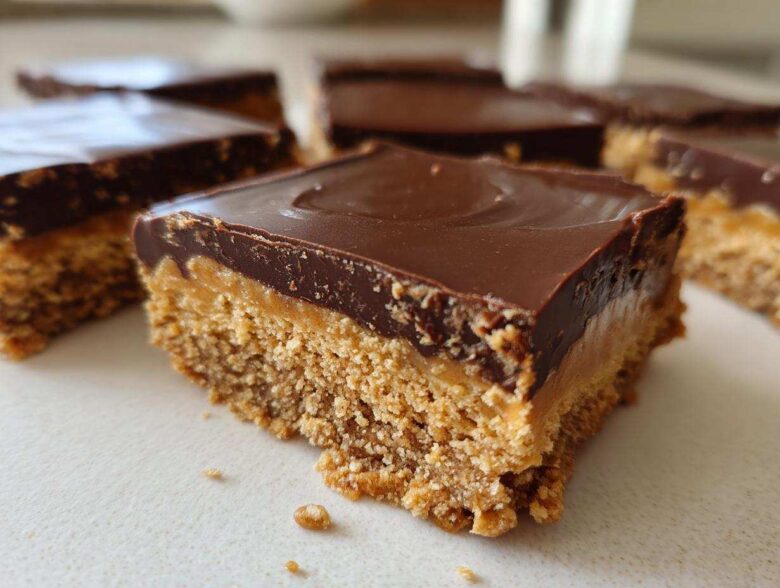
Oh my gosh, do you ever get that craving where you need something rich, salty, sweet, and unbelievably easy, like, yesterday? That’s exactly when I whip up these sensational bars! We all know and adore classic Buckeye candy—that perfect marriage of peanut butter and chocolate—but I decided to give it a major crunch upgrade by adding graham crackers. Trust me, these ultimate no-bake **buckeye graham crackers** bars are my secret weapon for last-minute get-togethers.
Since I live for classic American treats like fudge and peanut butter balls, I know a thing or two about candy chemistry, so I immediately recognized the potential here. These have that comforting, familiar taste but with the added texture of a good, sturdy base. You won’t even have to turn on the oven, which is my favorite kind of baking! Grab your stand mixer, because we are about to create a potluck legend in about twenty minutes of active work.
Why You Will Love These Buckeye Graham Crackers
Honestly, these little squares are dangerous because they are just so good, and you barely have to try! I love keeping a batch around for when the mood strikes, or when I realize I forgot a dish for an event. Here’s why I think you are going to be obsessed with them:
- They are truly No Bake Dessert Recipes at their absolute core—grab your bowl and that’s it!
- The prep time is insanely short—we are talking maybe 20 minutes of active mixing before they go chilling.
- That perfect combination of salty peanut butter mixed with buttery graham cracker crumbs delivers the best crunch.
- They freeze beautifully, making them a great option for holiday planning way ahead of time.
- These are the fastest things ever to cut into perfectly portioned finger sweets for gatherings.
- If you love classic Buckeye candy, this is the same incredible flavor profile but easier and crunchier!
Essential Ingredients for Perfect Buckeye Graham Crackers
A successful no-bake bar hinges entirely on the quality and texture of your starting ingredients. Since we aren’t using the oven to ‘set’ anything, the fats, sugars, and binders need to cooperate perfectly! Don’t skimp here; these simple components are what transform into that incredible, decadent layer we know and love. For the best results in these **buckeye graham crackers**, I always measure carefully. These bars rely on ratios, so using the right measurements for your butter and peanut butter is crucial for that perfect pressable texture.
Here is the exact list you’ll need to whip up a batch of these amazing bars:
- 1 cup unsalted butter, softened (Make sure it’s soft, not melted!)
- 2 cups powdered sugar (Also known as confectioners’ sugar)
- 1 1/2 cups creamy peanut butter (This is key—creamy works best for smoothness!)
- 1 teaspoon vanilla extract
- 2 cups graham cracker crumbs (I crush mine fresh if I can!)
- 1 1/2 cups semi-sweet chocolate chips
- 2 tablespoons shortening (Yes, shortening! It keeps the chocolate shiny.)
Ingredient Notes and Substitutions for Buckeye Graham Crackers
Okay, let’s talk specifics because this is where we earn our Expertise stripes. If you want true, reliable results with your **chocolate covered peanut butter bars**, listen up!
First, the peanut butter: I insist on creamy here. Crunchy peanut butter will give you a grainy, bumpy texture in the base, and we want smooth sailing for that dense base. Smooth peanut butter blends flawlessly with the softened butter and powdered sugar.
Second, the chocolate. Semi-sweet is my go-to because it balances the intense sweetness of the peanut butter filling perfectly. If you are making these mostly for kids or prefer a sweeter profile, feel free to swap in milk chocolate chips. However, if you go dark chocolate, you might want to add an extra tablespoon of powdered sugar to your peanut butter layer to compensate for the bitterness.
Finally, the shortening. Yes, it sounds old school, but it’s indispensable for the topping! Shortening mixed with chocolate chips gives you that beautiful, crack-free, glossy finish that melts perfectly in your mouth without that greasy texture you sometimes get from just using straight chocolate chips.
Step-by-Step Instructions for No Bake Buckeye Graham Crackers
Okay, get ready for the easiest 20 minutes of active prep you’ve ever spent making a dessert! Since these are a no-bake stunner, our technique focuses on making sure everything mixes up smooth and sets up perfectly. The total time might clock in over three hours, but that’s just chilling time, so you can relax while these **buckeye graham crackers** firm up!
The first big move is lining that pan—don’t skip this, seriously. I use an 8×8 inch square pan. You want long sheets of parchment paper laid across the bottom, with extra paper hanging over two opposite sides. Those overhangs are your built-in handles later when it’s time to lift and cut. Trust me, if you try to cut these in the pan, you’ll mangle the edges!
Creating the Peanut Butter Graham Cracker Base
This is where we build the satisfying crunch that sets these apart from plain Buckeye candy. We start by creaming the fats and sugar, just like a real cake, even though we aren’t baking it! In your mixing bowl, whip that softened butter first until it’s beautiful and light. Then, beat in the powdered sugar slowly. You want this mixture to look pale and super creamy.
Next, splash in that vanilla and scoop in all that lovely creamy peanut butter. Beat it until everything is incorporated and you have a smooth, sweet fluff. Now is the time for the star crunch factor: stir in those 2 cups of graham cracker crumbs until they are completely worked through the peanut butter mixture. This is going to get really thick and stiff—that’s exactly what we want for these **Easy Graham Cracker Recipes**!
Take all that thick peanut butter mixture and firmly press it down into the prepared pan. Use the bottom of a measuring cup or flat glass to really pack it in tightly. We’re going for a solid, dense layer here.
Melting Chocolate and Assembling Your Buckeye Graham Crackers
Next up is the chocolate topping, which comes together while your base is chilling slightly. Grab your microwave-safe bowl—make sure it’s dry!—and toss in the chocolate chips and the shortening.
The secret to silky chocolate that doesn’t seize up? Short bursts of heat. Microwave this at 30-second intervals, stirring well after every single buzz. You might need four or five rounds until it looks totally smooth and glossy, like liquid silk. This technique protects against scorching and keeps our **Peanut Butter Chocolate Treats** looking professional.
Pour that glorious melted chocolate right over your peanut butter base. Gently use an offset spatula to smooth it out evenly across the top. Don’t press too hard, or you’ll disturb the base layer! Once that’s smooth, it’s time for patience while these beauties chill in the fridge for at least three hours until that top chocolate layer is totally firm.
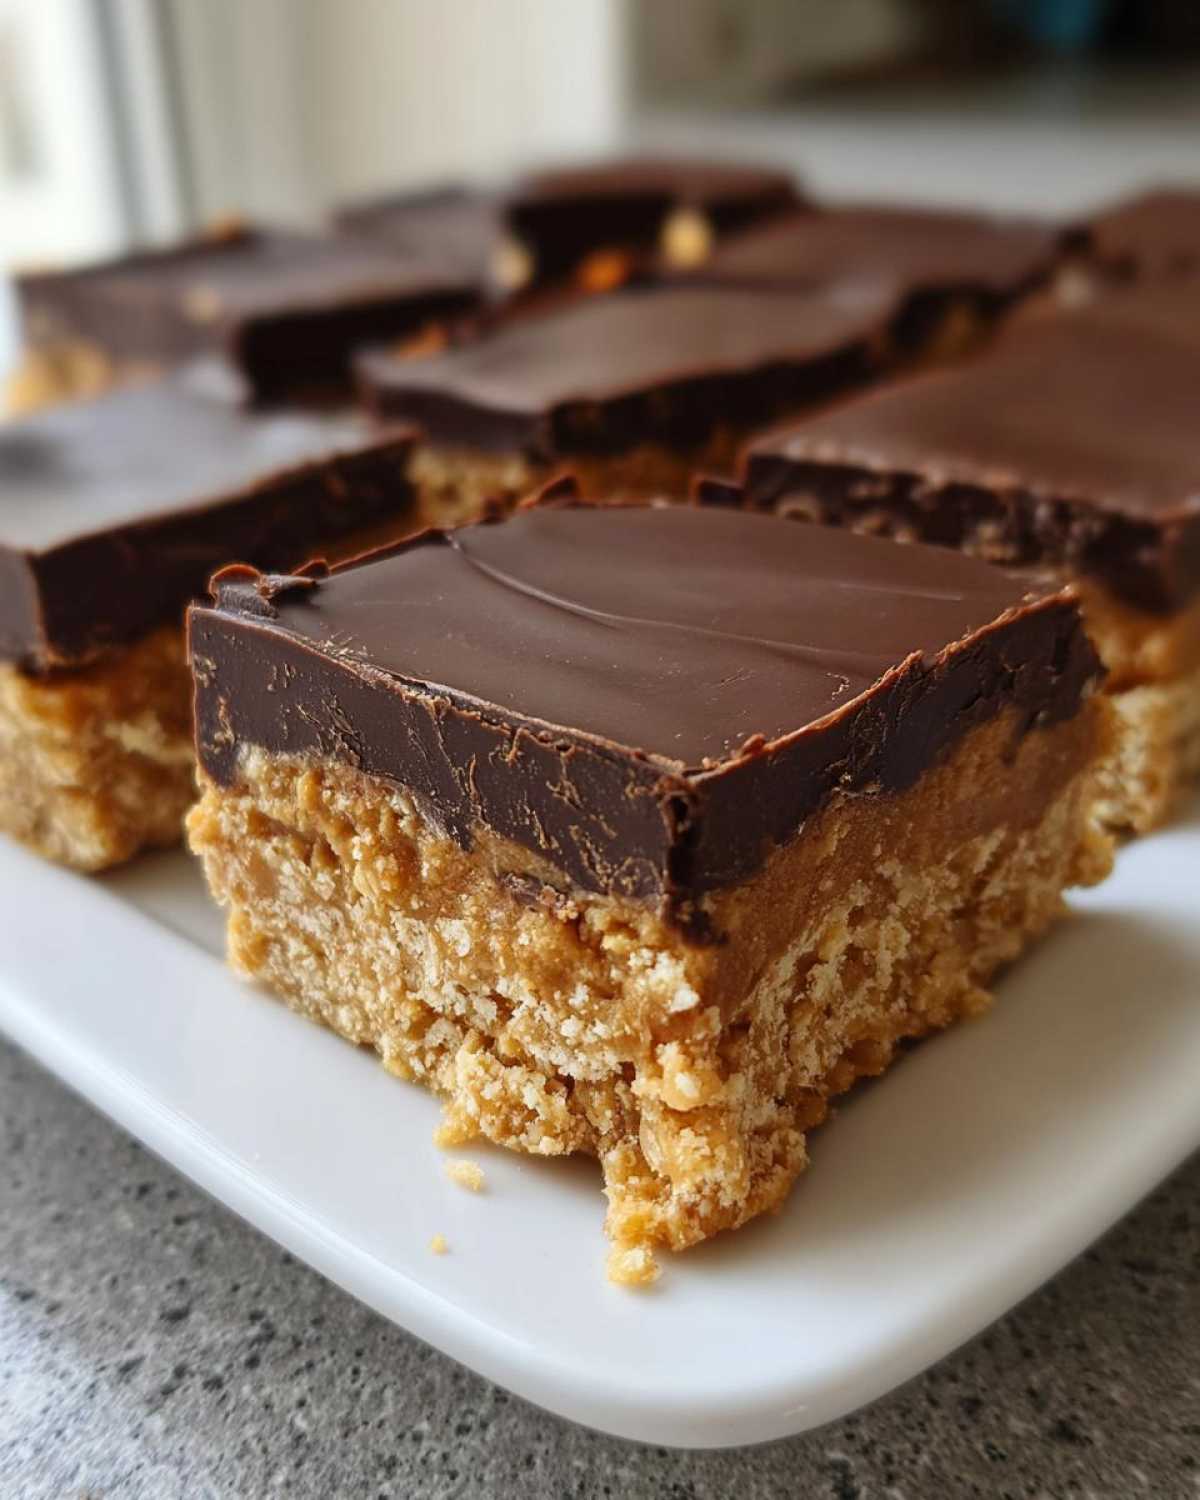
Always remember to handle hot melted chocolate with care!
Tips for Success Making Buckeye Graham Cracker Bars
Even though these are no-bake, a few little secrets can take them from good to absolutely legendary. I learned these hard-won lessons from my initial attempts where the chocolate cracked everywhere or the bars were impossible to slice smoothly—oops!
The secret to achieving that beautiful, clean look, especially when you are cutting them for gifts or potlucks, really comes down to temperature control. You want the base firm, but the chocolate topping shouldn’t be rock hard when you slice it. This is where I lean on the best advice from the ‘Notes’ section about letting them rest for a moment.
Here are the three things I always do:
- Chill Time is Non-Negotiable: Seriously, you need that minimum three hours in the fridge. If you try to cut them after two hours, the peanut butter layer will stretch and squish out from under the chocolate, making a huge mess and ruining the look of your perfect **Graham Cracker Crunch** bars.
- The 5-Minute Room Temp Trick: Once they are fully set (after the 3+ hours), use the parchment overhang to lift the entire slab onto a cutting board. Let the entire slab sit on the counter for exactly 5 minutes before you start slicing. This softens the chocolate just enough so your knife glides through instead of cracking the top layer.
- Use a Hot Knife: For those super clean edges, grab a long, sharp knife (a chef’s knife works great) and dip the blade into a glass of hot water between every single cut. Wipe the hot blade dry with a paper towel before plunging it into the bar. This melts the chocolate right at the cutting line, giving you glossy, perfect squares every time.
Follow those tips, especially the temperature ones, and you’ll have a gorgeous batch of easy, rich **Peanut Butter Chocolate Treats** ready to go!
Serving Suggestions for Your Buckeye Graham Crackers
The best part about these **buckeye graham crackers** is that they fit into almost any situation where someone wants something delicious and easy to grab! Seriously, they disappear faster than almost anything else I bring to a gathering. Because they are so sturdy and satisfying—thank you, graham cracker base!—they pass the crucial potluck test.
These are the ultimate **Quick Party Desserts**. You don’t need forks or little plates; they are perfect finger food! When I’m taking these to a church function or a kid’s soccer event, I always cut them smaller than usual—maybe into 20 or even 24 tiny squares. It makes people feel like they can have just one more without overindulging (which, spoiler alert, never happens).
I also think they make fantastic, simple food gifts, especially around the winter holidays. Simply wrap a few squares tightly in cellophane bags, tie them with a fun ribbon, and people will rave about your homemade candy! They look so much fancier than the five minutes of effort they actually require.
Think about how they can substitute for traditional cookies too. If you need an impressive, rich item but you’re tired of baking cookies (I know the feeling!), swap these in. They hit all those comfort food notes—salty, sweet, chocolatey—without ever needing the oven. They are a guaranteed crowd-pleaser and a fantastic **Peanut Butter Lovers Delight**!
Storage and Keeping Your Buckeye Graham Crackers Fresh
Now that you’ve gone to the trouble of making these perfectly balanced **No Oven Desserts**, you want to make sure they stay absolutely delicious, right? Good news! Because these bars are so rich and dense, they last a surprisingly long time, provided you keep them cool. They are really more like a candy bar than a cake!
The number one rule for keeping these fresh? If you aren’t eating them within the first day, they absolutely must go into the refrigerator. Because we used butter and shortening in the layers—not baking stabilizers—they soften up way too quickly at room temperature. I store mine in a sturdy, airtight container, layered between sheets of wax or parchment paper so nothing sticks together.
If you keep them covered tightly in the fridge, they stay wonderfully fresh for up to a full week. If you are prepping for a holiday party or just want a quick sweet fix way in advance, you can definitely freeze them too! Wrap the whole slab—or even individual squares—really tightly in plastic wrap, and then pop them into a freezer-safe bag or container. They hold up great for about two months in the freezer.
When you take them out of the fridge or freezer, remember the slicing tip I mentioned earlier! Chocolate gets brittle when it’s ice cold. If you plan to serve them chilled, let the whole slab sit out on the counter for about 5 to 10 minutes before you slice. Allowing that brief warming period means your knife will glide through the chocolate topping without causing horrible cracks. This small bit of patience is the secret to maintaining that beautiful, professional look on your **homemade chocolate treats**!
Frequently Asked Questions About Buckeye Graham Cracker Bars
When readers realize how easy these **buckeye graham crackers** are, they usually have a few quick questions bubbling up! It makes total sense; we want this **quick sweet fix** to be perfect the first time around. I’ve gathered the most common things people ask me when they are ready to try making these **No Oven Desserts** for the first time. Here are the answers that should clear things up!
Can I use crunchy peanut butter instead of creamy?
Oh, I get asked this all the time! My official recommendation for these bars—especially since we aren’t baking to temper the texture—is definitely creamy peanut butter. Creamy melts beautifully with the butter and sugar, giving you that smooth, dense layer that’s the foundation of a good **Buckeye Candy Twist**. If you use crunchy, you end up with a lot of extra, uneven chunks in the base, which can make spreading the peanut butter layer difficult and result in an uneven top when you pour the chocolate on.
How do I stop the chocolate topping from cracking when I cut the bars?
This is the number one frustration people have! The chocolate cracks because the peanut butter layer underneath is too cold and too hard when the chocolate sets. The peanut butter base shrinks slightly as it chills firmer than the chocolate does, causing tension. My trick, which I detailed above about the 5-minute rest, is the best defense. Let the whole slab sit at room temperature for about 5 minutes before you slice. Also, remember to run your knife under hot water and wipe it dry between every cut. That hot, clean blade glides through without tearing the chocolate.
Can I substitute something for the shortening in the chocolate topping?
The shortening is there for shine and stability, giving you that beautiful, non-greasy, melt-in-your-mouth texture that makes the topping so satisfying. If you absolutely cannot use shortening, you can use an equal amount of coconut oil. It performs similarly in helping that chocolate stay glossy and smooth when chilled. Please avoid using just plain butter, though; it often makes the chocolate too soft at room temperature and can lead to a duller finish!
For more in-depth help with any recipe questions or kitchen quandaries you might have, feel free to reach out to our team! We love hearing from fellow home cooks!
Estimated Nutritional Data for Buckeye Graham Cracker Bars
Now, I know what you’re thinking: “These are amazing, but how bad are they for me?” Well, honey, these **buckeye graham crackers** are decadent! We are dealing with butter, peanut butter, and chocolate, so we aren’t exactly whipping up a salad here. These are meant to be a treat, a little indulgence, and definitely one of those necessary **Comfort Food Desserts**!
I always run the numbers for peace of mind, but I want to be super clear: the estimates below are based purely on the standard ingredient amounts listed in the recipe using average brand data. If you swap your peanut butter for a natural, sugar-free variety, or use dark chocolate instead of semi-sweet, those numbers are going to shift! Consider this your baseline guide for one delightful square.
Here is the breakdown based on a yield of 16 bars:
- Serving Size: 1 bar
- Calories: 350
- Fat: 22g (with 10g of that being Saturated Fat)
- Carbohydrates: 35g
- Sugar: 30g
- Protein: 6g
- Cholesterol: 35mg
See? Rich! But totally worth it, especially for holidays or when you need that perfect energy boost. Because this recipe is so simple, you get maximum flavor payoff for minimum effort. Remember to read our full site policy regarding nutritional information, as these are just educated estimates for your **Peanut Butter Chocolate Treats**!
Share Your Quick Sweet Fix
Alright, my friend, now that you have the secret to making the ultimate **buckeye graham crackers**, I want to see them! Seriously, tag me on social media when you make these. I always love seeing how they turn out in different kitchens, especially those beautiful, clean slices!
And please, please, leave me a comment down below! Did you keep them classic, or did you make a little tweak? Maybe you added a sprinkle of flaky sea salt on top of the chocolate? Or perhaps you used cinnamon graham crackers? I’m always looking for new ideas for **Peanut Butter Lovers Delight** variations!
Tell me honestly: If you made these right now, what rating would you give them out of five stars? Were they that satisfying, effortless treat you needed? I’m hoping they are a solid 5/5!
If you loved how fast and fantastic these bars were, you can check out our full section of quick recipes designed for busy weeknights and last-minute parties. Happy baking—or, well, no-baking!
PrintUltimate No-Bake Buckeye Graham Cracker Bars
Make these simple, no-bake bars that combine peanut butter, chocolate, and graham crackers for a rich, satisfying treat inspired by Buckeye candy.
- Prep Time: 20 min
- Cook Time: 0 min
- Total Time: 3 hr 20 min
- Yield: 16 bars
- Category: Dessert
- Method: No-Bake
- Cuisine: American
- Diet: Vegetarian
Ingredients
- 1 cup unsalted butter, softened
- 2 cups powdered sugar
- 1 1/2 cups creamy peanut butter
- 1 teaspoon vanilla extract
- 2 cups graham cracker crumbs
- 1 1/2 cups semi-sweet chocolate chips
- 2 tablespoons shortening
Instructions
- Line an 8×8 inch baking pan with parchment paper, leaving an overhang for easy removal.
- In a large bowl, beat the softened butter, powdered sugar, peanut butter, and vanilla extract until the mixture is smooth and creamy.
- Stir in the graham cracker crumbs until fully combined. The mixture will be thick.
- Press the peanut butter mixture evenly into the bottom of the prepared pan.
- In a microwave-safe bowl, combine the chocolate chips and shortening. Microwave in 30-second intervals, stirring between each, until the chocolate is completely melted and smooth.
- Pour the melted chocolate mixture over the peanut butter layer. Spread it evenly to cover the entire surface.
- Refrigerate the bars for at least 3 hours, or until the chocolate layer is firm.
- Use the parchment overhang to lift the bars from the pan. Cut into 16 squares before serving.
Notes
- For cleaner cuts, allow the bars to sit at room temperature for 5 minutes before slicing.
- You can use milk chocolate or dark chocolate instead of semi-sweet chocolate chips.
- Store leftovers tightly covered in the refrigerator for up to one week.
Nutrition
- Serving Size: 1 bar
- Calories: 350
- Sugar: 30
- Sodium: 180
- Fat: 22
- Saturated Fat: 10
- Unsaturated Fat: 12
- Trans Fat: 0
- Carbohydrates: 35
- Fiber: 1
- Protein: 6
- Cholesterol: 35