

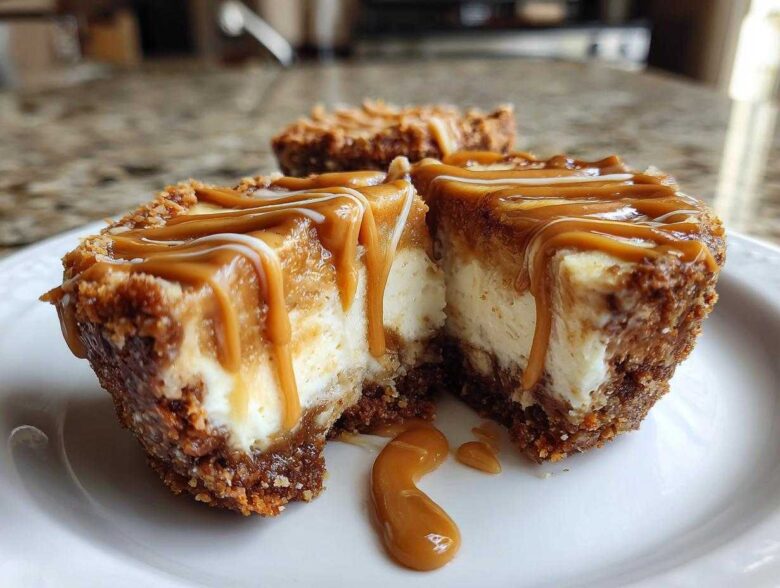
If you’re looking for that showstopper dessert that looks like you spent all day fussing over it, but only took about twenty minutes of actual work—well, pull up a chair, because I’ve got you covered. Eva and I discovered that sometimes the best stories happen when you skip the oven entirely! These are, without a doubt, the ultimate no-bake cookie butter cheesecake cups. They nail that creamy, decadent vibe perfect for parties or when you just need a spectacular snack. Seriously, the layers of crunchy crust and spiced filling are pure magic. This batch yields 12 individual cheesecake servings of pure indulgence.
Why You Need These No-Bake Cookie Butter Cheesecake Cups
I know you’re busy, just like us here at the Zine Press. That’s why these little cups are total lifesavers when you need a dessert that truly impresses without the heat of the oven. Trust me, you won’t miss the baking part one bit when you taste the texture here.
- Zero Oven Time: We are talking true no-bake cheesecake cups here. Perfect for hot summer days or when your oven is already taken over by, like, actual dinner.
- Instant Visual Impact: They look fancy! Serving these individual cheesecake servings makes any gathering feel instantly elevated.
- That Cookie Butter Factor: That spiced, caramelized flavor of Biscoff sinks into every part of this dessert. It’s beyond satisfying.
- Make Ahead Champion: You can assemble these speculoos cheesecake bites a day before your event. Less stress on party day means more time for fun!
Gathering Supplies for Your Cookie Butter Cheesecake Cups
Okay, let’s get down to brass tacks, because these cookie butter cheesecake cups need a few specific things to come together perfectly. Since we aren’t turning on the oven for the main event, our equipment is straightforward, but you need to make sure your ingredients are ready to go. Remember, this recipe is designed to give you exactly 12 perfect, individual cheesecake servings! If you’re ever looking for baking inspiration that requires an oven, check out my favorite chocolate chip cookie recipe.
Essential Equipment for No Bake Cheesecake Cups
Before you start crushing cookies, grab these tools. I find having everything laid out makes that 20-minute prep time fly by.
- A standard 12-cup muffin tin, ready with liners inserted.
- Mixing bowls—one small for the crust, one medium for the filling.
- An electric hand mixer (or a very strong whisk arm!).
- Rubber spatula for folding, and a spoon or piping bag for filling the cups.
- Measuring cups and spoons—precision matters here, even in a no-bake treat!
Ingredients for the Ultimate Cookie Butter Cheesecake Cups
You’ll notice we rely heavily on Biscoff, but don’t worry, we talk substitutions later! The key here is temperature. Make sure your cream cheese is truly soft, not just vaguely room temperature.
- 1 1/2 cups finely crushed Biscoff cookies (about 25 cookies—crush them well for that fine biscuit crust base!).
- 6 tablespoons unsalted butter, melted until smooth and ready to combine.
- 8 ounces cream cheese, softened completely—seriously, leave this out for at least an hour.
- 1/2 cup powdered sugar, sifted if it seems clumpy.
- 1 teaspoon vanilla extract, because vanilla makes everything taste more expensive.
- 1/4 cup heavy cream, chilled, ready to be whipped.
- 1/2 cup creamy cookie butter (like Biscoff spread), plus extra reserved for topping. Make sure the reserved amount is ready to be slightly warmed so it drizzles nicely!
- 12 standard cupcake liners or small dessert cups for assembly.
Step-by-Step: How to Prepare Your Cookie Butter Cheesecake Cups
Alright, let’s get these wonderful, easy cookie butter cheesecake cups put together! Since this is a no-bake adventure, we rely on quick assembly and chilling time, not oven heat. Just follow these steps in order, and you’ll have a dessert ready for the fridge faster than you can clear your counter afterwards. Remember that 4-hour chill time is your best friend; don’t rush it!
Building the Crunchy Biscuit Crust Dessert Base
First things first, we need a good foundation. In your smaller bowl, mix up those crushed Biscoff cookies with the melted butter until everything looks like damp, spiced sand. That’s the right texture, trust me! Scoop this mixture into the 12 cupcake liners nestled in your tin. Now, here’s my pro tip: really press that crumb down using the bottom of a shot glass or a tiny measuring cup. You want a firm, compact base so it doesn’t fall apart when someone picks up their cream cheese brownie cousin!
If you want an extra-sturdy biscuit crust dessert that really snaps, pop that muffin tin into a 350°F oven for exactly 5 minutes, as I mentioned in the notes. But—and this is important—you must let those crusts cool completely before you even think about adding filling, or the whole cup will melt!
Creating the Creamy Cookie Butter Dessert Filling
Time for the dreamy part! Get your electric mixer and beat that softened cream cheese until it’s totally smooth and lump-free. Then, gently mix in the powdered sugar and vanilla. Next, beat your cold heavy cream in a separate bowl until you see soft peaks forming—don’t go full stiff, just soft!
Now, gently fold that whipped cream into the cream cheese base. This keeps everything light and airy! For the cookie butter flavor, warm just a tiny bit of your reserved spread—about 15 seconds in the microwave—so it folds in easily without deflating your whipped air. Fold that slightly warmed cookie butter into the mixture until you see the beautiful, even color swirling through. Stop mixing as soon as it looks combined!
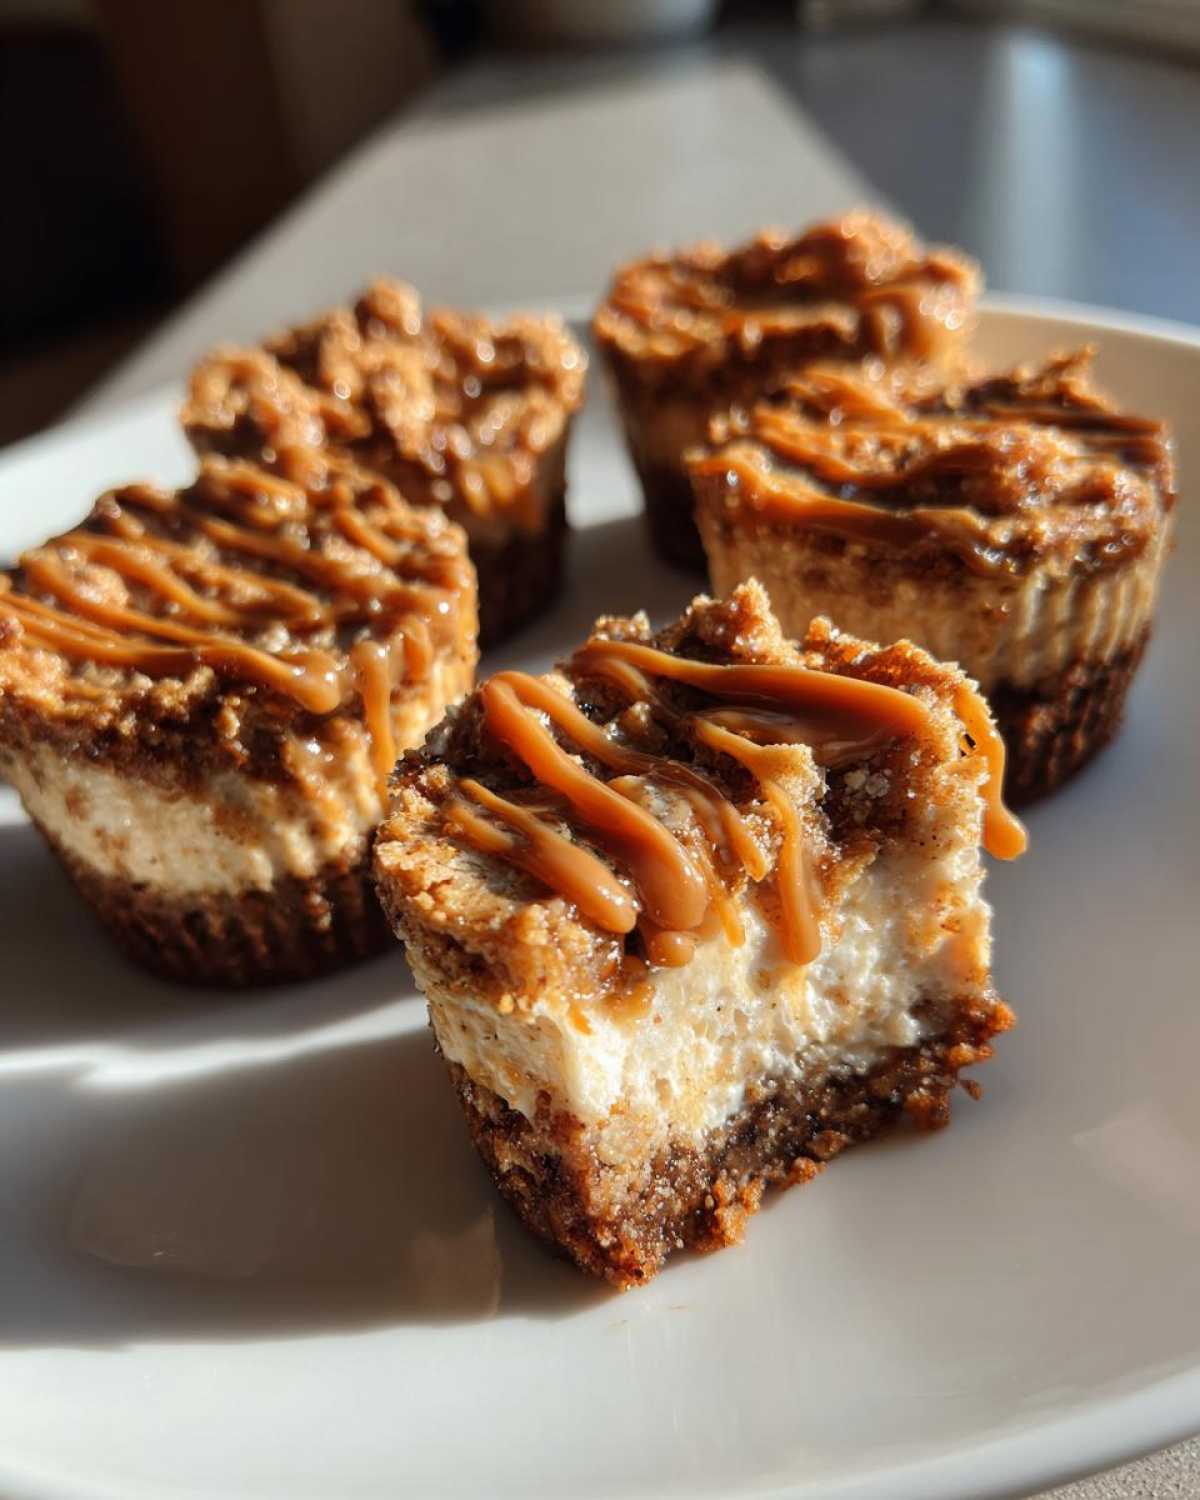
Chilling and Finishing Your Cookie Butter Cheesecake Cups
Carefully spoon or pipe that creamy cookie butter dessert filling right over your crusts in all 12 cups. Smooth the tops off nicely, because this is the layer that sets the stage for the drizzle! Pop the whole tin into the refrigerator. You need a minimum of 4 hours of chilling time for these to firm up properly; overnight is even better for the best results with these no bake cheesecake cups.
When they are totally firm, it’s time for the grand finale. Warm up a few more tablespoons of cookie butter until it’s a smooth, runny liquid. Drizzle it artfully over the top of each chilled cup right before serving. Wow! Instant showstopper!
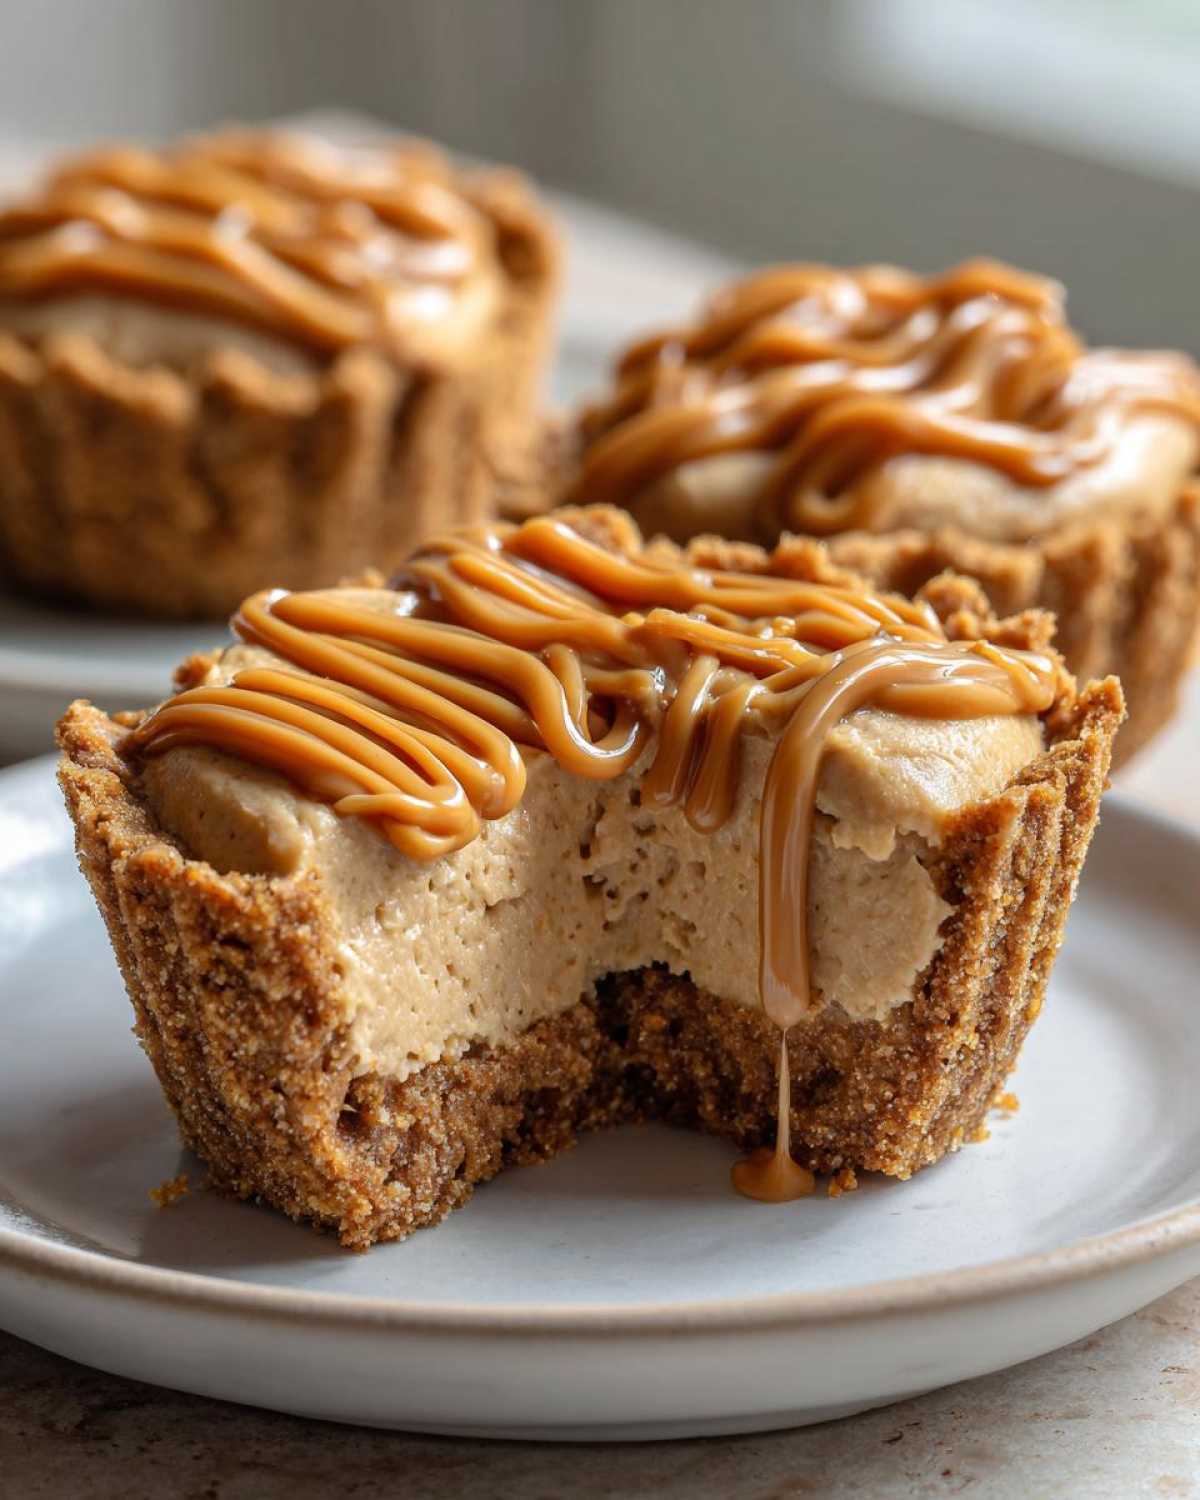
Tips for Perfect Cookie Butter Cheesecake Cups Every Time
Listen, skipping the oven is fun, but that doesn’t mean we can skip the technique! Achieving that truly creamy cookie butter dessert texture is all about managing your temperatures. First off, I cannot stress this enough: your cream cheese must be fully softened. If it’s cold, you get sad little lumps in your filling that ruin the smooth experience. Beat that cheese until it’s actually silky before adding anything else.
Secondly, when you whip the heavy cream, you want soft peaks, not stiff peaks. If you over-whip the cream, folding it into the cheese mixture becomes a workout, and you beat all the lovely air out. You want it light enough to scoop easily over the crust. Speaking of which, don’t forget to firm up that base; a slightly baked crust—even just five minutes—really holds up perfectly to the creamy topping. For more helpful hints on quick cooking, you might like my notes on easy French toast!
Ingredient Notes and Substitutions for Your Speculoos Cheesecake Bites
I get so many questions about swapping things out in these speculoos cheesecake bites, and that’s totally normal! Flavor Zine is all about making things work for *your* pantry. The reason I push Biscoff cookies so hard for the crust is genuinely because their spice blend—cinnamon, clove, a little something extra—just melts right into that buttery base in a way graham crackers just can’t replicate. It’s the signature flavor we’re chasing!
However, if you absolutely cannot find Biscoff cookies, don’t stress! You can absolutely use finely crushed graham crackers mixed with an extra half teaspoon of cinnamon and a tiny pinch of ground cloves. It’s a decent substitute, but be prepared for it to taste more like classic cheesecake than the spiced wonder we love.
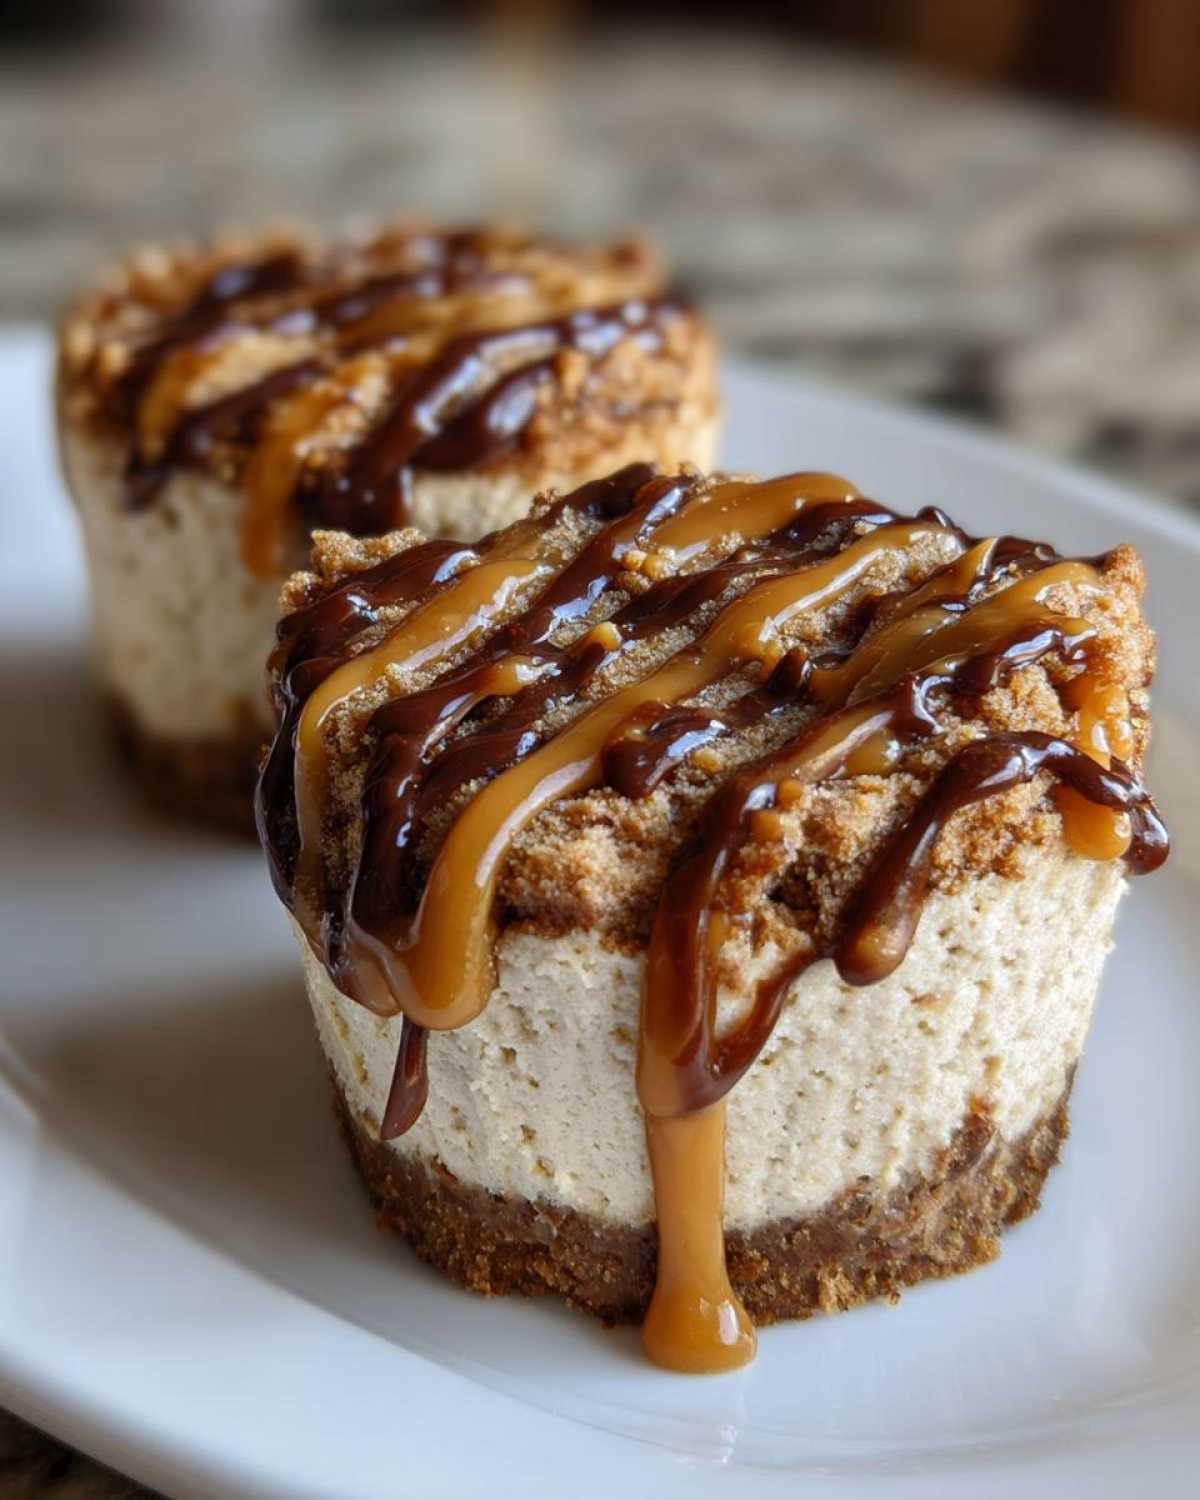
Now, let’s talk cream cheese again because this is crucial for the smooth filling. Whether you use Biscoff or graham crackers on the bottom, the filling integrity depends on temperature. Cold cream cheese fights the electric mixer; it clumps up immediately, and you end up with something that feels gritty, not smooth. You need it soft enough that if you gently press your finger into an 8-ounce block, it leaves a clear, easy dent without you having to push hard. Trust me, wasting 5 minutes heating it up beforehand saves you 20 minutes of aggressive beating afterward!
Storing and Making Ahead Dessert Cup Ideas
One of the best things about these incredible cookie butter dessert cups is that they are built for the future! Seriously, Eva and I rely on make-ahead desserts constantly. You know how much baking chaos we generate in the Zine kitchen, so anything that lets us off the hook the day of a party is a winner in my book.
Since these are no-bake cheesecake cups, they need that quality chilling time to set up completely, which is why they are fantastic for prepping early. As I mentioned briefly, you can absolutely make these ahead of time, which is essential when planning for big gatherings. They hold up beautifully in the fridge for up to three days.
Here is how you safely store your amazing creation. You must keep them covered tightly. If you just leave them open on a shelf, the cold air from the fridge will start to dry out the lovely creamy filling we worked so hard to make smooth. I grab a large, flat-sided container and place a layer of the cups inside, maybe using a little parchment paper between layers if they are touching sides, then seal the lid tight.
If you are storing them for a few days, hold off on that final drizzle of melted cookie butter until the very last second. They are better fresh-topped. If you decide to freeze them—which you certainly can do if you need to stash them for a few weeks—wrap each cup individually in plastic wrap first, then place them in a freezer-safe bag. When you’re ready to serve them, let them thaw in the fridge overnight first. You can check out some of my other favorite freezer-friendly ideas, like the make-ahead breakfast burritos, for more tips on saving time!
Serving Suggestions for Your Mini Cheesecake Cups
These mini cheesecake cups are rich enough to stand totally on their own, but why stop there, right? Presentation is half the fun, especially when you’re serving something as decadent as this. We want to make sure that when people grab one of these individual cheesecake servings, it feels like an event!
Since we are dealing with those warm, spiced notes from the Biscoff—almost like a holiday flavor profile—they pair beautifully with strong, bitter drinks. A fresh, hot cup of black coffee or a strong espresso cuts through the richness of the filling perfectly. If you’re serving them as part of a larger spread, think about balancing the intense sweetness. A small side bowl of tart raspberries or slightly under-ripe sliced peaches works wonders as a palate cleanser next to these indulgent sweet snacks.
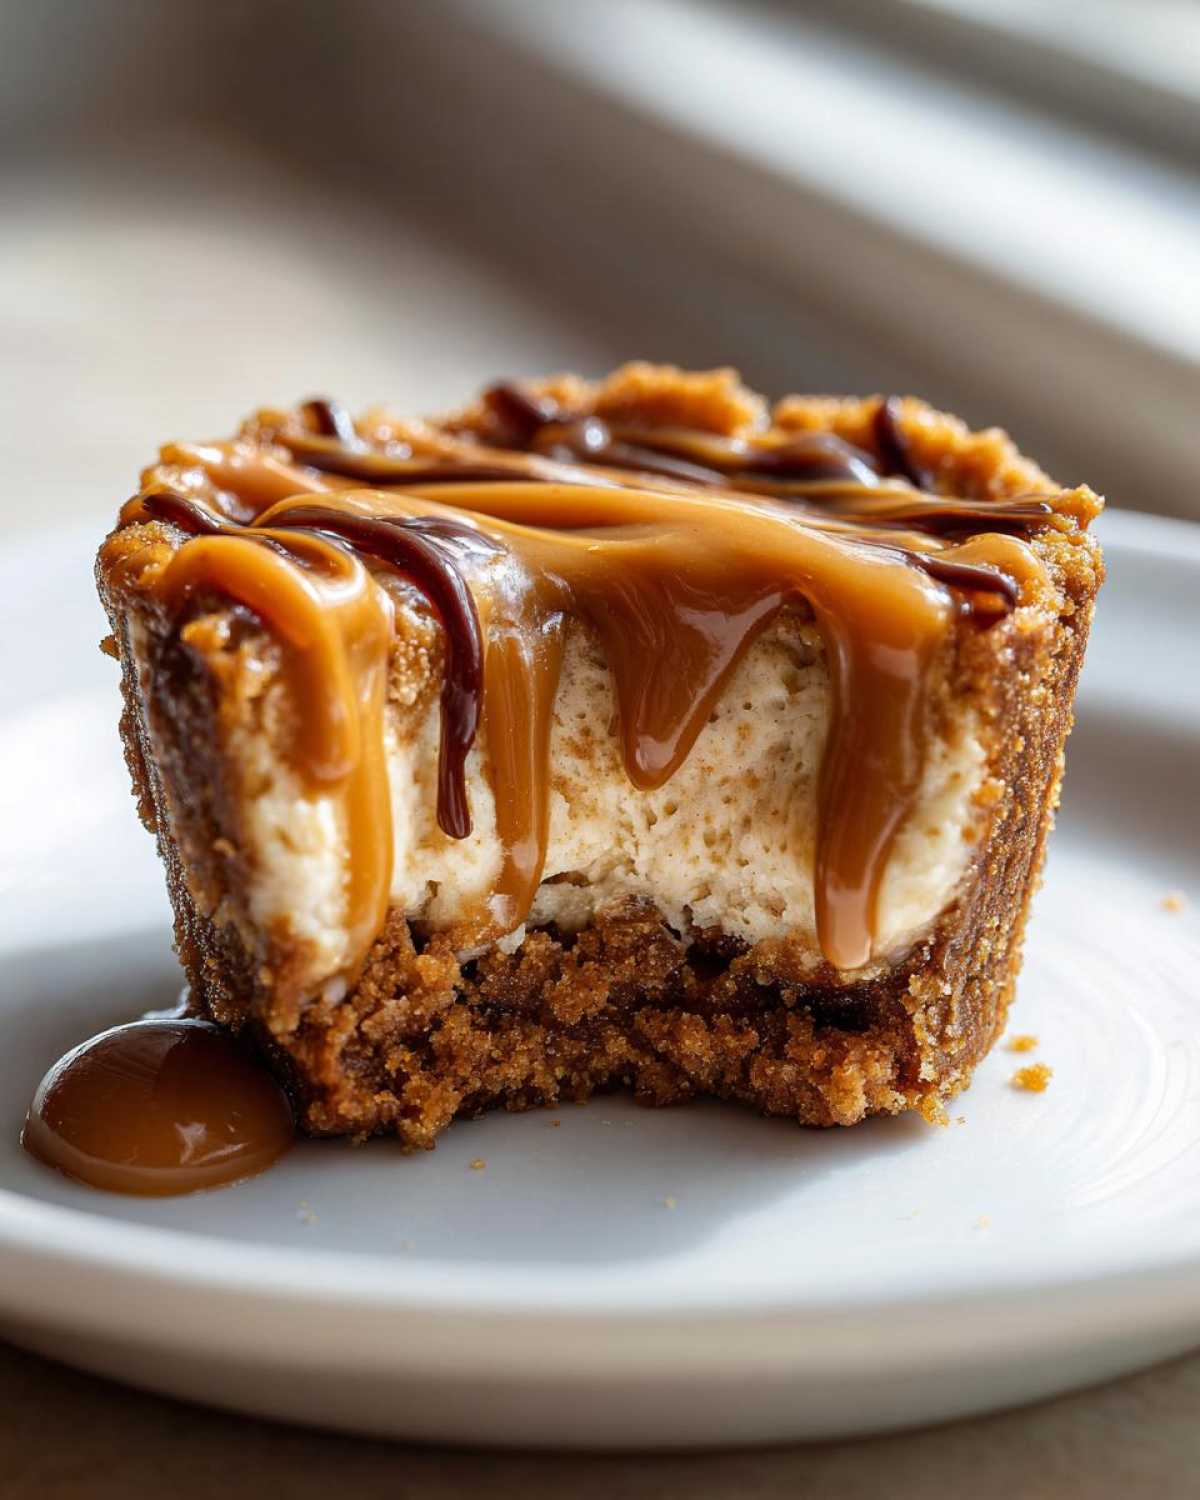
For presentation, Eva insists on using little paper doilies under each cup if you’re serving them on a platter—it makes them look instantly professional, even though we know they took barely any effort! You can also put a tiny sprinkle of finely chopped toasted pecans right on top of that final drizzle of cookie butter right before serving. That little bit of extra crunch and color really elevates the whole experience. If you are doing savory appetizers alongside these, you might want to try our recipe for easy slow cooker cranberry meatballs—the sweet and savory combo is unbeatable!
Frequently Asked Questions About Cookie Butter Cheesecake Cups
Okay, I know you might have a few lingering questions about making these amazing cookie butter cheesecake cups. It happens! We tweak and adjust things all the time here in the Flavor Zine kitchen, so let’s clear up any confusion about substitutions or how to best store your mini cheesecake cups!
Can I use a different cookie butter besides Biscoff for my Speculoos Cheesecake Bites?
That’s the first question everyone asks! Yes, you totally can use any creamy Speculoos spread you find. Biscoff is just what we usually have on hand and what the specific spice profile works best with for this recipe. If you find another brand, go for it! Just make sure it’s the smooth style, not the crunchy one, for the filling. For the crust, if you can’t find any cookie butter cookies, you can pivot to those graham crackers we talked about, turning this into a classic no-bake cheesecake cups recipe with a spiced twist. For more ideas on adjusting recipes, check out my general tips on the Flavor Zine blog!
What exactly makes this a ‘quick’ cheesecake recipe?
The “quick” part is all about that glorious lack of waiting for the oven to preheat or cool down! There’s no baking time required for these cookie butter dessert cups at all. The total hands-on time is really just about 20 minutes, maybe 30 if you’re really enjoying the cookie crushing process. The catch, as always with no-bake desserts, is the chilling time—you need that 4 hours minimum for everything to set properly. But that time is hands-off, meaning you can go watch a movie or tackle the dishes while these easy no bake desserts firm up!
How long do these individual cheesecake servings last in the fridge?
These little guys are surprisingly sturdy! Since they’re individual cheesecake servings, they stay fresh really well. I’ve kept mine covered snugly in an airtight container for a good three days in the refrigerator, and they are still wonderfully creamy and delicious—perfect for prepping for dinner parties! If you want the absolute best texture, though, I’d aim to serve them within 48 hours. You can even check out this recipe inspiration from our friends for general tips on irresistible dessert cups!
Can I freeze these creamy cookie butter dessert treats?
You absolutely can freeze them! If you’re looking for more make ahead dessert cups options, freezing is a fantastic way to keep them on hand. You have to wrap them very well. Wrap each cup individually in plastic wrap first, then place them all into a freezer-safe bag or container. Thaw them overnight in the fridge when you’re ready to serve. They thaw beautifully and maintain that creamy consistency!
Nutritional Snapshot of These Cookie Butter Dessert Cups
Now, I know Eva laughs because I’m usually the one saying, “Who cares about the numbers when it tastes this good?” But for those of you who track things, I pulled the estimate based on the standard ingredients list we used. Remember, this is just a snapshot, and if you swap Biscoff for graham crackers, or decide to go heavy on the final drizzle of cookie butter, those numbers will shift! That’s the fun part of making it your own unique Flavor Zine issue.
These cookie butter cheesecake cups are definitely an indulgence, meant for treating yourself, so don’t get stressed about the details. This data is based on one standard serving cup:
- Serving Size: 1 cup
- Calories: 320 — Totally worth it, don’t lie to yourself!
- Fat: 21g (with 12g of saturated fat from the cream cheese and butter)
- Carbohydrates: 31g
- Sugar: 25g — That’s where most of the cookie butter magic comes from!
- Protein: 4g
- Cholesterol: 55mg
We keep the ingredients list fairly straightforward, avoiding a ton of processed fillers, which helps keep the count reasonable for such a rich dessert. But seriously, if you eat two cups instead of one, just consider it a delicious adventure!
Share Your Flavor Zine Issue
Wow, if you made it this far, you’ve officially published your own delicious little ‘zine’!
Eva and I truly believe that the joy of baking comes when we share what we create. We want to know how your batch of cookie butter cheesecake cups turned out. Did the crust stay crisp? Was the filling perfectly creamy? Did that final drizzle look magazine-worthy?
If these little treats made your day a little sweeter, please swing back up to the top of the post and give this recipe a five-star rating! That helps other people discover this ultra-easy, no-oven recipe when they’re searching for their next great dessert idea.
And please, don’t be shy! Snap a photo of your finished creamy cookie butter dessert and tag us on social media—we absolutely love seeing how you put your own personal flavor into our ideas. I always check the comments down below, too. Tell us which part you loved most: Was it the crunchy biscuit crust dessert base, or the rich cheesecake filling? Let’s keep sharing this amazing stuff!
If you’re looking for more inspiration or want to reach out directly with feedback specific to your version, you can always find us over at the Flavor Zine contact page. If you liked the sound of these, you should also check out this great resource for other irresistible cookie butter cheesecake cups!
PrintThe Ultimate No-Bake Cookie Butter Cheesecake Cups
Make these easy, no-bake cookie butter cheesecake cups for a creamy, indulgent treat perfect for parties or quick desserts. They feature a crunchy cookie crust and rich Biscoff filling.
- Prep Time: 20 min
- Cook Time: 0 min
- Total Time: 4 hr 20 min
- Yield: 12 servings
- Category: Dessert
- Method: No-Bake
- Cuisine: American
- Diet: Vegetarian
Ingredients
- 1 1/2 cups finely crushed Biscoff cookies (about 25 cookies)
- 6 tablespoons unsalted butter, melted
- 8 ounces cream cheese, softened
- 1/2 cup powdered sugar
- 1 teaspoon vanilla extract
- 1/4 cup heavy cream
- 1/2 cup creamy cookie butter (like Biscoff spread), plus extra for topping
- 12 standard cupcake liners or small dessert cups
Instructions
- Prepare the crust: In a small bowl, combine the crushed Biscoff cookies and melted butter until the crumbs are evenly moistened.
- Divide the crust mixture evenly among 12 cupcake liners placed in a muffin tin. Press the mixture firmly into the bottom of each liner to form the base.
- Make the filling: In a medium bowl, beat the softened cream cheese with an electric mixer until smooth. Add the powdered sugar and vanilla extract, mixing until just combined.
- In a separate bowl, whip the heavy cream until soft peaks form. Gently fold the whipped cream into the cream cheese mixture.
- In a small bowl, warm 1/4 cup of cookie butter slightly (about 15 seconds in the microwave) to make it easier to mix. Fold this warmed cookie butter into the cream cheese mixture until the filling is uniform in color and texture.
- Spoon or pipe the cheesecake filling evenly over the crusts in each cup. Smooth the tops.
- Chill the cups in the refrigerator for at least 4 hours, or until firm.
- Before serving, warm a few tablespoons of extra cookie butter until pourable. Drizzle the melted cookie butter over the top of each chilled cheesecake cup.
Notes
- For an extra crunchy crust, you can briefly bake the crusts for 5 minutes at 350°F (175°C) and let them cool completely before adding the filling.
- If you do not have Biscoff cookies, you can substitute with graham crackers for the crust, but the flavor profile will change.
- Make these ahead! These individual cheesecake servings hold up well in the refrigerator for up to three days.
Nutrition
- Serving Size: 1 cup
- Calories: 320
- Sugar: 25
- Sodium: 210
- Fat: 21
- Saturated Fat: 12
- Unsaturated Fat: 9
- Trans Fat: 0
- Carbohydrates: 31
- Fiber: 1
- Protein: 4
- Cholesterol: 55