

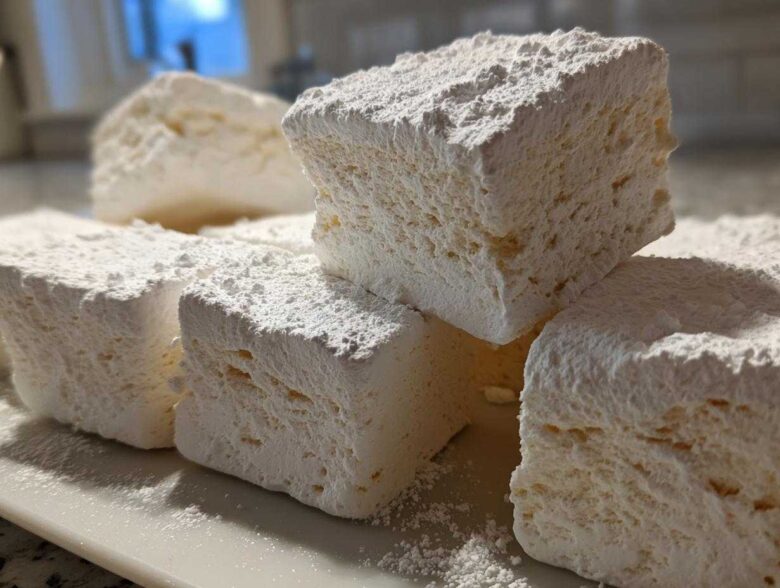
Okay, stop what you are doing right now and ditch those sad, vacuum-packed squares you buy at the store! Seriously, once you try homemade marshmallows—and I mean *truly* homemade—you will never go back. The difference is night and day. Store-bought ones are rubbery and taste mostly like air and sugar. Mine? They are the softest, fluffiest, melt-in-your-mouth pillows you can imagine. I totally understand if candy making seems scary; I used to think that too! But I spent way too many weekends burning syrup before I finally nailed the technique. This recipe is the breakthrough one—it’s honestly so straightforward, that anyone can achieve perfectly pillowy results on their first try!
I learned this entire process by making mistakes, but now that I’ve cracked the easy candy making code, I want to share the absolute best, reliable vanilla recipe with you. Trust me, making these for your hot chocolate this winter will change your life. You just need a few simple pantry items and a little bit of patience while the mixer does the hard work.
If you want to know more about who I am and why you should trust my baking advice, you can always check out my little corner of the internet here.
Why This Is the Best Homemade Marshmallows Recipe (Soft and Fluffy)
What makes my homemade marshmallows so far superior to anything in a plastic bag at the store? It all comes down to the whip and the temperature, honestly. Those commercial guys have stabilizers and preservatives that just make them bouncy—like chewing on slightly sweet rubber bands. But when you make them here, you get that unbelievable, cloud-like springiness. They actually melt when you put them near heat! That’s the sign of proper candy work. You feel professional just pulling them out of the mixer, trust me.
Now, you absolutely cannot wing this part. You need a candy thermometer. I know, it sounds fussy, but hitting that 240-degree mark for the soft-ball stage is your secret weapon for that pillowy texture.
Key Characteristics of Perfect Homemade Marshmallows
- They have a superior, glorious melt, especially over a campfire.
- You control the flavor completely—hello, real vanilla!
- The texture is genuinely springy and light, not dense or stiff.
- They hold their shape perfectly for cutting and gifting.
Gathering Ingredients for Your Homemade Marshmallows
Alright, let’s talk about what you need to grab before you even think about turning on the stove. Because we are making homemade marshmallows, precision matters way more here than when we’re just whipping up a quick cake batter. These are essentially sugar syrup held together by gelatin magic, so if you mess with the ratios, things can go south fast! Don’t panic, though, because I’ve kept the list of required items super basic. The vanilla is the star here, but we’ll cover all the details on those components in a minute. I promise, gathering these bits is half the battle!
Ingredient Notes and Substitutions for Homemade Marshmallows
I want to stress this: try to stick to the corn syrup if you possibly can. It keeps the crystal structure of the sugar smooth and that’s why we end up with that amazing, pillowy texture. If you absolutely cannot swing it, liquid glucose works, but I haven’t tested honey or maple syrup extensively—they change the flavor profile a lot. If you want to go gourmet, skip the vanilla extract and use the insides of a real vanilla bean! Scrape those tiny black specks right into the sugar mixture before you start heating it. That makes the most breathtaking vanilla bean marshmallows you’ve ever seen. It’s worth the splurge when you’re making batch for gifting!
Essential Equipment for Making Homemade Marshmallows
Okay, before we go any further into the step-by-step, there are two tools I simply insist you have on hand. If you try to do this by hand, you’ll end up with tired arms and a half-set blob. First, you really need a great stand mixer with a whisk attachment. That long whipping time we talked about? The machine does the heavy lifting! Second, and this is non-negotiable for candy making, you need an accurate candy thermometer. Seriously, this is how we avoid that rubbery mess. We have to get the sugar syrup to exactly 240 degrees Fahrenheit, no guessing allowed. Having these two things ready means you’re already winning the battle against sticky disasters!
Step-by-Step Instructions: Making the Fluffiest Homemade Marshmallows
This is where the magic happens, and honestly, it’s a bit thrilling watching the transformation! Just remember, we are dealing with very hot sugar here, so be careful when you approach the stove, okay? Get everything prepped first so you can move fast once that syrup hits the right temperature. We are going to break this down into three main phases: getting your base ready, cooking the sugar perfectly, and then the crazy but rewarding whipping session where your homemade marshmallows come to life.
Preparing the Pan and Blooming the Gelatin
First things first: you need to be ready for the rush later, so let’s prep the pan. Grease a 9×13 inch pan—I use a little smear of neutral oil. Then, make your dusting powder. Don’t just grab powdered sugar! You really need to mix the powdered sugar with cornstarch, usually half a cup of each. Dust that mixture generously all over your greased pan. This prevents that sticky nightmare scenario! Now, for the gelatin: grab your stand mixer bowl, pour in the cold water, and sprinkle the gelatin right over the top. Just let that sit for a solid 10 minutes. This is called ‘blooming,’ and it lets the gelatin absorb the water so it dissolves beautifully later.
Cooking the Syrup to Soft-Ball Stage for Homemade Marshmallows
While that gelatin is chilling out, get your syrup going. In a saucepan, combine your sugar, the corn syrup, the reserved water, and a pinch of salt. Heat this over medium heat. Now, here’s a big candy-making rule I learned the hard way: stir continuously until the sugar is completely dissolved and it starts to bubble. The second it boils, STOP STIRRING. If you stir it once it boils, you risk crystallization, and that makes grainy marshmallows. Attach your thermometer—this is crucial—and let it cook until it hits exactly 240 degrees Fahrenheit. That’s the soft-ball stage, and it means your homemade marshmallows will be bouncy, not runny.
Whipping and Finishing Your Homemade Marshmallows
Once you pull that 240-degree syrup off the heat, it’s go time! Turn your mixer onto low speed. Now, slowly, carefully, pour that hot syrup down the inside edge of the bowl. Do not—I repeat, do NOT pour it directly onto the whisk, or you’ll get sugar splatter everywhere, which is a huge burn hazard! Once it’s all added, kick that mixer up to high speed. You are going to let it run for 12 to 15 minutes. You might think it’s going on too long, but you need that whipping time to incorporate all that air and cool the mixture down. It’s done when the mixture looks super thick, glossy white, and holds stiff peaks when you lift the whisk. Stop the mixer, toss in your vanilla extract, and mix for just three more seconds. Carefully scrape the whole beautiful, sticky blob into your prepared pan. I always use an offset spatula that I’ve lightly oiled to smooth out the top. Then, just dust it lightly with more of the powder mix. You have to let this set completely, preferably overnight, before you touch it again. You can see more helpful tips, including my kitchen disclaimer here, if you run into any wobbles during the process!
Cutting and Storing Your Homemade Marshmallows Perfectly
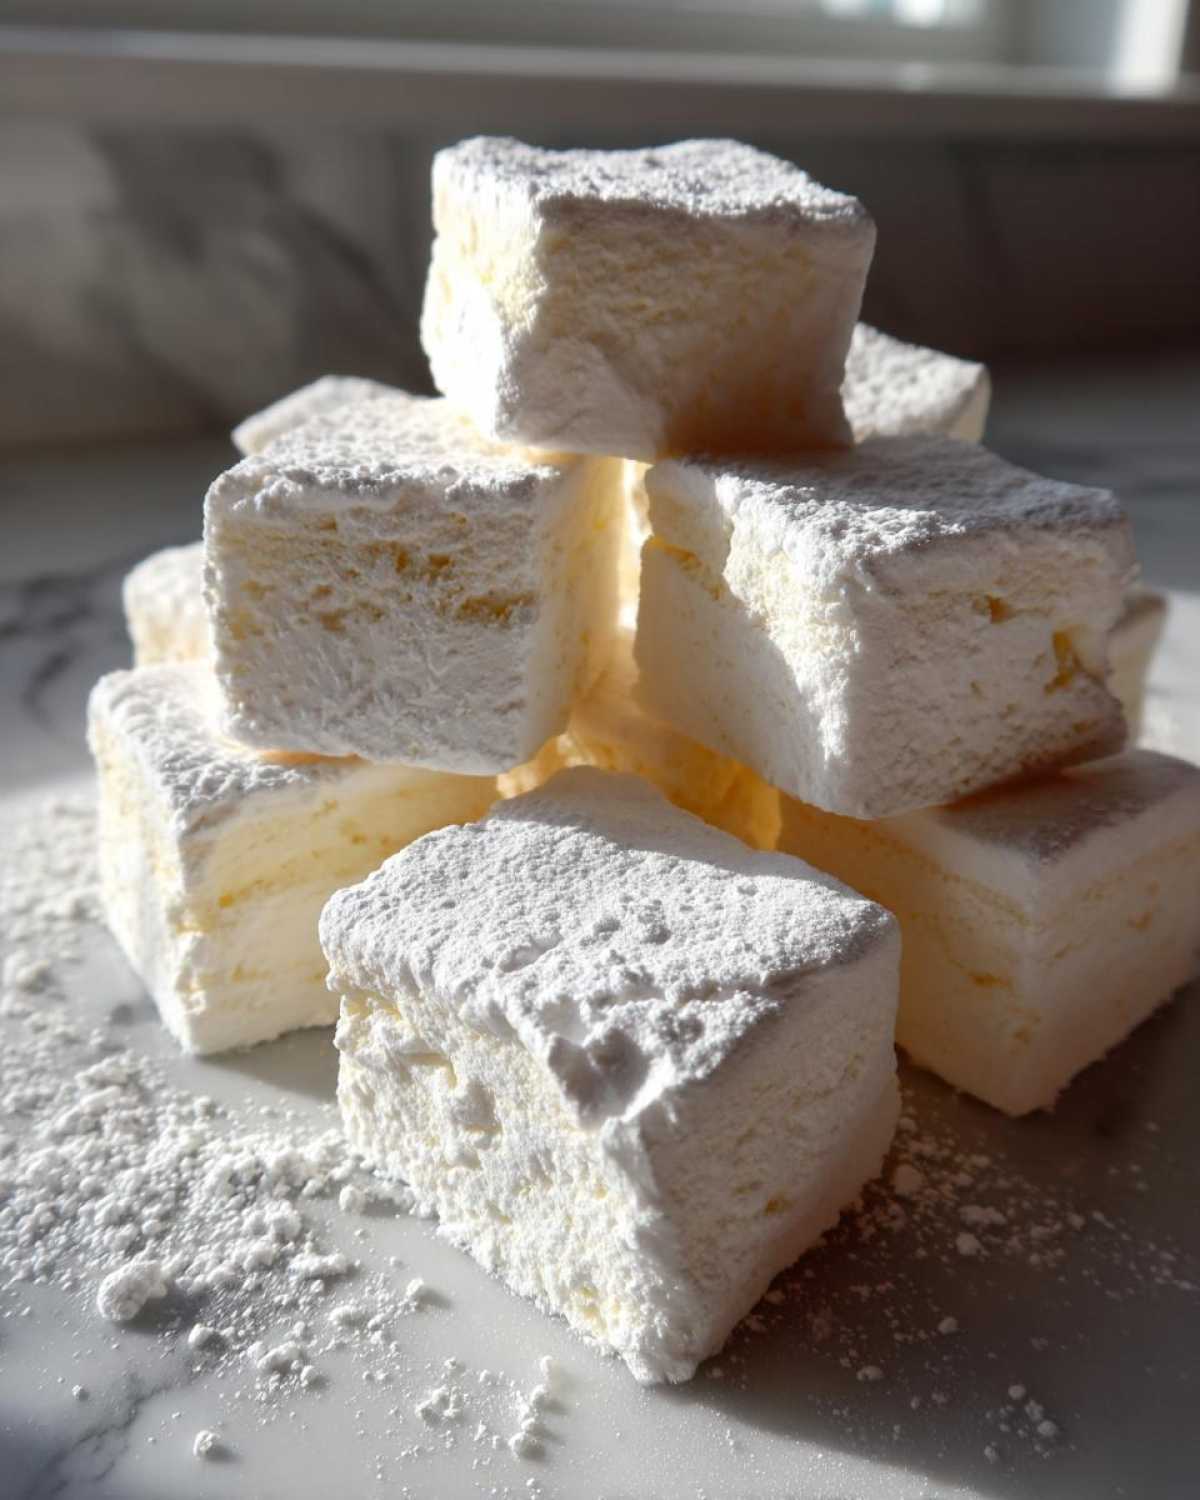
The hardest part is over—you successfully made cloud-like marshmallow batter! Now you have to practice some patience, which is always easier said than done when something smells this good. You absolutely must let the slab set up completely. I know you want to dive in immediately, but resist! Give it at least four hours at room temperature, but seriously, leaving it overnight is best. This lets the structure solidify perfectly so they don’t deflate when you cut them.
When it’s time to cut your gorgeous slab of homemade marshmallows, we need to prepare for stickiness again! Get a sharp, large knife and lightly oil the blade. If you have a pizza cutter, even better—that works like a charm! Carefully flip the entire slab out onto a cutting board that you’ve liberally dusted with your cornstarch/powdered sugar mix. Slice right through into your desired square sizes—I usually go for nice, chunky bites.
As you cut, toss those fresh cubes in the remaining powder mix until all the sticky sides are covered. That’s the final defense against them gluing themselves together later! To store them, keep your pillowy homemade sweets in an airtight container. Pop a layer of parchment paper down, sprinkle a few marshmallows, add another sheet of parchment, and repeat. They stay perfectly soft and fresh for up to two weeks this way!
Creative Variations for Homemade Gourmet Marshmallows
Once you master the vanilla batch, oh boy, the doors open right up! Who needs boring store-bought when you can whip up some incredible gourmet flavors right here in your own kitchen? The beauty of using this basic recipe for homemade marshmallows is how easily you can introduce new tastes. It’s simple candy making elevated!
If you are looking for something rich, try making chocolate flavored marshmallows. After the marshmallow is whipped and slightly cooled down—right before you scrape it into the pan—whisk in about a half cup of high-quality cocoa powder sifted with a little extra powdered sugar to keep the texture balanced. The color is astounding!
For the holidays, I always go for peppermint. Just substitute the vanilla extract with a teaspoon of pure peppermint extract when you finish whipping. They look gorgeous dusted with crushed candy canes! These additions take your simple treat and turn it into a wonderful item for gifting. Everybody loves receiving homemade gourmet marshmallows!
Frequently Asked Questions About Making Marshmallows From Scratch
You know, I always get so many little questions after people try this recipe for the first time. It’s normal when you step outside your comfort zone into candy making! Don’t worry if things look a little weird during the process; I’ve got the answers right here for you so you can keep churning out those pillowy homemade sweets.
Can I make homemade marshmallows without corn syrup?
Yes, you absolutely can swap it out if you need to, but you should know it affects the final texture a tiny bit. If you can find liquid glucose, that’s the closest swap and works nearly perfectly. If you have to use honey or maple syrup, you might end up with something slightly denser—more like a chewy treat than a light pillow. Just be aware that it changes the overall sugar balance, so measure exactly! Check out the notes in the recipe for more detail on that substitution.
Why did my homemade marshmallows not set up?
Ah, the dreaded sticky mess! Usually, this boils down to two things. Either you didn’t whip them long enough—I mean that full 12 to 15 minutes on high speed—because you need that air incorporation to cool and thicken the whole batch. Or, the syrup didn’t get hot enough. If you stop at 235 degrees instead of hitting that 240 soft-ball stage, you just don’t have enough cooked sugar structure to hold them up when they cool down. Trust me, the longer you whip, the better the final result for your DIY marshmallows!
What is the best way to use homemade marshmallows?
Oh, that’s my favorite question! Honestly, most of the time I just eat them plain, standing over the cutting board snacking on the squares. But if you want to get fancy, they are absolute perfection toasted over a campfire or gas burner because they actually caramelize instead of just burning to a crisp shell. They are the absolute star in s’mores, melting into gooey perfection. But my absolute favorite use is dropping a giant homemade marshmallow into a mug of rich hot cocoa right before serving. It melts slowly and makes the whole drink unbelievably creamy. For more context on my views on home baking methods, feel free to read my privacy policy, just so you know how I keep things secure!
Estimated Nutritional Data for Homemade Marshmallows
Since we are making everything from scratch, and unlike those store-bought versions, we know exactly what went into this magical cloud of sweetness, sometimes it’s interesting to see the breakdown. Now, I have to give you the standard disclaimer here: these numbers are estimates based on the standard recipe—you know, the one with the sugar and corn syrup—and serving size, which is about four squares. Candymaking results can vary slightly depending on exact ingredient measures, so take this more as a guideline!
Overall, you’re looking at a treat that is primarily sugar, which is expected for a true pillowy sweet like this. When you make your homemade marshmallows yourself, you can feel a little better knowing they are free from weird stabilizers and preservatives!
- Calories sit right around: 150 per serving
- Protein contribution is minor, about 2g
- The main macro is carbohydrates/sugar, around 38g
- We are thrilled to report 0g of fat! Zero!
It’s definitely a treat, but oh my goodness, is it one worth enjoying!
Sharing Your Pillowy Homemade Sweets
Well, that’s it! You’ve done it! You’ve officially tamed the sugar beast and created real, honest-to-goodness homemade marshmallows. I am so incredibly proud of you for conquering candy making! Now that you have this gigantic, fluffy slab of joy, you’ve got to show it off!
Please snap a picture of your perfectly cut squares—I want to see how big you made yours! Whether you’re planning on gifting them in cute little bags or just stockpiling them for next week’s hot chocolate binge, tag me on social media! Seeing your success is honestly the best part of sharing this recipe with you all. It just means the world to me.
And hey, if you loved this recipe, go ahead and leave a quick rating right below where you see this! It helps other bakers feel brave enough to try whipping up their own batch of pillowy homemade sweets. If you have any burning questions, or just want to share a flavor idea, you can always reach out to me via my contact page. Happy marshmallow making!
PrintEasy Homemade Vanilla Marshmallows Recipe
Make soft, fluffy, pillowy vanilla marshmallows from scratch. This straightforward recipe yields treats perfect for hot chocolate or s’mores.
- Prep Time: 20 min
- Cook Time: 10 min
- Total Time: 4 hr 30 min
- Yield: About 36 squares
- Category: Dessert
- Method: Whisking/Candy Making
- Cuisine: American
- Diet: Vegetarian
Ingredients
- 1 cup cold water, divided
- 3 packets unflavored gelatin (about 2 1/4 tablespoons)
- 2 cups granulated sugar
- 2/3 cup light corn syrup
- 1/2 cup water
- 1/4 teaspoon salt
- 1 tablespoon vanilla extract
- 1/2 cup powdered sugar, for dusting
- 1/2 cup cornstarch, for dusting
Instructions
- Lightly grease a 9×13 inch baking pan. Mix the powdered sugar and cornstarch together in a small bowl. Dust the bottom and sides of the prepared pan generously with this mixture. Set aside.
- Pour 1/2 cup of the cold water into the bowl of a stand mixer fitted with the whisk attachment. Sprinkle the gelatin over the water and let it bloom for 10 minutes.
- In a medium saucepan, combine the granulated sugar, corn syrup, 1/2 cup water, and salt. Heat over medium heat, stirring until the sugar dissolves. Stop stirring once it boils.
- Attach a candy thermometer to the side of the saucepan. Continue boiling the syrup without stirring until it reaches 240 degrees Fahrenheit (soft-ball stage). This usually takes about 8 to 10 minutes.
- Once the syrup reaches 240 degrees F, carefully remove the pan from the heat. Turn the stand mixer on low speed. Slowly and carefully pour the hot syrup down the side of the mixing bowl into the gelatin mixture. Avoid pouring directly onto the whisk.
- Increase the mixer speed to high. Beat the mixture for 12 to 15 minutes until the marshmallow is very thick, glossy, and has cooled significantly. It should hold stiff peaks.
- Stop the mixer. Add the vanilla extract and mix briefly until just combined.
- Scrape the marshmallow mixture into the prepared baking pan. Use a lightly oiled spatula to spread it evenly. Dust the top surface lightly with some of the reserved powdered sugar and cornstarch mixture.
- Let the marshmallows set uncovered at room temperature for at least 4 hours, or preferably overnight.
- Once set, turn the marshmallow out onto a cutting board dusted with the remaining powder mixture. Use a sharp, oiled knife or a pizza cutter to cut the slab into squares. Toss the cut sides in the powder mixture to prevent sticking.
Notes
- For a gourmet flavor, substitute the vanilla extract with 1 vanilla bean, scraped, added to the syrup mixture before heating.
- If you do not have corn syrup, you can substitute it with an equal amount of liquid glucose or honey, though the texture may change slightly.
- To store, place the cut marshmallows in an airtight container separated by parchment paper for up to two weeks.
Nutrition
- Serving Size: 4 squares
- Calories: 150
- Sugar: 35g
- Sodium: 5mg
- Fat: 0g
- Saturated Fat: 0g
- Unsaturated Fat: 0g
- Trans Fat: 0g
- Carbohydrates: 38g
- Fiber: 0g
- Protein: 2g
- Cholesterol: 0mg