

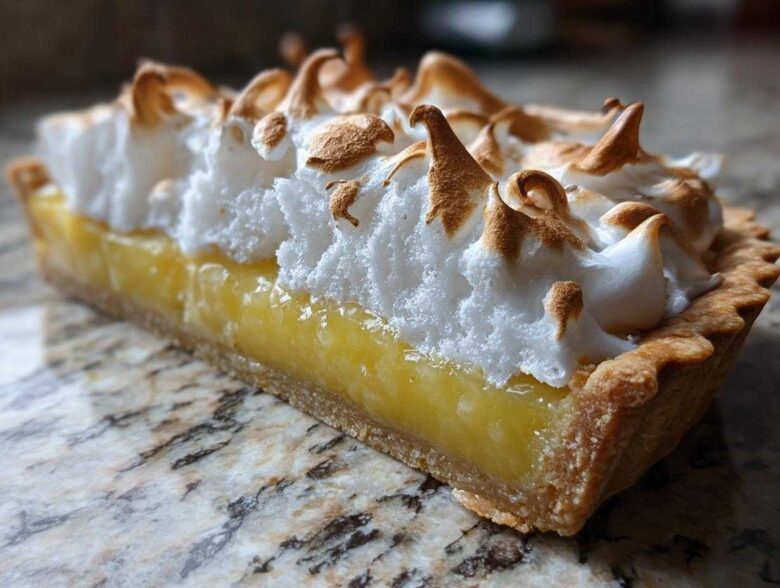
Oh, the glorious battle of a perfect lemon meringue pie! Honestly, that contrast—the bright, sharp punch of tart lemon cutting right through a sweet, cloud-like blanket of fluffy meringue—is what dessert dreams are made of. I’ve spent years tinkering, messing up batches, and learning the hard way so you don’t have to! This isn’t just any recipe; this is my ultimate guide to making a scratch-made, showstopping **lemon meringue** pie that will actually make people gasp when you bring it to the table. Forget those runny fillings and deflated toppings you get from boxes. We are nailing that intensely tangy lemon filling and piling high a perfectly toasted, stiff-peaked meringue. Trust me, once you conquer this classic, nothing else will do. I’ve learned a thing or two over the years, which you can read more about on my About Me page.
Why This Classic Lemon Meringue Pie Recipe Stands Out
Look, I’ve tried every shortcut out there, and the truth is, a truly great pie is worth the effort. This recipe isn’t fancy for show; it’s built on solid technique that ensures perfection every single time you make a **lemon meringue** dessert.
- Deeply tart filling that sings against the sweetness.
- Meringue that stands proud and holds its peaks up high.
- It’s completely homemade, meaning no weird additives—just pure flavor!
Achieving the Perfect Tangy Lemon Filling
This filling has zero shy flavor. We use copious amounts of fresh lemon juice and zest. That means grating your lemons properly before you even think about juicing them! If you want that intense, eye-puckering tartness that wakes up your taste buds, you have to treat the citrus right. It cooks up beautifully thick, so it never slumps when you try to slice it.
Tips for a Fluffy Meringue Topping
The secret weapon here is total paranoia about grease. The slightest smudge on your bowl or beaters means sad, weep-y meringue, and nobody wants that. Stick to temperature-controlled egg whites, use a little cream of tartar for stability, and you’ll whip up a gorgeous, fluffy meringue topping that browns perfectly in the oven.
Gathering Your Ingredients for the Best Lemon Meringue
Before we even think about turning on the stove, we need to gather our troops! Getting your ingredients ready means having everything at room temperature or measured out exactly. A good **lemon meringue** baker is obsessively organized. We’re looking for shiny, firm egg whites and vibrant, fresh lemons. Don’t try to sneak in pre-squeezed juice here; it just won’t deliver the punch we need for that perfect filling!
Ingredient Notes and Substitutions for Your Lemon Meringue
Okay, real talk time about substitutions. If you try to swap the cornstarch for flour, your filling will turn out cloudy and heavy, so stick to the cornstarch—it gives us that beautiful clear, shiny finish we want. Also, please, please use juice squeezed right now. Bottled juice doesn’t have the same aromatic oils as fresh lemons. For the egg whites, they absolutely must be room temperature to whip up into those tall, stiff peaks. If you forget, put them in a bowl of warm water for ten minutes!
Step-by-Step Instructions for Your Homemade Pie Recipe
Okay, here’s where we put all that preparation to work! Don’t rush these steps; every single minute matters for getting that super smooth filling and that mile-high meringue. Follow this flow, and you’ll have a true showstopper ready for the table. We start with the foundation before tackling that legendary citrus center and fluffy crown.
Preparing the Perfect Pie Crust Base
First things first: your crust needs to be ready to go! Whether you used store-bought or made your own Perfect Pie Crust, it has to be pre-baked. You want it lightly golden and fully cooled before the hot filling goes in. If you don’t pre-bake it, you’ll end up with a soggy bottom disaster, thanks to all that delicious moisture from the lemon layer. Make sure it’s fully set!
Constructing the Tangy Lemon Filling
Time to make the magic happen on the stovetop. Whisk your sugar, cornstarch, and salt right in the saucepan before adding any liquid—this stops clumps before they start! Stir that mixture constantly over medium heat until it’s thick and bubbling. Here’s the crucial bit: once it bubbles, you MUST keep it boiling gently for one full minute. This cooks out the raw starch taste, which is the secret to a truly clean, **Tangy Lemon Filling**. Then we temper those yolks so they mix in smoothly!
Mastering the Fluffy Meringue Topping
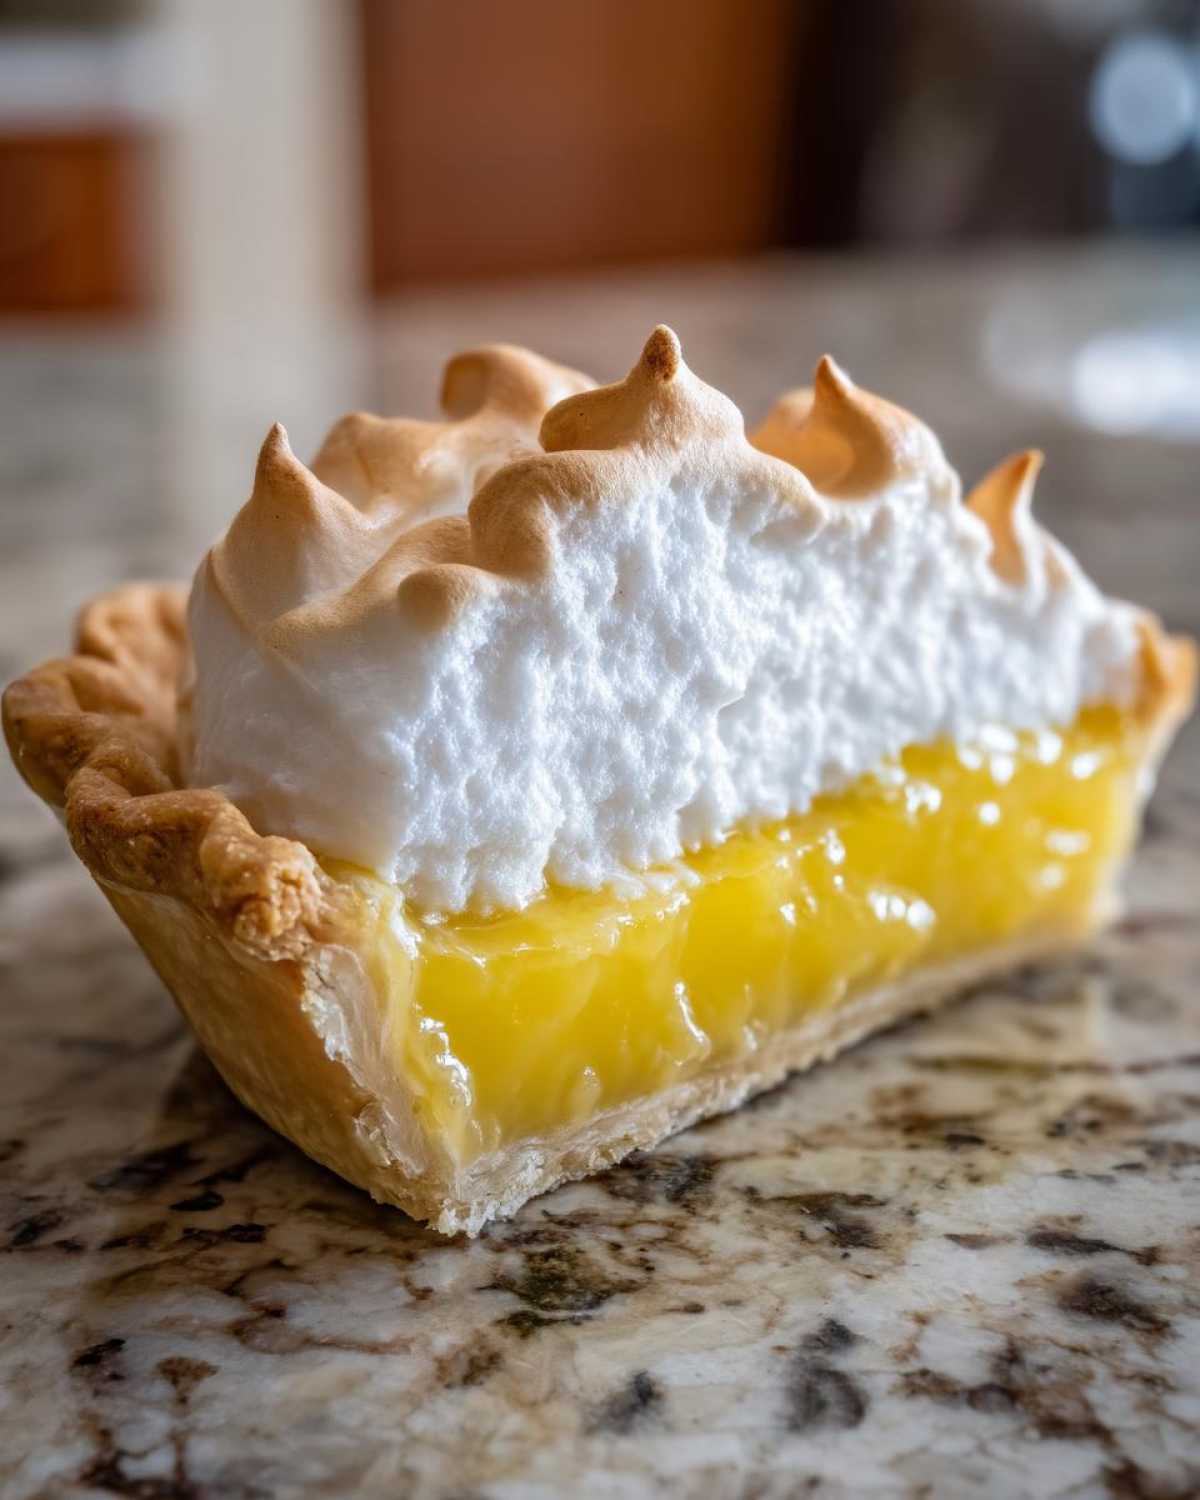
While the filling is still piping hot (yes, hot filling is key!), get your egg whites whipping. Make sure that bowl is sparkling clean—I mean absolutely zero fat anywhere! Beat those room-temperature whites until they look foamy, then toss in the cream of tartar. Once you hit soft peaks, start pouring in that final sugar, maybe a tablespoon at a time. Keep beating until you have stiff, glossy peaks that stand straight up when you lift the beaters. That’s what makes a spectacular **lemon meringue**!
Baking and Cooling the Final Lemon Meringue
Spoon that gorgeous meringue over the hot filling immediately—and I mean right away! Make sure that meringue seals completely against the edge of the crust all the way around. This stops it from shrinking as it bakes. Pop it into the 350-degree oven until those peaks are beautifully golden, usually just 12 to 15 minutes. Then, and this is the hardest part of the whole recipe, you must let it cool completely on a wire rack for at least three hours. Patience pays off, or the filling never sets right!
Tips for Success When Making Lemon Meringue
I’ve learned that making this pie is less about following steps exactly and more about paying attention to what the pie is trying to tell you, especially when it comes to the meringue. My biggest tip? Don’t skimp on speed when finishing the filling!
Always spread that meringue over the *hot* filling right away. If the filling cools even slightly, the meringue won’t bond properly to it, and you’ll get that awful shrinking or separation we talked about. When you spread it, make sure you create those lovely swirls and peaks with your spoon—that’s what catches the heat and browns so nicely.
Also, when you’re whipping those egg whites, make sure they are truly at room temperature; cold whites won’t reach the volume you need for that truly impressive height. Pay attention to the texture when you add the sugar, too. You want it to be stiff and glossy, like, really shiny! That means the sugar has dissolved, which helps prevent that sticky, weeping mess.
Troubleshooting Common Lemon Meringue Issues
It happens to the best of us: you pull out the pie, and suddenly mysterious beads of liquid show up weeping all over the meringue peaks! Ugh! That’s usually just undissolved sugar in the meringue that sweats out. Our recipe helps a lot by ensuring you boil that filling for a full minute and by adding sugar gradually to the whites.
If you see moisture forming between the crust and the filling, it means the hot filling cooled too much before the meringue went on. Another common headache is meringue shrinkage. That happens if the meringue doesn’t seal right against the crust edge. Make sure you push that topping right up against the pastry rim on all sides!
Serving Suggestions for Your Sweet and Tart Desserts
Once you see that gorgeous, towering **lemon meringue**, you know you have a true showstopper on your hands! This pie is rich enough to stand on its own, but presentation always makes it extra special.
I love serving this pie after a heavy meal, maybe after Thanksgiving or Easter dinner. The sharp citrus acts as a perfect palate cleanser. Keep it simple: a very thin slice on a crisp white plate lets that meringue shine. It pairs beautifully with a strong, hot black coffee or maybe a delicate Earl Grey tea to balance the sweetness.
If you want a little extra freshness on the side, don’t go for anything too heavy! A few fresh raspberries or a scoop of plain vanilla bean ice cream are the only accompaniments you’ll ever need for these amazing **sweet and tart desserts**.
Storage and Make Ahead Desserts Tips
Now for the tricky part: storing this beauty! Because we used a soft, fluffy meringue topping, this is definitely not a pie you want to leave sitting around for days. If you’re planning on making this for a party, I recommend baking the crust early in the day and keeping the filling cool. Don’t even think about making the meringue until about two hours before you plan to serve!
Once the pie is fully baked and cooled—remember that 3-hour set time—it absolutely has to go into the fridge. Meringue gets sad and watery if it hangs out on the counter too long. It’s best eaten within one day, max, for that perfect texture. If you slice it, cover the cut edge loosely with plastic wrap, but try to keep the meringue exposed to that cold air. It’s the ultimate **make ahead dessert** commitment: only make the topping right before serving!
Frequently Asked Questions About Lemon Meringue Pie
I always get questions when people first try to tackle this classic Pie. Honestly, it’s usually around modifications people want to make or questions about setting times. Everyone wants that perfect slice, right?
Can I use this recipe for Lemon Meringue Tarts?
Oh, absolutely! Making **Mini Lemon Desserts** out of this recipe is a fantastic idea, especially for parties. You’ll just need standard tart shells instead of one big pie crust. The main thing you have to watch is the baking time for the meringue. Because the filling layer will be much thinner in a small tart, it will heat up faster. Keep a close eye on them—you might only need 8 to 10 minutes for that beautiful golden top, rather than the full 15!
What if I want a less sweet lemon meringue?
I hear you! Sometimes the classic balance is just a shade too sweet for certain palates. If you want to lean harder into the tart side of our **Sweet and Tart Desserts**, you can absolutely reduce the sugar in the lemon filling itself. Try taking out about 2 tablespoons of the initial 1 1/2 cups of sugar. But please, don’t mess with the sugar in the meringue! The sugar stabilizes the egg whites, and reducing it there leads straight to weeping, which we are trying to avoid!
I also have some general safety and reliance info over on my Disclaimer page, just so you know where the information stands!
Estimated Nutritional Data for Lemon Meringue
Since we’re making everything completely from scratch, these numbers can shift a tiny bit based on your specific ingredients, but this gives you a great snapshot of what you’re eating. These figures are estimates based on 8 slices of this **lemon meringue** pie.
- Calories: Around 380 per slice
- Carbohydrates: Approximately 58g
- Fat: About 16g total
- Protein: Roughly 7g
I always encourage folks to check out my general policy on ingredient sourcing and data accuracy on the Privacy Policy page, of course. Enjoy this treat!
PrintClassic Lemon Meringue Pie

A recipe for a traditional, scratch-made lemon meringue pie featuring a tart lemon filling and a tall, fluffy meringue topping.
- Prep Time: 25 min
- Cook Time: 30 min
- Total Time: 3 hours 55 min
- Yield: 8 servings
- Category: Dessert
- Method: Baking
- Cuisine: American
- Diet: Vegetarian
Ingredients
- 1 9-inch unbaked pie crust
- 1 1/2 cups granulated sugar
- 1/3 cup cornstarch
- 1/4 teaspoon salt
- 1 1/2 cups cold water
- 4 large egg yolks, beaten
- 2 tablespoons butter
- 1/2 cup fresh lemon juice
- 1 tablespoon lemon zest
- 6 large egg whites, room temperature
- 1/2 teaspoon cream of tartar
- 6 tablespoons granulated sugar
Instructions
- Preheat your oven to 350 degrees F. Bake the pie crust according to package directions or your preferred recipe until lightly golden. Set aside.
- In a medium saucepan, whisk together 1 1/2 cups sugar, cornstarch, and salt. Gradually whisk in the cold water until smooth.
- Cook the mixture over medium heat, stirring constantly, until it thickens and bubbles. Cook for 1 minute more. Remove from heat.
- In a separate bowl, lightly beat the egg yolks. Slowly temper the yolks by whisking about 1 cup of the hot sugar mixture into the yolks. Then, pour the tempered yolk mixture back into the saucepan with the remaining hot mixture.
- Return the saucepan to medium heat. Cook, stirring constantly, until the filling thickens again and comes to a boil. Boil for 1 minute. Remove from heat.
- Stir in the butter, lemon juice, and lemon zest until the butter is melted and combined. Pour the hot lemon filling into the baked pie crust.
- In a clean, grease-free bowl, beat the egg whites with an electric mixer until soft peaks form. Add the cream of tartar and continue beating. Gradually add the remaining 6 tablespoons of sugar, beating until stiff, glossy peaks form.
- Spread the meringue evenly over the hot lemon filling, making sure the meringue touches the edge of the crust all around to prevent shrinking.
- Bake at 350 degrees F for 12 to 15 minutes, or until the meringue is lightly golden brown.
- Cool the pie completely on a wire rack for at least 3 hours before slicing.
Notes
- To prevent the meringue from weeping, ensure your mixing bowl and beaters are completely free of grease or fat.
- For a more stable meringue, use room temperature egg whites.
- Bake the pie immediately after topping with meringue for best results.
Nutrition
- Serving Size: 1 slice
- Calories: 380
- Sugar: 45g
- Sodium: 250mg
- Fat: 16g
- Saturated Fat: 6g
- Unsaturated Fat: 10g
- Trans Fat: 0g
- Carbohydrates: 58g
- Fiber: 1g
- Protein: 7g
- Cholesterol: 110mg