

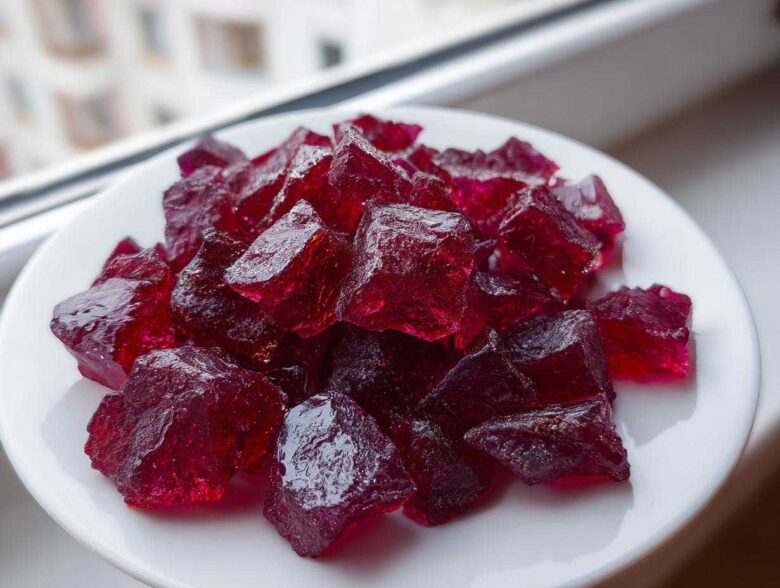
Oh my gosh, do you remember the little glass jars of impossibly red, spicy candy you’d find at old-timey candy shops? That sharp, sweet burn that just hits you perfectly? I am so thrilled to share my definitive guide for making real, proper **cinnamon rock candy** right on your own stovetop! Forget those soft, chewy versions; we are going for the true, hard-as-a-rock crystal texture everyone loves. That texture is all about hitting that perfect temperature—the hard crack stage—and wow, did I learn that lesson the hard way!
The first time I tried this as a teenager, I skipped the thermometer and ended up with a sticky, crystallized mess. Oops! I finally figured out the secret to getting that shatteringly crisp candy without any graininess: wiping down the sides of the pan while it boils. Trust me, mastering that one small step changes everything and guarantees you beautiful, vibrant results every time. Get your ingredients ready; we’re making magic!
Why This Homemade Cinnamon Candy Recipe Works
This isn’t just any spicy batch of sweets; this recipe is designed to deliver that throwback crunch we all look for. We aren’t messing around with methods that leave you with chewy taffy. This technique ensures you get that satisfying, clean snap every single time.
- You get that incredibly bold, almost fiery cinnamon flavor that makes these candies famous.
- The final texture is guaranteed to be hard and crystalline, just like candy straight from a vintage storefront.
- The ingredients list is so short! You probably have most of this stuff sitting in your pantry right now.
Achieving the Perfect Hard Candy Texture
The absolute key, and I mean *non-negotiable*, is temperature. If you want a true rock candy experience, you have to bring that sugar syrup up to exactly 300 degrees Fahrenheit. That’s the hard crack stage! Anything less and it stays sticky; anything more and you risk burning the sugar. It’s simple physics, but reaching that temperature is how we lock in the crunch.
Tips for Bold Cinnamon Flavor in Your Cinnamon Rock Candy
When it comes to flavor, I always go straight for the cinnamon oil unless I’m completely out of it. Ground cinnamon works in a pinch for a Homemade Cinnamon Candy Recipe, no doubt, but it turns the entire mixture cloudy and dull. The flavor just isn’t as pure or potent when you use the powder. The oil dissolves perfectly, giving you that vibrant red color and that intensely spicy kick that really makes this hard candy exciting!
Gathering Simple Ingredients for Cinnamon Rock Candy
Seriously, preparing this candy is half the battle, and luckily, the ingredient list is wonderfully short. You don’t need a dozen fancy things to make truly spectacular Old Fashioned Christmas Candy. I always line up everything before the stove comes on because once that syrup boils, you have zero buffer time! My notes always remind me to double-check the labels on my extracts, because you want the real deal here.
Ingredient Clarity for Easy Rock Candy Instructions
We keep the base classic for this Vintage Holiday Candy Recipe, which means it’s just sugar, corn syrup, water, and a little cream of tartar to help stabilize everything. I think you’ll find the measurements straightforward for this Simple Ingredients Hard Candy. And that food coloring? It’s totally optional, but I always add just a couple of drops so we get that gorgeous, classic look that screams ‘holiday.’
- Two cups of regular granulated sugar.
- Two-thirds cup of light corn syrup—this is essential to stop crystallization!
- Three-quarters cup of clean water.
- One teaspoon of cinnamon oil—this is where the magic happens for that potent flavor.
- One-half teaspoon of red food coloring (if you want that super bright look).
- One-quarter teaspoon of cream of tartar.
You can check out my general ingredient sourcing philosophy over on my recipe disclaimer page if you’re curious why I’m picky about syrup quality!
Preparation Steps for Your Homemade Cinnamon Candy Recipe
Before you even think about turning that burner on, prep is everything! Since this is an **Easy Rock Candy Instructions** guide, we want to make the pouring stage as speedy as possible. If you wait until the syrup hits 300 degrees to grab your tools, you’ll be scrambling, and that’s when disaster strikes in hard candy making!
First, decide how you want your final product to look. If you’re aiming for beautiful, shard-like pieces for a **Crunchy Cinnamon Snack**, grab a sturdy baking sheet and line it perfectly with parchment paper. I usually give that parchment a quick, light spray of non-stick oil just to be safe. If you prefer neat little cubes or shapes, make sure those silicone molds are clean and ready on the counter. Everything must be set before that pot goes on the heat!
The Stovetop Boiling Process for Cinnamon Rock Candy
Okay, this is where we move from prep to pure science. You need a heavy-bottomed pot; don’t try this in a thin aluminum pan, or the sugar will scorch underneath before it reaches temperature! Combine your sugar, corn syrup, water, and cream of tartar. Stir this gently over medium heat until you can no longer see any sugar granules sticking to the bottom of the pan. This dissolving step is crucial, so take your time here!
The moment it starts to boil, stop stirring! I cannot stress this enough: stirring once boiling starts is how you invite sugar crystals to form prematurely, and that ruins the whole batch. We want clear, smooth syrup, not grainy sludge.
Here’s my expert tip for avoiding those nasty crystals creeping down the sides: take a pastry brush dipped in plain water and gently wipe down the inside walls of the pot as the syrup boils. This washes down any stray sugar that might try to start crystal formations. Keep that thermometer in there and wait.
Reaching the Hard Crack Stage: The Secret to Spicy Hard Candy Tutorial
We are waiting for one number, and one number only: 300 degrees Fahrenheit. This is known as the hard crack stage, and achieving it ensures your final product is that wonderful, shattering **Bold Cinnamon Sweet Treat**. As soon as that shiny mercury—or digital reading—hits 300°F, pull that pot off the heat instantly. Don’t wait for it to simmer down a bit; remove it right away! Every second it stays on the heat after that point, it gets darker and closer to burning, and we definitely want to keep our candy clean and bright for that perfect look.
Flavoring and Pouring Your Cinnamon Rock Candy Syrup
The second you pull that scorching syrup off the heat, you have maybe thirty seconds before it starts setting up too fast. Let the violent bubbling calm down for just a moment—don’t wait too long! Now is the time for speed. Carefully drip in your teaspoon of cinnamon oil and your food coloring, if you are going for that beautiful, bright red shade. Stir it just enough to thoroughly combine it with the mixture. Remember, we are working fast because this stuff gets serious!
If you used molds, pour that glistening, hot liquid directly into the cavities—don’t overfill them! If you’re making the rock shapes, gently pour the syrup onto your parchment-lined sheet in one continuous layer. Try to keep the stream steady so you get a nice, even thickness across the candy. It looks so gorgeous and liquidy right then!
Move the tray or molds to a safe spot where nobody is going to bump them. We let this sit completely untouched now. Resist the temptation to poke it or move it around!
Cooling and Breaking Down the Crunchy Cinnamon Snack
Here comes the hardest part for all of us impatient bakers: waiting! You absolutely must let the candy cool completely at room temperature. I know, it’s tempting to try sticking it in the fridge, but resist that urge! Placing it in a cold environment too soon can cause condensation, which means sticky, gummy candy instead of that perfect snap we worked so hard for.
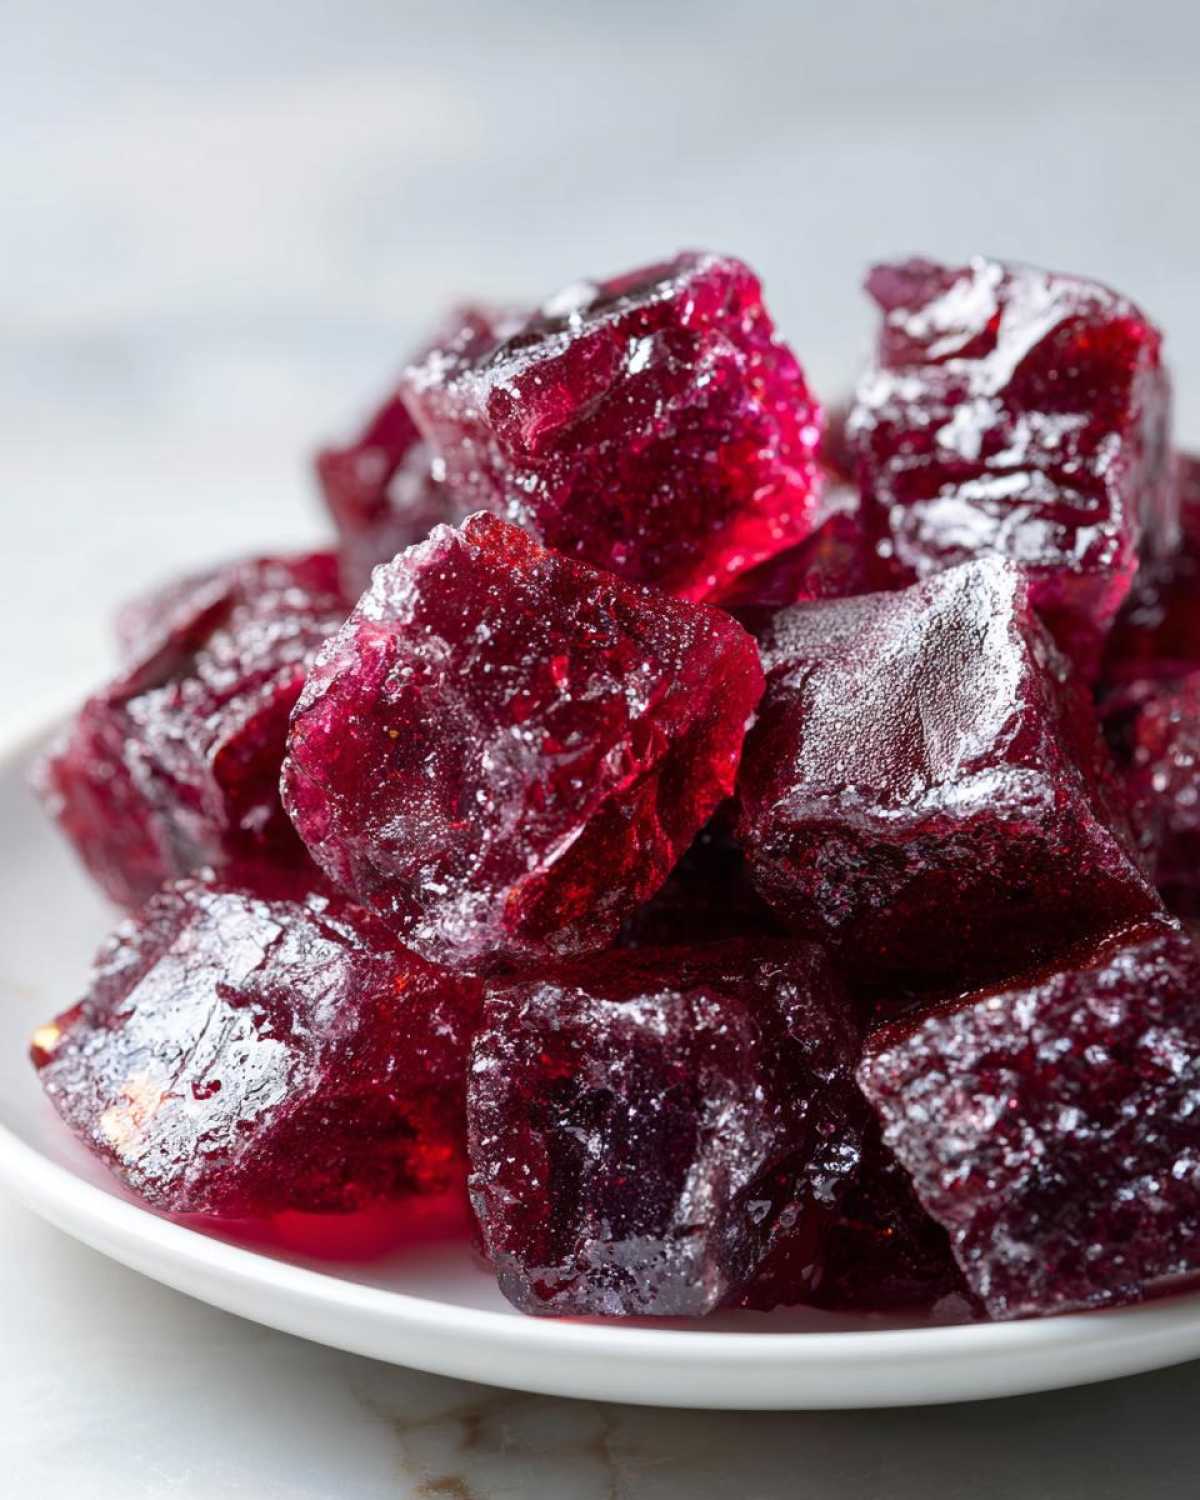
Give it a solid few hours—maybe even overnight—until it’s rock hard and totally cool to the touch. Once it’s set, if you poured it onto a sheet, it’s time for the fun part! Grab a clean kitchen towel, place it over the hardened slab, and give it a few solid, satisfying whacks with the back of a sturdy spoon or a small rolling pin. You are aiming for those wonderful, irregular pieces that look exactly like genuine rock candy shards. If you used molds, just pop them out gently. Perfect!
Tips for Perfect Guide to Perfect Hard Candy Making
We’ve made the candy, but now we need to make sure it lasts! Hard candy, especially cinnamon rock candy, has two enemies: moisture and time. If you live somewhere humid, you need to guard this stuff like it’s gold. My little trick when I know I have to handle the piping hot sugar? I dip the handle of my wooden spoon into a little bowl of ice water for a few seconds before I stir in the flavorings. It cools the handle just enough so I don’t accidentally cook my fingertips when I stir too vigorously. Safety first, always!
When it comes to storage, you need airtight containers, period. Don’t even think about plastic bags unless they seal completely. I use small mason jars with new lids. Humidity is the absolute worst enemy of that glassy finish, so keep them in the coolest, driest spot in your pantry. These candies hold up great, but if they start feeling even slightly tacky to the touch, you know the air is getting to them.
Troubleshooting Common Issues in Cinnamon Rock Candy
Even with the best directions, things sometimes go sideways in the sugar world. Don’t panic if you run into a snag—I’ve been there with every batch!
If your candy ends up sticky after cooling, that’s an easy fix; it just means you didn’t quite hit that 300-degree mark. Don’t try to re-boil it, though—that usually just makes it worse! Instead, you can usually reheat the sticky batch over very low heat just until it melts again, then let it boil *past* where it stopped last time. Keep that thermometer glued to the pot!
The other major bummer is crystallization, or ‘graining.’ If you see cloudy streaks or grainy sections, it means sugar formed a crystal structure. This usually happens if you stirred too much after it boiled, or if there was a tiny, stray crystal already in the pot. If this happens, you can try melting the batch down again and adding a tiny splash more water and corn syrup, then wiping the sides of the pot religiously as you bring it back up to temperature. Sometimes nature just wins, but usually, that water brush trick saves the day for this Cinnamon Rock Candy!
Making Old Fashioned Christmas Candy into DIY Spicy Edible Gifts
Honestly, making a big batch of this spicy, sharp candy just makes me think of Christmas stockings and little holiday treat bags. This makes such an incredible DIY Spicy Edible Gift because it looks so professional, even though it was super easy to whip up! The vibrant red color just screams celebration, doesn’t it?
When I package these up, I love keeping the pieces irregular. I don’t bother messing with molds most of the time; I just break the sheet into those natural, jagged shards. For gifting, line small cellophane bags with a little square of tissue paper—maybe green or gold—and then fill them with the candy. Tie the top with some bright red baker’s twine. They look rustic, homemade, and incredibly special!
These little packets of intense spice are perfect little additions to cookie platters or as small teacher gifts. I always know they’ll be a hit because they’re exactly the kind of unique, nostalgic treat folks don’t usually make themselves. You can find out more about my thoughts on sharing recipes and connecting with my community on my About Us page!
Frequently Asked Questions About Making Cinnamon Rock Candy
Whenever I share this recipe, I get a few questions that are totally normal when you’re dealing with hot sugar! It’s such a satisfying candy to make, but people always worry about getting that perfect crystalline finish. I’ve pulled together the most common things people ask me about their batches of Cinnamon Rock Candy.
Can I use ground cinnamon instead of oil in this Beginner Rock Candy Tutorial?
Yes, you absolutely can! Listen, if you don’t have cinnamon oil—which can be a little specialized—ground cinnamon is going to work. You just stir about a tablespoon of it in right at the end, just like you would with the oil. But here’s the trade-off, and I need to be honest about it: using the powder will make your finished candy opaque, meaning it will be cloudy or even slightly brownish-red instead of that beautiful, clear, gem-like color. Also, the flavor just doesn’t pop quite as boldly, but it still tastes delicious!
How should I store my finished Cinnamon Rock Candy?
Storage is super important for keeping your candy hard and ready to go! You need an airtight container, and I mean *airtight*. Forget Ziploc bags unless they are the heavy-duty freezer kind; even then, I’d advise against it. The minute the candy hits humid air, it starts absorbing moisture, and that leads straight back to stickiness, and we worked too hard to get that perfect shatter!
Find a clean mason jar or a container with a tight seal. Keep it in a cool, dry spot in your pantry. If you have a really large batch, sometimes I wrap individual pieces in wax paper before dropping them into the main jar, just for extra protection. As long as it stays dry, your candy will last for weeks, maybe even months!
If you have more questions about any step of the process, don’t hesitate to get in touch with me through my contact page. Happy candymaking!
Sharing Your Nostalgic Candy Recipes for Winter
Wow, we did it! We took simple sugar and turned it into bright, fiery, incredible cinnamon rock candy. Doesn’t that smell like childhood holidays? I truly hope this Vintage Holiday Candy Recipe becomes a tradition in your house, too. It’s just so rewarding watching that syrup boil and knowing you’re about to create little gems!
Now that you’ve made this batch, I desperately want to hear about it! Did you go for the oil or the ground spice? Did you get those perfect shards, or did you end up with a gooey but delicious fail (we all have those, don’t we)? Please leave a comment below telling me how your Homemade Cinnamon Candy Recipe turned out. Knowing how these recipes work for you guys is honestly the best part of doing all this!
And if you managed to snap a photo of your vibrant red candy, share it on social media and tag me! It makes my day seeing my recipes come to life in your kitchens. If you want to know more about how I run this site and protect your privacy while we chat about spices and sugar, definitely check out the details on my privacy policy page. Now go enjoy that spicy crunch!
PrintClassic Cinnamon Rock Candy
Follow these steps to make hard, spicy cinnamon rock candy at home using basic ingredients.
- Prep Time: 10 min
- Cook Time: 25 min
- Total Time: 4 hours 35 min
- Yield: About 2 cups
- Category: Dessert
- Method: Stovetop Boiling
- Cuisine: American
- Diet: Vegetarian
Ingredients
- 2 cups granulated sugar
- 2/3 cup light corn syrup
- 3/4 cup water
- 1 teaspoon cinnamon oil (or 1 tablespoon ground cinnamon, though oil provides better clarity)
- 1/2 teaspoon red food coloring (optional, for color)
- 1/4 teaspoon cream of tartar
Instructions
- Prepare your candy molds or a parchment-lined baking sheet by lightly greasing them.
- Combine the sugar, corn syrup, water, and cream of tartar in a heavy-bottomed saucepan.
- Stir the mixture over medium heat until the sugar dissolves completely. Stop stirring once it boils.
- Insert a candy thermometer and boil the mixture without stirring until it reaches 300 degrees Fahrenheit (the hard crack stage).
- Remove the pan from the heat immediately when it reaches 300 degrees F. Let the bubbling stop.
- Carefully stir in the cinnamon oil and red food coloring, if using. Work quickly.
- Pour the hot syrup into your prepared molds or onto the parchment-lined sheet to form a thin layer.
- Allow the candy to cool completely and harden at room temperature for several hours, or until firm.
- Once hard, break the candy into small, irregular ‘rock’ pieces or remove from molds.
Notes
- Wipe down the sides of the pan with a wet pastry brush during boiling to prevent sugar crystals from forming prematurely.
- Do not stir the syrup once it begins boiling to avoid graining.
- Use cinnamon oil for the clearest, boldest flavor and color.
Nutrition
- Serving Size: 1 piece (approx 10g)
- Calories: 40
- Sugar: 10g
- Sodium: 0mg
- Fat: 0g
- Saturated Fat: 0g
- Unsaturated Fat: 0g
- Trans Fat: 0g
- Carbohydrates: 10g
- Fiber: 0g
- Protein: 0g
- Cholesterol: 0mg