

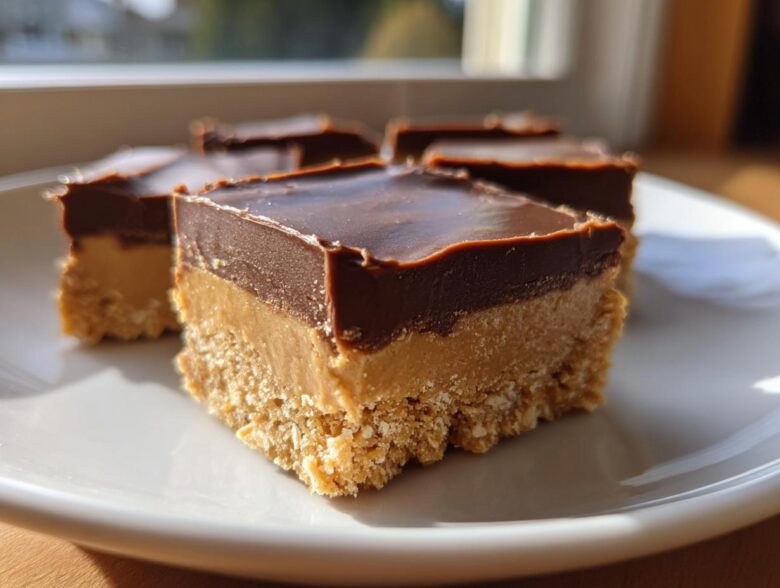
Oh my gosh, do you remember that feeling? That little bit of excitement when you caught the scent of warm chocolate and peanut butter wafting down the hall during lunchtime? For me, it always meant one thing: the legendary lunch lady peanut butter bars were being passed out. I swear, those treats were the best part of my entire school day! Well, guess what? I cracked the code. This isn’t some complicated baked version; this is the real deal—pure, simple, no-bake magic that tastes exactly like childhood. We’ll save the complicated stuff for another day, but trust me, you need this recipe in your life. If you want to know more about what drives my baking obsession, check out our story here.
Why You Will Love These Nostalgic Peanut Butter Bars
Honestly, these bars are my absolute go-to when I need something sweet fast, and they disappear instantly. I mean, who doesn’t love peanut butter and chocolate? Here’s why you’re going to be obsessed:
- Zero Ovens Required! That’s right, they are a true No Bake Peanut Butter Dessert. You mix, you press, you chill—that’s it. Perfect for super hot days or when you just don’t want to heat up the house.
- Pure Nostalgia in Every Bite: These taste exactly like the ones we used to get in the cafeteria. It’s pure, unadulterated comfort food.
- Ready in Minutes: The actual mixing time is under 15 minutes. You just have to wait patiently for the fridge to do the heavy lifting!
- The Ultimate Crowd Pleaser: If you bring these squares to a gathering, they vanish first. They are the definition of an Easy Crowd Pleasing Dessert.
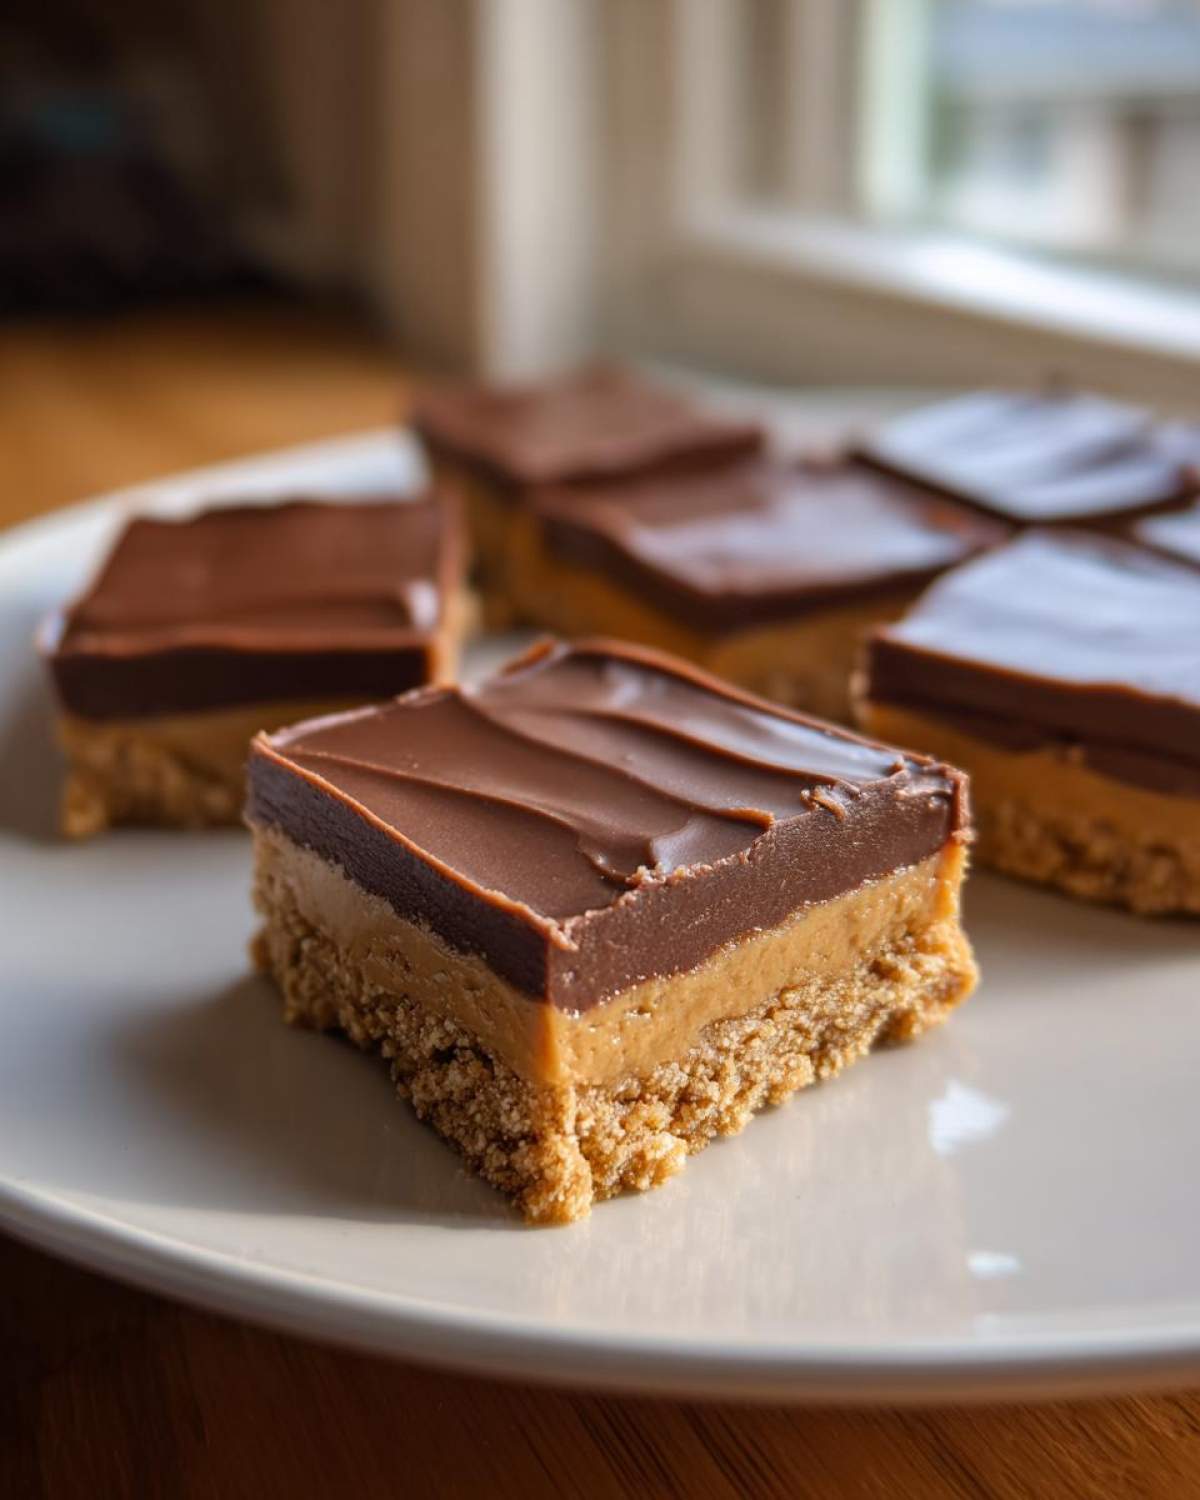
- Perfect Texture Combination: You get that slightly crumbly, salty-sweet base, the smooth, sweet filling, and then that rich, fudgy chocolate top. It’s textural heaven!
- Make Ahead Friendly: Mix them up the day before a party, and you won’t have any stress on the actual event day.
Gathering Ingredients for Authentic lunch lady peanut butter bars
Okay, the beauty of these specific bars is that you probably have half this stuff sitting in your pantry already. We aren’t messing around with fancy specialty items here; this is simple, classic baking magic. Getting the right stuff for each layer is crucial, even though it’s no-bake. Trust me, using the right peanut butter makes all the difference in the world for getting that true, nostalgic texture.
For the Graham Cracker Peanut Butter Base
This bottom layer is what gives the bars their structure and that slightly salty, comforting crunch. You need:
- One and a half cups of graham cracker crumbs—make sure they are fine! If you buy the crackers, crush them right up until they look like fine sand.
- Half a cup of unsalted butter. And this needs to be melted down completely before you mix it in. We need that melted fat to bind the crumbs together so they press nice and tight.
For the Peanut Butter Fudge Topping
The filling and the topping are where the real peanut buttery goodness happens. You’re going to need two separate amounts of peanut butter, so make sure you measure them out before you start!
- One full cup of creamy peanut butter for the main filling. Don’t use the natural kind that separates unless you stir it like crazy; we want that thick, classic texture here.
- A full cup of powdered sugar, because sweetness is non-negotiable in these retro desserts!
- Just half a teaspoon of vanilla extract to warm up the flavor of the filling.
- For the top layer, grab one cup of semi-sweet chocolate chips—your favorite kind works fine.
- And finally, just a quarter cup more of creamy peanut butter to melt right in with the chocolate. This is what keeps the chocolate from getting too hard and gives it that wonderful, slightly soft fudge consistency on top.
Step-by-Step Instructions for lunch lady peanut butter bars
Okay, here is the best part—putting it all together! Since there’s no baking, this goes together surprisingly fast, but you absolutely cannot rush the chilling. Patience equals perfect bars here. You need about 15 minutes of actual hands-on time, but then you have to let them set up completely, so plan your cooling time in advance!
Preparing the Pan and Base Layer
First things first, we need to prep that 8×8 inch pan. I swear by lining it entirely with parchment paper first, letting those two sides hang over the edges like little handles. This is how we get the bars out in one clean piece later, trust me! Now, mix up your graham cracker crumbs and the melted butter until it looks like wet sand. Press this mixture into the bottom of your lined pan evenly. Here’s my pro tip: use the bottom of a dry measuring cup to really pack it down hard. You want this base solid so it doesn’t crumble when you slice those perfect lunch lady peanut butter bars later.
Creating and Spreading the Creamy Filling
Switching gears, grab a separate bowl. We’re whipping up the creamy filling. Just beat together that full cup of peanut butter, the powdered sugar, and that tiny splash of vanilla until it’s beautifully smooth, almost like thick frosting. Carefully spread this luscious layer right over your packed graham cracker base. Keep the layers separate! Don’t let the filling sink into the base too much, just spread it gently across the top using an offset spatula if you have one.
Melting the Chocolate Topping and Final Assembly
Time for the crown jewel! In a microwave-safe bowl, combine your chocolate chips and that final quarter cup of peanut butter. Do NOT just blast this on high heat! Microwave it in 30-second bursts, stirring really well after every single one until it’s perfectly smooth and shiny. Pour that warm chocolate topping right over the peanut butter layer and work quickly with your spatula to spread it edge-to-edge. Now comes the hardest part: popping that pan into the fridge. It needs a minimum of two hours to fully firm up so those chocolate and peanut butter layers don’t get messy when you try to slice them.
Tips for Success: Achieving Perfect lunch lady peanut butter bars Every Time
Even though these are “no-bake” treats, timing is still important! If you rush the chilling stage, you’ll end up with a messy disaster when you try to slice them. The number one tip for picture-perfect squares—the kind that looks professional—is letting your knife catch up to the temperature. Right before you slice, run your knife under some really hot tap water, wipe it completely dry, and then make the cut. Do this for every single slice!
If you really want to mix things up next time, don’t feel stuck with graham crackers! You can totally swap those out for vanilla wafer crumbs for the base layer. Honestly, either way works perfectly for these lunch lady peanut butter bars. They turn out delicious and stay perfectly set up in the fridge up to a week. Just remember: chill well, cut hot and dry!
Storage and Make Ahead Dessert Bars
These are truly the best kind of bar because they taste even better the next day, which makes them perfect for planning ahead! Since these lunch lady peanut butter bars don’t have any eggs or flour that need baking, they rely on the chocolate and fat mixture to hold their shape. That means they really need to stay chilly.
Always, always store these tightly covered in the refrigerator. I usually pop them into an airtight container, maybe putting a little piece of wax paper between the layers if I stack them, just to make sure the chocolate doesn’t stick to the peanut butter filling of the bar above it. If you keep them cool, they stay fantastic—firm and ready to eat—for up to a full week. That’s why these are officially my favorite Make Ahead Dessert Bars!
You can definitely freeze them too, especially if you make a big double batch, which, let’s be honest, you probably will once you taste them. Wrap the bars tightly in plastic wrap, maybe even slide them into a freezer bag, and they’ll be good for about two months. Just let them thaw on the counter for about 30 minutes before you plan to serve them, and they’ll taste just as fresh as the day you made them.
Variations on the Classic lunch lady peanut butter bars
I love making things exactly as written, especially when a recipe has such an iconic flavor profile like these lunch lady peanut butter bars. But sometimes your pantry looks a little different, or maybe you just want to switch things up a tiny bit without turning this into a complicated project. Because this recipe is so straightforward, it handles minor swaps like a champ!
Here are a couple of super simple ways I’ve tweaked this recipe over the years that still keep that amazing, easy, nostalgic feeling intact. Remember, always be careful when swapping ingredients, especially around nut allergies, so check with your crowd first!
Switching up the Crumble Base
You know how I mentioned vanilla wafers? That is my number one go-to swap if I run out of graham crackers or just feel like something a little softer on the bottom. Simply crush up about two sleeves of vanilla wafers until you have the same one-and-a-half-cup measurement needed for the base. They don’t have quite the same robust flavor as graham crackers, but they create a fabulously tender crust. It shifts the whole vibe a bit, making them feel almost like a homemade Nutter Butter!
Embrace the Sweet and Salty Peanut Butter Bake
If you love that contrast between salty snacks and sweet chocolate, this tiny addition is a game-changer. You don’t have to change anything in the filling or the base—just sprinkle a very light layer of flaky sea salt right on top of the melted chocolate layer *before* you put the pan in the fridge. I only use a pinch per square, really. That little pop of salt cuts through the richness of the chocolate and peanut butter filling perfectly. It elevates it from a simple dessert bar to something a little more sophisticated without adding any extra work. It tastes exactly like a Sweet and Salty Peanut Butter Bake!
Try a Different Nut Butter Blend (Carefully!)
Now, I stick to creamy peanut butter because that’s the flavor everyone is looking for in these Quick Peanut Butter Squares. But if you have an absolute surplus of almond butter, you could swap out maybe a third of the peanut butter in the filling for almond butter. Just be aware that almond butter is often runnier than peanut butter, so you might need to add just a tiny bit more powdered sugar to keep that filling nice and stiff for spreading. But honestly, for an authentic taste, stick to peanut butter!
Frequently Asked Questions About School Cafeteria Treats Recipe
It’s funny how everyone remembers these treats a little differently, but the core recipe for these lunch lady peanut butter bars stays the same! Since these are such a classic item among Retro Dessert Recipes, I get asked the same few questions all the time. Here are the most common things folks wonder about when they’re making these quick squares! Before you go too far, please remember that what I share here is based on my own kitchen experiments, and for full transparency on ingredient sourcing and liability, check out our disclaimer page.
Can I use natural peanut butter in these lunch lady peanut butter bars?
That’s a great question! You absolutely can, but you have to be prepared for a little extra work. Natural peanut butter tends to be much runnier because the oils separate, and we need a truly thick, stable filling for these bars to set up correctly as Quick Peanut Butter Squares. If you use natural peanut butter, you must stir it until every drop of oil is incorporated back in. Even then, I usually recommend adding an extra tablespoon of powdered sugar to the filling mixture just to give it more structure. If you’re worried about texture, honestly, the standard creamy peanut butter works best here because it’s formulated to stay bound.
Can I freeze these No Bake Peanut Butter Dessert bars?
Yes, you totally can! These bars freeze like a dream, which is great news if you’ve made a big batch. Since they are already solid because of the chilling time, they hold up really well. The trick is to cut them first, wrap each square individually—I use plastic wrap or wax paper—and then place the wrapped squares into an airtight container or heavy-duty freezer bag. They stay perfect in the deep freeze for about two months. Just pull one out about half an hour before you want to eat it, or even thaw it for an hour on the counter if you’re feeling impatient!
What is the best way to cut the bars cleanly?
Clean cuts are the secret handshake of great bar desserts! Rule number one: they must be completely chilled. Seriously, leave them in that fridge for at least two hours, or even pop them in the freezer for 30 minutes if you’re in a rush and need clean edges. Rule number two, and this is the one I always swear by, is the hot knife technique. Heat up a sharp knife under hot water, wipe it completely dry so there’s no water residue, and then slice straight down. If the bottom gets sticky, wipe the knife clean and reheat it. That smooth, hot blade glides right through the chocolate and peanut butter layers, giving you those beautiful edges!
If you’ve got other questions about this recipe or want to share your own memories, I want to hear them! You can ask me anything over at the contact page, and please leave a rating below if you loved these homemade cafeteria classics!
Estimated Nutritional Data for a Serving of lunch lady peanut butter bars
Okay, so let’s talk turkey. We all know these lunch lady peanut butter bars are pure indulgence. They taste like childhood happiness, and frankly, that’s worth more than a number on a chart! However, for those of you who like to keep a general idea of what you’re eating, I pulled the estimated numbers based on the ingredients we used.
When you divide this recipe into 16 perfect squares—which is my favorite serving size, by the way—here is roughly what you are looking at per bar. Remember, this is just an estimate, because if you use a different brand of peanut butter or extra-sweet chocolate chips, those numbers wiggle a bit!
- Serving Size: 1 bar
- Calories: About 250
- Sugar: Around 20 grams (Gotta love that sugar!)
- Fat: Roughly 16 grams
- Protein: A nice little boost of 6 grams
- Cholesterol: Estimated at 10mg
- Carbohydrates: About 24 grams
I know, I know, it’s definitely a treat and not an everyday snack, but isn’t that what makes a Comfort Food Dessert Recipe so special? It’s meant to be enjoyed! Just be sure to drink plenty of water, and don’t worry an ounce about the sugar content when you’re enjoying this trip down memory lane. That’s my promise to you!
Share Your Childhood Favorite Bars Experience
Whew! Now that you have the absolute secret recipe for the best lunch lady peanut butter bars on the planet, I have to ask—what are you waiting for? Seriously, you have to try these this week! They are such a blast to make, and watching someone take that first bite and their eyes go wide is the best payoff.
I really, truly want to know what you think. Did they taste exactly like the ones from your school cafeteria? Were they exactly what you needed for that potluck this weekend? Please, please, please leave a rating down below—a simple five-star review tells me that I nailed the authentic recipe, and it helps other people find this little piece of baking history, too!
And hey, if you make a batch, snap a picture! Tag me when you post them on Instagram or Facebook. I love seeing these Comfort Food Dessert Recipe treats popping up in your kitchens. It makes me feel like we’re all baking together again, just like old friends. If you ever have specific questions about the recipe or just want to chat about baking in general, you can always reach out to me directly over at the contact page. Happy baking, everyone!
PrintClassic No-Bake Lunch Lady Peanut Butter Bars
Make the nostalgic peanut butter bars often served in school cafeterias. This recipe uses a simple graham cracker base, a creamy peanut butter filling, and a chocolate topping, all without baking.
- Prep Time: 15 min
- Cook Time: 0 min
- Total Time: 2 hours 15 min
- Yield: 16 bars
- Category: Dessert
- Method: No-Bake
- Cuisine: American
- Diet: Vegetarian
Ingredients
- 1 1/2 cups graham cracker crumbs
- 1/2 cup (1 stick) unsalted butter, melted
- 1 cup creamy peanut butter
- 1 cup powdered sugar
- 1/2 teaspoon vanilla extract
- 1 cup semi-sweet chocolate chips
- 1/4 cup creamy peanut butter (for topping)
Instructions
- Line an 8×8 inch baking pan with parchment paper, leaving an overhang on two sides for easy removal.
- In a medium bowl, combine the graham cracker crumbs and melted butter. Press this mixture firmly and evenly into the bottom of the prepared pan.
- In a separate bowl, beat together 1 cup of peanut butter, powdered sugar, and vanilla extract until smooth. Spread this peanut butter mixture evenly over the graham cracker base.
- In a microwave-safe bowl, combine the chocolate chips and the remaining 1/4 cup of peanut butter. Microwave in 30-second intervals, stirring well after each, until the mixture is smooth and fully melted.
- Pour the chocolate mixture over the peanut butter layer and spread it to cover completely.
- Refrigerate the bars for at least 2 hours, or until the chocolate topping is firm.
- Use the parchment paper overhang to lift the bars out of the pan. Cut into squares before serving.
Notes
- For cleaner cuts, run your knife under hot water and wipe dry between slices.
- You can substitute the graham cracker crumbs with vanilla wafer crumbs for a different flavor base.
- Store leftovers tightly covered in the refrigerator for up to one week.
Nutrition
- Serving Size: 1 bar
- Calories: 250
- Sugar: 20
- Sodium: 110
- Fat: 16
- Saturated Fat: 6
- Unsaturated Fat: 10
- Trans Fat: 0
- Carbohydrates: 24
- Fiber: 1
- Protein: 6
- Cholesterol: 10