

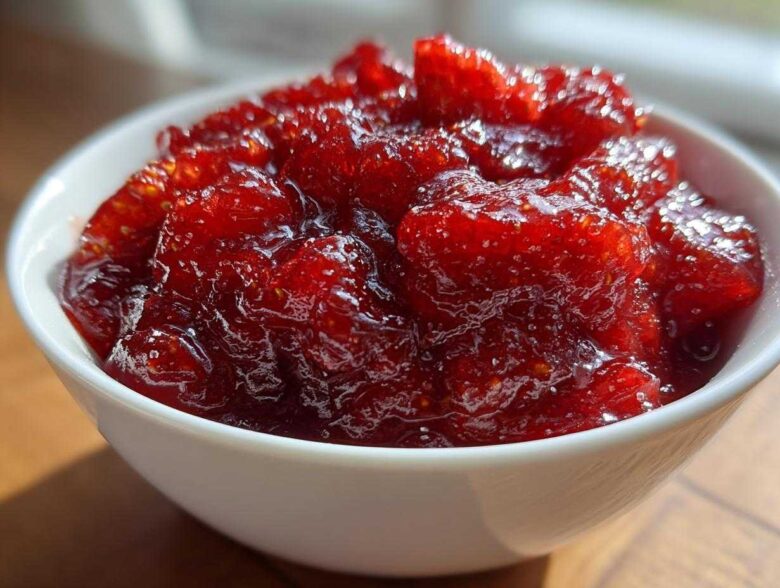
Oh, you know those perfect, sun-drenched strawberries you just bought but can’t possibly eat them all before they turn sour? I used to dread that dilemma every June. For years, I trusted my grandmother’s detailed canning recipes, but honestly, who has the time to stand over a boiling pot for an hour just for jam? Not me! I needed that fresh summer flavor preserved instantly.
That’s why I perfected this method. Trust me when I say this **strawberry freezer jam** is an absolute game-changer. It’s hands-down the easiest fruit preserve you will ever make—zero boiling, zero complicated canning steps required. I’ve made hundreds of batches over the years, testing every little tweak, and this simple technique consistently delivers that vibrant, fresh-from-the-patch taste. You’ll see. I’m so happy to share this secret with you that I wrote all about who we are on our About Us page so you can see why I share these quick kitchen wins!
Why This Is the Best Quick Strawberry Freezer Jam Recipe (No Canning Needed)
When people ask me for the fastest way to deal with a surplus of amazing strawberries, this is my go-to answer, hands down. Why fuss with hot water baths and sterilization when you can capture peak fresh flavor in just minutes? This **strawberry freezer jam** is designed for people who love good food but don’t have hours to spend standing over a stove.
- Zero boiling time! That means way less heat in the kitchen.
- You get that bright, fresh flavor that cooked jams just can’t match.
- It’s virtually impossible to mess up—perfect for beginner jam makers.
- It keeps beautifully in the freezer for nearly a year!
Speed and Simplicity of Making Strawberry Freezer Jam
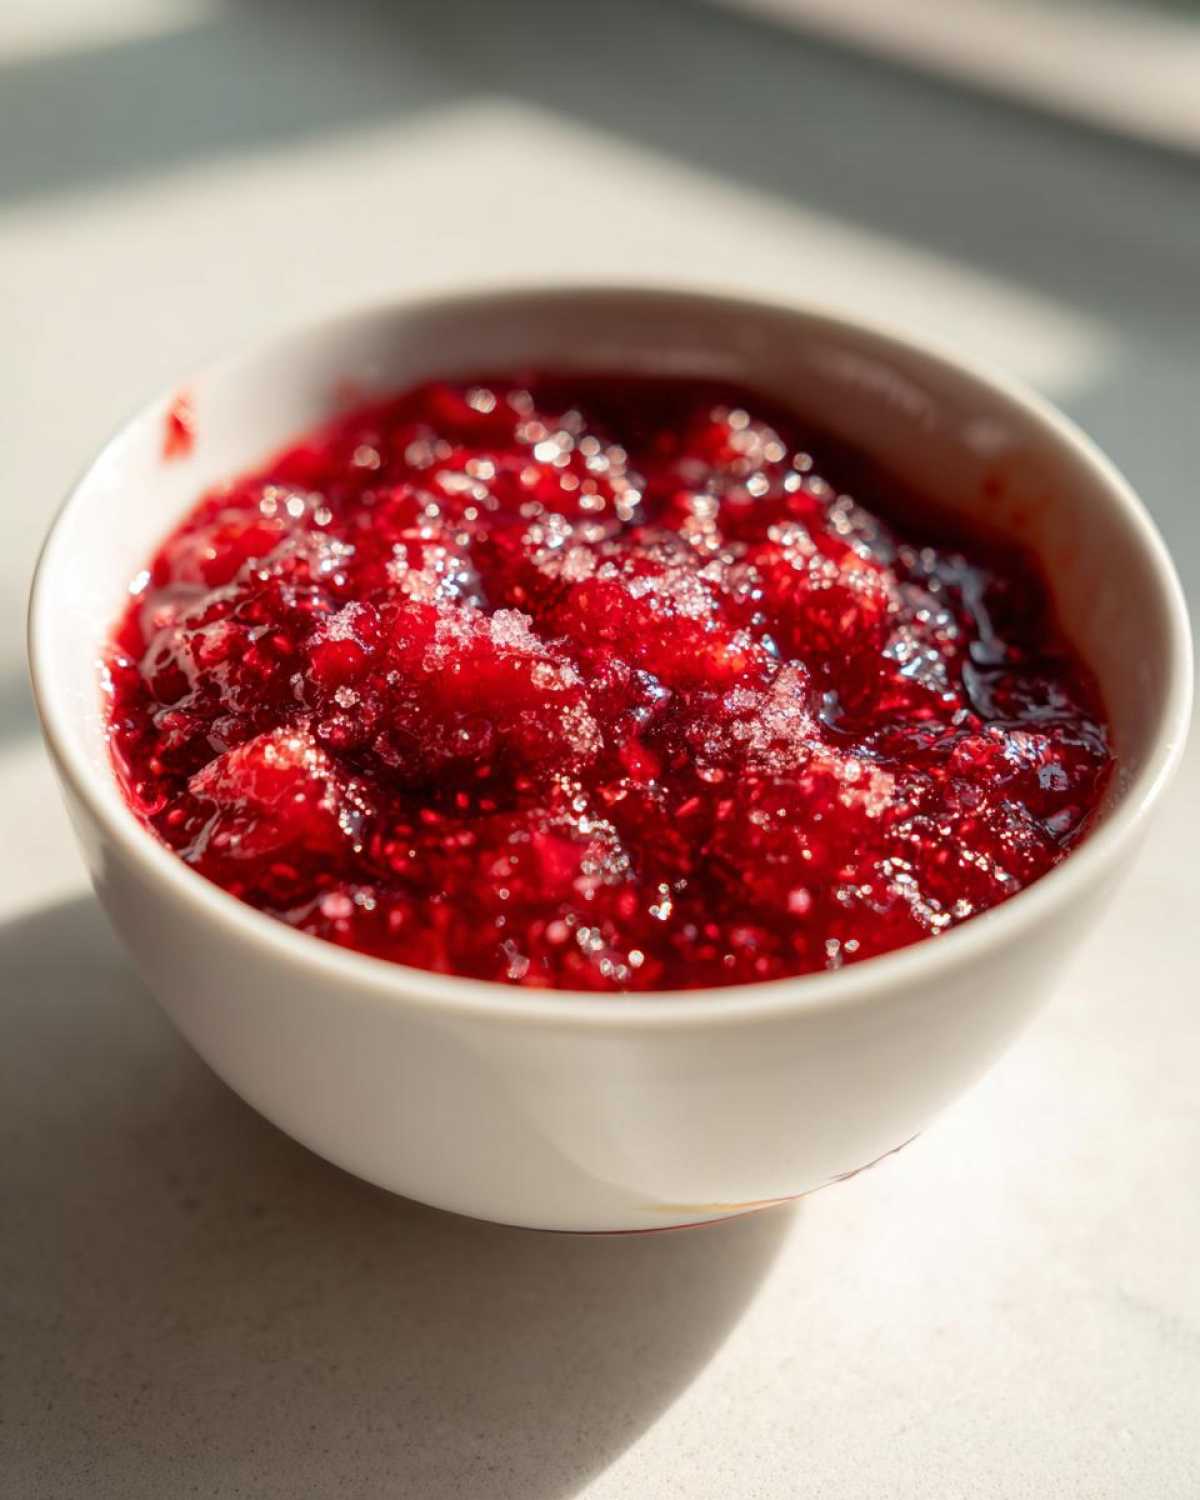
We are talking about maybe 10 minutes of actual work here. Seriously! You crush the berries, you stir in the sugar and lemon juice, and then you wait while the magic happens. Compared to traditional methods, where you wait for the water to boil, then wait for the jam to reach setting point, this is lightning fast. It’s the perfect **quick strawberry jam recipe** for when that summer bounty hits!
Gathering Ingredients for Your Strawberry Freezer Jam
The beauty of making **strawberry freezer jam** this way is just how few ingredients you need. I always say, if you start with amazing strawberries, you are already halfway to heaven! You only need three things—some fruit, a bit of sugar for texture, and a splash of acidity to brighten everything up. Don’t even think about digging out that old box of pectin; we aren’t using any here!
Whether you picked berries yesterday or found a bag of frozen ones deep in the chilly depths of your freezer, this recipe welcomes them both. The key isn’t the cooking, it’s ensuring they are prepped right before mixing. We need them crushed, not blended into a thin sauce. That chunky texture is what makes it feel luxurious on a piece of toast.
Ingredient Clarity and Preparation Notes
It’s crucial we talk about the state of the strawberries. You need to hull them first, obviously, and then crush them by hand—I use a sturdy wooden spoon or a potato masher works too! We want small pieces, not a watery puree. That texture is what makes this an excellent **easy homemade fruit preserves**.
As for the sugar, 1/2 cup seems like a lot, but remember, this sugar does the heavy lifting that pectin usually does. It helps thicken the juice! And please, don’t skip the lemon juice. It keeps the color vibrant and sharpens that intense burst of fresh strawberry flavor. Without it, the flavor falls a little flat.
Step-by-Step Instructions for Easy Homemade Fruit Preserves
Okay, this is where we actually make the **strawberry freezer jam**, and honestly, it’s so simple I feel like I should apologize for how little effort it takes. This is the process I use for all my **easy homemade fruit preserves** because I preach quick results! We aren’t waiting for rolling bubbles or worrying about seal checks. We are just stirring and waiting for beautiful juice creation.
The entire active part of this **beginner jam making tutorial** happens in about ten minutes. It’s foolproof, I promise. Just follow exactly what I do here, and your jars will be ready for the freezer before you can even finish washing your crushing spoon!
Preparing the Fruit and Mixing the Strawberry Freezer Jam
First things first: get those strawberries hulled. If they are frozen, I let them sit on the counter for about 20 minutes so they are just starting to weep juice but still firm. Then, you put them into a medium bowl. I prefer crushing them by hand with a muddler or a sturdy masher because I like bigger chunks, but if you have a massive batch, a quick pulse in the food processor can work for you.
Next, sprinkle in that sugar and the lemon juice right over the top. Grab a spoon and stir until everything looks well incorporated and you can see the sugar crystals starting to disappear into what will become your liquid gold.
Resting and Storing Your No Canning Jam Recipes
Here is the non-negotiable step for all **no canning jam recipes**: you must let this mixture rest on the counter for 15 minutes. Stir it halfway through this time. When the sugar sits with the crushed fruit, it physically pulls out so much more juice—this replaces the role of all that heavy cooking! This resting period is essential for getting true jam consistency.
Once that’s done, start spooning the mixture into your clean, freezer-safe jars or containers. Don’t fill them to the absolute top! You have to leave about half an inch of space—that’s headspace. The jam needs room to expand when it freezes solid. Seal them tight and pop them straight into the freezer. Congratulations, you just made **strawberry freezer jam**!
Tips for Perfect Strawberry Freezer Jam Every Time
Even though this is the easiest path to **strawberry freezer jam**, a few little tricks I’ve learned over the years can take it from good to absolutely legendary. Since we are skipping the pectin and the boiling, we rely entirely on the fruit releasing its natural thickeners, which means consistency in preparation is key! Don’t be lazy when you start crushing those berries; it truly matters.
We want that perfect balance where it’s spreadable when slightly thawed but still holds its shape a little bit. Unlike thick, cooked preserves, this is meant to taste like fresh summer fruit suspended in a sweet syrup, remember? That’s the payoff for doing it the quick way!
Achieving the Right Texture in Your Fruit Spread Recipe Freezer Safe
I can’t stress this enough: how you crush the strawberries dictates the final texture of your **fruit spread recipe freezer safe**. If you obliterate them in the food processor, you end up with a smooth sauce that freezes rock hard and doesn’t feel like jam. I love using a potato masher because it’s rough and fast.
If you are cutting back on sugar to make a **low sugar freezer jam**, be prepared for a softer set. That’s just science! The sugar needs to be there to help bind the juice with the fruit fibers. If you use less, it will be more like a fantastic, slightly thick strawberry sauce you pour over ice cream. It’s delicious, but it won’t spread like traditional jam.
Storage and Reheating Instructions for Strawberry Preserve Ideas
Now that you’ve made your gorgeous, no-cook **strawberry freezer jam**, the next question is: how long does that summer sunshine last? The fantastic news is that because this is one of the best **fruit preservation methods** for retaining fresh flavor, it lasts ages in the deep freeze! I always label my containers, but realistically, the flavor is absolutely vibrant for about 10 to 12 months. After that, it’s still safe, but the color might start to dim a little.
When you’re ready to eat it, just pull a jar out of the freezer. You have two options! If you need it right away for toast—which, let’s be real, is always—you can let it sit on the counter for about 30 minutes. It thaws incredibly fast compared to store-bought stuff. Or, if you’re planning ahead, move a container to the fridge the night before. It thaws beautifully and slowly that way. Honestly, I sometimes eat it when it’s still semi-frozen, like a delicious, fruity slushie!
Serving Suggestions: Beyond Toast for Your Quick Topping Recipes
Okay, I know you made this **strawberry freezer jam** to spread on toast or biscuits, and that’s absolutely necessary. But seriously, don’t let that jar live only in the toaster lane! Because this jam retains such a bright, fresh flavor, it makes the most incredible topping for desserts. It tastes like you just mashed up fresh strawberries seconds ago!
Think about it: Use it as a stunning **strawberry dessert topping** over cheesecake or vanilla ice cream—it looks gourmet but took zero effort. It’s also amazing swirled into plain Greek yogurt for a quick breakfast boost or used to sweeten up plain sparkling water. Next time you’re making pancakes, ditch the syrup and use this instead! It’s one of the easiest ways to turn a simple item into a memorable treat using these **quick topping recipes**.
Frequently Asked Questions About Making Jam Without Boiling
When you go for a super simple, no-cook method like this **strawberry freezer jam**, I always end up having a few questions pop up when I first try it. Don’t worry if you’re wondering about shelf life or set consistency—that’s totally normal! I think these answers cover the things I used to wonder about most when I was first figuring out **simple fruit preserving**.
Can I make this strawberry freezer jam without pectin?
Yes, you absolutely can! This entire recipe is built around being **no pectin strawberry jam**. We rely on the natural pectin that is already in the strawberries. The sugar and the little bit of lemon juice help bind the juice together so it sets a bit softer than a traditional cooked jam, but it’s still gorgeous for spreading!
How long does this jam last in the refrigerator if I don’t freeze it?
This is where the difference between freezer jam and traditional jam shows. Since we aren’t boiling it for the long seal, it’s much more perishable. If you keep your jars in the fridge, plan to eat them within 6 to 7 days. Honestly, if you’re making a **small batch jam recipe**, freezing is always the safest and best bet!
Can I use frozen sugar or freeze-dried strawberries?
We need granulated sugar here, not frozen! The freezing process is what the fruit goes through, not the sugar itself. As for freeze-dried berries, I wouldn’t recommend jumping to those for this **no canning jam recipes** tutorial. Freeze-dried fruit behaves very differently when rehydrated, and you won’t get the right juice release we need for this method.
Is this considered a low sugar freezer jam recipe?
Well, it’s *lower* sugar than traditional jam recipes because we skip the pectin, which needs a lot of sugar to work its magic. But to get any set at all without boiling, you do need that half cup of sugar per four cups of fruit. If you want something much lighter, try dropping it to 1/3 cup, but just know it will definitely stay runnier. It becomes more of a sweet syrup, but it’s still wonderful over ice cream!
Understanding the Nutrition of This Simple Fruit Preserving Method
I always get asked about the nutritional scoop for this **simple fruit preserving** method, and while I’m a cook, not a certified nutritionist, I pulled the estimates for you so you know what you are really spreading on those scones! Keep in mind these are totally estimates based on the 4 cups of strawberries and the sugar ratio we used.
For context, this is why I encourage people to go for my lower sugar option sometimes—because the sugar is definitely the main driver here. You can always check out our general site disclaimer before digging into any health estimates!
| Serving Size (2 tablespoons) | Calories | Sugar | Sodium | Fat |
|---|---|---|---|---|
| 2 tablespoons | 45 | 11g | 1mg | 0g |
See? It’s still a wonderful, low-fat way to enjoy fruit! Because we skip the heavy cooking and commercial pectin, you’re keeping things pretty clean here with this **strawberry freezer jam**.
Share Your Experience Making This Simple Strawberry Freezer Jam
Now it’s your turn! I poured my heart into showing you the simplest, fastest way to get that pure summer flavor locked down in your freezer. Did you try the no-cook method? How did the texture turn out for you? Please stop by our Contact Page to let me know what you thought!
Rate this **strawberry freezer jam** below, share a picture if you can, and tell me what you ate it with first—was it toast, yogurt, or maybe straight from the jar? Happy preserving, everyone!
PrintQuick Strawberry Freezer Jam (No Canning)
Make fresh-tasting strawberry jam quickly without boiling or canning. This simple recipe stores well in the freezer for up to one year.
- Prep Time: 10 min
- Cook Time: 0 min
- Total Time: 25 min
- Yield: About 2 cups
- Category: Dessert Topping
- Method: No-Cook Preservation
- Cuisine: American
- Diet: Vegetarian
Ingredients
- 4 cups fresh or frozen strawberries, hulled and crushed
- 1/2 cup granulated sugar
- 1 tablespoon lemon juice
Instructions
- Prepare the strawberries: If using fresh, crush them lightly in a bowl. If using frozen, thaw them slightly and crush them.
- Mix the crushed strawberries, sugar, and lemon juice together in a medium bowl. Stir until the sugar mostly dissolves.
- Let the mixture sit at room temperature for 15 minutes, stirring occasionally. This allows the sugar to draw out more juice.
- Spoon the jam mixture into clean, freezer-safe containers, leaving about 1/2 inch of headspace at the top.
- Cover the containers tightly and place them in the freezer. The jam is ready to eat once frozen solid.
Notes
- For a lower sugar jam, you can reduce the sugar to 1/3 cup, but the texture may be slightly softer.
- If you prefer a smoother jam, pulse the strawberries briefly in a food processor instead of crushing by hand.
- This jam is best used within 10 to 12 months for optimal flavor.
Nutrition
- Serving Size: 2 tablespoons
- Calories: 45
- Sugar: 11g
- Sodium: 1mg
- Fat: 0g
- Saturated Fat: 0g
- Unsaturated Fat: 0g
- Trans Fat: 0g
- Carbohydrates: 11g
- Fiber: 1g
- Protein: 0g
- Cholesterol: 0mg