


Oh, there is just nothing quite like pulling a slice of pie that is pure sunshine onto a plate, is there? For me and Mateo, one of the ultimate triumphs in our little Flavor Zine kitchen has always been achieving that perfect, cloud-like crown over sunshine-yellow filling. We spent way too many weekends battling weeping meringue and runny centers until we finally cracked the code on what I’m calling the best homemade classic lemon meringue pie recipe. This isn’t just about good flavor; this is about mastering the technique so that your meringue stays tall, fluffy, and perfectly golden brown, resisting all that annoying shrinkage. It’s a showstopper, truly, and I can’t wait to show you how we make it totally foolproof for you, too! If you love this zesty flavor profile, you should definitely check out my moist and tangy lemon loaf recipe for another bright treat.
Why This is the Best Lemon Meringue Recipe You Will Make
I know, I know, every baker claims their recipe is the best, but stand by me here! What makes this version of the best lemon meringue recipe truly superior is the attention paid to preventing those dreaded dessert disasters. We aren’t fooling around with bland filling here; we aim for an intensely tangy lemon filling that just cuts right through the sweetness.
Mateo’s biggest fear used to be that watery puddle under the meringue—we call that weeping, and it’s the kiss of death for a stunning pie. We solved that! By using cornstarch as our thickening base and applying some crucial heat timing, we get a stable custard that won’t shrink away from the crust.
And the meringue? Oh, it’s a towering cloud! It’s tall, it’s light, and it browns just beautifully in the oven. This recipe is designed for confidence, turning out a gorgeous, bakery-quality lemon meringue pie every single time, even if you think baking from scratch is too tricky. You’re going to love this sweet and tart baking experience! If you need another refreshing citrus dish, you absolutely must try out my moist and tangy lemon loaf recipe sometime soon.
Gathering Ingredients for Your Classic Lemon Meringue Pie
Okay, before we get into the messy, delightful process, let’s talk supplies. If you want that amazing lemon meringue pie texture we talked about, you can’t cut corners here, especially with the fresh stuff! Make sure you have everything measured out before you even turn on the stove—trust me, timing matters a lot here.
You’ll need:
- One (9 inch) unbaked pie crust—cooled completely!
- 1 1/2 cups granulated sugar and another 1/2 cup just for the meringue.
- 1/3 cup cornstarch to thicken the filling right up.
- 4 large egg yolks, and yes, you need to lightly beat those before mixing.
- 1/2 cup of fresh lemon juice—don’t even think about using that bottled stuff!
- 1 tablespoon of fresh lemon zest—this is where the bright flavor comes from.
- 4 large egg whites, and this is important: they MUST be at room temperature.
- 1/4 teaspoon of cream of tartar, which is our secret weapon for that stable pile of fluff.
We’re aiming for something truly special, which is why fresh ingredients make all the difference in these classic lemon desserts. If you want to practice making a great, complex base flavor first, Mateo just posted the most incredible caramelized onions recipe that takes patience, just like this pie!
Step-by-Step Instructions for Perfect Lemon Meringue
This is where the magic of your homemade lemon meringue truly happens! Don’t rush these steps; they are designed to work together to create that fantastic stability. We’ve broken it down into four critical phases so you can tackle this masterpiece without feeling overwhelmed.
Preparing the Pre-Baked Crust
First things first, your crust needs to be totally cooperative. Bake your 9-inch pie crust until it’s just lightly golden, following whatever your favorite recipe or package says. The most important thing? You need to let it cool down completely! If you pour hot filling into a hot crust, you’re starting off on the wrong foot.
Creating the Tangy Lemon Filling
In a medium saucepan—keep that heat on medium for now—whisk together the 1 1/2 cups of sugar, the cornstarch, and the salt until they are totally blended. Now, slowly whisk in the cold water until everything looks smooth. Bring this to a boil, stirring all the time, and let it boil for a full minute while you keep stirring. Take it off the heat.
Next, temper your yolks! This prevents scrambled eggs, which is a total kitchen nightmare. Whisk the 4 egg yolks lightly in a separate bowl. Then, drizzle about one cup of that hot sugar base *very slowly* into the yolks while whisking constantly. Once those yolks are warmed up, pour that tempered mixture back into the main saucepan. Return it to the heat, bring it back to a boil for one minute, stirring constantly. Immediately remove it! Stir in the lemon juice, that beautiful zest, and the butter until everything melts. Wow, the scent of these zesty citrus desserts alone makes the effort worth it!
Whipping the Fluffy Meringue Topping
While the filling is sitting, get your meringue going. You need a super clean, grease-free bowl for your 4 room-temperature egg whites and the cream of tartar. Beat these on medium speed until you see soft peaks forming—they should look a little like soft-serve ice cream.
Now, add that remaining 1/2 cup of sugar one tablespoon at a time, beating well after every addition. Crank your mixer up to high and keep going until you have towering, stiff, glossy peaks. This is your secret to that incredible fluffy meringue topping that won’t deflate on you! This technique is key to creating your no weep lemon meringue.
Assembly and Achieving Golden Brown Perfection for your lemon meringue
This is the final, thrilling part! Take that hot lemon filling and pour it right into your cooled pie crust. Now, immediately take that meringue and spread it over the hot filling. You have to make sure that meringue goes all the way to touch the edge of the crust *all around the sides*. Seriously, seal it against the edge like you’re tucking in a little kid so it doesn’t shrink back as it bakes!
Use the back of a spoon to make pretty swirls—they’ll look amazing when they brown. Pop it into a 350°F oven for just 12 to 15 minutes. You have to watch it like a hawk since you’re just trying to color the peaks! Once it’s golden, pull it out. For the best set in your lemon meringue pie, let it cool completely on a rack for at least 4 hours. Resist the urge to slice it early, or it’ll be soup!

If you want to try another amazing baking technique that focuses on a high rise, check out my technique for foolproof Yorkshire pudding—it uses similar principles of heat management!
Tips for Success: Mastering the Art of Lemon Meringue
Look, even with the best recipe for lemon meringue pie, you can trip up on the details. That’s why we write these little notes, right? My absolute non-negotiable rule for a fluffy meringue topping? Your bowl and whisk must be spotless. I mean surgically clean! If there is even a tiny trace of grease or egg yolk clinging anywhere, your whites won’t whip up into those stiff peaks we need; they’ll just look sad and foamy.
I remember one frantic summer when Mateo was trying to rush. He used a bowl he swore he just washed, but the meringue wouldn’t set for anything. We finally figured out he’d wiped it down with a slightly oily dishcloth. Oops! We ditched the whites, cleaned everything with vinegar and hot water, and tried again. Success the second time!

Also, I have to remind you again: that cooling time is mandatory. Letting the pie sit on the wire rack for a full four hours is crucial for the tangy lemon filling to set firm. It’s hard when the pie smells this good, but patience is what makes this a truly great homemade lemon meringue.
If you want to practice making other amazing desserts ahead of time, check out our recipe for the best chocolate chip cookie recipe—cookies are much more forgiving when it comes to setting time!
Ingredient Notes and Substitutions for Lemon Meringue
Let’s quickly review a few ingredient choices because, believe it or not, the slightest swap can drastically change your beautiful lemon meringue pie. I want to make sure you get that perfect consistency for your sweet and tart baking adventure.
First, let’s talk about those egg whites for the meringue. They absolutely have to be at room temperature! If you try whipping cold egg whites, they just don’t achieve the same volume. Cold whites won’t incorporate air properly, and you end up with less volume. So, pull those egg whites out of the fridge about 30 minutes before you plan to whip them. It’s a tiny step that makes a huge difference in getting that towering look!
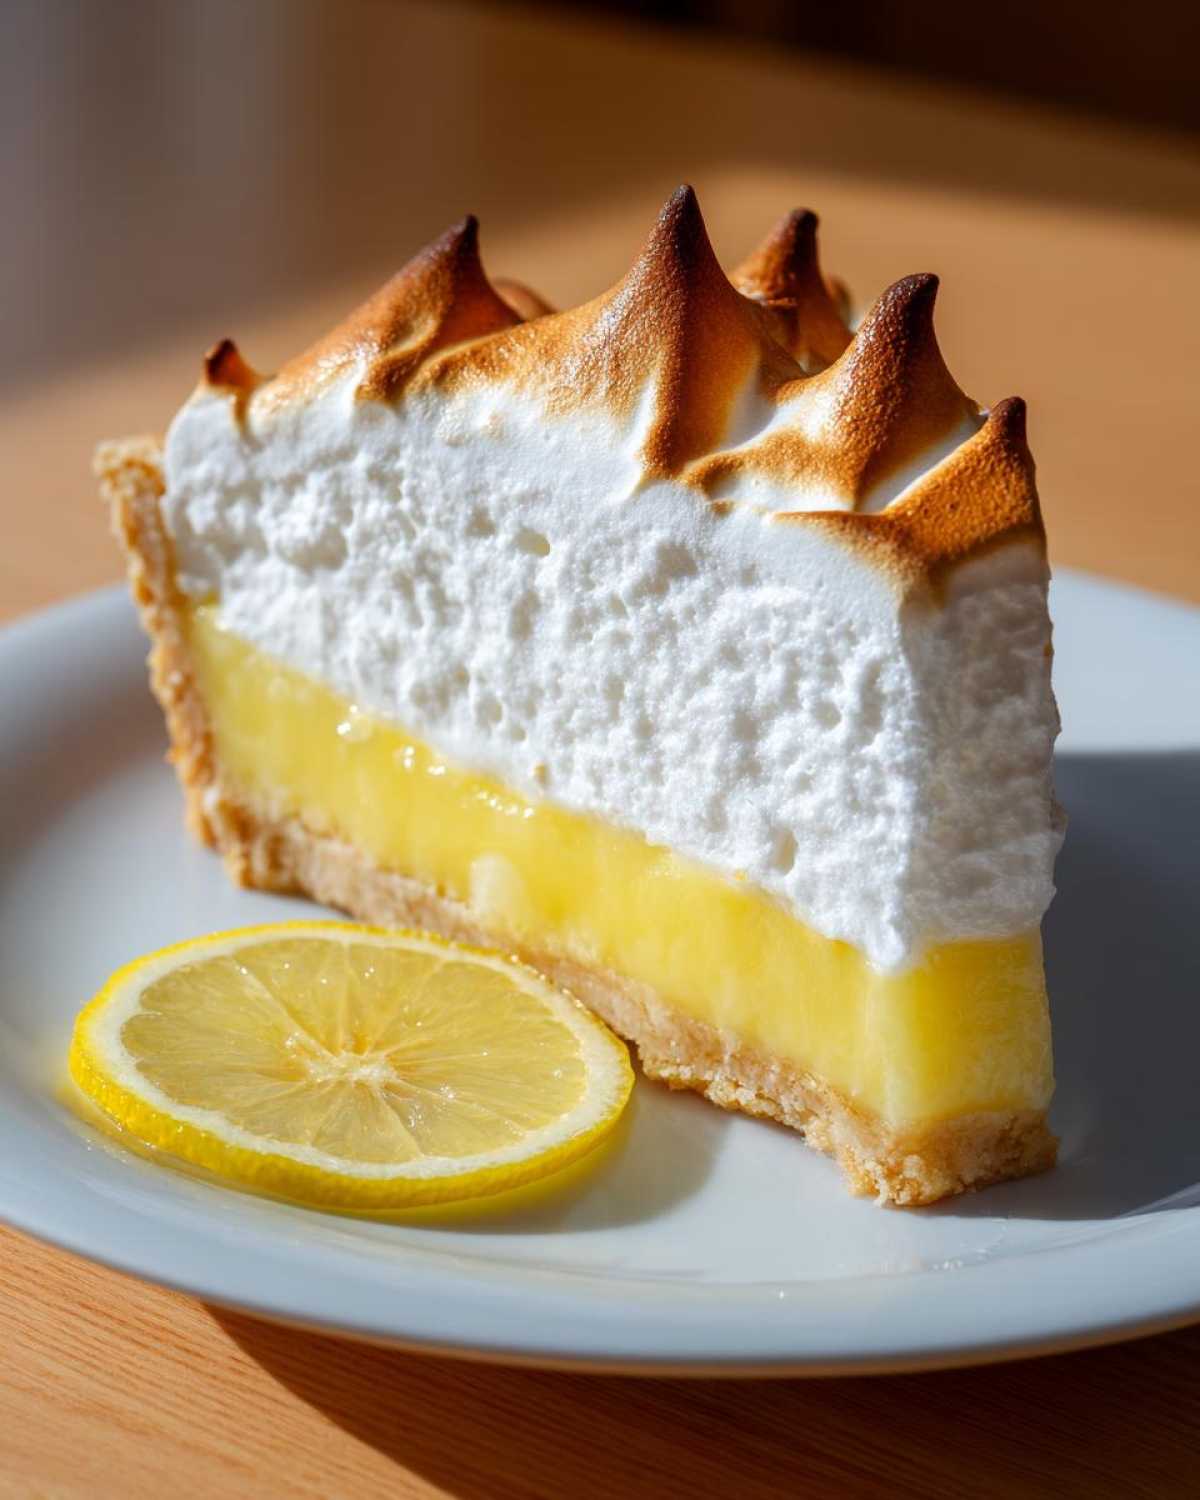
Next up: the lemon! For the brightest, most zesty—and I mean *zesty*—flavor in your filling, you must use fresh juice and zest. Bottled lemon juice has preservatives added, and honestly, it tastes flat next to the vibrant punch you get from a real lemon. If you skip the fresh zest, you are skipping the very thing that makes this pie so incredibly refreshing for summer gatherings.
Good news for our vegetarian friends: this recipe is naturally vegetarian! No weird gelatin or anything tricky sneaking into the filling or the topping. It’s all yolks, sugar, starch, and lemon doing the heavy lifting. If you’re looking for other easy, fast vegetarian recipes, you have to try my quick and fluffy French toast recipe for a weekend breakfast!
Storage and Make Ahead Tips for Your Dessert
Alright, now that you have produced this absolute masterpiece of a lemon meringue pie, the big question is: how long can I keep this gorgeous thing around? Honestly, the moment that meringue hits the lemon filling, the clock starts ticking on perfection, especially if you live where it’s humid. This is a classic lemon dessert that truly shines on the day it’s made.
If you absolutely must store it, keep it in the refrigerator. For the first few hours, I honestly leave it uncovered on the counter or fridge shelf so the heat can escape evenly. After that, you can cover it loosely, but remember, plastic touching meringue equals sadness and sticking! I’d say it’s best enjoyed within 24 hours.
Mateo and I almost never manage to keep one around past the next day, but if you’re planning a gathering, some components are your friends for making a big day easier. You can totally make the tangy lemon filling a day ahead! Just cover it tightly with plastic wrap, pressing the wrap right onto the surface of the filling—this seals out air and prevents that skin from forming. Keep it chilled.
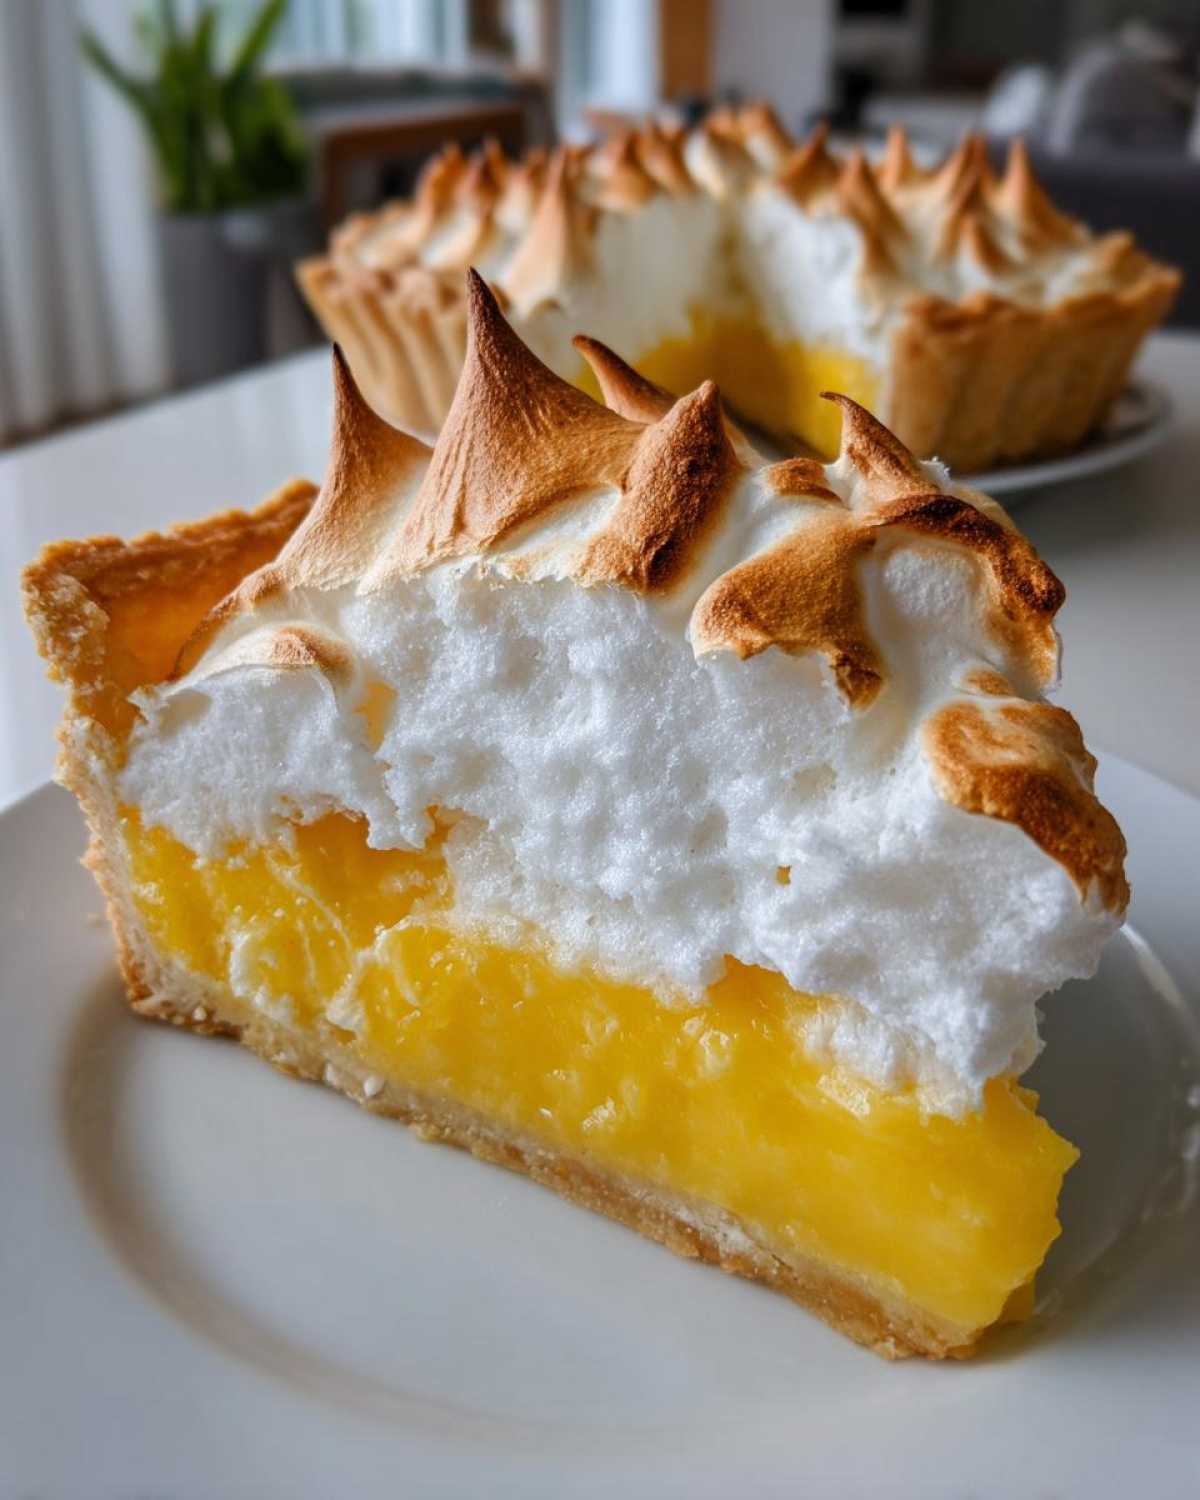
The next day, cool that filling slightly, pour it into your cooled shell, and whip up the meringue fresh. It’s way better to have fresh meringue than day-old meringue that might start weeping on you. If you are planning ahead for multiple make-ahead meals, you might find my tips on freezing breakfast burritos helpful, but this delicate pie definitely prefers a short timeline!
Serving Suggestions for this Summer Lemon Pie
Now that you’ve got this stunning, towering mountain of beautiful lemon meringue, let’s talk about presenting it! Because this pie is so intensely sweet and tart, you want to serve it at the perfect temperature to really get that textural contrast.
My biggest recommendation is to serve it slightly chilled—not straight from the ice-cold fridge, though! Give it about 20 minutes on the counter before you slice it. When the filling is nice and cool, it’s firm and provides that perfect sharp contrast to the light, airy meringue topping. It’s just divine when the knife cuts through that creamy base and fluffy top!
This pie just screams summer, so it pairs wonderfully with simple, light accompaniments. Forget heavy sauces! We usually serve it alongside a very strong, hot cup of coffee—the bitterness of the coffee is just stunning next to the lemon’s sharpness.
If you are serving this as the end of a big meal, you might look at something on the lighter side for the main course. Since we are talking about bright, zesty flavors, perhaps you already served something savory with herbs? If you’re looking for another easy, bright dessert to share after a lighter meal, you might check out my recipe for an easy apple crisp—it’s served warm, which is a lovely counterpoint to the chilled pie, though only if you enjoy that temperature clash!
Frequently Asked Questions About Lemon Meringue Pie
I gathered some of the questions Mateo and I always get thrown at us whenever we bring one of these stunning pies to a gathering. Dealing with a lemon meringue pie can feel intimidating, but once you know these little tricks, you’ll feel like a pro at making these classic lemon desserts!
Can I use a pre-made crust instead of baking from scratch?
Absolutely, yes! I won’t tell anyone, I promise. We spent so much time getting the filling and meringue perfect that sometimes we just don’t have the energy to fuss with a whole homemade crust. The recipe calls for a single 9-inch unbaked crust ready to go. The only catch, and this is important for that sweet and tart baking balance, is that you *must* blind bake it completely and make sure it’s fully cooled before the hot lemon filling goes in. A lukewarm crust will steam your filling!
Why does my meringue keep weeping or forming beads?
Ah, the dreaded weep! This is the #1 complaint about homemade lemon meringue, and it almost always comes down to moisture management. Weeping happens when the meringue releases moisture back onto the filling because the sugar didn’t fully dissolve, or the meringue wasn’t sealed properly onto the filling. To get that beautiful no weep lemon meringue, ensure you beat the sugar thoroughly into the egg whites until they are truly glossy and stiff. Also, make sure that hot filling completely covers the crust edge-to-edge so the meringue seals it in like a protective blanket!
How do I make sure I get that impressively tall, fluffy meringue topping?
Height is everything here! It comes down to two things we talked about in the instructions: temperature and stability. First, your egg whites need to be at room temperature. Cold whites just won’t achieve the volume you need for a truly fluffy meringue topping. Second, don’t skip the cream of tartar! It stabilizes those proteins so they hold their air structure when you beat them into those incredible stiff peaks. When you think they look done, beat them for another 30 seconds—you want towering peaks that don’t slump when you lift the whisk.
Can I use a kitchen torch instead of baking the meringue?
Yes, you totally can, and this is my favorite shortcut for a fast finish! If your filling is really hot when you pipe the meringue on, you can skip the oven entirely. Just use a reliable kitchen torch and glide it over the surface until you get that gorgeous golden-brown color, just like we did for that *zesty citrus desserts* recipe we tested last month. Torching gives you really defined peaks, which I love, but you still need to chill the pie afterward so the filling sets completely underneath!
Nutritional Snapshot of Classic Lemon Meringue
Okay, let’s be real for a second—when you’re eating a slice of heaven-on-earth lemon meringue pie, you aren’t usually thinking about macros, right? Who cares when it tastes that good? But since we’re running Flavor Zine, Mateo insists we give you the full picture, just in case you’re tracking things!
This data is based on one typical slice of the pie, using standard ingredient measurements. Please know that because we all measure a little differently—and because we never use the same brand of crust twice—these numbers are just an estimate for you to have a general idea. That’s just how we roll here; authenticity over absolute measurement!
Here’s the rough breakdown per serving:
- Calories: Approximately 380
- Sugar: Around 45 grams (Hey, it’s mostly lemon and meringue! It needs that sugar to taste good!)
- Fat: About 15 grams
- Saturated Fat: Roughly 6 grams
- Carbohydrates: About 60 grams
- Protein: Around 5 grams
- Cholesterol: Near 85 mg
Just remember, this is an estimate based on the detailed recipe we laid out. If you add a side of whipped cream or use a thicker, richer crust, those numbers are going to shift. But honestly? Grab a fork and enjoy the moment. That’s the most nutritious part of this whole experience!
PrintThe Best Homemade Classic Lemon Meringue Pie

You will make a classic lemon meringue pie featuring a tangy, zesty lemon filling and a tall, fluffy meringue topping. This recipe focuses on techniques for a stable meringue that browns beautifully.
- Prep Time: 30 min
- Cook Time: 25 min
- Total Time: 55 min
- Yield: 8 servings
- Category: Dessert
- Method: Baking
- Cuisine: American
- Diet: Vegetarian
Ingredients
- 1 (9 inch) unbaked pie crust
- 1 1/2 cups granulated sugar
- 1/3 cup cornstarch
- 1/4 teaspoon salt
- 1 1/2 cups cold water
- 4 large egg yolks, lightly beaten
- 1/2 cup fresh lemon juice
- 1 tablespoon lemon zest
- 2 tablespoons unsalted butter
- 4 large egg whites, at room temperature
- 1/4 teaspoon cream of tartar
- 1/2 cup granulated sugar (for meringue)
Instructions
- Preheat your oven to 350°F (175°C). Bake the pie crust according to package directions or your preferred method until lightly golden. Let it cool completely.
- For the tangy lemon filling, whisk together 1 1/2 cups sugar, cornstarch, and salt in a medium saucepan. Gradually whisk in the cold water until smooth.
- Place the saucepan over medium heat. Cook, stirring constantly, until the mixture thickens and boils. Boil for one minute, stirring continuously. Remove from heat.
- In a separate bowl, whisk the egg yolks lightly. Slowly temper the yolks by whisking about one cup of the hot sugar mixture into the yolks. Then, pour the tempered yolk mixture back into the saucepan with the remaining hot mixture.
- Return the saucepan to medium heat. Cook, stirring constantly, until the filling comes to a boil again. Boil for one minute. Remove from heat immediately.
- Stir in the lemon juice, lemon zest, and butter until the butter melts completely. Pour this zesty lemon filling into the cooled, prebaked pie crust.
- For the fluffy meringue topping, place the room temperature egg whites and cream of tartar in a clean, grease-free mixing bowl. Beat with an electric mixer on medium speed until soft peaks form.
- Gradually add the 1/2 cup of sugar, one tablespoon at a time, beating well after each addition. Increase the mixer speed to high and beat until stiff, glossy peaks form. This creates your no weep lemon meringue.
- Spread the meringue evenly over the hot lemon filling, making sure the meringue touches the edge of the crust all around to prevent shrinking. Create decorative swirls with the back of a spoon.
- Bake for 12 to 15 minutes, or until the meringue is golden brown. Watch closely to prevent burning.
- Cool the pie completely on a wire rack for at least 4 hours before slicing. This helps the filling set properly.
Notes
- For a stable meringue that resists weeping, make sure your mixing bowl and whisk attachments are completely free of any grease or egg yolk residue.
- Use fresh lemon juice and zest for the brightest flavor in your tangy lemon filling.
- If you want a quicker finish, you can brown the meringue using a kitchen torch instead of baking it.
Nutrition
- Serving Size: 1 slice
- Calories: 380
- Sugar: 45
- Sodium: 180
- Fat: 15
- Saturated Fat: 6
- Unsaturated Fat: 9
- Trans Fat: 0
- Carbohydrates: 60
- Fiber: 1
- Protein: 5
- Cholesterol: 85