

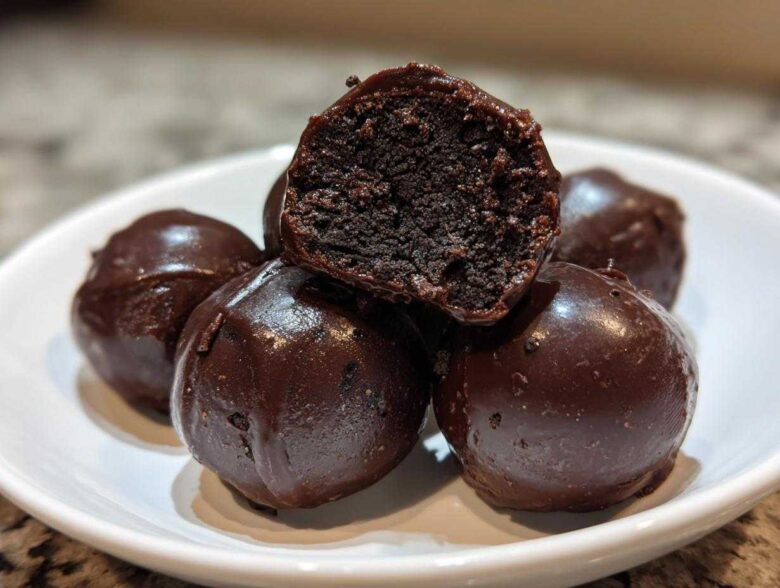
Okay, let’s be real: sometimes you need something utterly decadent, totally satisfying, but you’re looking at the clock and thinking, “I have zero time for baking.” That’s why these classic oreo balls are my absolute lifeline! Seriously, this is the easiest, no-bake recipe you will ever find. We are talking three ingredients, maybe twenty minutes of actual work, and BAM—you have a party-ready dessert. Whether it’s a last-minute school event or Christmas Eve when you realize you forgot a treat, this recipe always saves my bacon. You can check out more about how we share genuine recipes like this over at our about page.
Why This Classic Oreo Balls Recipe Works for Everyone
There’s just no beating the speed and payoff you get from these beauties. If you need quick Oreo desserts that taste like you slaved for hours, look no further. The best part is how few things you need to buy; these are true minimal ingredient desserts. I pull this out when I need something for unexpected guests, or even just a Tuesday night when I desperately need chocolate.
Readers constantly tell me this recipe turns them into heroes at potlucks because they deliver maximum decadence for practically zero effort. It really is foolproof, which is why I feel so confident sharing it with you.
The Appeal of No Bake Oreo Balls
The oven stays off, which is a huge win in the summer! Because there’s no baking involved, you’re only dealing with mixing and melting. That 3-ingredient magic means you probably have everything in your pantry right now. Pulling this together is less about baking and more about fast assembly, honestly.
Perfect Oreo Balls for Parties and Gatherings
These are designed to be brilliant bite sized desserts. They look so neat and professional, especially when dipped in shiny chocolate. My favorite trick is making the whole batch the day before and chilling them overnight. They firm up even better, and then you just set them out when the party starts. Total lifesaver for busy hosts!
Gathering Ingredients for Your 3 Ingredient Oreo Balls
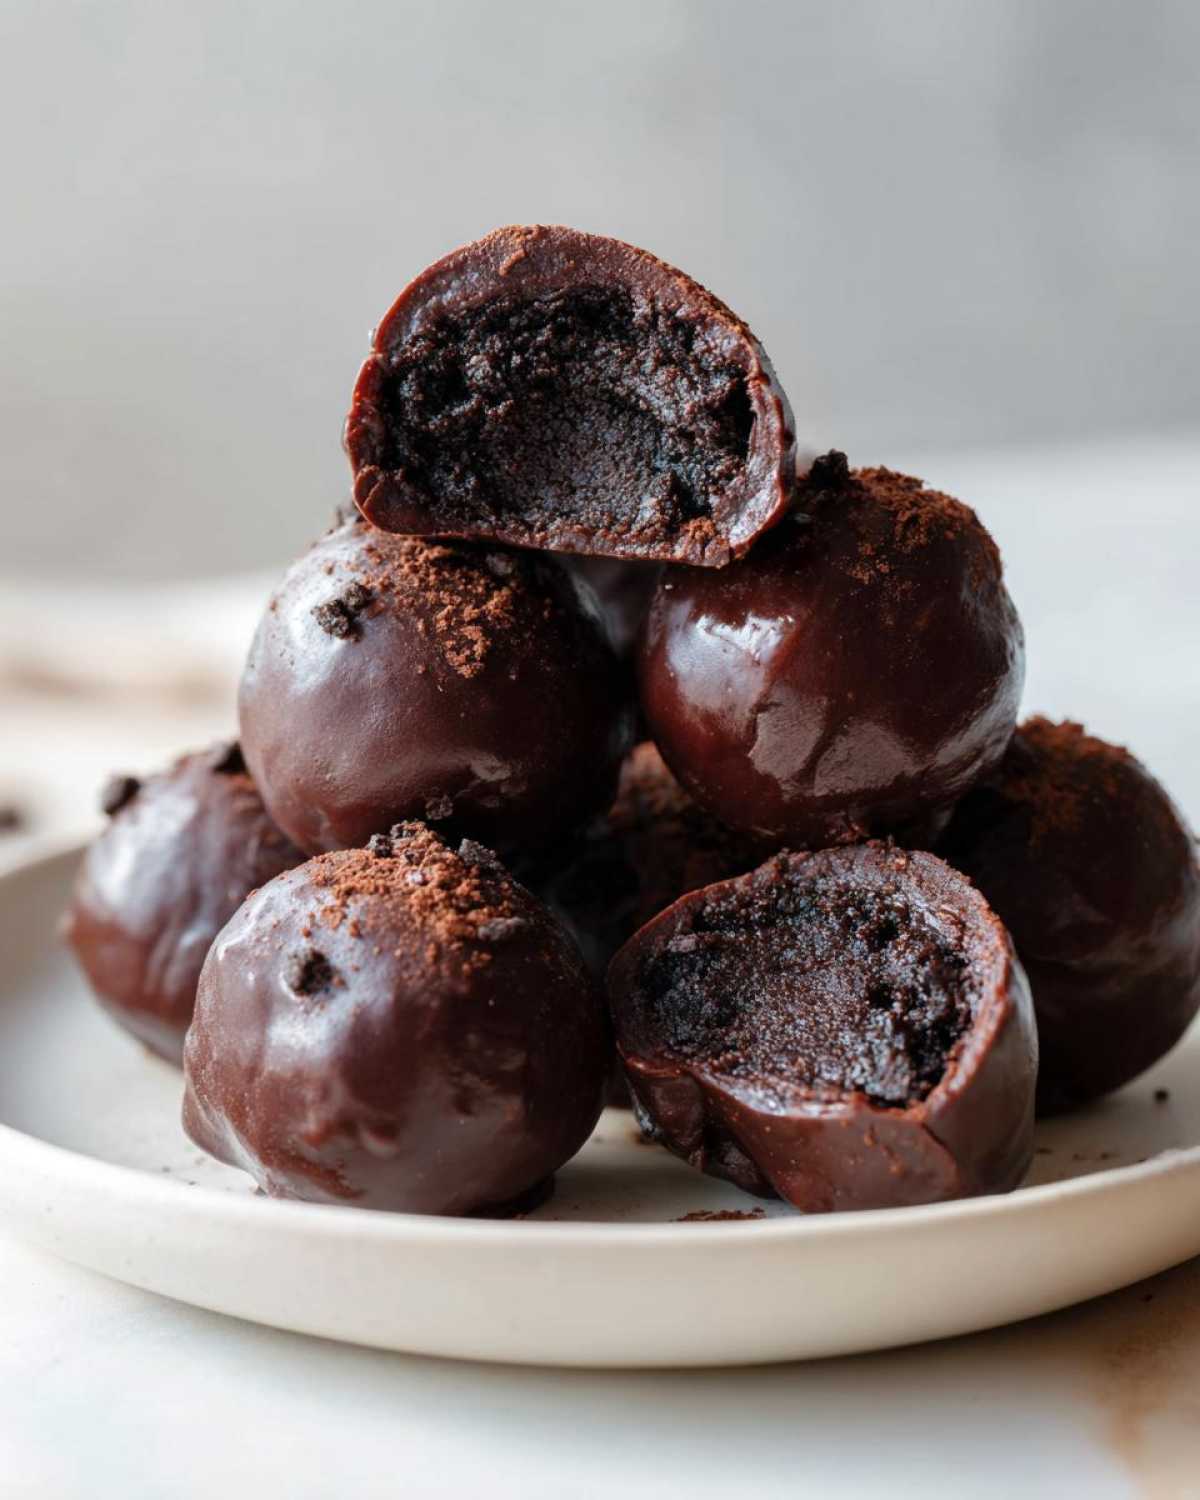
Now, this is where the magic starts, and I have to stress clarity here because success relies on having these things just right. We keep this list tiny because, honestly, who needs five different things for the absolute best Oreo Balls Recipe? Having everything measured and ready to go makes the process fly by. Trust me, having that cream cheese exactly the right temperature makes all the difference in the world; otherwise, you end up fighting the crumbs!
Here is exactly what you need to grab from the pantry and fridge:
- 1 package (14.3 oz) Oreo cookies (Whole package, including that wonderful white filling!)
- 8 oz cream cheese, softened completely
- 16 oz semi-sweet chocolate, melted for dipping
Ingredient Notes and Substitutions for Oreo Balls
Let’s talk quality control. You absolutely must use softened cream cheese. If it’s cold, it will just tear the cookie crumbs apart, and you’ll end up with a crumbly mess instead of a smooth dough. I usually pull mine out about an hour before I plan to mix.
When it comes to the chocolate coating, semi-sweet is the classic, but if you prefer it richer, go for dark chocolate chips. Milk chocolate works too, but it gets a little soft faster at room temperature. If you’re out of Oreos, you *could* use other sandwich cookies, but I really think the specific OREO structure provides that signature texture we’re looking for in these Cream Cheese Oreo Balls. Stick to the plan for the first time, and you won’t regret it!
Step-by-Step Guide: How to Make Easy Oreo Truffles
Alright, here’s the real meat of the process. Don’t let the word ‘truffles’ scare you; if you can stir a bowl, you can make these amazing Easy Oreo Truffles. We’re moving fast here, but remember, they need downtime to chill before we get to the fun part—the chocolate dip! Pay close attention to the chilling times; they are non-negotiable if you want perfectly coated oreo balls. I always make sure to review our site policies, like the disclaimer, before sharing essential baking advice, just to make sure everything is clear for you!
Preparing the Oreo Cookie Base for Your Oreo Balls
First things first, we need crumbs! If you have a food processor, this is its moment to shine. Just dump the whole package of Oreos in there—filling and all—and pulse until they look like fine dirt. Don’t overdo it until it’s powder; we want just fine crumbs. What if you don’t have a fancy gadget? No problem! Toss those cookies into a heavy-duty zip-top bag, seal it up tight (maybe double bag it, just in case!), and use a rolling pin or the bottom of a heavy pan to smash them until they are finely crushed. Once you have those crumbs, dump them into a medium bowl. Next up, add that softened 8-ounce block of cream cheese. Now, you mix! You can use a hand mixer to keep things cleaner, but honestly, I just dive in with clean hands. You need to work it all together until it’s completely uniform and looks like dark, sweet cookie dough. If it’s crumbly, your cream cheese was too cold, but just keep squeezing until it starts holding together.
Chilling and Shaping the Cream Cheese Oreo Balls
This stage is crucial for success, so don’t skip it! Take spoonfuls of that dough and roll them gently between your palms into little spheres. I aim for about 1 inch across—think perfect little bite-sized rounds. Place all your rolled No Bake Oreo Balls onto a baking sheet lined with parchment paper. Why parchment? Because we don’t want them sticking when they firm up!
Now, into the fridge they go for at least 30 minutes. This chilling step is the secret sauce! When the cream cheese mixture is nice and firm, it won’t fall apart or melt when it hits the warm chocolate. If you try to dip them warm, you’ll just end up with sad, chocolate-covered smears instead of beautiful, coated balls. I usually make my dough, chill for 30 minutes, and then use that time to melt my chocolate. It times out perfectly!
Coating the Oreo Balls in Smooth Chocolate
Time for the grand finale! Melting the chocolate requires patience—don’t rush this or you’ll seize it up. Put your 16 ounces of semi-sweet chocolate in a microwave-safe bowl. Heat it in short bursts: 30 seconds at a time. Stir well after every 30 seconds, even if it doesn’t look melted yet. Keep stirring until it’s silky smooth. This method prevents burning and keeps the chocolate shiny.
Take your chilled balls out of the fridge. Drop one into the melted chocolate, and use a fork—yes, a plain dinner fork—to roll it around until it’s completely submerged. Lift the fork, let the excess chocolate drip back into the bowl for a few seconds, and then gently slide the coated oreo balls back onto your parchment-lined sheet. Repeat until every single one is dipped. Then, we chill them again! Pop the whole tray back into the fridge for at least an hour so that beautiful chocolate shell can set hard. Remember that delicious tip I shared about adding sprinkles? Now is the time to do it, right before the chocolate fully hardens!
Tips for Perfect Chocolate Coated Oreo Bites
Even the easiest recipe can use a few tricks to make it look like you hired a professional pastry chef! Since these are such simple little Easy Homemade Candy treats, consistency is key, especially with that chocolate coating. If your chocolate seems too thick after melting, don’t panic! You can thin it just a tiny bit by stirring in a teaspoon of coconut oil or unsalted butter. This helps it flow smoothly around the chilled truffle, giving you a thinner, prettier shell.
Another thing to watch out for is condensation. If you take those cold No Bake Chocolate Truffles right out of the fridge and immediately dunk them into chocolate, you might get little sweat beads forming under the coating later on. It’s better if you let them sit on the counter for about five minutes while you finish melting the chocolate, just long enough to take the intense chill off.
And if you want to make them truly special for the holidays? Grab some crushed peppermint sticks or festive sprinkles! As soon as that ball comes out of the chocolate dip, just roll the bottom lightly in the topping. They look so vibrant on a platter, and everyone loves a little festive sparkle on their treats!
Storage and Reheating Instructions for Oreo Dessert Balls
So, you’ve got all these glorious Oreo Dessert Balls and there are just too many for one sitting, right? Don’t you dare put them on a plate uncovered! The key to keeping these perfect little delights firm is an airtight container. I stack mine between layers of wax paper or parchment paper so the chocolate doesn’t stick together.
They stay wonderful in the refrigerator for about two weeks easily. Since they have that cream cheese center, keeping them chilled is important for texture and safety. If you need them for longer, freezing is fantastic; they actually taste great semi-frozen like little ice cream bites!
Serving Suggestions for Your Decadent Oreo Treats
When it comes time to serve these incredible Decadent Oreo Treats, presentation really makes them look extra fancy! They are perfect little Party Dessert Ideas because you can get quite creative with how you display them. I always arrange them on a tiered cake stand surrounded by fresh raspberries—the bright red against the dark chocolate is stunning!
If you used crushed nuts or peppermint on top, serving them on a crisp white platter really makes those colors pop. For bigger events, sometimes I just stand them up inside the cups of a chocolate-lined muffin tin. It keeps them neat and easy for guests to grab as they mingle!
Frequently Asked Questions About Oreo Balls Recipe
I always get the same handful of questions when people first try the Oreo Balls Recipe, which is totally normal when you’re dealing with Easy Homemade Candy! I’ve collected the most common ones right here to make sure your first batch turns out flawless. Don’t hesitate to reach out if I missed something—you can always find my contact details here.
Can I make Oreo Balls without cream cheese?
Oh, I wouldn’t advise it, honestly! The cream cheese is the glue that holds the entire universe of the No Bake Oreo Balls together. It provides the necessary moisture and tang that keeps them from tasting like dry cookie dust mixed with chocolate. If you skip it, you’re basically just making crushed cookies. If you have an allergy or strong aversion to dairy, you might be able to experiment with a stiff cashew cream cheese substitute, but for this classic version, the cream cheese is mandatory for binding!
Are these Oreo Balls safe to freeze?
Absolutely! Freezing is one of my favorite ways to prep for big holidays like Christmas. You can freeze the finished, coated Chocolate Oreo Bites for up to three months. Just make sure they are in that airtight container with layers of wax paper so the chocolate doesn’t get scratched up. When you want to serve them, pull the container out of the freezer and let them thaw on the counter for about 20 minutes before serving. They come out tasting like they were just made!
Estimated Nutritional Data for Classic Oreo Balls
Now, I know some folks track calories, and some just want to know the general damage these little bites do—spoiler alert: they’re decadent! I always like to give a rough idea of what you’re looking at per treat. Remember, because this is a proprietary recipe mix (and I didn’t measure out every single gram of fat in the cream cheese frosting!), these numbers are ballparks. They are based on using standard Oreo cookies and semi-sweet chocolate chips, and the serving size is one of those perfect little 1-inch balls.
When you are looking at the breakdown, just remember these are meant to be treats, not diet food! For reference, if you were checking out the fine print, I always reference our terms and conditions when discussing estimated data like this.
Here is what I calculate for one single, glorious ball:
- Serving Size: 1 ball
- Calories: 150
- Fat: 10g
- Saturated Fat: 6g
- Carbohydrates: 15g
- Sugar: 15g
- Protein: 2g
- Cholesterol: 15mg
See that high sugar count? That’s the joy of the cookie and the chocolate doing its job! Don’t stress too much about every single number, though. The real nutrition is in the joy they bring when you share them. If you’re looking to adjust macros, swapping out milk chocolate for dark chocolate will drop the sugar slightly, but honestly, why mess with perfection?
Share Your Experience Making These Easy Oreo Desserts
Okay, I’ve spilled all my secrets for making the ultimate, can’t-mess-it-up oreo balls. Now, it’s your turn! I genuinely want to know how these little gems turned out for you. Did you stick to the classic three ingredients, or did you get adventurous with the chocolate coating? Maybe you tried sprinkling them with sea salt or using the holiday mix-ins I mentioned?
Please, please, please leave me a star rating right down below. That feedback helps other busy bakers decide if this lightning-fast dessert is right for their next gathering. It only takes a second! And if you shared pictures of your finished treats on social media, tag me! I love seeing your creations and celebrating your success with these Quick Oreo Desserts.
If you have any lingering questions about ingredient swaps or storage—or if you just want to tell me how many you ate in one sitting (I won’t judge!)—drop a comment in the box. Your experience helps build this community! And just a friendly heads-up regarding any site functionality, you can always check out the privacy policy if you’re curious about how we handle all your wonderful comments and shared stories.
PrintEasy 3-Ingredient No-Bake Oreo Balls

Make classic, decadent Oreo truffles using only three ingredients. This no-bake recipe is fast and perfect for parties or quick desserts.
- Prep Time: 20 min
- Cook Time: 5 min
- Total Time: 55 min
- Yield: About 30 balls
- Category: Dessert
- Method: No Bake
- Cuisine: American
- Diet: Vegetarian
Ingredients
- 1 package (14.3 oz) Oreo cookies
- 8 oz cream cheese, softened
- 16 oz semi-sweet chocolate, melted
Instructions
- Place all Oreo cookies, filling included, into a food processor. Pulse until you have fine crumbs.
- Transfer the crumbs to a medium bowl. Add the softened cream cheese.
- Mix the crumbs and cream cheese together using a hand mixer or clean hands until fully combined and a dough forms.
- Roll the mixture into small balls, about 1 inch in diameter. Place them on a parchment-lined baking sheet.
- Chill the balls in the refrigerator for at least 30 minutes to firm up.
- Melt the semi-sweet chocolate in a microwave-safe bowl in 30-second intervals, stirring between each interval until smooth.
- Dip each chilled Oreo ball into the melted chocolate, ensuring it is fully coated. Use a fork to lift the ball out.
- Return the coated balls to the parchment-lined sheet.
- Refrigerate the finished Oreo balls for at least 1 hour, or until the chocolate coating is set.
Notes
- If you do not have a food processor, place the cookies in a sturdy zip-top bag and crush them thoroughly with a rolling pin.
- For a festive look, sprinkle crushed peppermint or colored sprinkles over the chocolate coating before it sets.
- If the cream cheese is too cold, the mixture will be crumbly. Allow it to sit at room temperature for 30 minutes before mixing.
Nutrition
- Serving Size: 1 ball
- Calories: 150
- Sugar: 15
- Sodium: 75
- Fat: 10
- Saturated Fat: 6
- Unsaturated Fat: 4
- Trans Fat: 0.1
- Carbohydrates: 15
- Fiber: 0.5
- Protein: 2
- Cholesterol: 15