

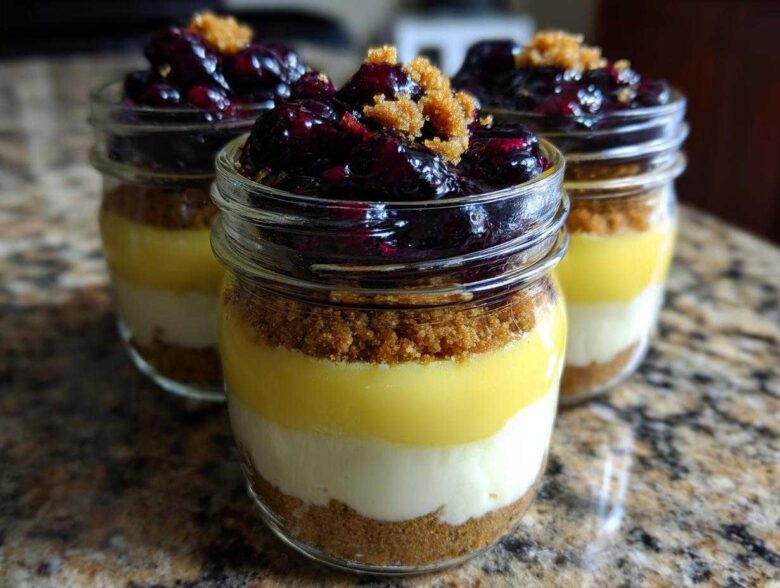
Oh my gosh, are you tired of trying to wrestle an entire cheesecake out of a springform pan? I know I am! Sometimes you just want a perfect little portion wrapped up and ready to go, especially when the weather gets warm and you’re thinking about picnics. Well, I’ve cracked the code for the ultimate grab-and-go treat. We are talking about bright, zesty, creamy perfection layered with sweet, juicy berries. Meet my go-to recipe for Lemon Blueberry Cheesecake Jars! Trust me when I say making cheesecake in jars is just easier, cleaner, and stops me from stress-eating the entire thing before dessert even starts. It’s just genius, honestly. If you want more simple recipes like this one, head over and check out my main recipe index!
Why You Will Love These Lemon Blueberry Cheesecake Jars
Seriously, these little desserts changed my life. They take all the fancy flavor of a classic baked cheesecake and make it idiot-proof. You don’t even need your oven! Here’s why I think you should stop what you’re doing and make these right now:
- They are the definition of perfect Individual dessert jars. No slicing, no fuss, just grab a spoon!
- That flavor combination! The lemon is bright and tangy, but the sweet blueberry swirl keeps it perfectly balanced. It’s pure summer captured in glass.
- Since they are No bake layered trifles (of sorts!), you can whip up the recipe in about 30 minutes of active time.
- Make-ahead heaven! Seriously, these only get better overnight in the fridge, making them perfect for parties.
- Single serve desserts mean portion control for me… or maybe just the guarantee that everyone gets a perfect, fully-layered jar.
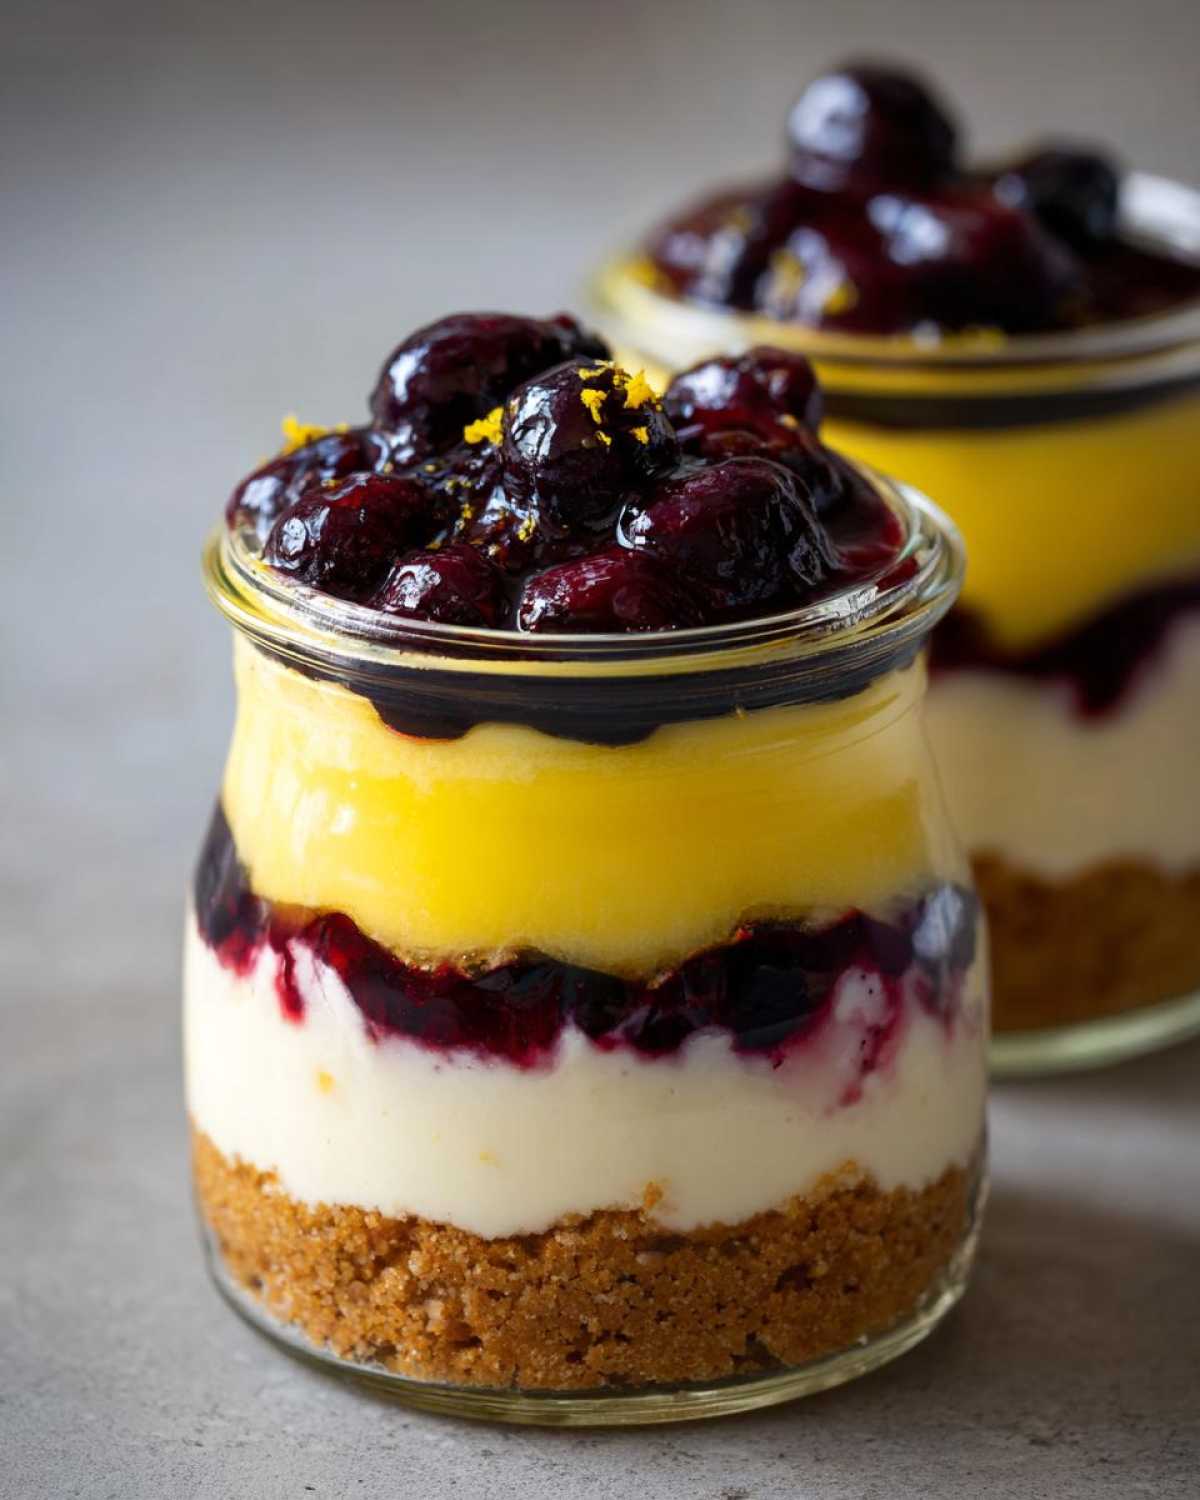
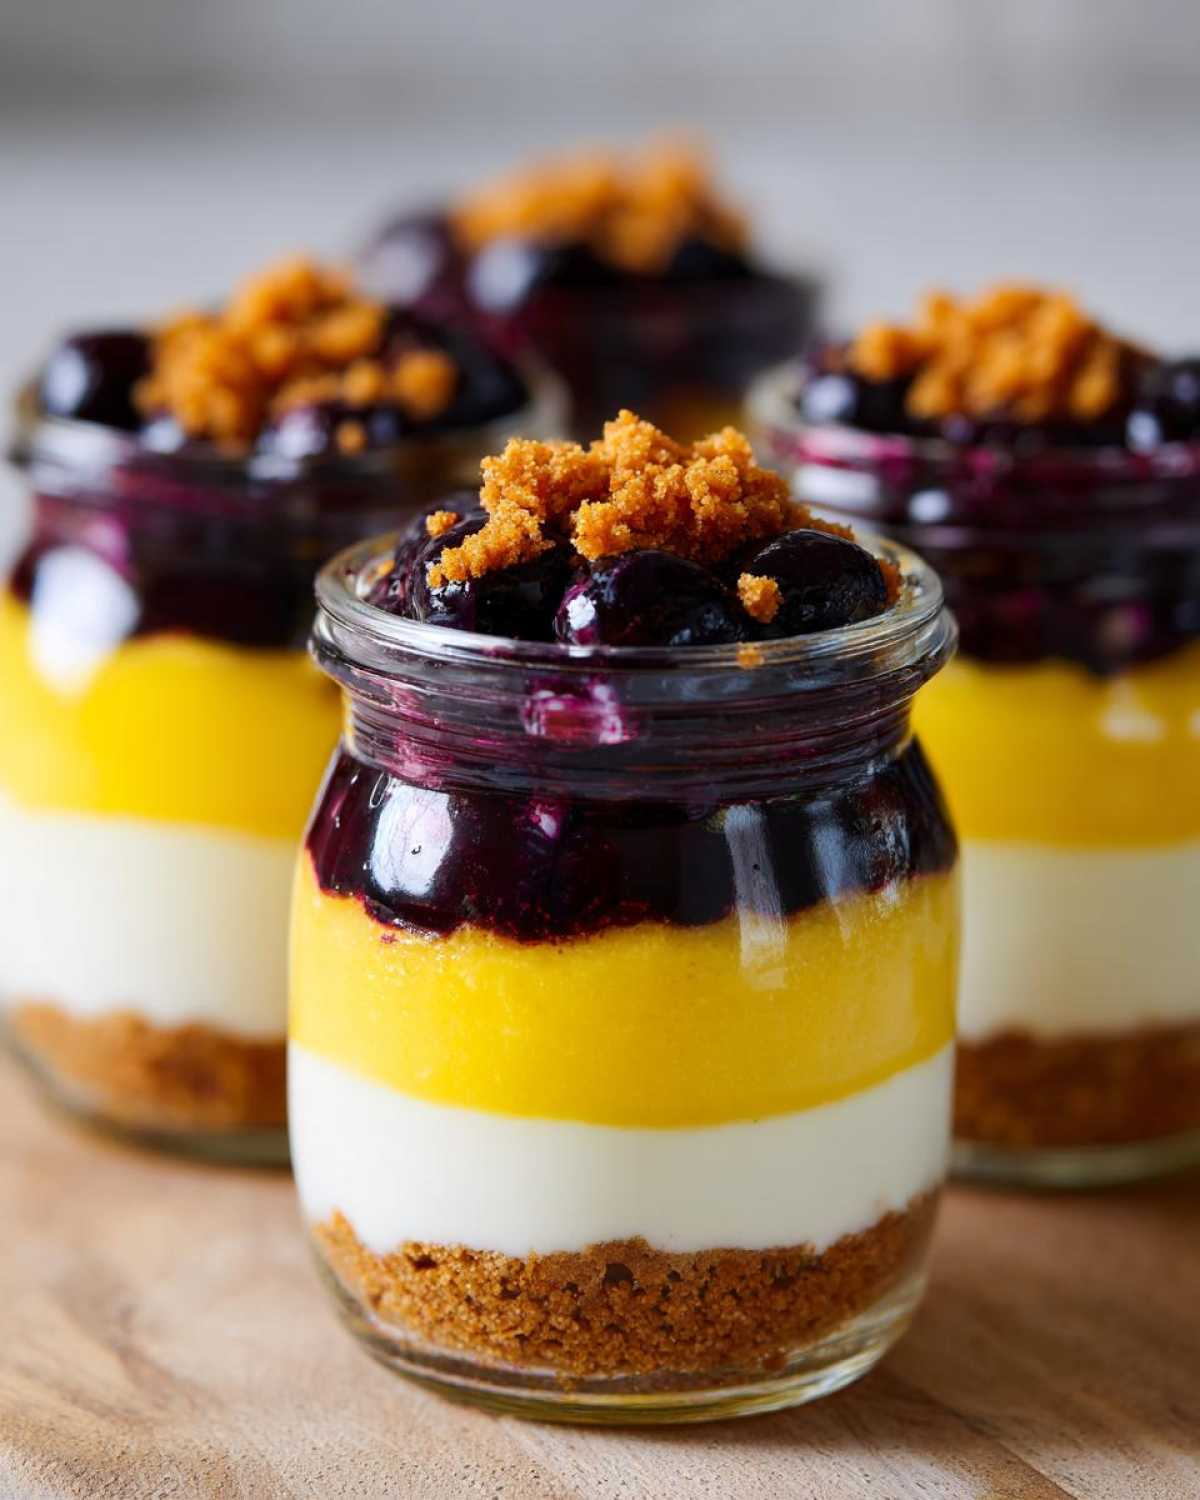
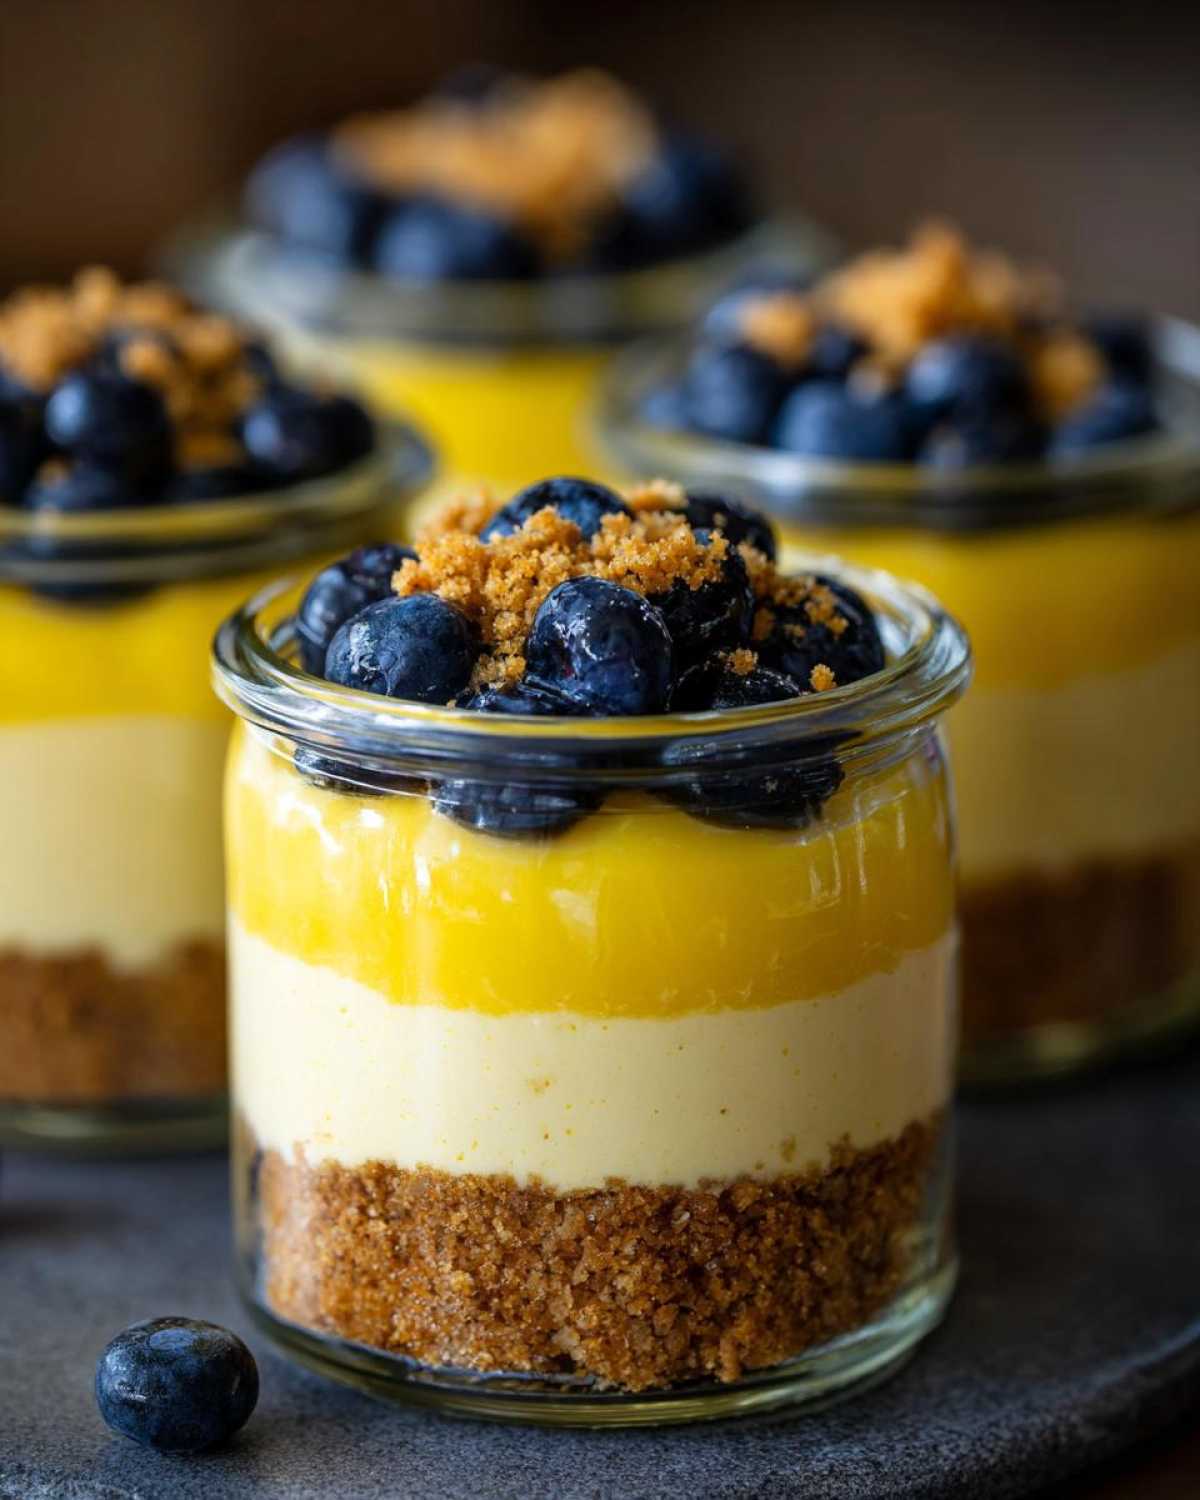
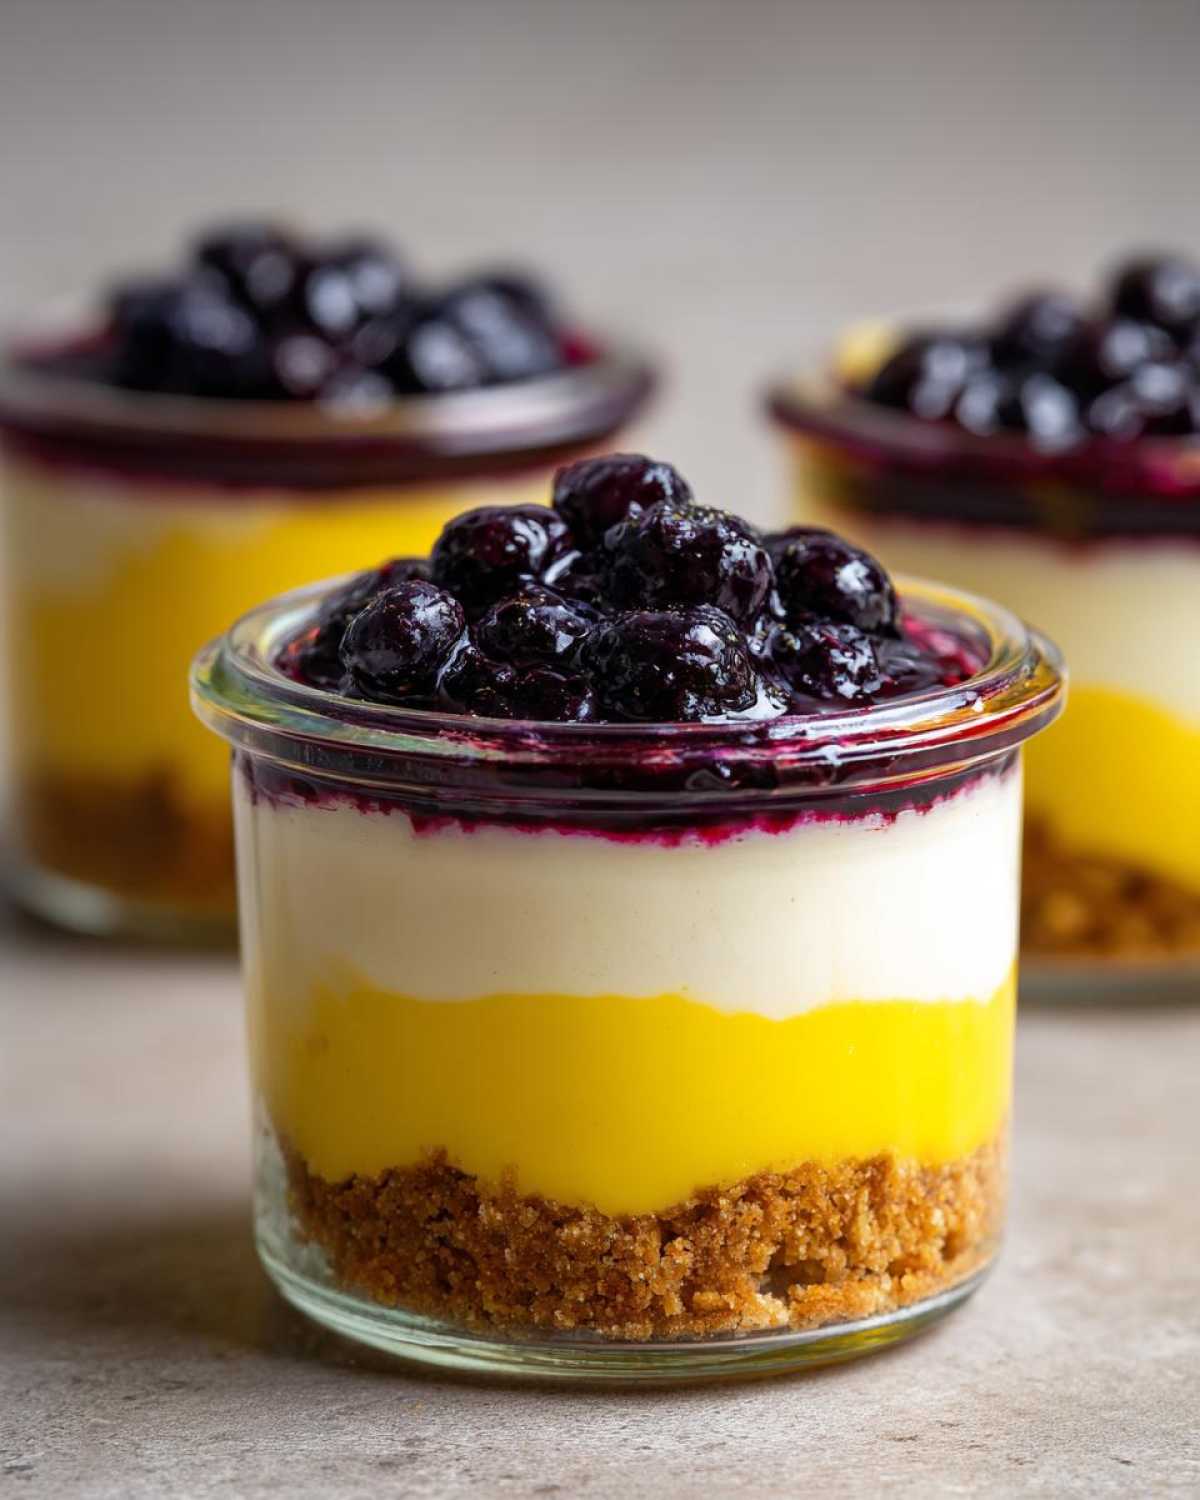
- They look incredible! The distinct bottom crust, the creamy middle, and the rich blue topping—it’s all stacked up beautifully, begging to be photographed.
- They travel like a dream! You can pop these straight into a cooler for a Picnic desserts no bake situation. Check out my tips for handling other fruit desserts here!
Gathering Ingredients for Your Lemon Blueberry Cheesecake Jars
Okay, grabbing the ingredients is almost as fun as eating the final product! Since we aren’t turning on the oven, we have to make sure everything is top-notch for that amazing creamy texture. This recipe is built in three strong parts: the sturdy crust, the bright filling, and that gorgeous blueberry crown. Pay attention to your cream cheese; it absolutely has to be softened perfectly for this to work!
Go ahead and pull out your list; here’s exactly what you need for four perfect servings. If you want to see how I make my famous blueberry muffins, check out this great related recipe!
For the Graham Cracker Crust
- 1 1/2 cups graham cracker crumbs
- 1/4 cup granulated sugar (yes, we need a little sugar for the base!)
- 6 tablespoons unsalted butter, melted
For the Creamy Lemon Filling
This is where the magic happens! Notice we use both lemon juice and zest for that double whammy of citrus flavor. Remember, the cream cheese needs to be fully softened—I mean, room temperature soft—so it beats up beautifully without lumps. If you want another fantastic lemon recipe, my lemon loaf is unforgettable.
- 16 ounces cream cheese, softened
- 1 cup powdered sugar
- 1/2 cup heavy whipping cream
- 1/4 cup fresh lemon juice
- 1 teaspoon lemon zest
For the Fresh Blueberry Topping
We cook this down just slightly so it thickens nicely without turning into jam. Using fresh blueberries is a must here; they burst perfectly and give you that genuine summer taste.
- 1 pint fresh blueberries
- 1/4 cup granulated sugar
- 1 tablespoon water
Step-by-Step Instructions for No Bake Cheesecake Jars
I love that these Lemon Blueberry Cheesecake Jars come together so fast! Since we rely on chilling to set the texture—not baking—timing those chill moments is key. We build this up slowly, layer by layer, so don’t rush the fridge time, okay? If you’re looking for other grab-and-go ideas, take a peep at my favorite make ahead desserts in a jar post!
Preparing the Crust and Assembling the Base Layer
First things first, we build our sturdy graham cracker base! Just mix those crumbs, the first measure of sugar, and the melted butter right in a bowl until everything looks sandy and damp. Then, grab your four 8-ounce jars. You’re going to press about two tablespoons of that mixture right into the bottom of each one. We want a nice compact base! Pop those jars into the fridge while you work on the creamy part—just 10 minutes lets them firm up nicely.
Creating the Creamy Lemon Filling for Lemon Blueberry Cheesecake Jars
Time for the stars of the show! Make sure that cream cheese is super soft, then beat it until it’s unbelievably smooth. Slowly, drizzle in that powdered sugar. Now here’s the expert tip for the creamiest texture ever: whip that heavy cream separately until you get those soft peaks. You must gently fold the whipped cream into the cream cheese mixture—don’t stir aggressively, or you’ll deflate all those beautiful air bubbles! Finally, mix the lemon juice and zest in until it’s just combined. If you love cream cheese in everything, you have to try my amazing cream cheese brownies next!
Layering and Cooking the Blueberry Topping
Grab those chilled crusts! Spoon or pipe half of your beautiful lemon filling evenly over the crusts in the four jars and send them back to hang out in the cold. While those are setting, it’s time for the topping. Put your blueberries, the second measure of sugar, and water into a tiny saucepan. Let it simmer over medium heat for about 5 to 7 minutes. Stir it gently until the berries soften just a little and the sauce thickens up. This is critical: you must let this topping cool completely before you use it, otherwise, it melts the cheesecake layer!
Final Assembly and Chilling of Lemon Blueberry Cheesecake Jars
Once that blueberry topping is totally cool—I mean room temp cool—it’s time for the final assembly. Top each jar with the rest of that luscious lemon filling you made. Then, spoon that wonderfully thick blueberry topping right over the second layer of filling. Now comes the hardest part: waiting! These need at least 4 hours in the refrigerator to get firm enough to eat with a spoon. If you’re planning ahead, these are just as good the next day, maybe even better! For more make-ahead favorites, don’t forget to look at my no-bake peanut butter pie recipe.
Tips for Perfect Lemon Blueberry Cheesecake Jars
Even though this is a no-bake recipe, there are a few little secrets I’ve picked up over making these over and over that ensure you get that restaurant-quality texture, every single time. Texture is everything when you’re dealing with no bake cheesecake jars, right?
Keep these points in mind as you gather your supplies; they make a huge difference in the final result. Speaking of great results, if you’re looking for another flawless recipe with reliable outcomes, you simply must check out my best chocolate chip cookie recipe!
- Don’t feel tied down to graham crackers! If you’re out or just want a switch, I often use vanilla wafers—they work just as wonderfully for the crust base. Shortbread cookies are another super luxurious substitute; they add a nice buttery snap.
- If you want that blueberry topping to be extra thick—maybe you’re serving these outside on a hot day and need it to hold up—just give it a few extra minutes simmering on the stove. Don’t let it become jam, but just cook until it coats the back of a spoon nicely.
- The lemon has to be fresh, period. If you try to use the stuff from the little plastic lemon that sits in your fridge door, it just won’t have that essential sparkle! The zest adds those necessary fragrant oils that really make these citrus dessert jars sing.
- Chill time is not waiting time. I know it’s tempting to eat them after an hour, but that full 4-hour chill time (or even overnight!) is what allows the heavy cream and cream cheese to solidify. Rushing this step gives you soup instead of cheesecake. No one wants that!
- These stay great for days, which is amazing for meal prepping those easy layered desserts! Make sure the lids are sealed tight when you store them.
Storage and Make Ahead Instructions for Lemon Blueberry Cheesecake Jars
This is seriously where these Lemon Blueberry Cheesecake Jars shine the brightest, folks. Because they are no-bake and already portioned out, they are basically the champion of make-ahead party plans. Forget the stress of trying to slice a full cake! You can whip these up way ahead of time.
If you’re big on weekly meal prep for desserts or trying to get ahead for a big brunch, these are your new best friend. I often make a double batch because they disappear fast, and the best part? They stay perfectly fresh. Check out my methods for prepping other items, like these easy egg bites, which are great for portability too!
Listen, these single-serve desserts keep really well in the refrigerator for up to three days. Three whole days of perfect, creamy, lemony goodness just waiting for you! Just make sure you put the lids on tight after the final chill time settles in. The acidity from the lemon actually helps keep everything tasting bright even on day three. That stability is exactly why they are such brilliant make ahead desserts in a jar.
If you need them to last longer than that, you could freeze them, but I don’t usually recommend it for this recipe. Why? Because the texture of the whipped cream filling can get a little weird once it thaws out. For the absolute best flavor and that dreamy creamy texture, aim to eat them within 48 to 72 hours of assembling them!
Serving Suggestions for Citrus Dessert Jars
Since these Lemon Blueberry Cheesecake Jars are rich and creamy on their own, you don’t need a huge spread to go along with them. They really shine when paired with something light and refreshing, almost like a palate cleanser beside them. I always lean toward the brighter side of things when serving these, especially since they fit so perfectly into that picnic vibe we talked about!
Think about keeping the sides simple and fresh. You want whatever you serve alongside them to highlight that amazing tartness of the lemon, not fight against it. I especially love taking these out to outdoor gatherings because they are already contained—a true win for any Picnic desserts no bake situation!
If you’re looking for a great savory side that cuts through the richness of the cheesecake, you have to try this amazing recipe for watermelon salad. The saltiness of the feta and the crispness of the melon are just heavenly next to the creamy citrus base!
Here are a few other ideas for building out your individual dessert presentation:
- A simple shortbread cookie: Forget dipping; these citrus dessert jars are fantastic with a dry, buttery shortbread cookie balanced right against the rim of the jar.
- Fresh mint garnish: Seriously, this is my favorite finishing touch. A tiny sprig of fresh mint just brightens up the entire presentation visually and aromatically before you dig in.
- A side of light fruit salad: If you need more fruit, stick to things that won’t overwhelm the blueberry flavor, like sliced kiwi or perhaps some very pale green grapes.
- For the coffee lover: A strong, cool espresso or a simple iced black tea is the perfect grown-up pairing for these rich, portion controlled cheesecake servings.
Frequently Asked Questions About Lemon Blueberry Cheesecake Jars
It’s normal to have a few questions when you’re trying out a new format, even if it’s super simple like these Lemon Blueberry Cheesecake Jars! I’ve gathered up the ones I hear most often from friends who are trying this recipe for the first time. Usually, it’s all about the texture or how to prepare them for parties!
I swear, once you try making your next batch of easy layered desserts this way, you’ll never go back to the big pan! If you’re interested in more layered goodness, check out the tips in my layered desserts post!
Can I bake these Lemon Blueberry Cheesecake Jars?
That’s a great question, but I really recommend sticking to the no-bake method here! This recipe is specifically engineered for a super smooth, firm texture achieved through chilling, which is why it’s so perfect as one of those no oven desserts. If you try to bake these in glass jars, you run a real risk of the glass cracking due to the temperature shock when you take them out. Plus, part of the charm of these individual dessert jars is that there’s absolutely zero effort once the ingredients are mixed! Keep it no-bake to keep it easy!
What size jars work best for these individual dessert jars?
For this specific recipe, I designed it perfectly for {Yield: 4 servings} using standard 8-ounce mason jars (the ones with the wider mouth are easiest to spoon into!). This size gives you a really nice depth for three distinct layers without being too overwhelming for one person. If you’re making these for my younger cousins, you might opt for 4-ounce jars; you’ll easily get 6 or 8 servings then, but just remember you’ll need to halve the amount of crust mix!
If you’re feeling super decadent, you could use 12-ounce jars, but you’ll probably want to double the entire recipe for those, as the layers might look a little thin otherwise. It’s all about that visual pop with these mason jar cheesecakes, remember?
Estimated Nutritional Breakdown for Portion Controlled Cheesecake
Now, I know we come to dessert to enjoy ourselves, not count every little crumb, right? But since these are already portioned out as perfect little portion controlled cheesecake servings, it’s super helpful to see exactly what’s in each jar. I used my standard measurements and the nutritional tools to figure this out, but remember, homemade ingredients can always vary!
This is just an estimate, of course—my sweet tooth tends to push the sugar a little higher maybe! But looking at this breakdown, it’s actually pretty reasonable for such a rich, creamy treat. Don’t sweat these numbers too much; just enjoy the fact that you made this amazing dessert yourself!
- Serving Size: 1 jar
- Calories: 550 (Worth every single one!)
- Sugar: 45g
- Fat: 35g
- Saturated Fat: 20g
- Carbohydrates: 55g
- Protein: 8g
- Cholesterol: 100mg
Keep in mind that these figures are based on the ingredients listed in the recipe, so if you use a different type of cookie for the crust or slightly different cream cheese, those numbers could shift a tiny bit. But hey, comparing this to a slice from that fancy bakery? I win every time with these Lemon Blueberry Cheesecake Jars!
Share Your Experience Making Lemon Blueberry Cheesecake Jars
Alright, my friends, now that you have tasted that incredible blend of zesty lemon and sweet, cooked blueberry, I absolutely need to know what you thought! Making these Lemon Blueberry Cheesecake Jars is so rewarding, but seeing how *you* customized them or how they survived your family picnic is the best part of having this blog.
Did you stick strictly to the recipe measurements? Or did you sneak in a little extra lemon zest because you love that bright tang? Maybe you swapped the graham crackers for Oreos—don’t worry, I won’t judge if you did! Let me know!
Seriously, drop a rating down below—give these jars a 5-star salute if they knocked your socks off! I always read every single comment, and your feedback really helps me know which recipes to feature next. It’s like we are all baking together, even if we are miles apart!
While you’re leaving your lovely comments, tell me specifically about the blueberry topping. Was it perfectly thick? Did it pool just right over that gorgeous creamy middle layer? If you loved these, you absolutely have to try my recipe for the classic Southern pecan pie next; it’s a totally different vibe, but just as beloved!
Go ahead, brag a little! And if you snapped a gorgeous photo of your finished individual dessert jars sitting on your porch swing or packed in a cooler, absolutely share it on social media and tag me! Nothing makes me happier than seeing my recipes come to life in your kitchens.
PrintNo-Bake Lemon Blueberry Cheesecake Jars
Prepare individual servings of creamy lemon cheesecake layered with fresh blueberry topping in small jars for an easy, make-ahead dessert.
- Prep Time: 25 min
- Cook Time: 7 min
- Total Time: 32 min
- Yield: 4 servings
- Category: Dessert
- Method: No Bake
- Cuisine: American
- Diet: Vegetarian
Ingredients
- 1 1/2 cups graham cracker crumbs
- 1/4 cup granulated sugar (for crust)
- 6 tablespoons unsalted butter, melted
- 16 ounces cream cheese, softened
- 1 cup powdered sugar
- 1/2 cup heavy whipping cream
- 1/4 cup fresh lemon juice
- 1 teaspoon lemon zest
- 1 pint fresh blueberries
- 1/4 cup granulated sugar (for topping)
- 1 tablespoon water
Instructions
- Combine graham cracker crumbs, 1/4 cup sugar, and melted butter. Press 2 tablespoons of this mixture into the bottom of four 8-ounce jars. Chill for 10 minutes.
- Beat the softened cream cheese until smooth. Gradually add powdered sugar, beating until fully incorporated.
- In a separate bowl, whip the heavy cream until soft peaks form. Gently fold the whipped cream into the cream cheese mixture.
- Stir in the lemon juice and lemon zest until just combined.
- Spoon or pipe half of the cheesecake filling evenly over the crust layers in the four jars. Return jars to the refrigerator.
- Make the blueberry topping: Combine blueberries, 1/4 cup sugar, and water in a small saucepan. Cook over medium heat for 5 to 7 minutes, stirring occasionally, until the berries soften slightly and the sauce thickens. Cool completely.
- Once the filling is set, top each jar with the remaining cheesecake filling.
- Spoon the cooled blueberry topping over the second layer of filling.
- Chill the jars for at least 4 hours, or until firm, before serving.
Notes
- You can substitute vanilla wafers or shortbread cookies for the graham crackers in the crust.
- For a thicker topping, simmer the blueberries for a few extra minutes.
- These desserts keep well in the refrigerator for up to three days.
Nutrition
- Serving Size: 1 jar
- Calories: 550
- Sugar: 45
- Sodium: 250
- Fat: 35
- Saturated Fat: 20
- Unsaturated Fat: 15
- Trans Fat: 0
- Carbohydrates: 55
- Fiber: 2
- Protein: 8
- Cholesterol: 100