

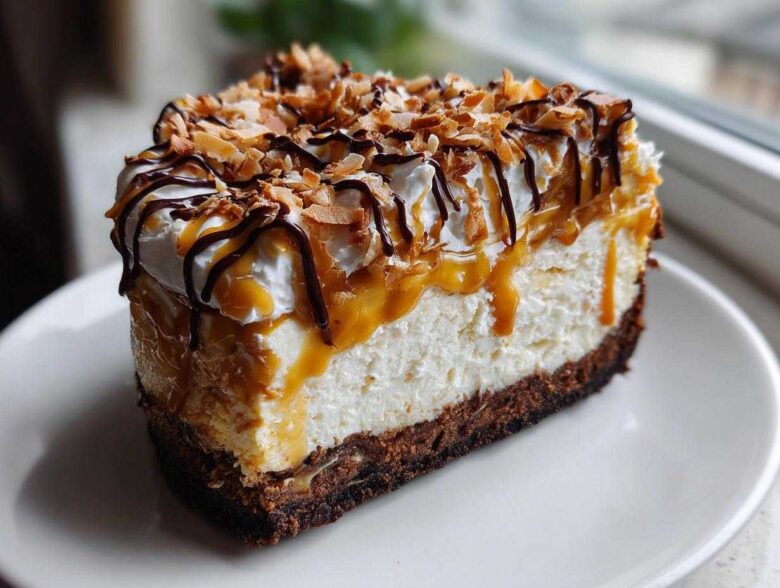
Oh my goodness, are you ever struck by that specific, urgent craving? You know the one—it needs chocolate, and nuts, and caramel, and something impossibly creamy, all stacked up pretty? Well, when that hits me, I don’t mess around. I go straight for my absolute favorite dessert invention: the **Samoa Cheesecake**! This isn’t some fussy, cracked-top baked monster; this is the ultimate no-bake dream, capturing every single magical flavor of those beloved Girl Scout cookies.
I first whipped this up for a friend’s surprise party because I needed something truly show-stopping but didn’t want to risk burning anything right before the guests arrived. Trust me, the deep, rich flavors of caramel, toasted coconut, and chocolate layered over that thick, cool cream cheese base make this the dessert everyone always asks about. It’s ridiculously indulgent, shockingly easy, and it’s the only way I want to eat cheesecake now. We’re linking to more about us here if you want to see who we are behind the apron! See why we love sharing recipes like this!
Why This No-Bake Samoa Cheesecake Recipe Works
Why bother putting this incredible dessert in the oven? Honestly, you don’t need to! The beauty of this no-bake **Samoa Cheesecake** is speed and guaranteed success. Since we aren’t messing with eggs, we skip the tricky oven steps completely. That means less stress for you and a perfectly smooth texture every time.
- It’s lightning fast to assemble—I can usually have it ready for the fridge in under 30 minutes of hands-on time.
- It’s an absolute dream for busy hosts; this is my secret weapon for an Easy Cheesecake for Parties.
- It delivers maximum flavor payoff with minimum effort, creating such a Creamy Layered Dessert.
Achieving the Perfect Texture in Your Samoa Cheesecake
For me, the non-negotiable is that silky, cool texture. Baked cheesecakes are good, sure, but they can sometimes get a little dense or, worse, cracked! Here, we rely on softened cream cheese beaten until fluffy, and then we gently fold in heavy cream that we’ve whipped separately. That whipped cream is the magic; it traps all the air and guarantees a lighter, almost mousse-like texture that sets up beautifully overnight. It is the key to that melt-in-your-mouth experience!
Essential Components for Your Samoa Cheesecake
Okay, let’s talk structure. To truly nail this **Samoa Cheesecake**, you have to respect the layers. It’s not just about mixing things; it’s about respecting what makes those cookies so addictive! We need three key players here—the crunchy foundation, the cool, tangy center, and that glorious, sticky topping. Get these three right, and you have a showstopper ready to go.
Understanding these elements proves you aren’t just throwing things in a pan; you know how the flavors need to interact for the ultimate experience. It’s the balance of textures that matters most!
The Chocolate Cookie Crust for Your Samoa Cheesecake
First up is the base, and for a true Samoa vibe, it has absolutely got to be chocolate. Forget plain graham crackers; we need the deep, slightly bitter crunch of chocolate cookies, like Oreos without the filling! You crush those babies up fine, mix them with just the right amount of melted butter, and then press. Pressing is crucial here—use the bottom of a measuring cup to pack that Oreo Crust Cheesecake down really firm. It holds everything up when you slice it later, so don’t be shy on the pressure, okay?
Crafting the Creamy Filling Base
Once the crust is chilling out, we move to the stars of the show: the filling! This MUST be smooth, and I mean glassy smooth. That starts and ends with using cream cheese that has been sitting out long enough to soften completely—if it’s cold, it will chunk up on you, trust me. We sweeten it simply with powdered sugar and vanilla, but the real volume comes from folding in that whipped heavy cream later. Keep that cream cheese beatings light and airy before you introduce the cream!
Ingredients for the Ultimate Samoa Cheesecake
Alright, here is everything we need to make this happen! Do not skip the chilling times, folks, because that’s what turns this into a sliceable, glorious **Samoa Cheesecake**. I’ve broken it down so you can organize your shopping list easily. Remember, the better the quality of your vanilla and chocolate chips, the richer the final result will be!
- For the Crust:
- 1 1/2 cups chocolate cookie crumbs (I use Oreos, wrappers and all if I’m feeling lazy, but scrape the cream filling out first!)
- 1/4 cup unsalted butter, melted (use real butter here, it tastes better!)
- For the Creamy Filling: (Make sure your cream cheese is truly soft!)
- 2 (8 ounce) packages cream cheese, softened
- 1 cup powdered sugar
- 1 teaspoon vanilla extract
- 1/4 cup heavy cream
- For the Topping Magic:
- 1 cup caramel sauce (store-bought is fine, but homemade is a treat!)
- 1 1/2 cups sweetened flaked coconut
- 1/2 cup semi-sweet chocolate chips
- 1 tablespoon coconut oil (this helps the chocolate drizzle stay smooth and glossy)
Step-by-Step Instructions for No-Bake Samoa Cheesecake
Now for the fun part—putting this absolute dream together! Since we are keeping this a no-bake version, the process is incredibly straightforward, but precision on the chilling times is what wins the day. You can find our full disclaimer if you want to double-check anything about using this process! Check out our process guidelines here. Get your springform pan ready, because we are moving fast!
Preparing the Crust and Toasting the Coconut
First things first, let’s build that foundation! You’re going to mix your chocolate cookie crumbs with the melted butter until it resembles wet sand—you should be able to squeeze a bit and have it hold its shape. Press that mixture really, really solidly into the bottom of your 9-inch springform pan. Pop that into the fridge to firm up for about 15 minutes while you prep the coconut. Toasting the coconut is crucial for flavor, but watch it like a hawk! Spread it in a single layer on a baking sheet and bake at 350°F for maybe five to eight minutes. It jumps from golden brown to burnt charcoal in like two seconds, so stay right there and pull it out when it just smells nutty and looks lightly toasted.
Assembling and Setting the Samoa Cheesecake Filling
While the coconut cools, make the filling. Beat that softened cream cheese until it’s lump-free—you want it like silk! Then beat in your powdered sugar and vanilla. The final step for that airy texture is whipping the heavy cream separately until it forms soft peaks. Now, gently fold that whipped cream into the cream cheese base. I mean *fold*, don’t stir! We want to keep all that air we just whipped in there! Pour this glorious mixture over your pre-chilled crust and smooth the top. This layer needs serious chill time—we schedule at least six hours, but honestly, overnight is best for a truly sliceable **Samoa Cheesecake**.
The Caramel and Chocolate Drizzle Finale
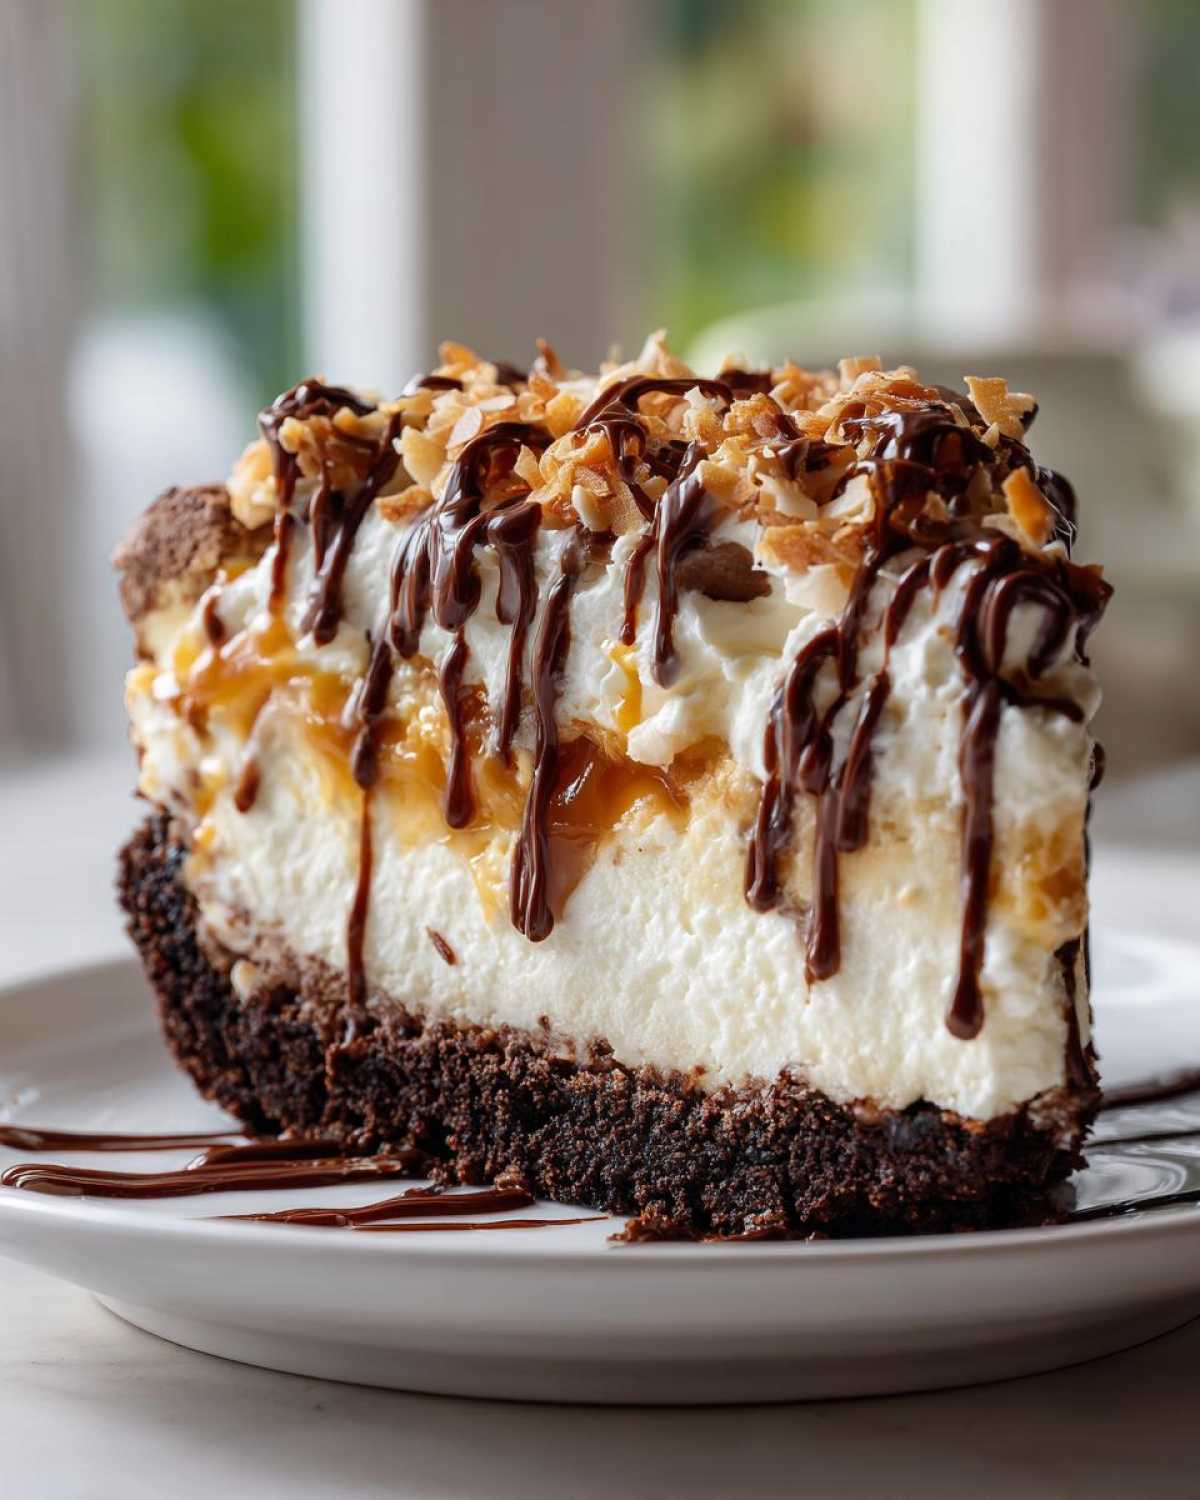
Once your cheesecake is totally set—give it a gentle poke to test!—it’s time for decoration. Melt your chocolate chips with that tablespoon of coconut oil. The oil is my little trick; it ensures the chocolate drizzle stays shiny and slightly soft when cold, instead of snapping off like a hard candy shell. Then, drizzle that heavenly homemade or store-bought caramel sauce all over the top. Sprinkle your toasted coconut evenly over the caramel layer while it’s still gooey. Finally, take your melted chocolate and drizzle it back and forth across the whole thing in a fun, haphazard pattern. Slice and serve this amazing **Caramel Coconut Cheesecake Recipe** cold!
Tips for an Exceptional Samoa Cheesecake
Even though this is technically a no-bake recipe, we still want it to be absolutely unforgettable! I’ve learned a few things over the years making this for holidays and birthdays—it always ends up being a centerpiece of any gathering, a real Showstopper Celebration Dessert. A few tweaks can take it from ‘great’ to ‘I need that recipe immediately!’ Trust me on these little tricks that help capture those perfect Homemade Samoa Cookie Flavors.
My number one personal tip? If you are using store-bought caramel sauce, warm it up just slightly before you pour it over the chilled cheesecake. It sounds too simple, but warming it a little thins it just so, allowing it to spread beautifully and settle into all those little dips and valleys in the coconut layer before it firms up again. It makes the finished look professional!
Ingredient Substitutions for Your Samoa Cheesecake
Look, sometimes you run into a craving, and your pantry doesn’t have exactly what I listed, but that’s okay! We adapt! If you don’t have chocolate cookies, you can absolutely use graham crackers for the crust, but I highly suggest mixing in about a tablespoon of cocoa powder with the butter to keep that chocolate tang present. It won’t be quite the same, but it works in a pinch!
Also, you do not have to stress about making caramel sauce from scratch—I use the jar stuff all the time! Just buy a good quality, thick salted caramel sauce. The salt is important; it cuts through the sweetness of the filling. Finally, if you are using pre-shredded coconut and don’t want to toast it, you can briefly microwave it for 45 seconds on high, stirring halfway through. It warms it up and pops the flavor, though toasting the real flavor boost!
Storing and Serving Your Decadent Samoa Cheesecake
Okay, the hard part is over—your **Samoa Cheesecake** is set and looks like a million bucks! Now we need to make sure it stays looking and tasting flawless until it hits the table. Since this is a no-bake recipe, storage is super simple, but you have to treat it right because that creamy filling doesn’t want to go near room temperature for too long!
You absolutely must keep this beauty chilled. Once it’s fully set in the fridge, cover the springform pan tightly with plastic wrap or foil. This stops it from absorbing any weird fridge smells—and believe me, cheesecake can soak up odors fast! Because we skipped the oven and eggs, this makes for such a wonderful Decadent Cheesecake Idea that stays fresh for days.
I find that it tastes best on day two, honestly. That extra day lets those caramel and coconut flavors really soak into the creamy filling. I usually tell people it’s good in the fridge for up to four or five days, though I doubt you’ll have any leftovers past day two! When you’re ready to serve, you can slice it straight from the fridge. Please, whatever you do, do *not* try to bring this to room temperature to “soften it up.” That just results in soup, not cheesecake!
When slicing, use a sharp, thin knife dipped in hot water between each cut. Wipe the knife clean, dip it, slice, wipe it again. This ensures every piece comes out looking as gorgeous and clean-layered as the one before it. You want those layers popping when you serve it up!
Frequently Asked Questions About Samoa Cheesecake
I know you’re going to have questions because this dessert is so rich and layered—it’s natural! I’ve gathered a few things folks have asked me over the years about making sure their **Samoa Cheesecake** turns out perfectly creamy. Don’t hesitate to reach out if you still have doubts; you can connect with us here! Contact us anytime!
How long does this no-bake Samoa Cheesecake need to chill?
This is the most important question for any no-bake recipe! You absolutely must give this cheesecake time to set properly. We recommend a minimum of six hours in the refrigerator, but honestly, if you can wait until the next day, you will be rewarded tenfold. Overnight chilling ensures that the cream cheese filling is firm enough to hold up to the heavy toppings and slice cleanly—no sloppy edges for us!
Can I make this into a lower-sugar dessert?
That’s a thoughtful question! Because we use powdered sugar in the filling and caramel sauce has a ton of sugar, drastically cutting it down can affect the texture since sugar plays a role in structure, even in no-bake versions. If you want to cut back, use a light hand when drizzling the caramel—maybe just half a cup instead of a full cup. It helps tremendously if you want a slightly less sweet treat while still enjoying the incredible **Caramel Coconut Cheesecake Recipe** flavor profile.
Can I make a baked version of this Samoa Cheesecake?
That’s a great alternative thought! While this version is designed specifically to be easy and no-bake, you certainly *could* try to adapt it into a baked cheesecake. However, you would need to add eggs, adjust the heavy cream ratio significantly, and likely change the baking time and temperature completely. Honestly, if you want a baked version, you’re essentially starting a totally different recipe. Stick to this one for guaranteed creaminess without the hassle of a water bath!
What’s the best way to slice this showstopper dessert evenly?
This is key for presentation whenever you serve one of these Showstopper Celebration Desserts! Don’t just grab a knife. Get a long, thin knife—like a carving knife—and dip it into a tall glass of very hot water. Wipe the blade completely dry with a paper towel, then make your cut. Repeat that hot water dip and dry step before every single slice! This gentle heat melts the layers just enough to glide through the creamy filling and the hardened caramel without tearing the crust apart. It makes the world of difference!
Nutritional Estimates for this Caramel Coconut Cheesecake Recipe
Now, I know some of you are going to ask about the numbers, and I get it! We all want to keep track of what we’re enjoying, especially with something this rich. I want to be super clear: these numbers are estimates based on standard ingredient volumes and what I typically use for my ingredients. This is a rich, indulgent treat, so keep that in mind. Nobody is eating this **Caramel Coconut Cheesecake Recipe** because they are counting lettuce leaves, right?
You can find the full terms and conditions regarding our nutritional estimates right here on the site if you want the fine print! Please review our conditions here. We always say homemade treats should be enjoyed in moderation!
Here’s the breakdown per slice for this glorious **Samoa Cheesecake**:
- Serving Size: 1 slice
- Calories: 480
- Sugar: 45g
- Sodium: 250mg
- Fat: 32g
- Saturated Fat: 18g
- Unsaturated Fat: 14g
- Trans Fat: 0.5g
- Carbohydrates: 48g
- Fiber: 2g
- Protein: 6g
- Cholesterol: 95mg
See? It’s definitely a treat! But wow, is it worth every single calorie when you take that first bite with the cool, airy filling and the salty caramel mixing together. Don’t stress too much over the exact numbers; just make sure you savor every single bite you take of this dessert!
Share Your Best Samoa Cookie Inspired Treats
Whew! You’ve made it through the whole process, and now you have this incredible, towering **Samoa Cheesecake** ready to be devoured. But the journey isn’t quite over! I truly love seeing how you all interpret my family favorites, and this dessert is one that begs for variation. Did you add some toasted pecans to the crust? Did you use white chocolate instead of dark for the drizzle? I want to hear every detail!
Please, please hop down to the comments section and leave a star rating for me! It helps other bakers decide if they should take the plunge on this recipe, and those ratings keep me inspired to keep developing new, ridiculously delicious treats like this. If you snap a photo of your creation, tag me on social media so I can share your masterpiece on my stories!
If you want to check out our privacy policy before sharing any details online, feel free to read through it here: Review Our Policy. Go on, tell me everything about your glorious, gooey, chocolatey, caramelly cheesecake creation!
PrintNo-Bake Samoa Cheesecake with Chocolate Cookie Crust
Make a decadent, no-bake cheesecake inspired by Samoa cookies, featuring a chocolate cookie crust, creamy filling, homemade caramel sauce, toasted coconut, and a chocolate drizzle.
- Prep Time: 25 min
- Cook Time: 8 min
- Total Time: 6 hr 33 min
- Yield: 10 servings
- Category: Dessert
- Method: No-Bake
- Cuisine: American
- Diet: Vegetarian
Ingredients
- 1 1/2 cups chocolate cookie crumbs (like Oreo wafers)
- 1/4 cup unsalted butter, melted
- 2 (8 ounce) packages cream cheese, softened
- 1 cup powdered sugar
- 1 teaspoon vanilla extract
- 1/4 cup heavy cream
- 1 cup caramel sauce (store-bought or homemade)
- 1 1/2 cups sweetened flaked coconut
- 1/2 cup semi-sweet chocolate chips
- 1 tablespoon coconut oil
Instructions
- Prepare the crust: Mix the chocolate cookie crumbs and melted butter. Press the mixture firmly into the bottom of a 9-inch springform pan. Chill the crust for 15 minutes.
- Toast the coconut: Spread the flaked coconut on a baking sheet. Bake at 350°F (175°C) for 5 to 8 minutes, watching closely until golden brown. Set aside.
- Make the filling: In a large bowl, beat the softened cream cheese until smooth. Gradually beat in the powdered sugar and vanilla extract.
- Whip the heavy cream separately until soft peaks form. Gently fold the whipped cream into the cream cheese mixture until just combined.
- Pour the cheesecake filling over the chilled crust and smooth the top. Refrigerate for at least 6 hours, or preferably overnight, until firm.
- Prepare the drizzle: Combine the chocolate chips and coconut oil in a microwave-safe bowl. Microwave in 30-second intervals, stirring until smooth.
- Assemble the cheesecake: Once the cheesecake is set, carefully run a knife around the edge and release the springform ring. Drizzle the top generously with the caramel sauce. Sprinkle the toasted coconut evenly over the caramel layer.
- Drizzle the melted chocolate mixture over the top in a decorative pattern. Slice and serve cold.
Notes
- For a thicker caramel layer, warm the caramel sauce slightly before pouring it over the set cheesecake.
- If you do not have a springform pan, line a regular pie dish with plastic wrap before pressing in the crust for easy removal.
- Use high-quality vanilla extract for the best flavor in the filling.
Nutrition
- Serving Size: 1 slice
- Calories: 480
- Sugar: 45g
- Sodium: 250mg
- Fat: 32g
- Saturated Fat: 18g
- Unsaturated Fat: 14g
- Trans Fat: 0.5g
- Carbohydrates: 48g
- Fiber: 2g
- Protein: 6g
- Cholesterol: 95mg