

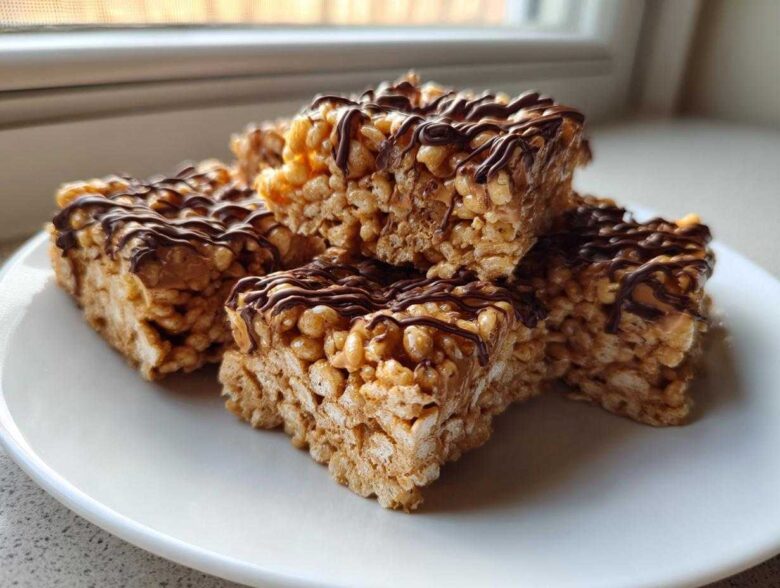
Oh, these treats! If you’re looking for something that instantly transports you back to childhood lunchboxes but delivers on that incredible, satisfying chewiness you always dream of, you’ve found the spot. We’re talking about the absolute best **peanut butter rice krispie treats** you can whip up in about fifteen minutes flat. Mateo calls them my “Instant Nostalgia Bars.” They’re gooey, full of that unmistakable salty-sweet combination, and they require zero oven time, making them the perfect quick dessert for any random Tuesday. Writing these recipes for Flavor Zine isn’t just about listing steps; it’s about capturing those moments where simple ingredients create pure joy. If you want to know more about why we bake our stories into everything, check out our mission over at Flavor Zine. Trust me, you want this recipe tucked away for your next craving or impromptu party!
Why You Will Make the Best peanut butter rice krispie treats
I know there are a million Rice Krispie recipes out there, especially the ones that turn out dry and crumbly—and nobody wants that! These **peanut butter rice krispie treats** are different. They are specifically engineered to stay chewy and gooey, even a day or two later. Mateo is always reaching for the leftovers, which is how I know I’ve done it right.
Here’s why this version is going straight to the top of your favorites list:
- Maximum Chew Factor: We nail the marshmallow melting technique. By keeping the heat low and stirring constantly, we avoid hardening the sugars, which is the secret behind ultra-gooey marshmallow squares.
- No Oven Required: Seriously, this is the ultimate quick dessert no oven recipe. From stove to pan in under 15 minutes, these are perfect for when a craving hits hard!
- The Peanut Butter Magic: Creamy peanut butter melts beautifully into the marshmallow, giving you a smooth, rich base that doesn’t taste grainy at all. It makes these the best peanut butter crispy treats you’ve ever tried.
- Kid-Friendly and Party Ready: These are the simplest sweet snacks you can make, perfect for lunchboxes or doubling up for big parties. Everyone loves a good, no-bake peanut butter marshmallow dessert.
Gather Your Ingredients for Chewy peanut butter rice krispie treats
Okay, time to raid the pantry! Since this is a no-bake masterpiece, precision in measuring is pretty important, especially with how we handle the marshmallows—we want gooey, not cement! Don’t stress too much, though; we’re keeping this simple. Most of this stuff should already be hanging around, which is why these make such fantastic pantry ingredient desserts.
If you’ve ever tried making marshmallows from scratch—and if you haven’t, maybe peek at my homemade marshmallow guide—you know why we’re using the store-bought kind here for speed! For the base gooey cereal bars, you will need:
- 6 tablespoons unsalted butter (just make sure it’s real butter, not that fake stuff!)
- 1 cup creamy peanut butter (this is key for the smooth texture!)
- 1 (10 ounce) package marshmallows, or about 4 cups mini marshmallows
- 6 cups crispy rice cereal
- 1/2 teaspoon vanilla extract
- 1/4 teaspoon salt (optional, but it really cuts the sweetness nicely!)
Now, if you want to elevate these **peanut butter rice krispie treats** further into chocolate peanut butter cereal bars territory, we need the topping ingredients separately. You can skip this part if you prefer the simple, classic look, but trust me, the drizzle is worth it:
For that Gorgeous Chocolate Topping (Optional):
- 1 cup semi-sweet chocolate chips
- 1 tablespoon butter
That’s everything! Grab your biggest saucepan and your 13×9 inch pan—let’s get melting!
Step-by-Step Guide to Perfect peanut butter rice krispie treats
Alright, time to put on your game face, because this is where the magic happens! While these **peanut butter rice krispie treats** are incredibly simple—we’re talking fast cooking time here—the secret to that amazing, soft, gooey texture is all in the technique. Slow and steady wins the race when melted sugar is involved, even if you’re in a rush. We want these to be those perfect chewy marshmallow squares, not little hockey pucks!
Preparing the Pan and Melting the Base
First things first, get your pan ready. I usually grab my 13×9 pan and either give it a good spray with non-stick or, even better, line it with parchment paper that sticks up over the edges. This gives me these nice little ‘handles’ later for lifting the whole thing out. Genius, right?
Now, grab your biggest, sturdiest saucepan. We’re going to start this process over very low heat. Seriously, turn your burner down. You’re going to melt the 6 tablespoons of butter, and once that’s liquid, drop in the cup of creamy peanut butter. You watch that like a hawk! Stir it together until it’s completely smooth and glossy. If you use medium heat, the peanut butter can scorch on the bottom, and we definitely don’t want burnt sugar flavor in our quick dessert no oven treat!
Incorporating Marshmallows for Gooey peanut butter rice krispie treats
Once that butter-peanut butter blend is looking like velvet, take the whole pan off the heat. This is the moment where most folks unintentionally ruin the chewiness! We add the marshmallows now. Keep stirring them constantly until they are totally melted and you have one cohesive, beautiful, sticky mass. Don’t try to rush this by turning the heat back up—that cooks the marshmallows and makes them seize up. I always stop stirring the second I see the last little white lump disappear. Mix in your vanilla and optional salt right here, just so it’s distributed evenly!
If you were making my creamy olive dip, I’d tell you to stir vigorously, but here? Gentleness is your friend!
Folding Cereal and Pressing the peanut butter rice krispie treats
Time for the crispy rice cereal! Dump all 6 cups into the marshmallow mixture. Now, this requires a gentle touch. Use your rubber spatula and fold everything together. You’re not beating a cake batter here; you’re just making sure every single piece of cereal gets kissed by that peanut butter goodness. Work quickly because the mixture starts setting up fast.
Transfer the cereal mix into your prepared pan. Here is the absolute most important tip for having those perfect **chewy marshmallow squares** that don’t crack when you cut them: DO NOT PRESS HARD! If you compact these treats down, you squeeze out all the air bubbles we worked so hard to keep when melting the marshmallows, and you end up with hard bars. Just use a piece of wax paper or your lightly buttered hand to gently coax the mixture into an even layer across the pan. That’s it! No smashing allowed!
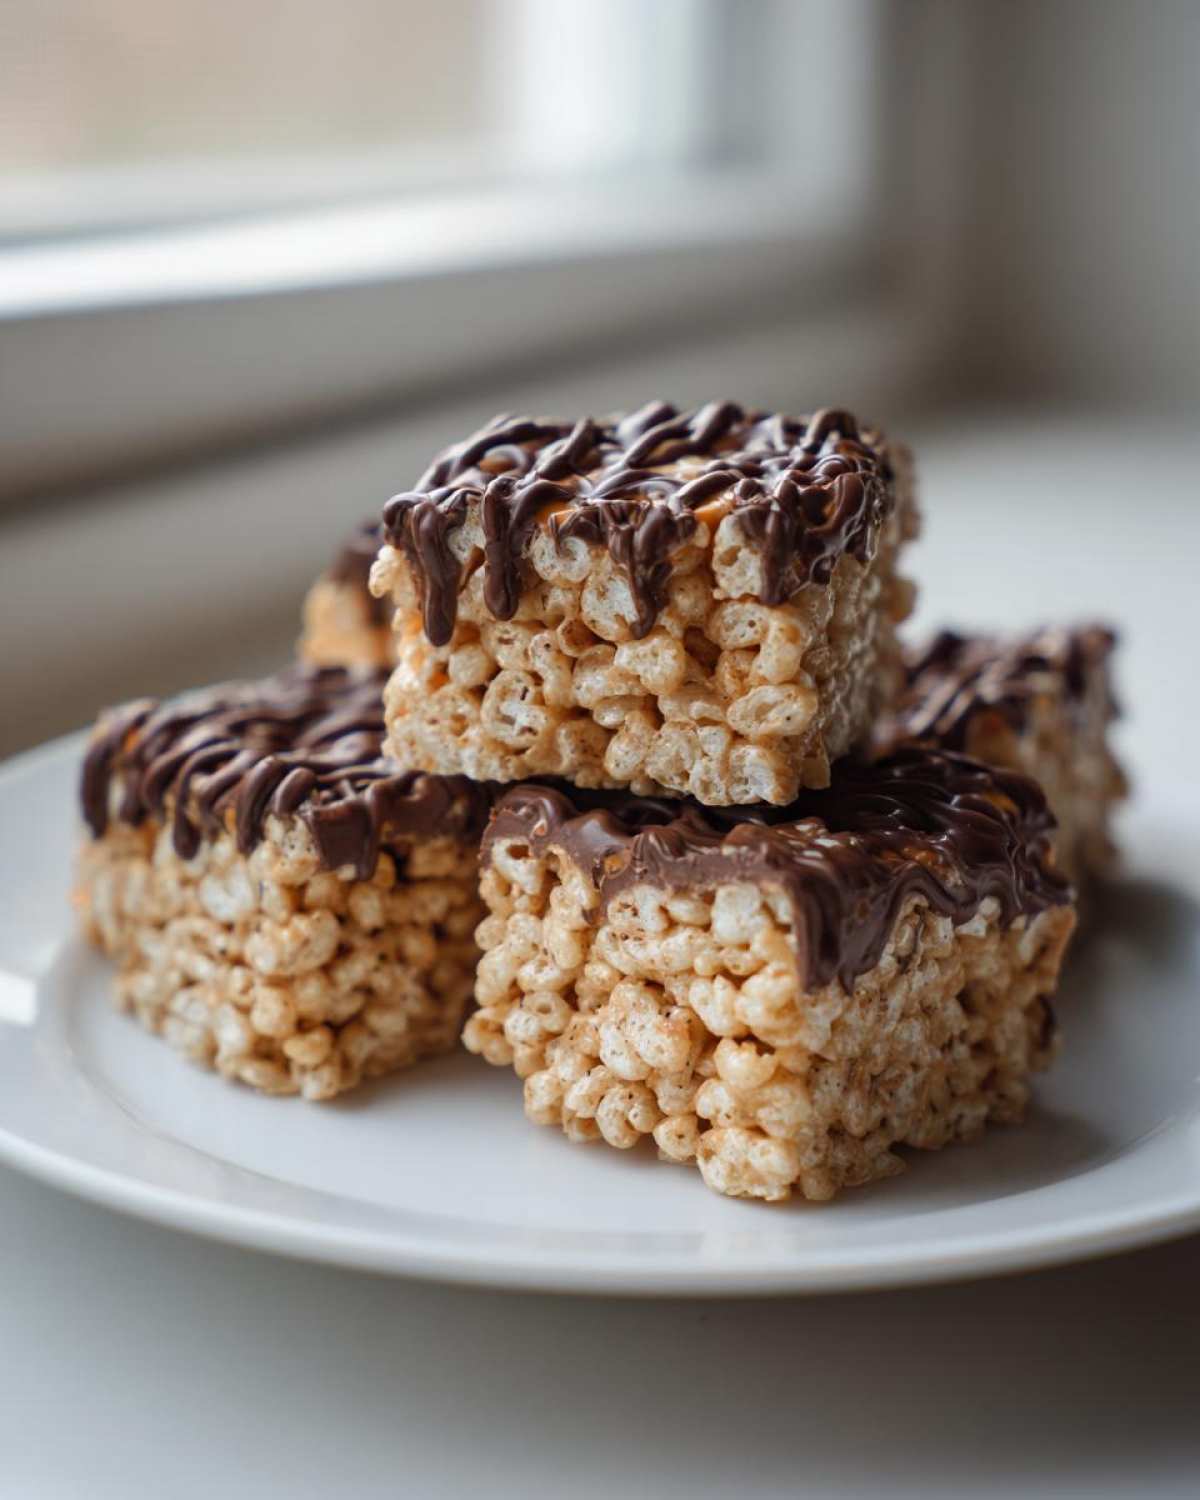
If you’re adding the chocolate topping (and you should!), melt the chocolate chips and the extra tablespoon of butter slowly, drizzle it over the top, and use a knife to give it a little swirl or marbling effect. Then, kick back and just let those beauties set up completely at room temperature for about an hour before slicing.
Tips for Achieving the Best Chewy Marshmallow Squares
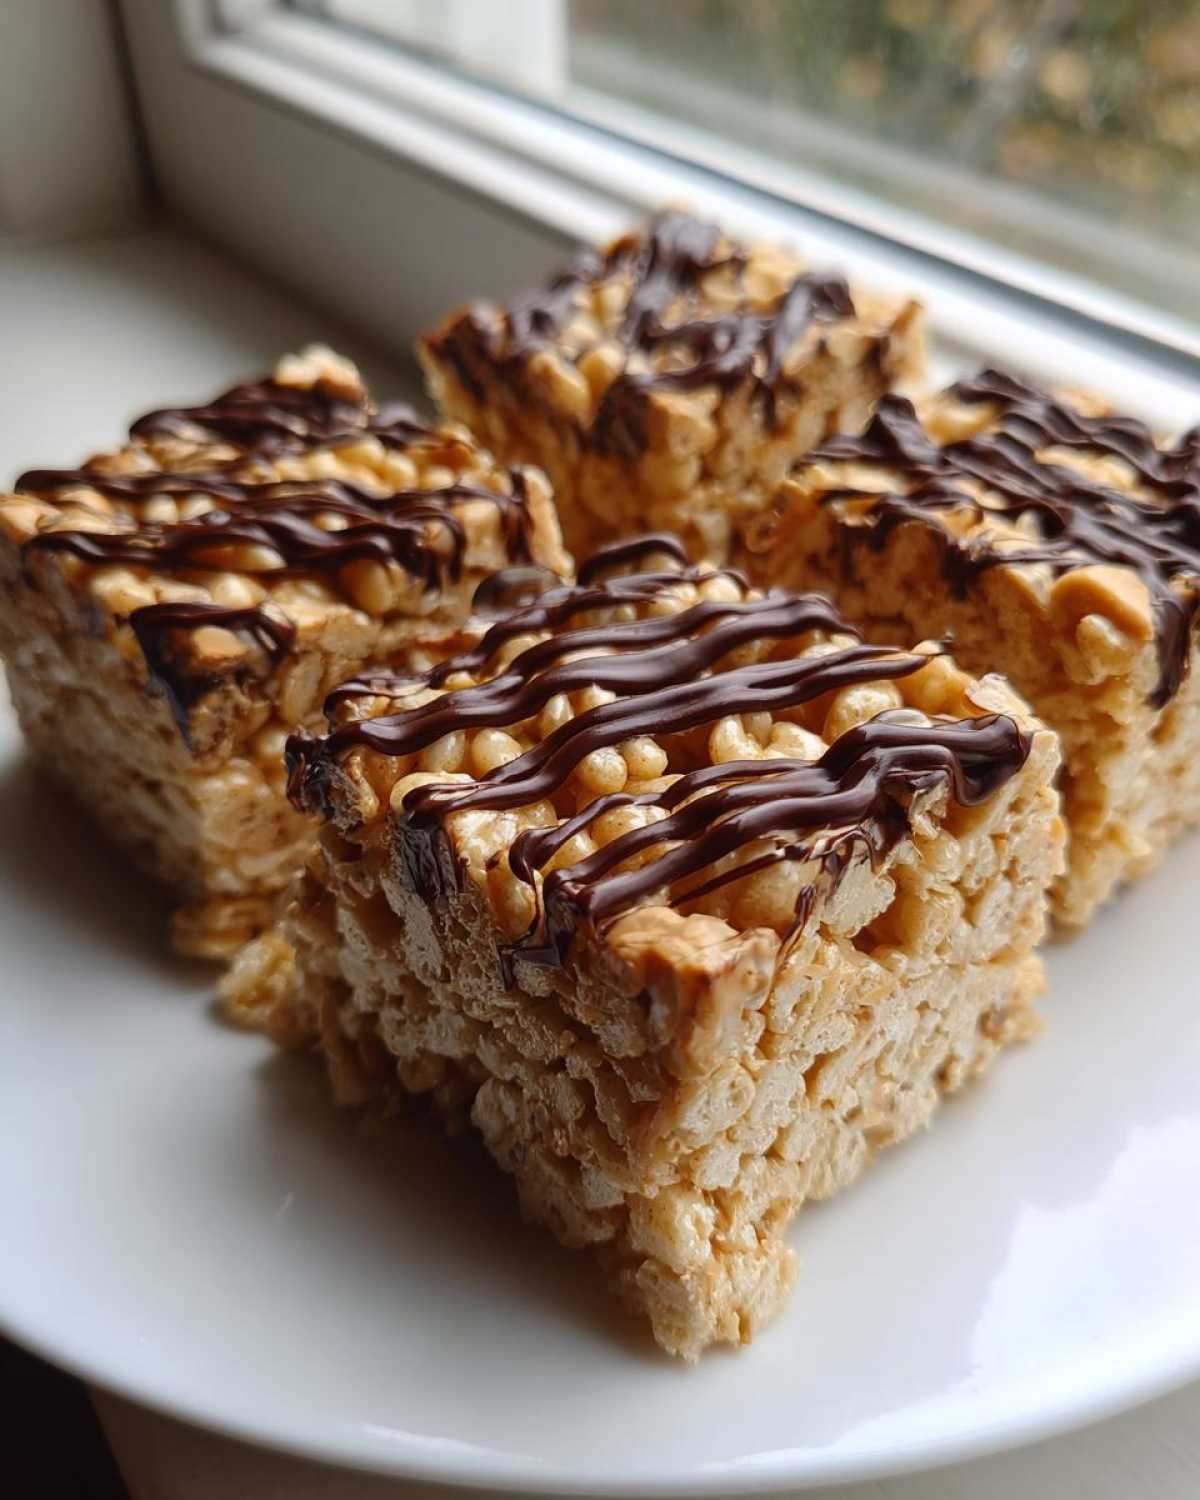
We’ve covered the basic process, but since the number one request I get about these **peanut butter rice krispie treats** is always “How do I make them super chewy?”, I want to focus on these expert-level fine-tuning tips. Mateo insists my stovetop method yields the best results, and I think it all comes down to respecting the marshmallow when it’s melting. These aren’t complicated steps, but they make a huge difference between an okay treat and one you’ll hide from your family!
One thing to remember is that like my honey wheat bread, using the best quality base ingredient really matters here. For the chewiest squares, keep these three things front of mind:
- Marshmallow Freshness is Non-Negotiable: This might sound obsessive, but if your marshmallows are even slightly hard or stale, your final product will be too. Always grab a fresh bag for the best possible gooeyness. If they are a little stiff when you start, they’ll become rock hard when heated.
- Low Heat, Zero Boiling: I cannot stress this enough: keep that heat on low when melting the butter and peanut butter, and pull the pot completely off the burner before adding the marshmallows. Overheating them drives out the moisture and the structure collapses, leading to those hard, brittle bars nobody wants. We want them smooth and pliable!
- Creamy vs. Crunchy Peanut Butter: For the absolute chewiest, smoothest base, I stick to creamy peanut butter. It incorporates so much better into the melted marshmallow mixture. Crunchy peanut butter is delicious, and you can absolutely use it, but know that it adds pockets of hardness. If you love a little crunch, using crunchy is fine, but it won’t give you that signature soft, gooey texture our family loves.
- The Gentle Fold: Remember that key instruction not to pack them down? That goes for mixing, too. Once the cereal goes in, use a spatula to gently *fold* it in until barely coated. If you stir too long or too aggressively, you start crushing the cereal pieces, which actually makes the overall bar denser and less light.
Follow these rules on heat and handling, and I promise you’ll have the best **gooey cereal bars** ready for snacking!
Variations on the Classic peanut butter rice krispie treats
Once you’ve mastered the base recipe for these **peanut butter rice krispie treats**—and I bet you already have, because seriously, you’re crushing it—you might be wondering what else we can do with this amazing mixture. Since this is such a simple, flexible recipe, it’s perfect for customizing! We love experimenting with toppings and shapes, especially when Mateo is showing up with unexpected guests.
If you’re looking for something a little different than the standard squares, or if you want to sneak some extra flavor in, here are the easy ways we switch things up. Don’t forget to check out my notes on the no-bake peanut butter pie if you’re still in a PB mood!
First, let’s talk about changing the texture right in the base. As I mentioned, I prefer creamy peanut butter for that ultra-smooth texture, but if you love extra bite, go ahead and use crunchy peanut butter! It transforms your **chewy marshmallow squares** into something with a bit more resistance. It’s a totally valid choice if you enjoy those little nutty surprises throughout.
Next up: shape shifting! These bars are perfect for parties, but sometimes you just want to make little grab-and-go bites instead of cutting out squares. You can easily turn these into **Peanut Butter Balls with Rice Krispies**!
Making Peanut Butter Balls Instead of Bars
This variation requires just one extra step after you’ve folded in the cereal. Remember how I said not to pack the mixture down into the pan? Well, when making balls, you actually want to use your hands to gently roll the mixture into small spheres—about 1 to 1.5 inches wide. You’re compressing it just enough to hold its shape, but you still don’t want to crush all the air out of them.
Once rolled, the biggest game-changer is chilling them. Pop the little peanut butter energy balls onto a parchment-lined tray and stick them in the fridge for about 20 minutes. This helps them firm up before you dip them. If you’re following the recipe note about the chocolate topping, this is the perfect time to melt your chocolate.
We dip these balls halfway into the melted chocolate (the drizzle looks amazing on these too!) and let them set completely. They make fantastic party treat ideas no bake options because they are perfectly portioned!
Elevating the Topping: Beyond a Simple Drizzle
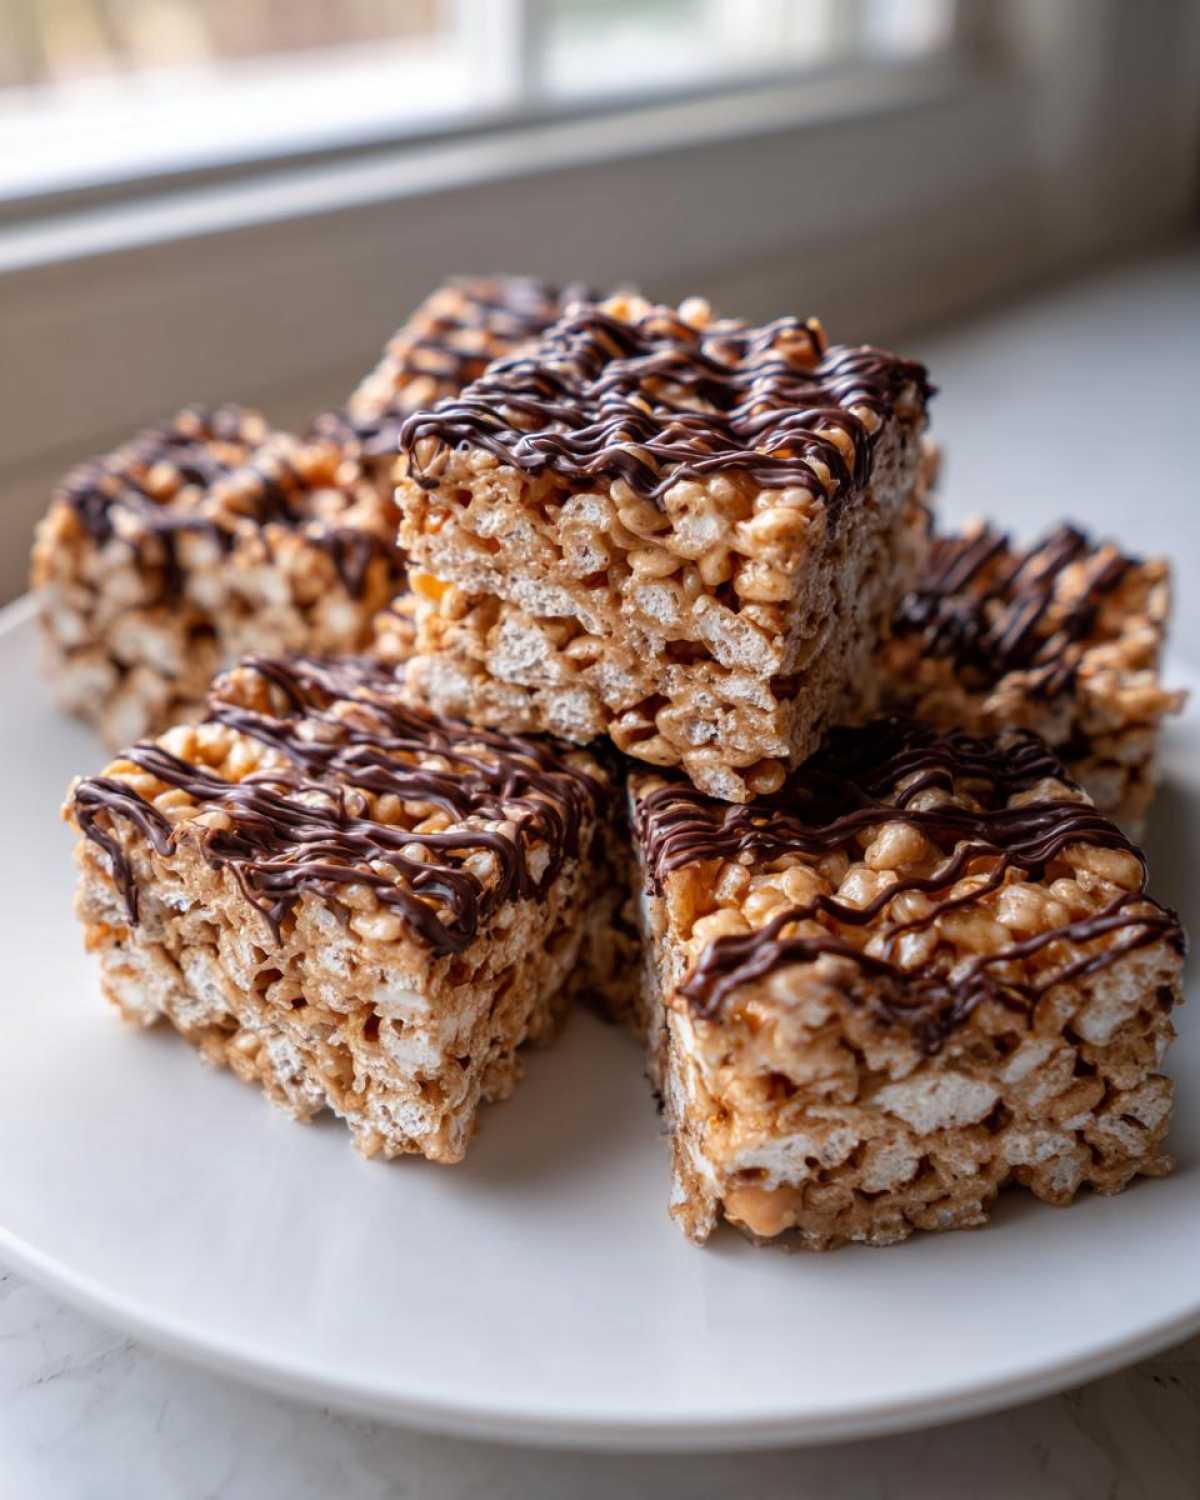
If you’re already making the optional chocolate layer, you have so many ways to play with it! The recipe calls for a simple drizzle or swirl, which gives you those gorgeous **chocolate peanut butter cereal bars** where the cereal is still visible. But if you want more chocolate coverage, you can:
- Full Layer Coverage: Spread the entire melted chocolate mixture evenly over the top of the set bars for a solid peanut butter fudge bars top layer.
- Salt Finish: Sprinkle a tiny bit of flaky sea salt over the chocolate right after you drizzle or spread it. The salt makes the peanut butter flavor pop like crazy!
- Butterscotch Swap: Instead of pure chocolate chips, substitute half of the chips with butterscotch chips for a classic Scotcharoo Recipe Alternative flavor profile. Mateo loves when I do this; it’s richer, somehow!
Honestly, once you have the perfectly gooey base down, these **simple sweet snacks** become your canvas. Feel free to experiment! If you want more ideas on rich, no-bake bars, check out my notes on Lunch Lady Peanut Butter Bars for another layer of inspiration.
Storage and Keeping Your peanut butter rice krispie treats Fresh
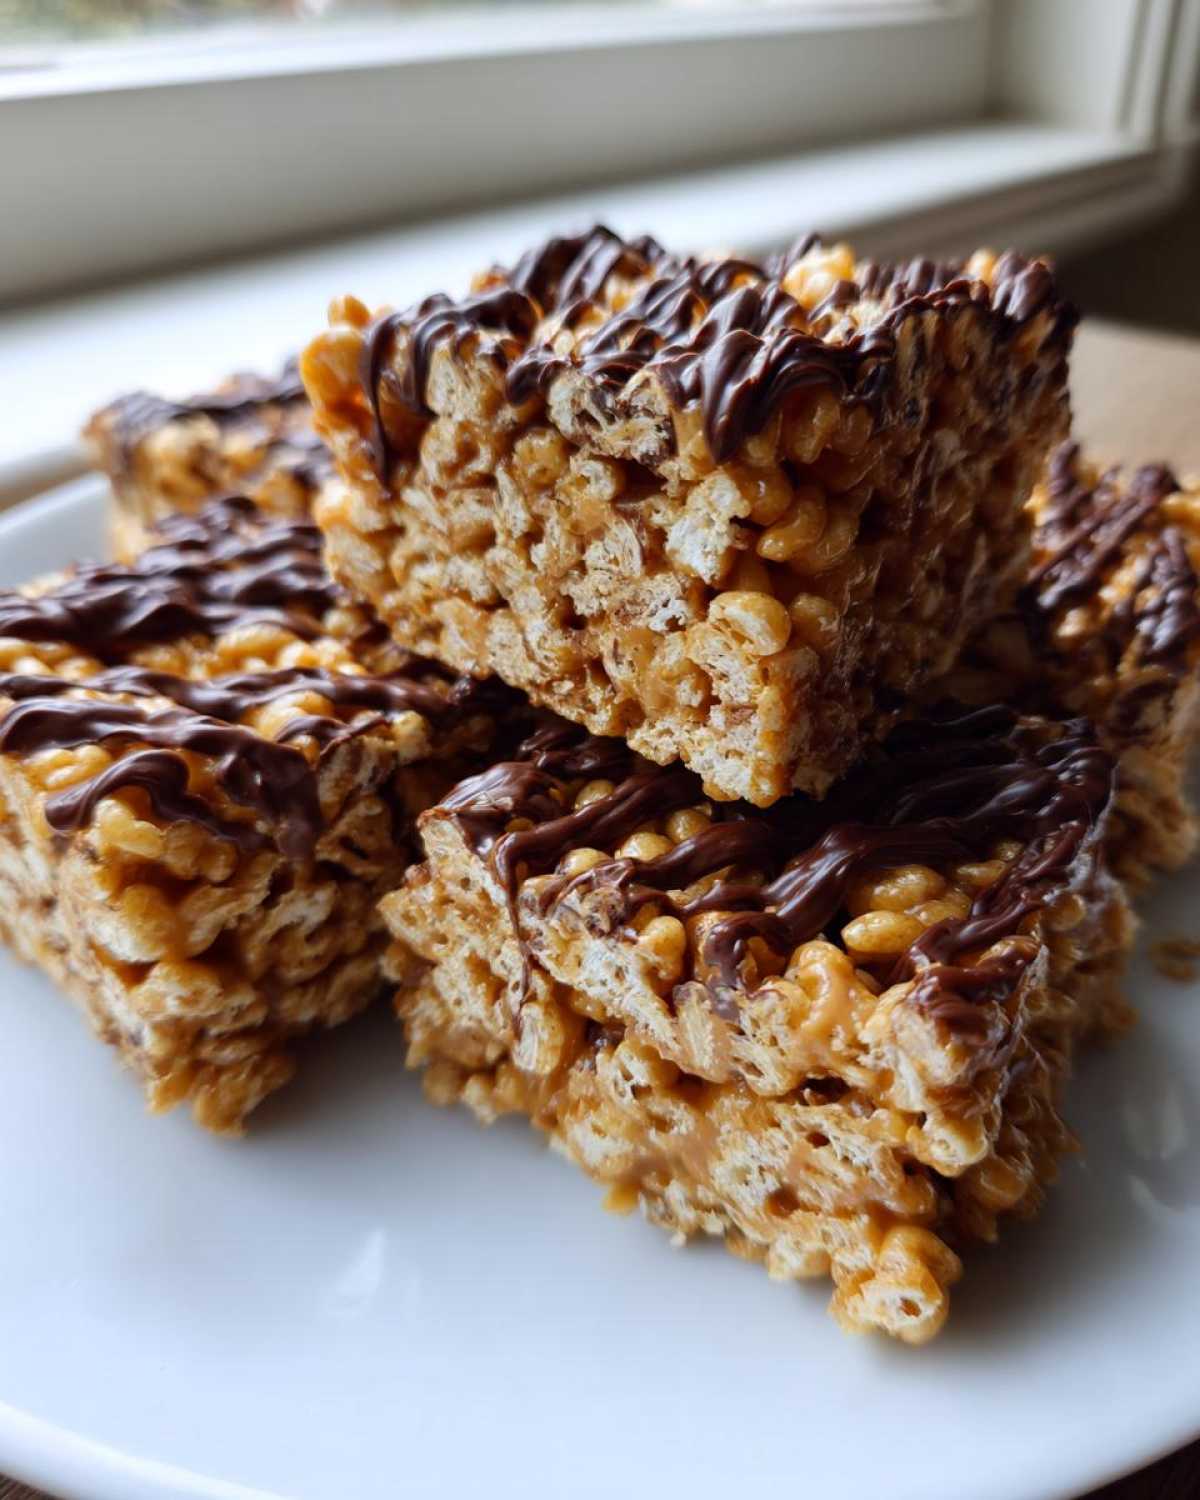
Ah, the dilemma! You’ve made the most delicious batch of **peanut butter rice krispie treats**, and now you have… leftovers? If you’re lucky enough to have any left after the first hour, keeping them in that perfect, chewy state is important. Nobody wants their homemade crispy squares feeling hard the next day. Because we worked so hard to keep the marshmallows gooey, we need to treat them right!
The good news is these are excellent for meal prep because they are no-bake and keep relatively well. The bad news? If you seal them up too tightly or put them in the fridge, they can lose some of that fresh-out-of-the-pan softness. Here’s my routine for shelf life success:
- Room Temperature is Best: For maximum chewiness, store these right on the counter. Pop them into an airtight container—make sure you use a lid that seals well—and keep them away from direct sunlight or any heat source, like your oven top.
- Separation is Key: If you have multiple layers, say, if you made a really thick batch or added that chocolate topping, place a piece of wax paper or parchment paper between the layers when stacking them in the container. This stops the gooey bottom from sticking to the chocolate top of the bar underneath it.
- How Long Do They Last? Honestly, if you sealed them right and you’re using good, fresh ingredients (especially fluffy marshmallows!), they should stay perfectly soft and delicious for about 3 to 4 days at room temperature. After that, they might start to stiffen up just a tiny bit.
Now, should we refrigerate them? My answer is generally no, unless your kitchen is incredibly hot. Refrigeration hardens the butter and stiffens the marshmallow structure, making them much less gooey. If you absolutely must chill them—perhaps you added a super soft filling that needs support—just be sure to let them sit out on the counter for at least 30 minutes before serving. A slightly softened, room-temperature treat is always better than a cold, hard one!
Serving Suggestions for Your Quick Dessert No Oven Treat
It’s almost rude to make these incredible **peanut butter rice krispie treats** and not show them off a little, right? Since these are my go-to when I need a **quick dessert no oven** solution, I always keep a few presentation tricks up my sleeve. They are fantastic on their own, of course, but when you are bringing them to a potluck or just want to make an afternoon snack feel special, a little styling goes a long way. They are probably the easiest things I bring to any gathering, which is why they are always featured in my list of **party treat ideas no bake** staples.
Here are a few ways Mateo and I like to serve these up:
- The Mini-Munch: When you cut them into **Peanut Butter Balls with Rice Krispies** (remember that variation?), serving them in small, colorful paper cupcake liners makes cleanup a breeze and looks so festive! They become these perfect little bites that no one can resist.
- The Ice Cream Companion: Seriously, this is my favorite rich-snack pairing. If you serve a small, warm brownie or a scoop of vanilla ice cream, one of these chilled squares on the side adds the perfect salty, crunchy texture contrast. It turns a simple dessert into something much more impressive. You could even crumble a leftover or slightly harder piece over ice cream like a topping!
- Layered Up on a Board: If you’re putting together a dessert grazing board (which I absolutely love to do using my notes from making chocolate chip cookies), cut these into small squares or triangles. Mix them in between fresh fruit, a soft cookie like Cool Whip cookies, and maybe some peanut butter fudge bars pieces. Everyone loves mixing textures!
Because they are so sturdy and hold their shape so well—especially after that hour of cooling time—they travel beautifully. You don’t have to worry about them melting or collapsing like a frosted cake, making them ideal for picnics or beach trips. Just make sure you use that parchment paper overhang we talked about so you can lift the whole slab out cleanly before cutting!
Frequently Asked Questions About peanut butter rice krispie treats
I took all the common questions I get from friends (and Mateo, who claims he’s testing my knowledge!) and put them here. If you had a question about swaps or texture, it’s probably answered below. We want everyone to succeed with their **chewy marshmallow squares**!
Can I use natural, oily peanut butter instead of creamy?
This is a tricky one! If you use natural peanut butter where the oil separates, you’re introducing extra liquid into the hot marshmallow mixture, which can make your treats really oily and soft—maybe too soft to even hold their shape as **No Bake Peanut Butter Bars**. If you absolutely have to use natural PB, make sure you stir it really well first so it’s totally emulsified. However, for the absolute best, most stable, and reliably gooey result, stick to traditional, stabilized creamy peanut butter for these **gooey cereal bars**. It just blends better!
My treats came out hard! How do I get them softer next time?
Oh, no! That’s the worst when you wanted **easy rice krispie treats recipe** results. Hard treats almost always mean one of two things happened: either you added the cereal when the marshmallow mix was too hot, or you used slightly stale marshmallows. Always, always pull the pan off the heat before adding the marshmallows, and don’t put it back on until they are *almost* melted. The second rule for soft texture is to gently press them into the pan—don’t pack them down hard! Remember, air equals chew!
Can I use crunchy peanut butter for extra texture?
Yes, absolutely! If you prefer that extra resistance and crunch in your **crunchy peanut butter squares**, swapping in crunchy peanut butter for creamy is an easy modification. It doesn’t significantly change the chewiness of the marshmallow base, but it adds those lovely, crunchy peanut pieces throughout the bar. Just use the same amount! It makes for a great combination if you’re topping them with smooth chocolate, too.
What is the best way to store these to maintain freshness?
For the best texture, you want to keep these **family favorite no bake cookies** away from the fridge! Store them in an airtight container right on your counter, out of direct sunlight. If you’re stacking them, place a layer of parchment paper between the layers to stop the gooey bottoms from sticking to the tops. They stay perfectly soft for about three or four days that way. If you want to see how others keep their treats fresh, check out some tips from my friends over at Crazy for Crust!
Can I use less sugar by skipping the optional chocolate topping?
That’s a great question if you’re looking for a slight reduction in sweetness! Yes, you can definitely skip the chocolate topping. The base recipe itself is sweet because of the marshmallows, but skipping the *optional* topping definitely cuts down on the overall sugar load for your **simple sweet snacks**, giving you a more balanced flavor profile that really lets the peanut butter shine through. It’s still delicious!
Nutritional Estimate for peanut butter rice krispie treats
Now, I want to be super clear: I’m a storyteller in the kitchen, not a registered nutritionist! These numbers are just an approximation based on the ingredients listed above, especially using the classic recipe without the heavy chocolate drizzle. If you’re making **party treat ideas no bake** for a crowd, it’s good to have a general idea of what you’re serving, though! Here is the breakdown per serving size (1 square):
| Serving Size | 1 square |
| Calories | 180 |
| Sugar | 15g |
| Fat | 9g |
| Carbohydrates | 24g |
| Protein | 4g |
If you ever want to check out more of our kitchen chronicles or see what else we’re publishing in the Flavor Zine, you can always browse the main recipe index!
Nutritional Estimate for peanut butter rice krispie treats
Now, I want to be super clear: I’m a storyteller in the kitchen, not a registered nutritionist! These numbers are just an approximation based on the ingredients listed above, especially using the classic recipe without the heavy chocolate drizzle. If you’re making **party treat ideas no bake** for a crowd, it’s good to have a general idea of what you’re serving, though!
| Serving Size | 1 square |
| Calories | 180 |
| Sugar | 15g |
| Fat | 9g |
| Carbohydrates | 24g |
| Protein | 4g |
If you ever want to check out more of our kitchen chronicles or see what else we’re publishing in the Flavor Zine, you can always browse the main recipe index!
PrintChewy Peanut Butter Rice Krispie Treats with Optional Chocolate Swirl
Make the best, gooey Peanut Butter Rice Krispie Treats. This easy, no-bake recipe delivers maximum chewiness and is perfect for a quick dessert or kid-friendly snack.
- Prep Time: 10 min
- Cook Time: 5 min
- Total Time: 15 min
- Yield: 18 squares
- Category: Dessert
- Method: Stovetop
- Cuisine: American
- Diet: Vegetarian
Ingredients
- 6 tablespoons unsalted butter
- 1 cup creamy peanut butter
- 1 (10 ounce) package marshmallows, or about 4 cups mini marshmallows
- 6 cups crispy rice cereal
- 1/2 teaspoon vanilla extract
- 1/4 teaspoon salt (optional, for flavor balance)
- For Chocolate Topping (Optional): 1 cup semi-sweet chocolate chips, 1 tablespoon butter
Instructions
- Lightly grease a 13×9 inch baking pan or line it with parchment paper, leaving an overhang for easy removal. Set aside.
- In a large saucepan, melt the 6 tablespoons of butter over low heat.
- Add the peanut butter to the melted butter and stir until completely smooth and combined. Remove the pan from the heat.
- Add the marshmallows to the peanut butter mixture. Stir constantly until the marshmallows are fully melted and smooth. Do not overheat the marshmallows, as this makes the treats hard.
- Stir in the vanilla extract and salt, if using.
- Pour the crispy rice cereal into the marshmallow mixture. Fold gently with a rubber spatula until the cereal is evenly coated. Work quickly to keep the mixture soft.
- Transfer the mixture to your prepared baking pan. Lightly press the mixture evenly into the pan using a piece of wax paper or lightly buttered hands. Do not pack it down too firmly; pressing too hard removes air and reduces chewiness.
- If adding the chocolate topping, melt the chocolate chips and 1 tablespoon of butter together in a microwave-safe bowl in 30-second intervals, stirring until smooth. Drizzle or spread the melted chocolate over the top of the treats. You can swirl it with a knife for a marbled look.
- Let the treats cool completely at room temperature for at least 1 hour before cutting into squares or bars.
- Cut into desired serving sizes.
Notes
- For the chewiest treats, use fresh marshmallows and avoid over-melting them. Keep the heat low.
- If you want to make Peanut Butter Balls instead of bars, press the mixture into balls and chill them before dipping them in the melted chocolate topping.
- Using crunchy peanut butter will add extra texture, but creamy peanut butter helps achieve a smoother base.
- This recipe makes great Pantry Ingredient Desserts because the ingredients are typically always on hand.
Nutrition
- Serving Size: 1 square
- Calories: 180
- Sugar: 15
- Sodium: 110
- Fat: 9
- Saturated Fat: 3
- Unsaturated Fat: 6
- Trans Fat: 0
- Carbohydrates: 24
- Fiber: 1
- Protein: 4
- Cholesterol: 5