

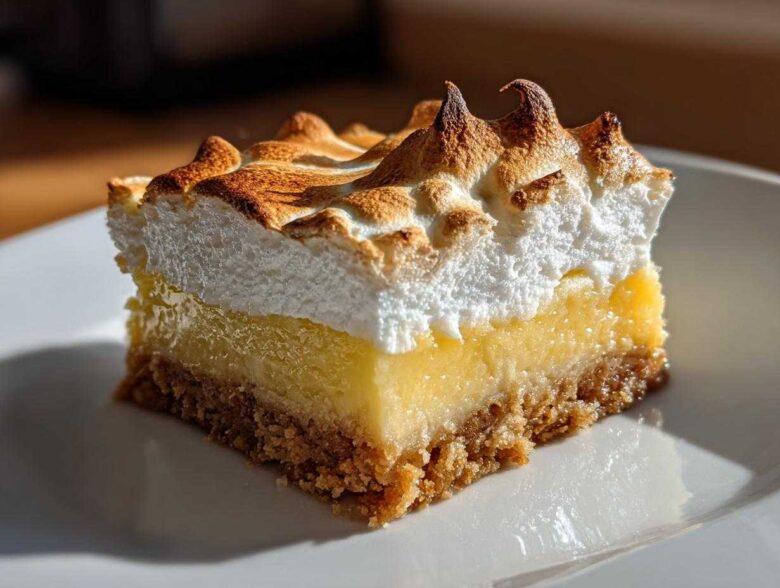
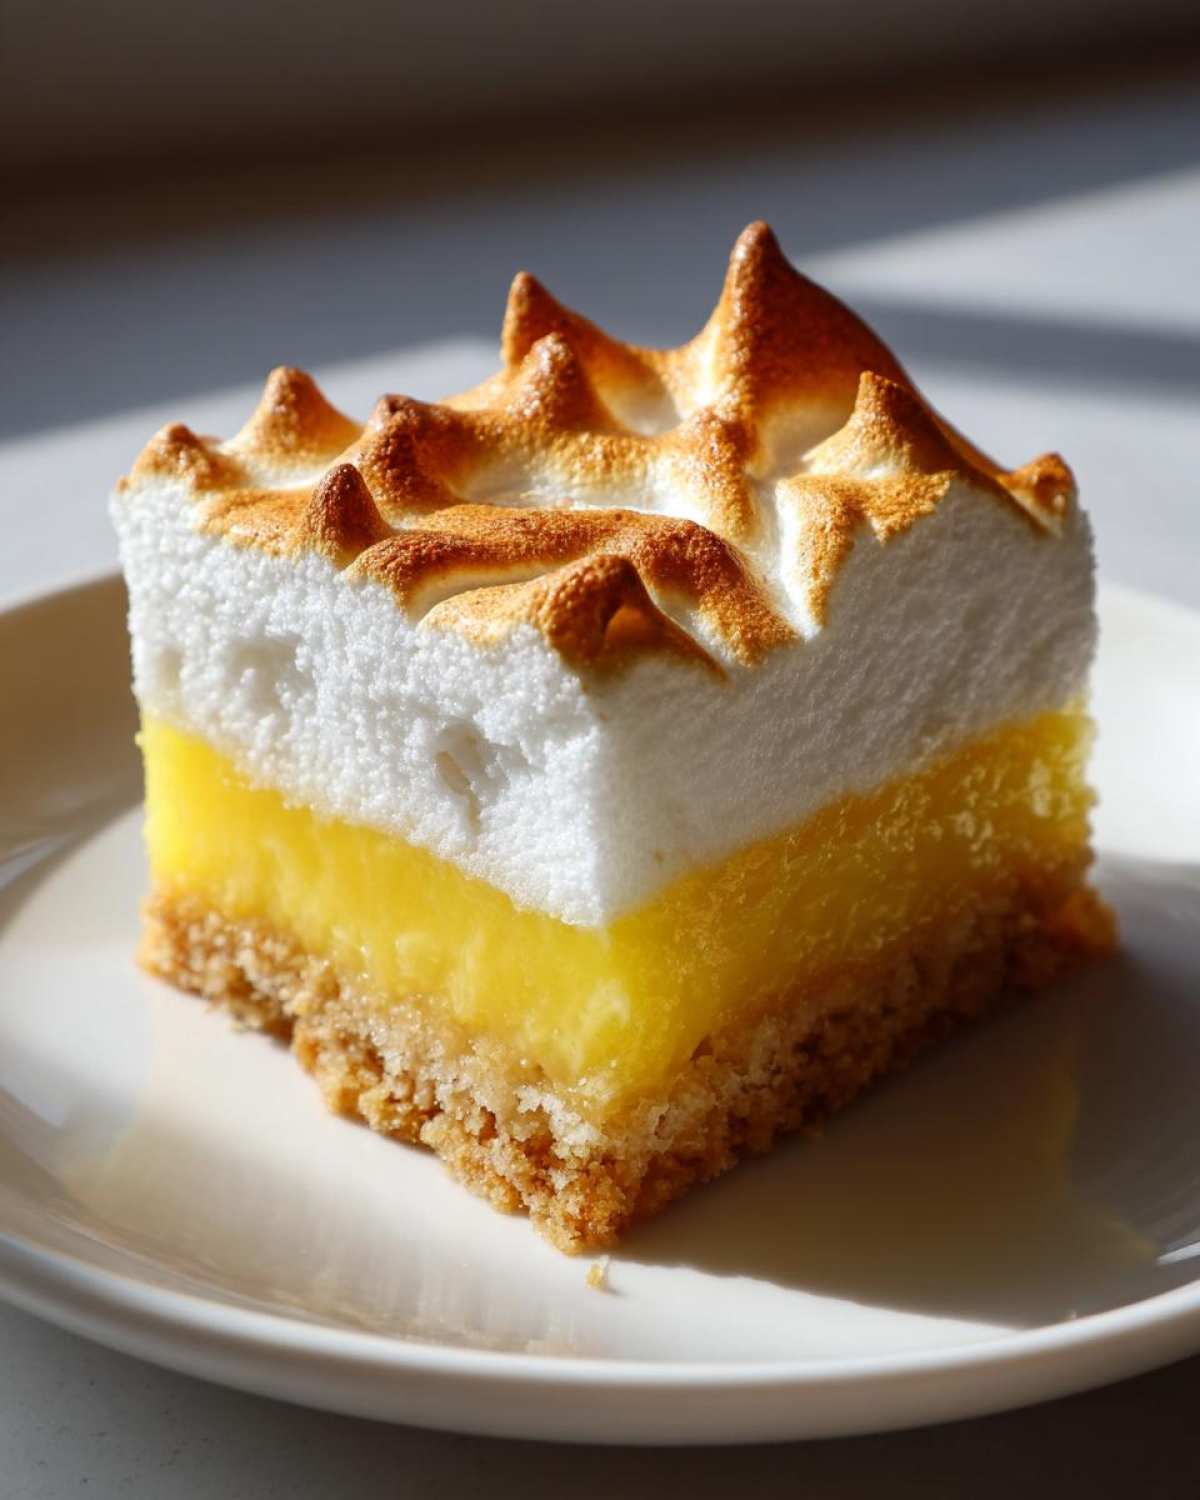
Oh, you know how I feel about complicated desserts! I adore the classic look of a big, pillowy Lemon Meringue Pie, trust me. But getting that flaky crust just right in a round pan? Forget about it! After my third attempt ended with a sloppy mess that looked more like soup than dessert, I decided to switch tactics. That’s when I perfected these absolutely glorious Lemon Meringue Pie Bars. These bars give you that incredible zingy lemon filling, that buttery shortbread hug, and that perfectly toasted meringue cloud, all wrapped up in a convenient, easy-to-slice square. It took quite a few tries to nail the texture of the filling so it sets up perfectly in the bar format, but I promise, this recipe is the keeper. You get all the fancy flavor without any of the pie-pan drama!
Why You Will Love These Lemon Meringue Pie Bars
- They are the ultimate entertaining desserts because they are already cut into perfect squares for serving!
- The shortbread crust bakes up sturdy and buttery, making these ideal for parties or picnics.
- You get that signature bright burst of citrus in every bite.
- We nailed the ratio for the most satisfying Tart and Sweet Lemon Bars you’ll ever make, I swear!
Convenience of Lemon Meringue Pie Bars
Seriously, transport is a dream. No more worrying about sliding filling when you carry this dish to a friend’s house. Just make sure you line that pan right, and you’re good to go. It’s just easier!
Achieving the Perfect Tart and Sweet Lemon Bars Flavor
Don’t worry that making them into bars dulls the flavor. Not at all! I made sure the lemon layer has enough fresh juice to really sing. It balances the sweetness of the crust and the topping perfectly. One taste and you’ll see why these are called the Tart and Sweet Lemon Bars!
Essential Ingredients for Perfect Lemon Meringue Pie Bars
Listen, you can’t make magic without the right stuff, especially when baking. And for these Lemon Meringue Pie Bars, attention to detail on what you toss into the bowl makes a huge difference between ‘good’ and ‘OMG, I need the recipe!’ I’ve broken down exactly what you need so you don’t miss a thing. Make sure your butter is cold, and your egg whites are *not* chilly—that’s trust-building E-E-A-T right there!
For the Shortbread Crust Lemon Filling Base
This base is just four ingredients, but it needs to be spot on. You’ll need 1 1/2 cups of all-purpose flour, 1/2 cup of granulated sugar, just a pinch of salt (1/4 tsp), and the star: 1 cup (that’s two whole sticks!) of cold unsalted butter, cut into cubes. Those cold cubes are non-negotiable for a crumbly, melt-in-your-mouth texture later on!
Crafting the Tangy Lemon Filling for Lemon Meringue Pie Bars
This is where the zing comes from! Grab 1 1/2 cups sugar, 1/4 cup flour, 1/4 cup cornstarch for that luscious thickness, and 1/4 tsp salt. You absolutely need 4 large egg yolks, just lightly beaten—don’t whip air into them! We follow that up with 1 1/2 cups of cold water, 1/2 cup of fresh lemon juice (seriously, use fresh; check out my guide on Baking with Fresh Lemon Juice if you need convincing), 2 tablespoons of butter, and 1 teaspoon of zest to really wake up the flavor.
Making the Fluffy Meringue Topping for Lemon Meringue Pie Bars
For the cloud layer of your perfect Lemon Meringue Pie Bars, you need 4 large egg whites, and they must be at room temperature! We treat them kindly by adding 1/4 teaspoon of cream of tartar to help them get super stable. Then, slowly stream in 1/2 cup of granulated sugar until you hit those stiff, glossy peaks, finishing it off with 1/4 teaspoon of vanilla extract for background flavor.
Step-by-Step Guide to Making Lemon Meringue Pie Bars
Alright, buckle up, because even though these are bars, if you rush the steps, you’ll end up with a runny mess. I follow this process religiously; it’s less about following a list and more about building stable layers, just like when I make my favorite apple crisp topping! Remember to keep that oven preheated to 350 degrees F the whole time, and make sure you’ve got that parchment paper overhang ready for easy lifting later. Total cook time hovers around 50 minutes, not counting any cooling breaks!
Preparing and Baking the Shortbread Crust Lemon Meringue Pie Bars Base
First up, the crust needs to look like perfectly damp sand when you mix the flour, sugar, salt, and cold butter. Use your fingers or a pastry blender until it’s coarse crumbs. Press that mixture firmly and evenly into your prepared pan. Don’t leave any thin spots! Pop it into the 350°F oven for about 18 to 20 minutes. You’re waiting for just the edges to turn a light, happy golden brown. Pull it out, but keep that oven running for the next layer of our Lemon Meringue Pie Bars!
Cooking the Smooth Lemon Filling
This is the tricky bit where you earn your culinary stripes! In a saucepan, whisk the dry filling ingredients (sugar, cornstarch, flour, salt) first, then whisk in the cold water until it looks muddy but smooth. Cook this over medium heat, stirring constantly—and I mean *constantly*—for about 5 to 7 minutes until it’s thick and bubbles slowly. Now, the crucial part: tempering the yolks. Take about a cup of that hot goo and slowly whisk it into your 4 lightly beaten egg yolks. Pour that perfectly warmed yolk mixture back into the saucepan. Return it to low heat, stir for just one minute more (don’t let it boil!), then whisk in your butter, juice, and zest. See? Smooth as silk, no lumps!
Assembling and Setting the Lemon Filling Over the Crust
Pour that hot, fragrant lemon filling right over your warm crust layer. Spread it gently so it’s perfectly level. Then, carefully slide the whole thing back into that still-hot oven for another 12 to 15 minutes. You’ll know it’s set when the center looks firm, not like a liquid swimming pool. Take it out and let it cool completely on a rack—this part takes patience, but it’s essential before the meringue goes on.
Achieving Stable Meringue Topping for Lemon Meringue Pie Bars
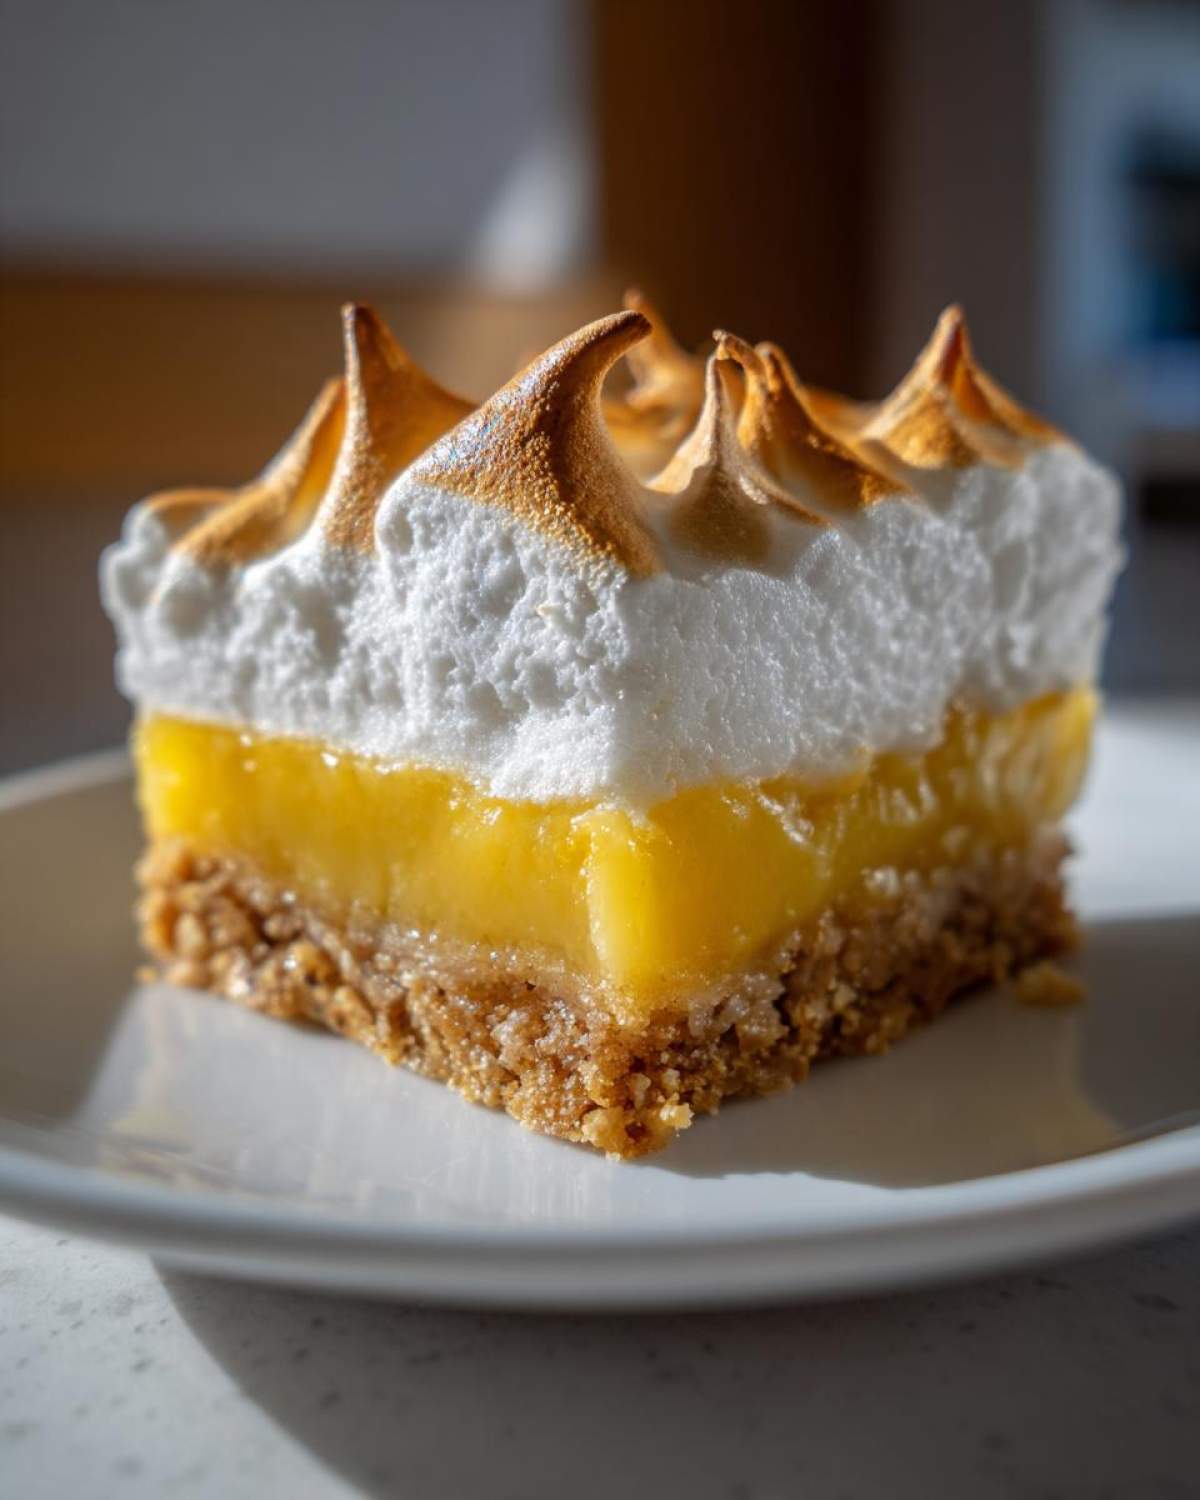
While the lemon layer is calming down, get ready for the clouds! You need a completely grease-free bowl here, I cannot stress that enough. Whip your room-temperature egg whites and cream of tartar on medium speed until they make soft peaks—the kind that flop over slightly. Slowly, slowly, start sprinkling in the sugar, one tablespoon at a time, while you increase the speed. Keep beating until you get those fantastic, stiff, glossy peaks that hold their shape. This gradual sugar addition is the secret to How to Make Stable Meringue Topping on your Lemon Meringue Pie Bars!
Final Bake and Cooling of Lemon Meringue Pie Bars
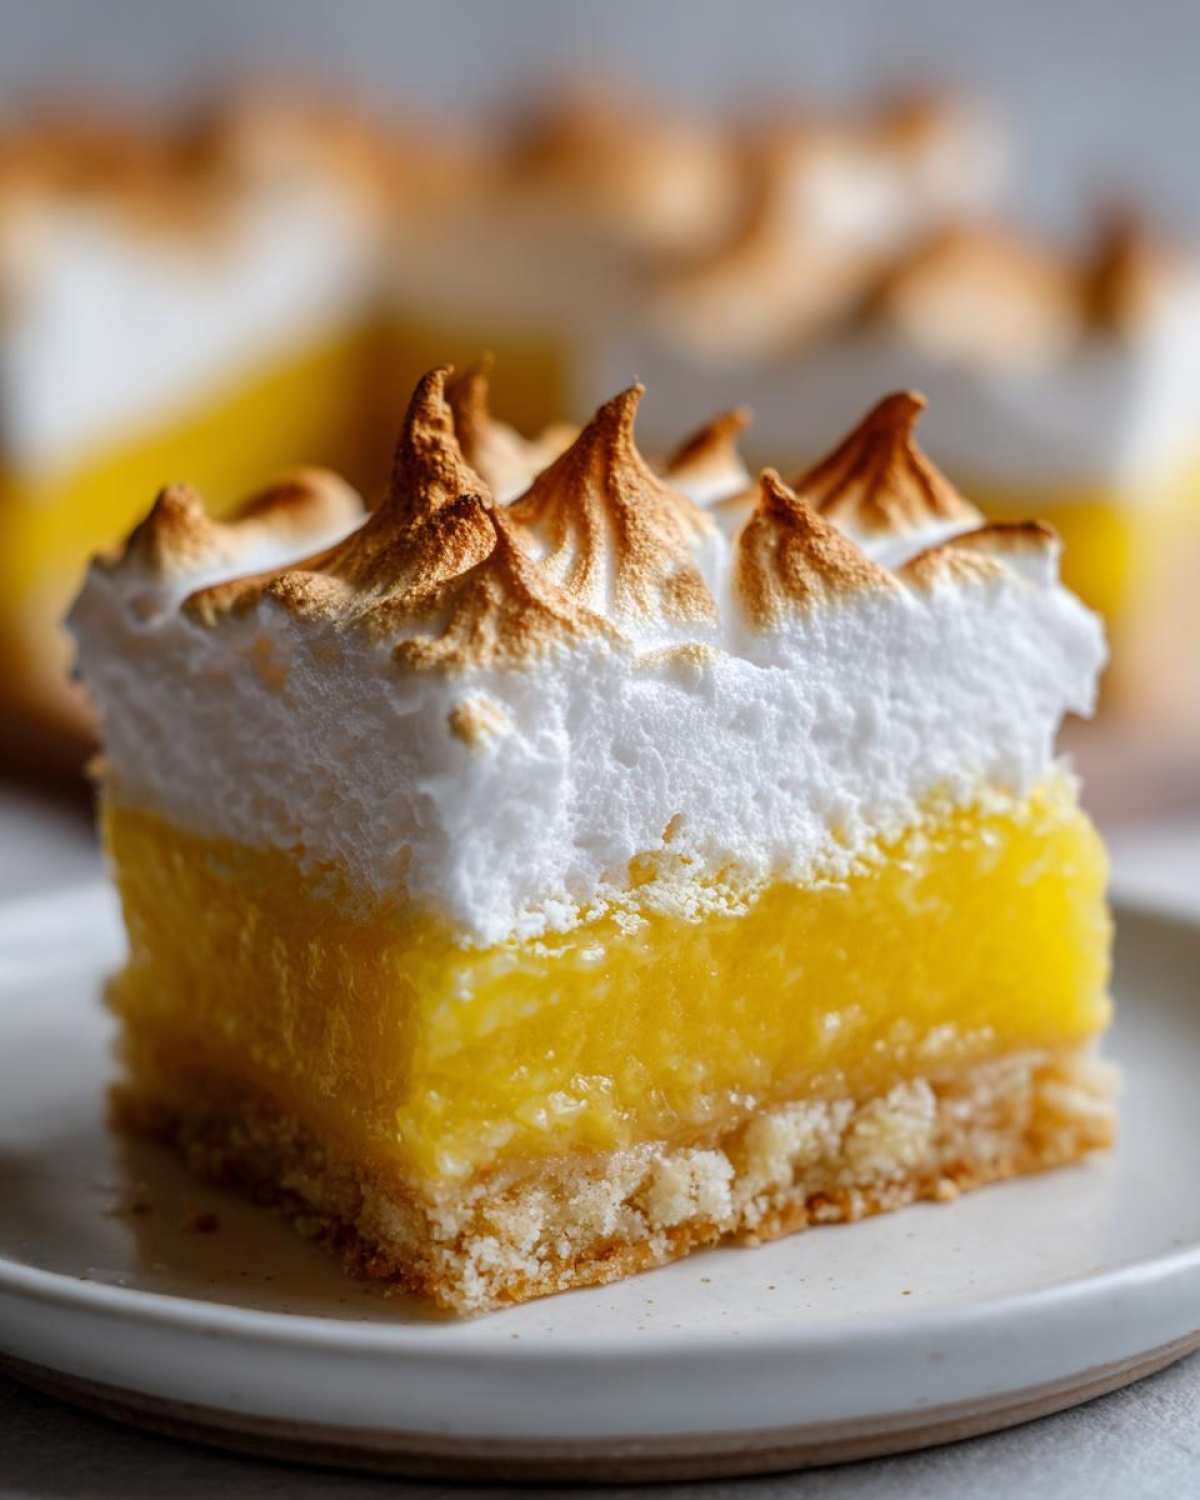
Once the lemon layer is cool to the touch, spread that glorious meringue all over it. Be sure to seal the edges right against the crust so it doesn’t shrink later. Bake this final layer for just 10 to 12 minutes until those peaks look toasted, or grab a kitchen torch if you have one and gently brown those high spots—I love the torch method myself! The absolute hardest part? Letting the whole pan cool down completely before you use the parchment sling to lift out your beautiful Lemon Meringue Pie Bars for slicing.
Tips for Success with Homemade Lemon Meringue Squares
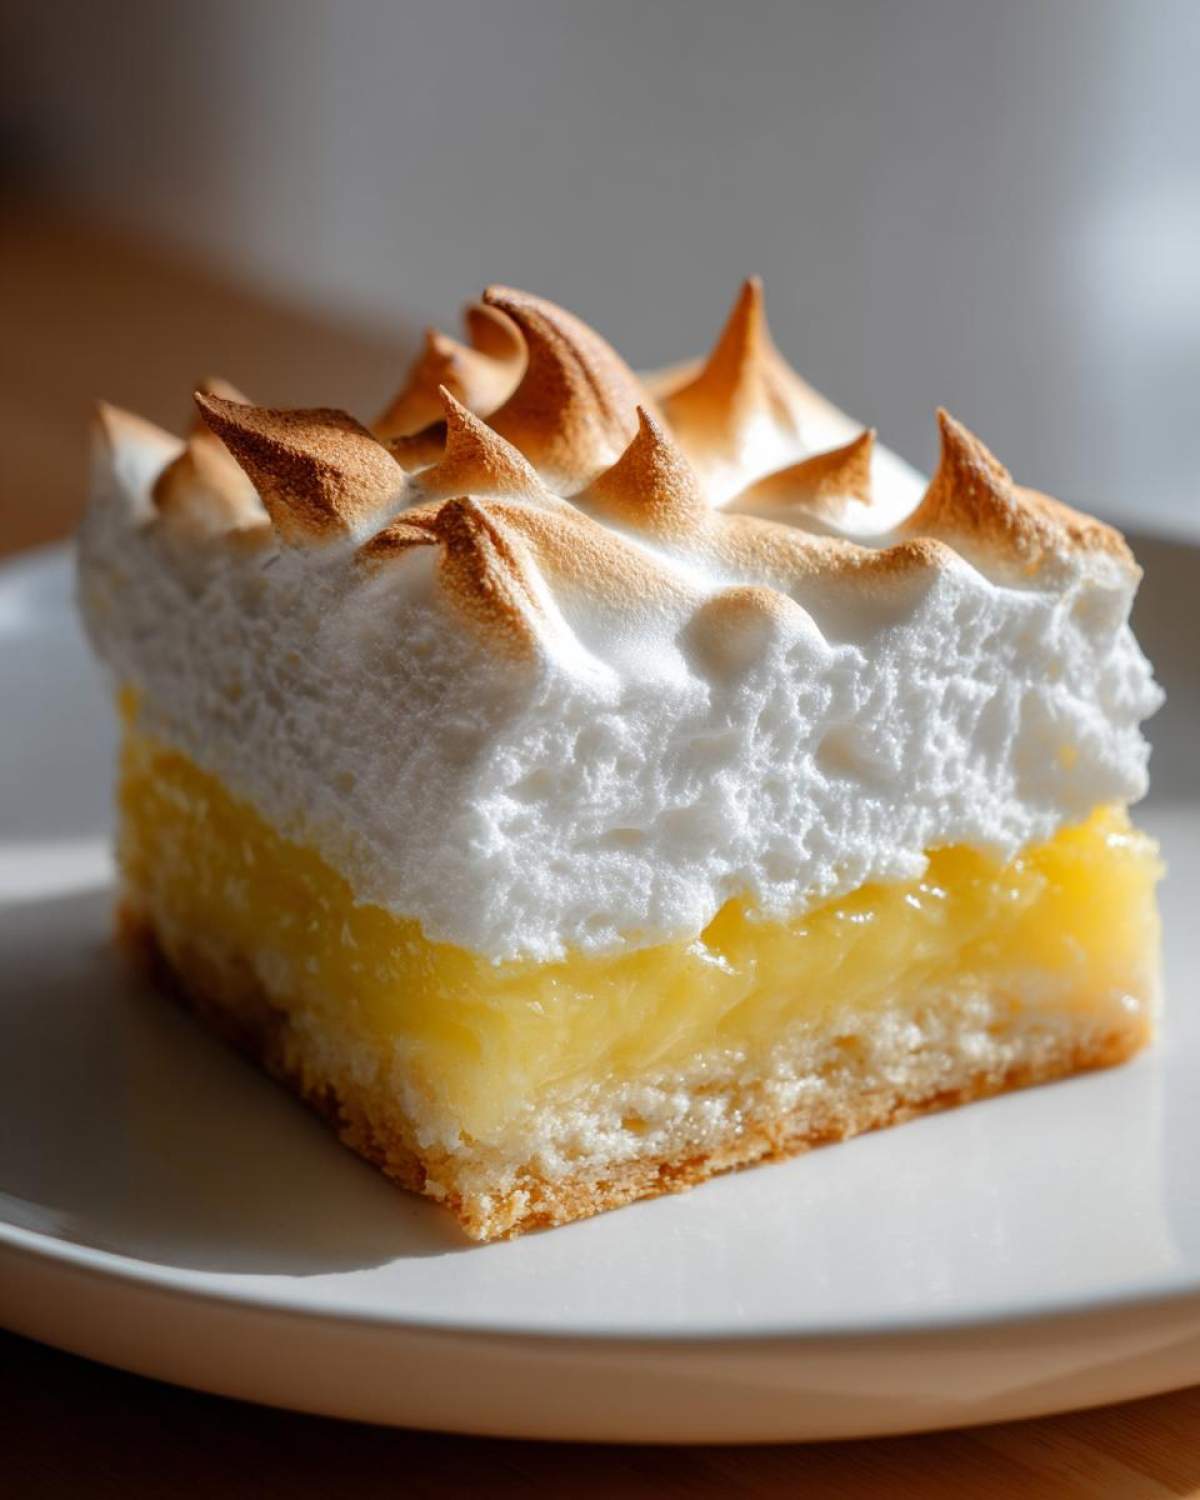
Okay, everyone has heard the horror story about meringue weeping—isn’t that the worst? It happens when moisture gets trapped or the sugar dissolves weirdly. To ward off those sad little puddles on your beautiful Homemade Lemon Meringue Squares, the number one rule is total cleanliness! You have to make absolutely sure your bowl and beaters for the meringue are spotless. Any speck of grease or even a tiny drop of egg yolk will stop those whites from whipping up properly. That’s why I rub mine down with a little lemon half if I’m nervous!
Secondly, for volume that lifts your topping high and proud, room temperature egg whites are your best friend. They’re more relaxed and capture air so much better than cold ones. This gives you that lovely structure needed for perfect peaks. If you want to skip the final 10 minutes in the oven, that’s fine, grab your kitchen torch, but just remember: meringue loves heat applied directly to the top! Don’t forget to check out my tips for the famous chocolate chip cookie recipe; the rules about cold versus room temperature ingredients cross over a lot!
Storage and Make Ahead Lemon Bars Instructions
Now, storing these beauties is a little different than storing a plain shortbread cookie. Because we have that fluffy meringue on top, these bars really need to live in the fridge. Pop them into an airtight container, and they stay fantastic for about three or four days. They are perfect for those times you need Make Ahead Lemon Bars!
I often find that if I bake them the day before a big gathering, they are so much easier to slice perfectly once they’ve chilled thoroughly overnight. If you are worried about the meringue getting a little sticky from the moisture, you can actually bake the crust and filling, let it cool completely, cover it, and store it in the fridge for a day. Then, whip up the meringue and bake it off right before you serve! It’s a great little trick I use when hosting, kind of like how I prep for my cranberry meatballs ahead of time.
Variations on Classic Lemon Bar Recipes
Once you master the core recipe for these Lemon Meringue Pie Bars—which is rock solid, by the way—you can have a little fun. I love experimenting when I know the base is perfect. These are my favorite Classic Lemon Bar Variations for changing things up without needing a whole new recipe!
First up, forget lemon zest just once in a while! Try substituting half of the lemon zest with orange zest in the filling. Orange and lemon are best friends, and the orange just adds this sunnier, almost floral note to the tartness. It’s subtle, but wow, is it delicious, especially in the summer.
My second favorite tweak is changing up the crust. We love that shortbread, but if you want something with a little more depth, try swapping out half the flour in the crust for finely ground almonds or even vanilla wafer crumbs. It makes a lovely nutty base that complements the citrus so well. If you’ve ever made my pecan pie, you know how much I adore adding texture under a sweet filling!
And finally, if you’re serving these on a regular night and don’t want to fuss with the meringue (which, okay, takes extra steps), you can still have a spectacular dessert. Just skip the meringue entirely! Instead, after the lemon layer sets, bake it uncovered for the full time until it looks just barely done, let it cool, and then dust the top generously with powdered sugar just before serving. Instant, amazing Easy Lemon Bars Recipe!
Frequently Asked Questions About Lemon Meringue Pie Bars
I get so many questions about these bars because everyone wants them to turn out perfectly, just like the pictures! Baking is all about practice, but I’ve learned a few shortcuts over the years that I’m happy to share to make your life easier when tackling these Lemon Meringue Pie Bars. I tried to answer the biggest ones right here!
Can I use bottled lemon juice instead of fresh for these Lemon Meringue Pie Bars?
Oh, I know bottled juice is tempting when you’re rushing, but please try to use fresh if you can. The bottled stuff has a flatter, sometimes cooked flavor, and it just doesn’t give you that bright sunshine zing that defines these dessert bars. If you absolutely must use it, you might consider adding a tiny extra pinch of lemon zest to try and bring back some of that vibrant aroma. For the best Best Lemon Dessert Bars experience, fresh rules the day!
What is the best way to get clean slices when cutting the bars?
This is so important, especially once that gorgeous meringue is on there! If you try to cut these while they are warm or room temperature, the filling will smudge everywhere. You need them completely chilled. Once they are cold from the fridge, take your sharpest, biggest knife and dip it into a glass of really hot water. Quickly wipe the knife dry, and make your cut. Dip the knife in hot water and wipe again between every single slice. This keeps the blade clean, and you get those beautiful, sharp edges you were hoping for!
Also, don’t forget to check out my guide on making pizza dough; the same principle of using heat to slice cleanly applies to a lot of baked goods!
Nutritional Estimates for Lemon Meringue Pie Bars
Now, I’m not a registered nutritionist by any means—I’m a baker who loves butter! So take these numbers with a grain of salt, okay? Think of these as general guidelines; they are based purely on the ingredients listed in the recipe above, assuming a yield of 24 squares, as provided in my professional breakdown. If you use extra butter or maybe sneak a bit more sugar into your meringue (I won’t tell!), your numbers will change!
For one single delightful square, we estimate the following breakdown:
- Serving Size: 1 bar
- Calories: 220
- Sugar: 25g (That’s where the joy is, right?)
- Fat: 11g
- Saturated Fat: 6g
- Carbohydrates: 30g
- Protein: 3g
- Cholesterol: 55mg
As always, for full official details, please refer to the full disclaimer page, which can be found right here. But honestly, when a dessert tastes this good, I usually just pretend the numbers don’t exist!
Share Your Bright Lemon Dessert Creations
Are you ready to enjoy the best slice of sunshine? I really hope you loved making these Lemon Meringue Pie Bars as much as I do! Please swing back here and leave me a huge five-star rating and tell me what you thought in the comments below. Did your meringue get perfectly toasted? I absolutely love seeing your pictures when you share your own Bright Lemon Dessert creations out there online. If you need anything else, feel free to drop me a line via my contact page. Happy baking!
PrintUltimate Lemon Meringue Pie Bars

A recipe for convenient lemon meringue pie bars featuring a shortbread crust, a tart lemon filling, and a fluffy, toasted meringue topping.
- Prep Time: 30 min
- Cook Time: 55 min
- Total Time: 85 min
- Yield: 24 bars
- Category: Dessert
- Method: Baking
- Cuisine: American
- Diet: Vegetarian
Ingredients
- For the Shortbread Crust: 1 1/2 cups all-purpose flour
- 1/2 cup granulated sugar
- 1/4 teaspoon salt
- 1 cup (2 sticks) cold unsalted butter, cut into cubes
- For the Lemon Filling: 1 1/2 cups granulated sugar
- 1/4 cup all-purpose flour
- 1/4 cup cornstarch
- 1/4 teaspoon salt
- 4 large egg yolks, lightly beaten
- 1 1/2 cups cold water
- 1/2 cup fresh lemon juice
- 2 tablespoons unsalted butter
- 1 teaspoon lemon zest
- For the Meringue Topping: 4 large egg whites, room temperature
- 1/4 teaspoon cream of tartar
- 1/2 cup granulated sugar
- 1/4 teaspoon vanilla extract
Instructions
- Preheat your oven to 350 degrees F. Line a 9×13 inch baking pan with parchment paper, leaving an overhang on the sides for easy removal.
- Prepare the crust: In a medium bowl, whisk together the flour, sugar, and salt for the crust. Cut in the cold butter using a pastry blender or your fingers until the mixture resembles coarse crumbs.
- Press the crust mixture evenly into the bottom of the prepared pan. Bake for 18 to 20 minutes, or until the edges are lightly golden. Remove from the oven and set aside while you prepare the filling. Keep the oven on.
- Prepare the lemon filling: In a medium saucepan, whisk together the sugar, flour, cornstarch, and salt. Whisk in the cold water until smooth.
- Cook the mixture over medium heat, stirring constantly, until it thickens significantly, about 5 to 7 minutes. It should bubble slowly.
- Remove the saucepan from the heat. In a separate small bowl, whisk the egg yolks. Slowly temper the yolks by whisking about 1 cup of the hot sugar mixture into the yolks.
- Pour the tempered yolk mixture back into the saucepan with the remaining hot mixture. Return the pan to low heat and cook, stirring constantly, for 1 minute more. Do not boil.
- Remove from heat. Stir in the 2 tablespoons of butter, lemon juice, and lemon zest until the butter melts and the filling is smooth.
- Pour the hot lemon filling evenly over the warm baked crust. Return the pan to the oven and bake for 12 to 15 minutes, until the filling is set and no longer liquid in the center. Remove from the oven and let cool completely on a wire rack (about 1 hour).
- Prepare the meringue: In a clean, grease-free bowl, beat the egg whites and cream of tartar with an electric mixer on medium speed until soft peaks form.
- Gradually add the sugar, one tablespoon at a time, beating until stiff, glossy peaks form. Beat in the vanilla extract.
- Spread the meringue evenly over the cooled lemon layer, making sure to seal the meringue to the edges of the crust to prevent shrinking.
- Bake the meringue for 10 to 12 minutes, or until the tips are lightly golden brown. Alternatively, use a kitchen torch to brown the meringue.
- Cool the bars completely before lifting them out of the pan using the parchment overhang. Cut into squares.
Notes
- To prevent the meringue from weeping, make sure your mixing bowl and beaters are completely free of any grease or egg yolk residue.
- For a stable meringue, use room temperature egg whites; they whip up to a greater volume.
- If you prefer a softer meringue, skip the final baking step and use a kitchen torch to brown the peaks.
Nutrition
- Serving Size: 1 bar
- Calories: 220
- Sugar: 25
- Sodium: 75
- Fat: 11
- Saturated Fat: 6
- Unsaturated Fat: 5
- Trans Fat: 0
- Carbohydrates: 30
- Fiber: 1
- Protein: 3
- Cholesterol: 55