

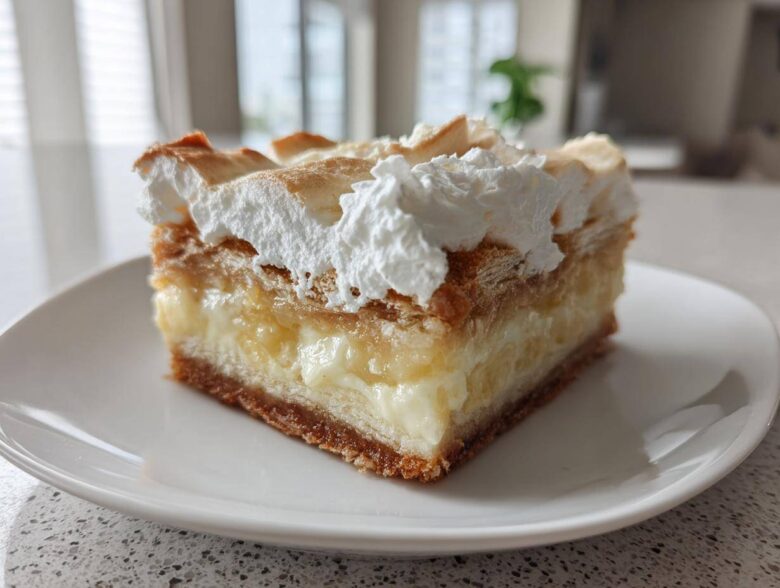
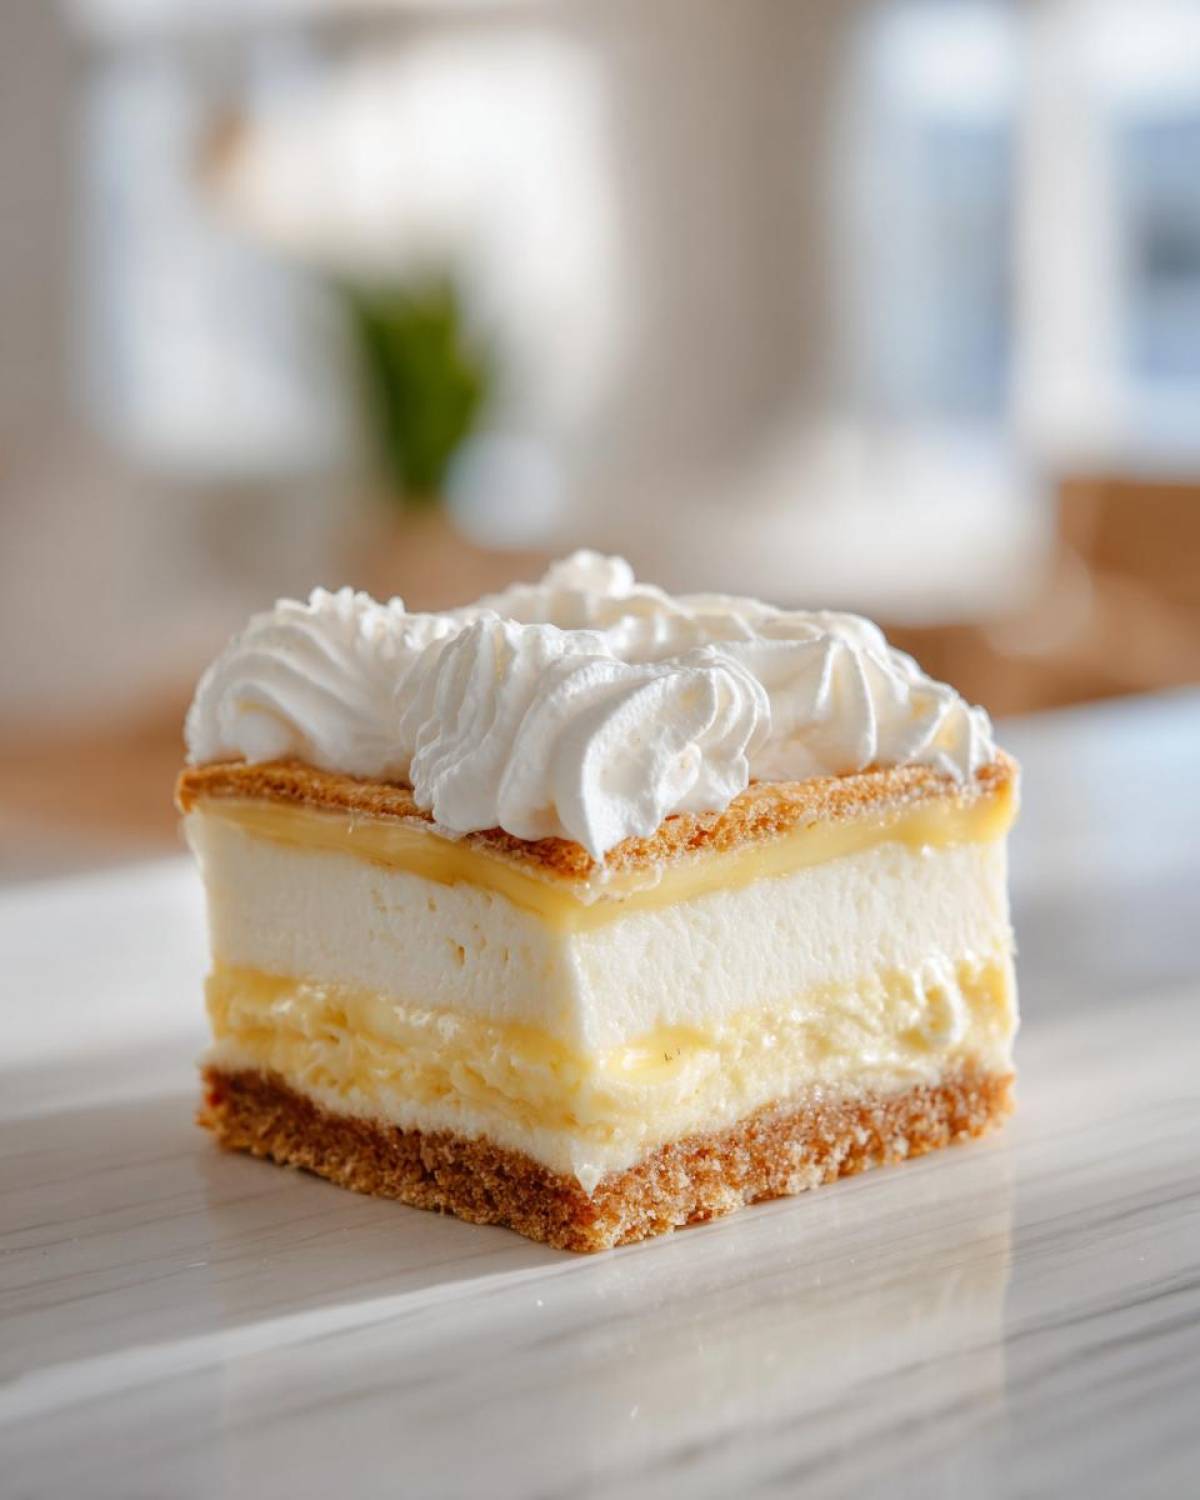
Okay, listen up, because combining two legendary desserts into one perfect bite is tricky business, but when you nail it? Wow. I’m talking about the ultimate crowd-pleaser for literally any event. Forget choosing between a slice of rich cheesecake or a scoop of creamy banana pudding – we’re merging the best parts of both into these unbelievable **Banana Pudding Cheesecake Bars**.
When I first tried fusing them, my first batch was a disaster. The layers just wouldn’t cooperate! But after tweaking the chilling times and getting the cheesecake base just right, I finally perfected this recipe you see here. I brought these to my cousin’s huge backyard BBQ last summer, and seriously, they vanished before the potato salad even got touched. Trust me, these layered treats are going to be your new favorite holiday or potluck contribution. If you’re looking for the best cheesecake bar recipes, you’ve found the champion.
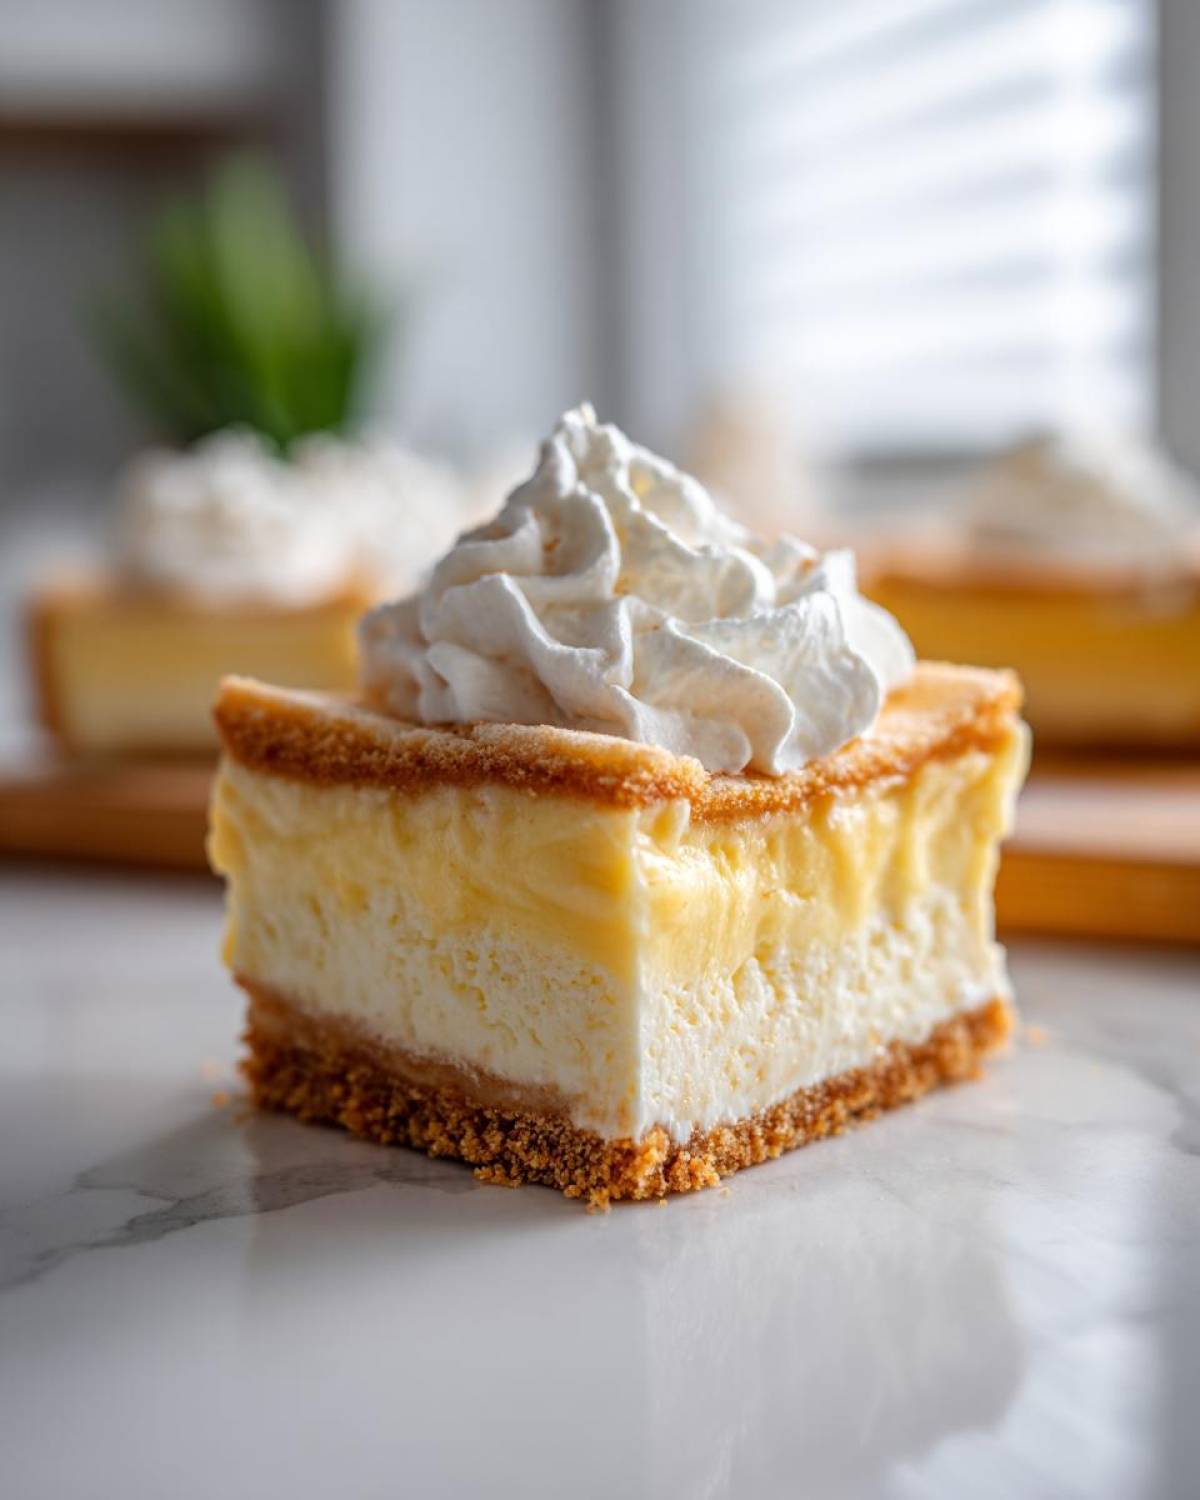
Why You Will Love These Banana Pudding Cheesecake Bars
Honestly, these things disappear fast because they hit every single sweet spot. They just work! Here’s why these layered, creamy bars are about to become your baking obsession:
- The incredible texture contrast—that crisp wafer crust against the smooth, creamy cheesecake bars? Perfection.
- They are completely make-ahead friendly, which saves your sanity before any big gathering.
- They travel like champs, making them the ideal potluck dessert bars.
- You get that classic, comforting Southern banana pudding flavor profile, but handheld!
I actually made a batch ahead of time and brought them to a friend’s house, and I think they were sadder when they were gone than I was! Seriously, try making this batch; you won’t regret it. This recipe is much easier than baking a full pie. Check out this link if you need other easy dessert ideas where I talk about my homemade recipes if you need a break from sweet treats, haha!
Essential Ingredients for Perfect Banana Pudding Cheesecake Bars
Getting the layers right means starting with quality components, and I’ve found that the measurements here are just non-negotiable if you want that perfect, firm-but-creamy texture. Don’t try to substitute the cream cheese consistency or the type of pudding—you’ll end up with soup instead of bars! For the true Southern style dessert bars experience, you need these specific guys. Grab your mixing bowls, because here is everything you need to gather up before you even think about turning on that oven. If you’ve ever made my famous pecan pie, you know I take ingredient prep seriously!
For the Vanilla Wafer Crust
- 1 1/2 cups vanilla wafer crumbs (Make sure these are fine crumbs, not chunky bits!)
- 1/2 cup unsalted butter, melted
For the Creamy Cheesecake Layer
- 8 ounces cream cheese, softened (And I mean *softened*—leave it out for hours!)
- 1/2 cup granulated sugar
- 1 large egg
- 1 teaspoon vanilla extract
For the Banana Pudding Topping
- 2 large ripe bananas, mashed (They should be spotty, trust me!)
- 1 (3.4 ounce) package instant vanilla pudding mix
- 1 1/2 cups cold milk
For the Sweet Cream Dessert Finish
- 1 cup heavy cream, whipped
- 1/4 cup powdered sugar (For sweetening that lovely whipped topping)
- Optional: Caramel sauce for drizzling (This makes them extra decadent!)
Step-by-Step Instructions for Layered Cheesecake Bars
Alright, this is where the magic happens! Don’t rush these steps, especially the cooling parts—that’s the secret to keeping your layers separate and gorgeous. Remember how I said these layers make the best chocolate chip cookie recipe envy? It’s all in the execution!
Preparing and Baking the Crust
First things first, let’s get that oven happy setting. You want to preheat it to 350°F (175°C). Now, don’t skip the parchment paper trick! Line your 8×8 inch pan so that a little paper hangs over the sides—that’s your built-in handle later. Mix up those vanilla wafer crumbs with the melted butter until it looks like wet sand. Press it down into the bottom of the pan really firmly. I mean it, use the bottom of a measuring cup to pack it tight! Pop that base into the oven for just 8 minutes to set it up, and then pull it out and let it cool down just a tiny bit while you make the next layer.
Creating the Cheesecake Base for Your Banana Pudding Cheesecake Bars
This layer needs to be smooth as silk. Beat your softened cream cheese and granulated sugar together until you can’t see any lumps at all. Then, gently mix in the egg and vanilla extract. Don’t overbeat once the egg goes in; just blend it until it comes together. Carefully spread this creamy mixture right over that warmish crust. Bake this stage for about 15 to 18 minutes. You’re looking for the edges to look solid, but the very middle should still wobble just a tiny bit when you nudge the pan. Seriously, a little jiggle is good! Let it cool down completely before moving on, or you’ll melt the next layer right off.
Assembling the Banana Pudding Layer
While the cheesecake part is cooling off its feet, we make the star flavor! Whisk the instant vanilla pudding mix and the cold milk together like crazy for about two minutes until it starts getting thick enough to coat a spoon. Let it sit for five minutes so it firms up even more. Then, gently, *gently*, fold your mashed bananas right into that pudding. You don’t want to deflate all that air! Spread this luscious layer evenly over the completely cooled cheesecake. Now, pop the whole thing into the fridge.
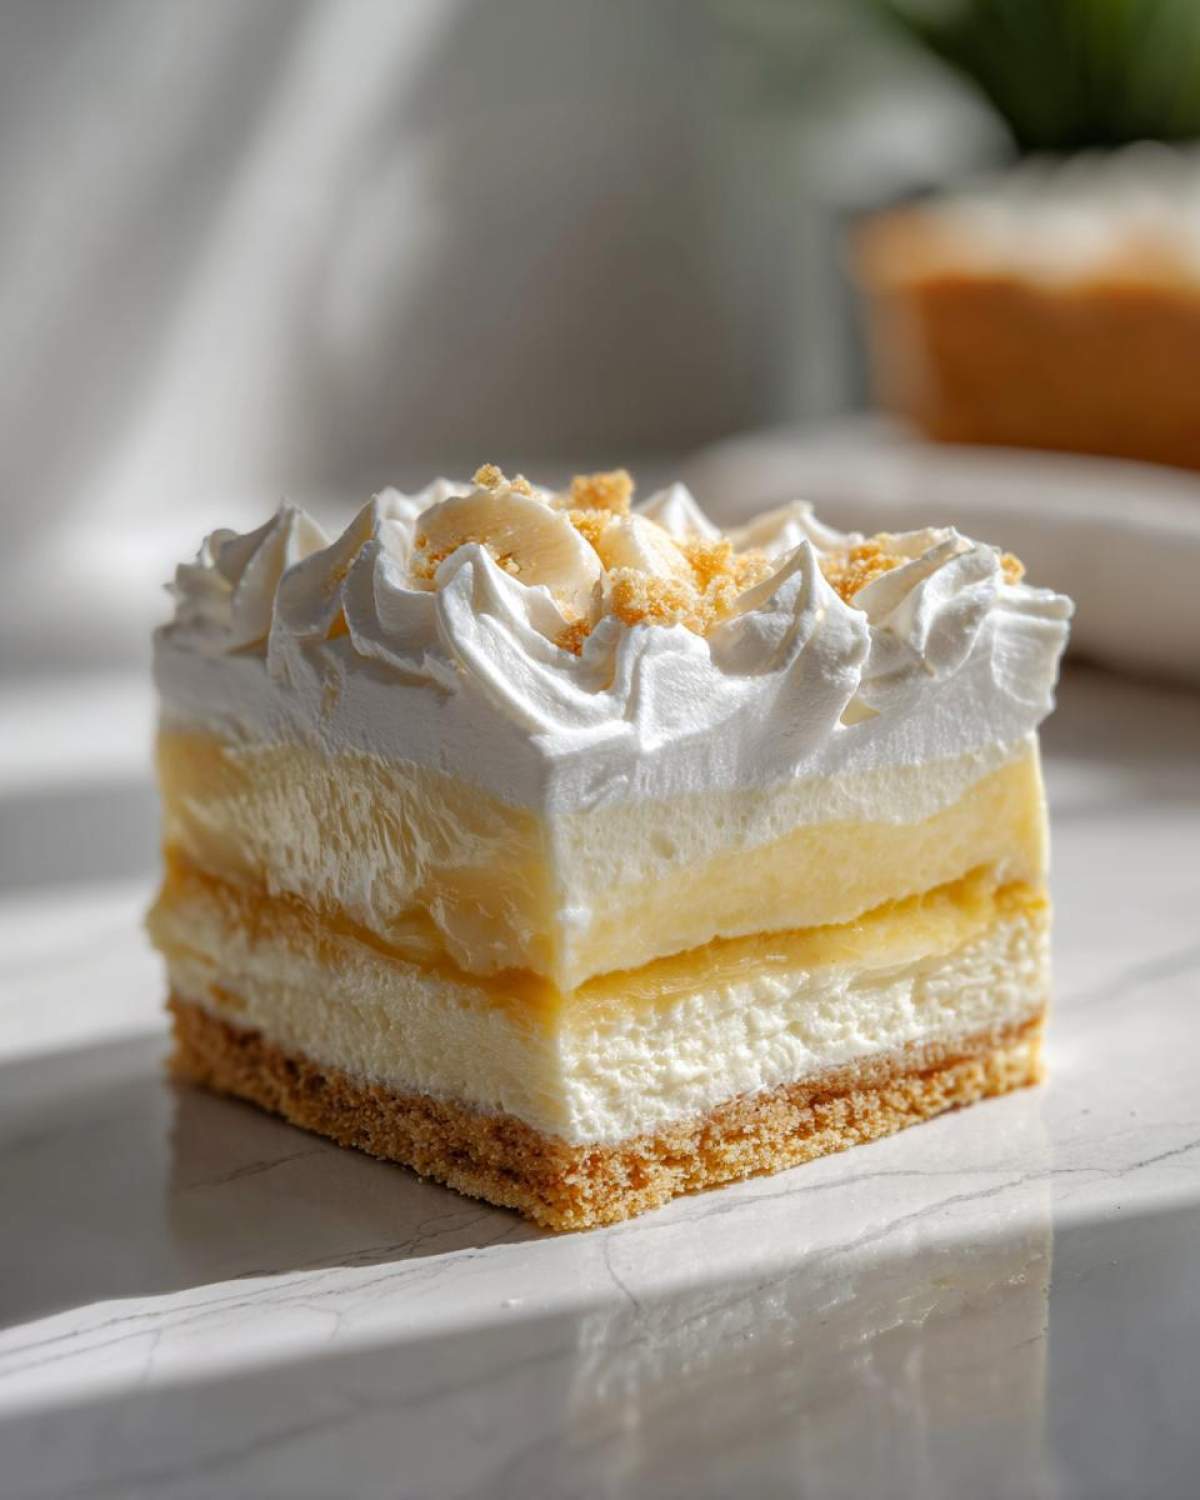
Chilling and Finishing the Banana Cheesecake Bars Recipe
Patience is a virtue here, my friend. You need a minimum of 4 hours in the refrigerator—longer is even better—to make sure that whole structure is perfectly firm for slicing. Once it’s chilled through, whip up your heavy cream with the powdered sugar until you hit those stiff peaks. Spread that sweet cream dollop right on top. If you’re feeling extra flashy, drizzle on some caramel sauce before cutting it into 16 nice squares. If you skip chilling, you end up with soup, so don’t skip it for these!
Tips for Making the Best Banana Pudding Cheesecake Bars
You know, baking these layered beauties is all about timing, timing, timing! If you want that perfect texture where everything holds together beautifully, you’ve got to heed the warnings about cooling times. Don’t rush between baking the crust and adding the cheesecake filling, or you’ll get a soggy bottom, and nobody wants that!
For the best banana flavor in that pudding layer, use bananas that look like they’ve had a rough day—truly ripe, spotty bananas are sweeter and mash up beautifully. Also, remember that slight jiggle in the cheesecake before it comes out? That’s the key to avoiding cracks later on. A little center movement means it will set up perfectly once it chills down in the fridge. If you need other tips on perfecting toppings, especially crunchy ones, you might want to check out my notes on the buttery oat topping from my apple crisp recipe; the concept of texture layering is similar!
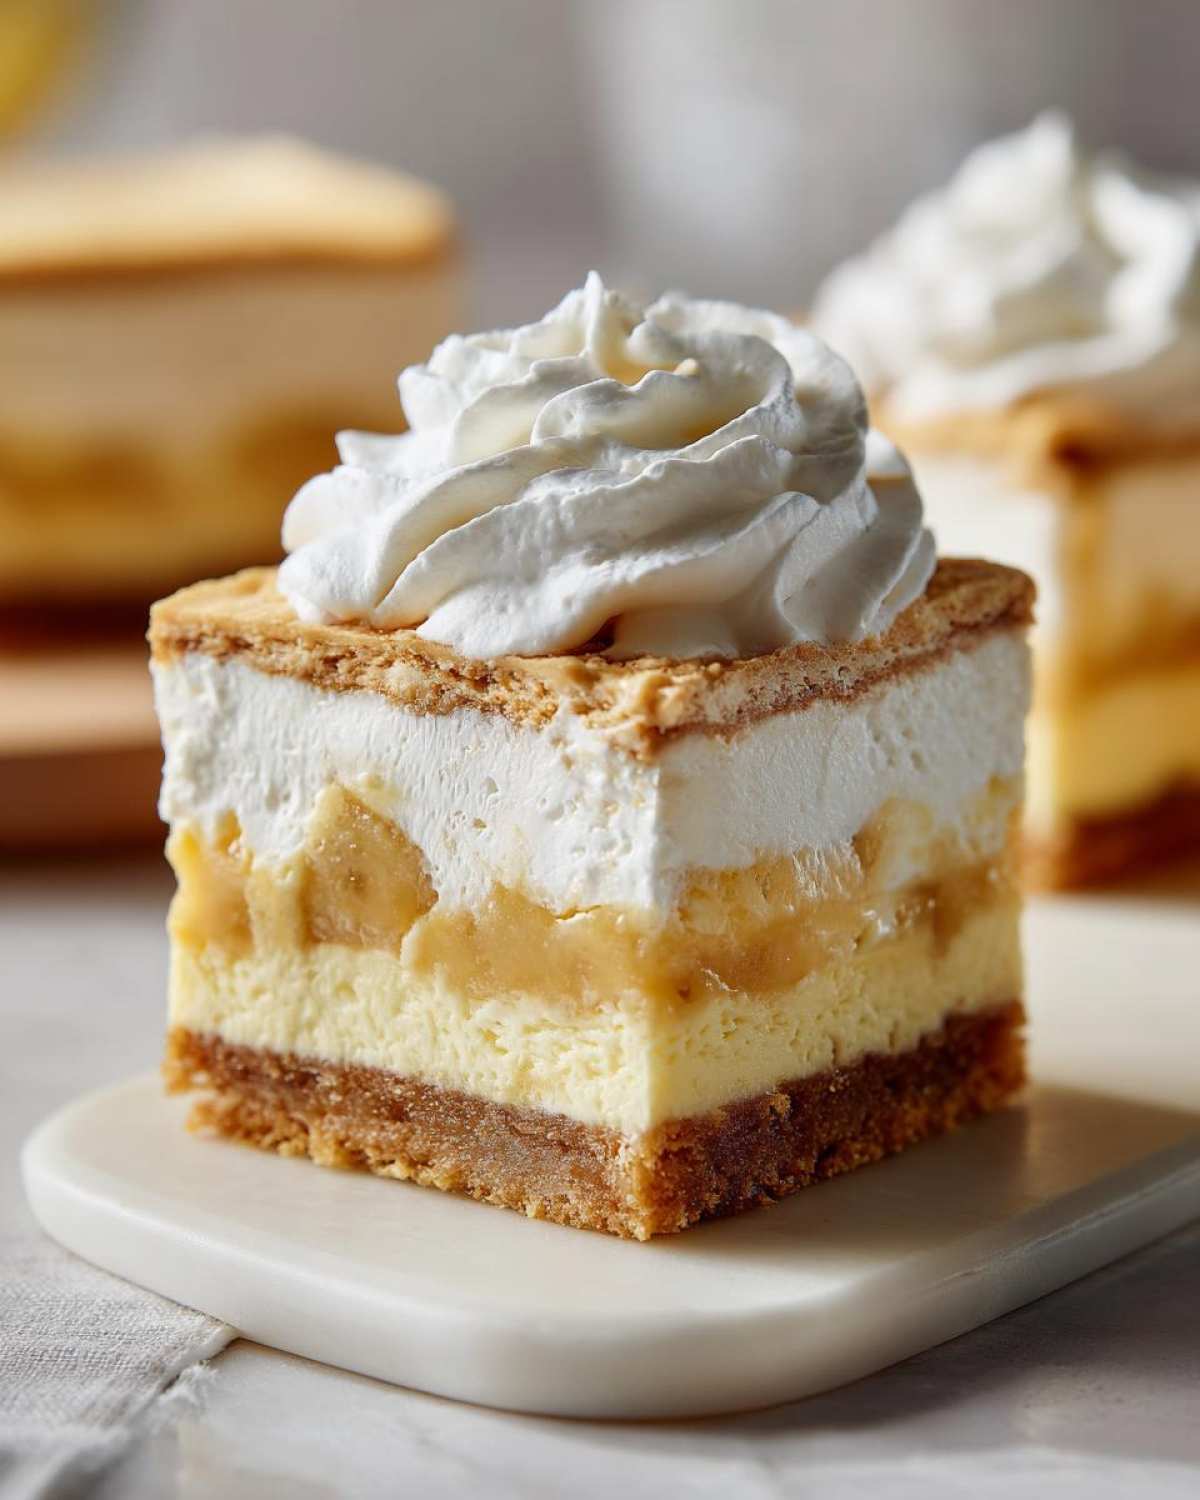
Finally, make sure your cream cheese is room temperature. Cold cream cheese fights the sugar, and then you end up with dense, lumpy cheesecake filling instead of that lovely creamy texture we’re aiming for.
Ingredient Notes and Substitutions for Banana Pudding Dessert Bars
Look, I get it. Sometimes you run out of something, or maybe you just prefer a different method. While I swear by this baked base for that perfect crunch, I want you to feel like you can make these Banana Pudding Dessert Bars work for you! We can absolutely talk about adjustments because nobody likes a recipe roadblock.
First, let’s tackle that ‘No-Bake Option’ mentioned in the notes. If you want these entirely chilled, just ditch steps 1 and 4—that means no baking the crust and no baking the cheesecake layer! Instead, you chill the buttered wafer crust for about 30 minutes until it’s solid. Then, for the cheesecake layer, you mix the cream cheese, powdered sugar (instead of granulated), and a touch of vanilla, and just chill that right on top of the crust instead of baking it. It makes for a less structured but ultra-creamy bar, perfect for summer when you don’t want to turn on the oven!
Regarding the pudding: make sure you use the *instant* mix. The cook time for regular pudding is completely different, and it’s too loose for this bar structure. Stick to instant vanilla for that quick set time we rely on. And bananas? If they aren’t super ripe, they won’t have the flavor payoff. If yours look a little pale, mash them up and zap them in the microwave for 30 seconds—that brings out the sweetness!
If you’re ever trying to make a dish like my creamy scalloped potatoes ahead of time and wonder about longevity, the same rule applies here: these bars are best enjoyed within 3 days. If you want to explore other rich, creamy dishes, that potato recipe is a winner!
Storage and Serving Suggestions for Your Banana Pudding Cheesecake Bars
These layered beauties need to stay chilly once they are fully set up. Since we have that creamy cheesecake layer and the fresh banana pudding, these absolutely must be kept in the fridge. I store mine in an airtight container, stacked with wax paper between the layers so nothing sticks together. They’ll stay perfectly delicious for about three to four days.
Don’t even bother trying to reheat them—they are 100% best served ice cold, straight from that chill! That cooling time solidifies the pudding and firms up the cream cheese layer beautifully. If you want to jazz them up right before serving, that extra drizzle of caramel sauce is totally the way to go! If you need a good base recipe for making homemade sauces, seriously check out how I make amazing caramelized onions—the patience for slow cooking translates perfectly to rich sauces!
Troubleshooting Common Issues with Banana Cheesecake Bars Recipe
Even in my kitchen—where I swear I have ninja skills with a spatula—things occasionally go sideways, especially when layering! Don’t panic if your Banana Cheesecake Bars Recipe doesn’t come out looking like a magazine cover on the first try. Usually, these little hiccups are super easy to fix with a bit of knowledge. Remember that one time I tried baking my cream cheese brownies too long? Total disaster, but I learned from it!
Here are the main problems bakers run into with these sweet creations and what you can do to save the day.
Soggy Vanilla Wafer Crust
This is the absolute worst! You want a nice snap from that crust, not a mushy mess. Nine times out of ten, a soggy crust means the butter wasn’t cold enough when you mixed it, or you didn’t press the crumbs down hard enough in the pan. If you have time, always go back to the notes and chill that crust for an extra 10 minutes before that initial 8-minute bake. Baking it, even for that short time, helps seal the butter around the crumbs. If it’s slightly soft after baking, let it cool completely before adding the cheesecake batter—heat transfers moisture!
Cracked Cheesecake Layer
The classic dessert drama! Cheesecake is notoriously prone to cracking, and it usually has to do with temperature jumps. You might have overbeat the egg when mixing the filling, which introduced too much air, or you took it out of the oven too fast. The most important trick for a smooth top is the cooling process! Once the bake time is up, turn off the oven, but prop the door open slightly and let the cheesecake sit in the residual heat for about 30 minutes. This gradual cool-down stops it from shrinking suddenly against cold air, preventing those ugly fissures.
Pudding Layer Won’t Set Up Firmly
If your Banana Pudding Dessert Bars topping looks more like banana soup than soft pudding, don’t stress your whipped cream yet! Instant pudding needs two things to set: the right temperature and time. Make sure you used *ice-cold* milk—not refrigerated, but genuinely cold. You must whisk it vigorously until you see it thickening, about two minutes. Then, let it rest for the full 5 minutes before folding in those bananas. If it’s still too thin after resting, you can carefully whisk in half a box of extra dry instant pudding mix right before spreading it. The biggest culprit here, though, is definitely not letting it chill for the full 4 hours minimum!
Frequently Asked Questions About Banana Pudding Cheesecake Bars
I know you’re going to have questions running through your head once you see this recipe—it’s complicated, right? It feels fancy, but honestly, once you’ve made one layer successfully, the rest is just assembly! Here are some of the things people always ask me when they try to create these perfect layered cheesecake bars.
Can I make these entirely no-bake?
Yes, absolutely! If you’re avoiding the oven, you totally can make these a chilled treat. You just skip the initial oven steps for the crust and the cheesecake layer. For the crust, press the buttered crumbs into the pan and chill it solid for about 30 minutes. Then, for the cheesecake layer, skip the egg and bake time! Mix your softened cream cheese with powdered sugar instead of granulated sugar, and spread that chilled mixture over the wafer base. It results in a slightly softer, but still super delicious, no bake cheesecake bars.
How long do these sweet cream dessert bars last in the fridge?
Because we have fresh bananas and real cream cheese in here, you really want to eat these sooner rather than later to get that amazing texture. I find they are at their peak perfection on day one or two. If you store them properly in an airtight container in the fridge, they can last up to four days, but honestly, the banana flavor starts to change a bit after day four. If you are making them for a party, do them the morning before!
What kind of bananas are best for the banana pudding layer?
This is so crucial! You want bananas that are perfectly ripe—meaning the peels are mostly yellow with plenty of freckles or dark spots. Brown bananas are too mushy and don’t have that bright banana flavor needed against the rich cheesecake. If your bananas are still a little green or pale yellow, mash them up and microwave them for 30 seconds; that really kicks up their sweetness and moisture content so they work better in the pudding!
Is this recipe considered a true Southern Style Dessert Bar?
I certainly think so! Anytime you are combining classic vanilla wafers, proper cream cheese, and rich banana pudding components, you’re echoing true Southern baking tradition. It has that comforting, rich texture that we love down here. If you are looking for other comforting flavors, you might want to see how I make my rich homemade brown gravy sometime—it takes the same kind of slow consideration for flavor!
Nutritional Estimates for Decadent Bar Recipes
Okay, let’s talk numbers for these decadent bar recipes. Since these are layered with cream cheese and buttery wafers, they are definitely a treat, not a health food, but knowing what’s in a slice is always good, right? Please remember these are just estimates calculated based on the ingredients list and assuming you get exactly 16 bars out of the pan. When I bake this much richness, I figure it’s best enjoyed in small victory portions!
- Serving Size: 1 bar
- Calories: 310
- Total Fat: 18g (with 10g saturated fat)
- Carbohydrates: 34g
- Protein: 4g
- Sugar: 25g
These are substantial squares, so 310 calories feels right for something this creamy and rich. Enjoy every bite!
Share Your Best Banana Pudding Cheesecake Bars Creations
Now it’s your turn to get in on the fun! I’ve poured all my best tips and secrets into showing you how to make these incredible **Banana Pudding Cheesecake Bars**, but I absolutely live to hear how they turn out for you!
Did you try the caramel drizzle? Did you manage to keep your layers perfectly separated? Did they vanish instantly at your next gathering? Don’t keep those victories a secret! I want to see your photos on social media—tag me so I can share your gorgeous work. And please, please leave a rating and a comment below. Hearing what you loved about the creamy cheesecake layer or crispy a crust tells me everything I need to know!
If you want to learn more about my kitchen philosophy and see what I’m whipping up next, you can check out my About Us page. Happy baking, and I can’t wait to see those delicious layers!
PrintBanana Pudding Cheesecake Bars
Make these creamy, layered bars combining a vanilla wafer crust, a rich cheesecake layer, and a banana pudding topping.
- Prep Time: 25 min
- Cook Time: 23 min
- Total Time: 4 hours 48 min
- Yield: 16 bars
- Category: Dessert
- Method: Baking and Chilling
- Cuisine: American
- Diet: Vegetarian
Ingredients
- 1 1/2 cups vanilla wafer crumbs
- 1/2 cup unsalted butter, melted
- 8 ounces cream cheese, softened
- 1/2 cup granulated sugar
- 1 large egg
- 1 teaspoon vanilla extract
- 2 large ripe bananas, mashed
- 1 (3.4 ounce) package instant vanilla pudding mix
- 1 1/2 cups cold milk
- 1 cup heavy cream, whipped
- 1/4 cup powdered sugar (for whipped cream)
- Optional: Caramel sauce for drizzling
Instructions
- Preheat your oven to 350°F (175°C). Line an 8×8 inch baking pan with parchment paper, leaving an overhang for easy removal.
- Combine the vanilla wafer crumbs and melted butter. Press this mixture firmly into the bottom of the prepared pan to form the crust. Bake the crust for 8 minutes. Let it cool slightly.
- In a medium bowl, beat the softened cream cheese and granulated sugar until smooth. Beat in the egg and vanilla extract until just combined.
- Spread the cream cheese mixture evenly over the cooled crust. Bake for 15 to 18 minutes, or until the edges are set but the center still has a slight jiggle. Cool completely on a wire rack.
- While the cheesecake cools, prepare the banana pudding layer. In a bowl, whisk together the instant vanilla pudding mix and cold milk for 2 minutes until it starts to thicken. Let it stand for 5 minutes.
- Gently fold the mashed bananas into the thickened pudding mixture. Spread this banana pudding mixture over the cooled cheesecake layer.
- Chill the bars in the refrigerator for at least 4 hours, or until the pudding layer is firm.
- Prepare the topping by whipping the heavy cream and powdered sugar until stiff peaks form. Spread or pipe the whipped cream over the chilled bars.
- If desired, drizzle with caramel sauce before slicing into bars. Cut into 16 squares before serving.
Notes
- For a firmer crust, chill the buttered crumbs for 10 minutes before the initial bake.
- Use slightly overripe bananas for the best flavor in the pudding layer.
- If you prefer a no-bake option, skip step 1 and 4, and chill the crust for 30 minutes before adding the cheesecake filling (made without the egg and baked time).
Nutrition
- Serving Size: 1 bar
- Calories: 310
- Sugar: 25
- Sodium: 180
- Fat: 18
- Saturated Fat: 10
- Unsaturated Fat: 8
- Trans Fat: 0.5
- Carbohydrates: 34
- Fiber: 1
- Protein: 4
- Cholesterol: 55